Authorizing Facebook APIs in Astera Centerprise
Facebook uses HTTP-based APIs that can be utilized to extract or load data, to and from Facebook. You can configure Facebook APIs for use in Astera Centerprise using the ‘Custom API’ source in the REST API Browser (Beta).
To authorize a Facebook API in Astera Centerprise, follow the steps below.
1. Go to this Url: https://developers.facebook.com/ and log in.
Note: If you have not created an account yet, you need to create one first after signing in.
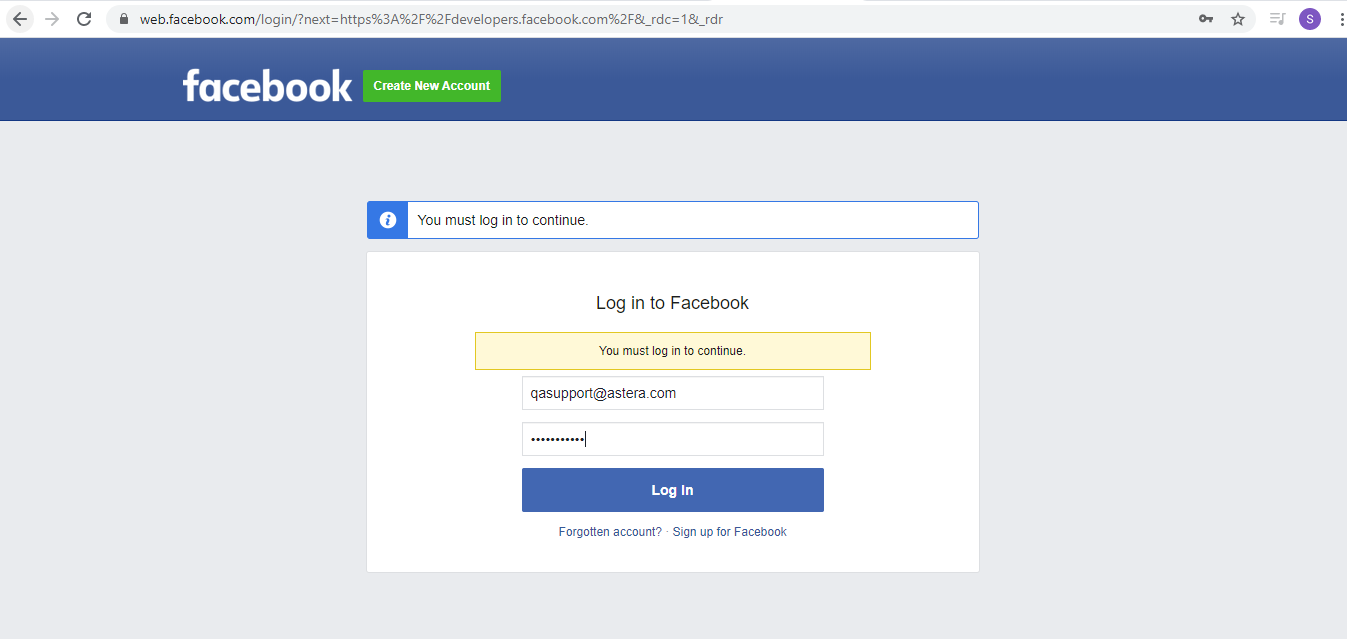
2. Enter the email address of your Facebook account to log in.
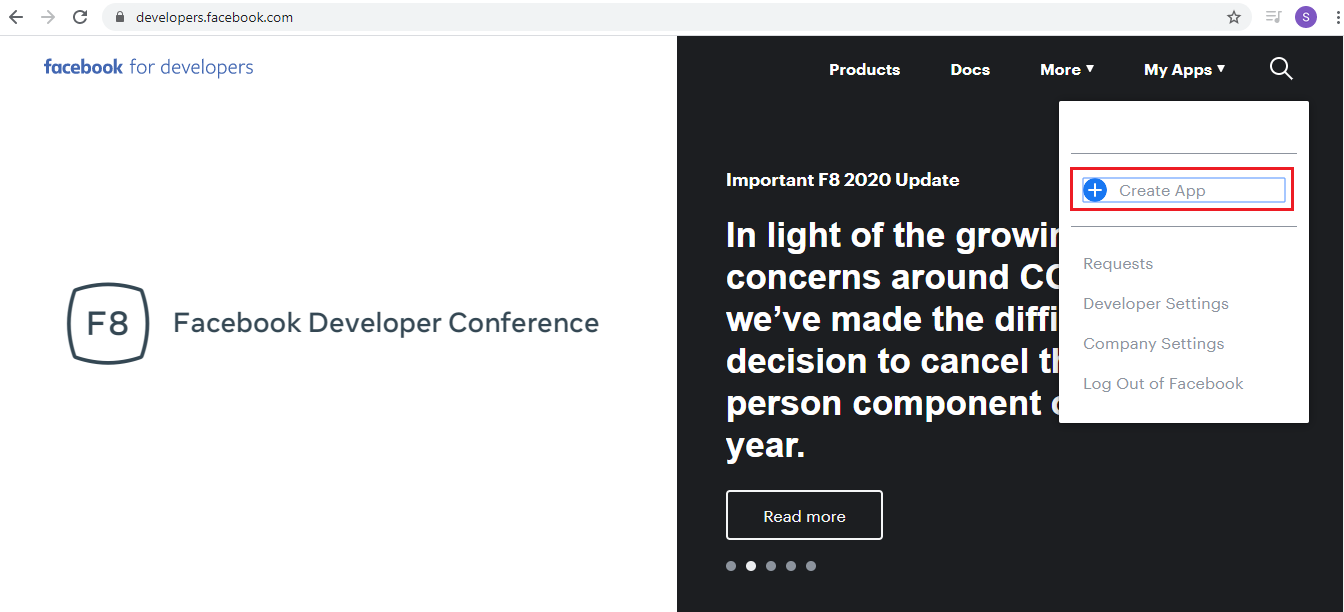
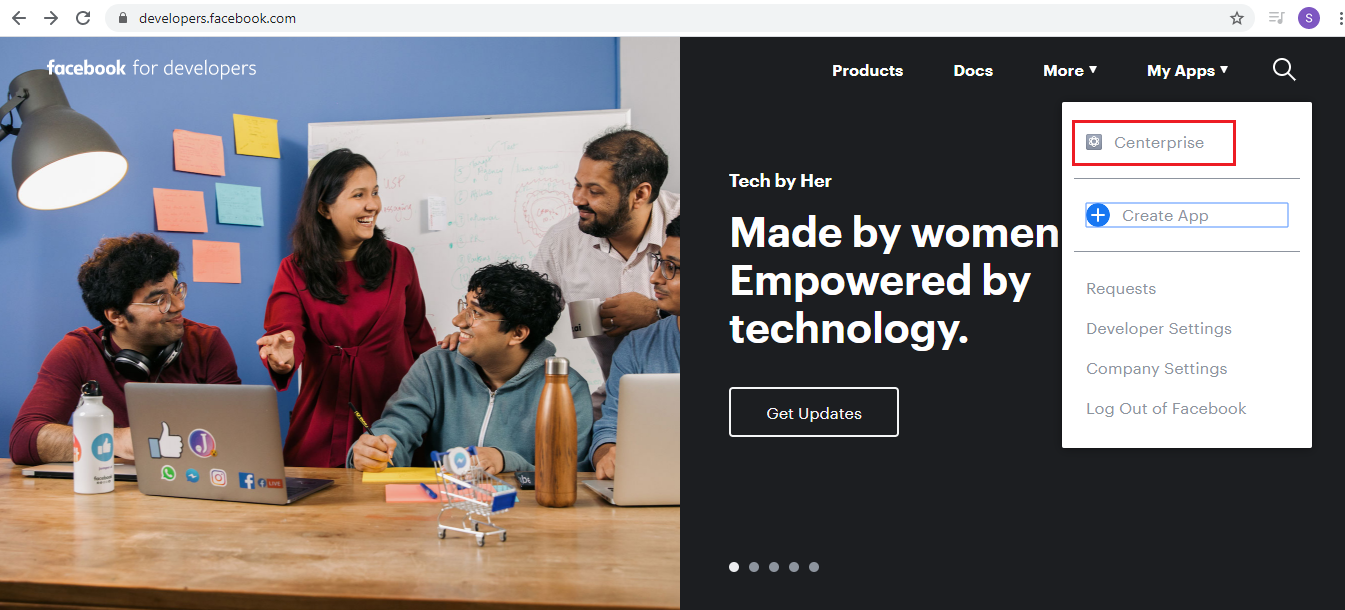
3. Go to My Apps > Create App to create an application.
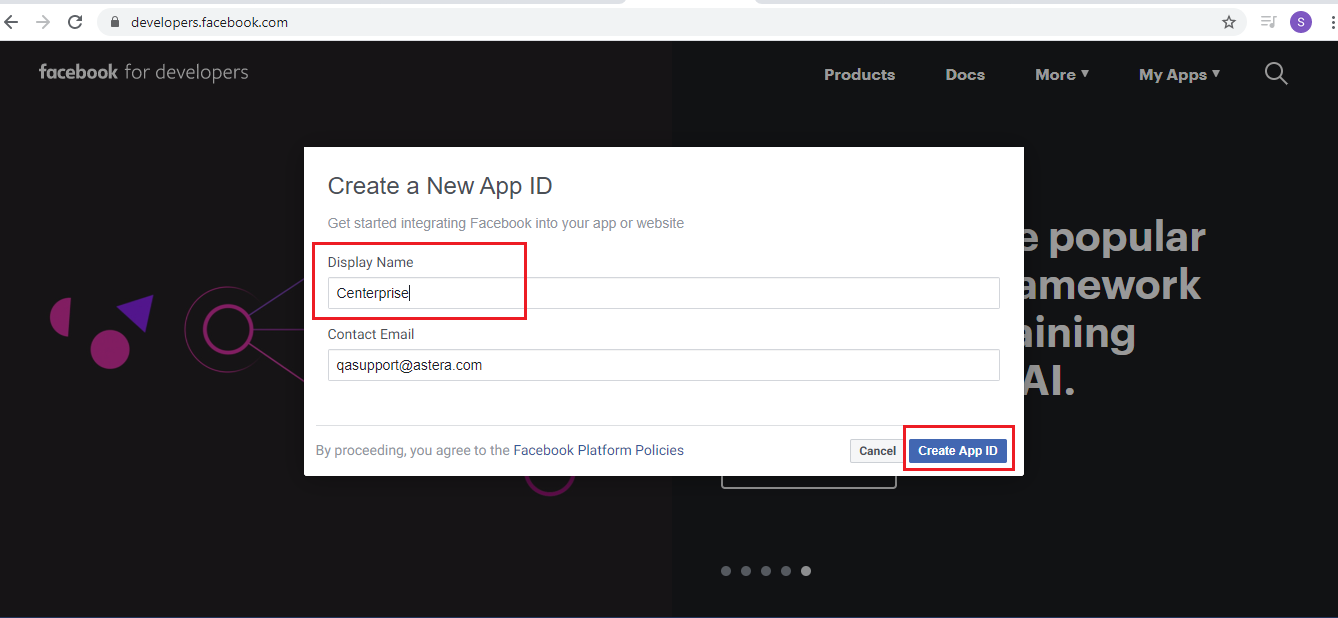
4. Provide the Display Name for your application and click on Create App ID.
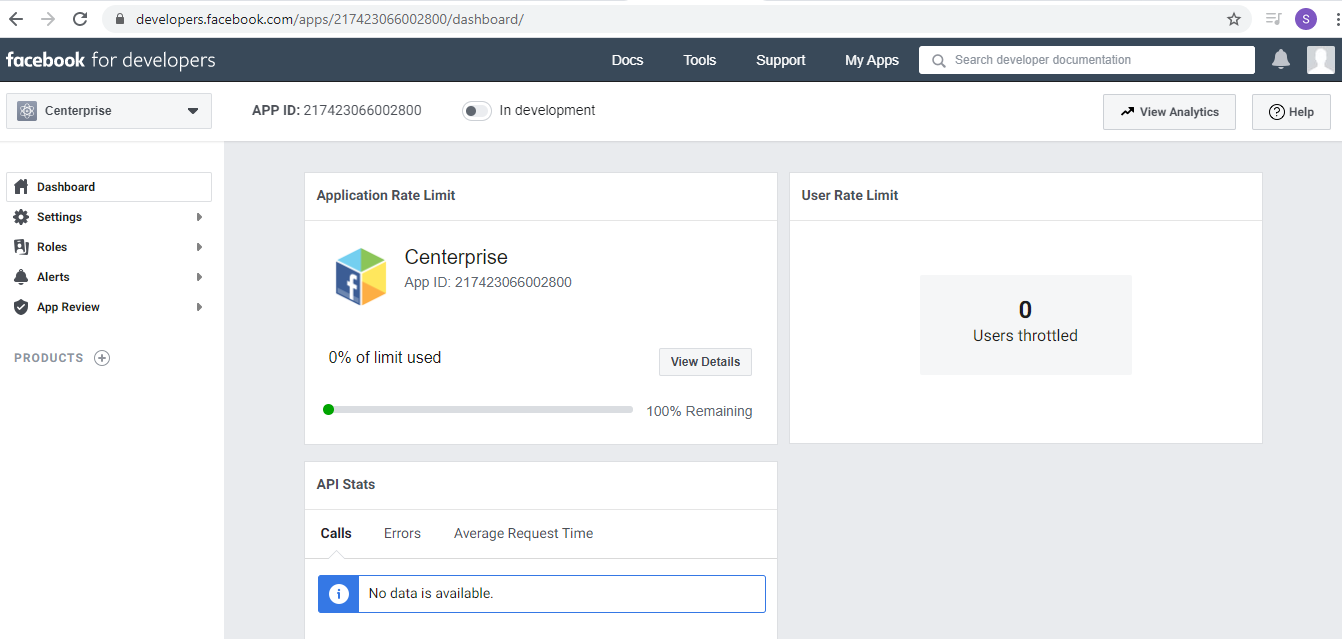
Once your application is created, it will show up under the My Apps tab.
5. Click on Centerprise to open the dashboard.
Reference Url: https://developers.facebook.com/apps/217423066002800/dashboard/
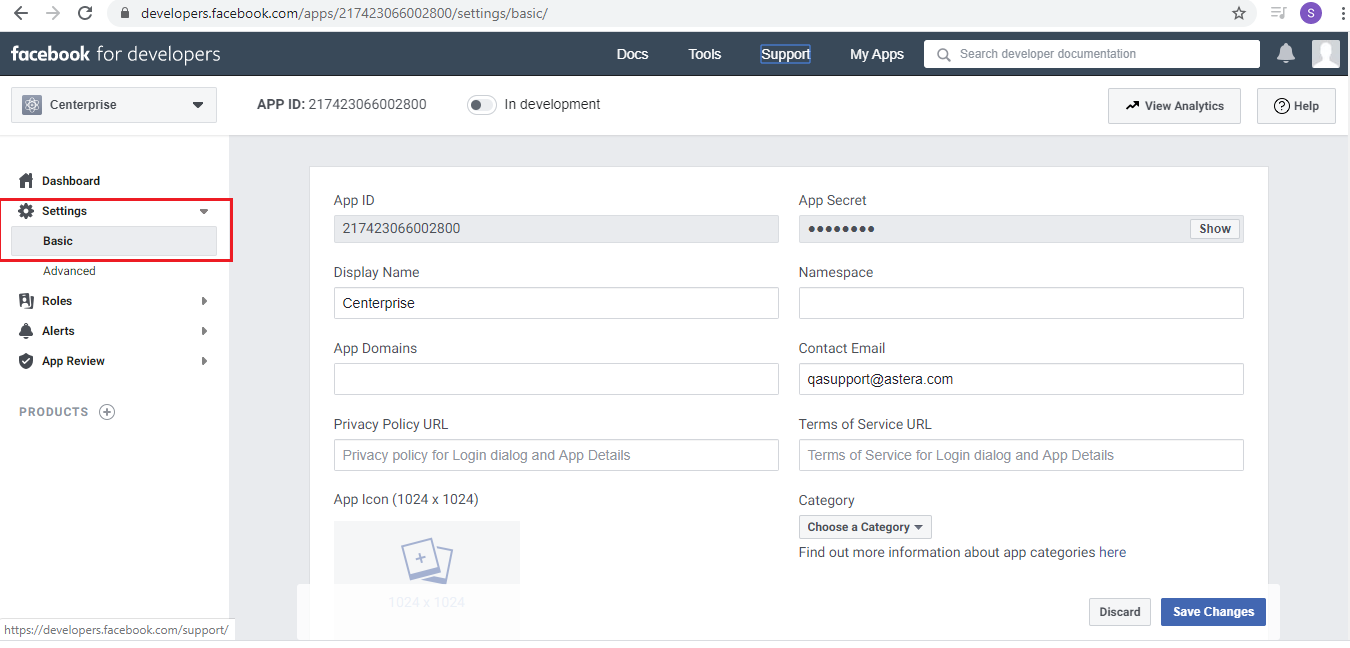
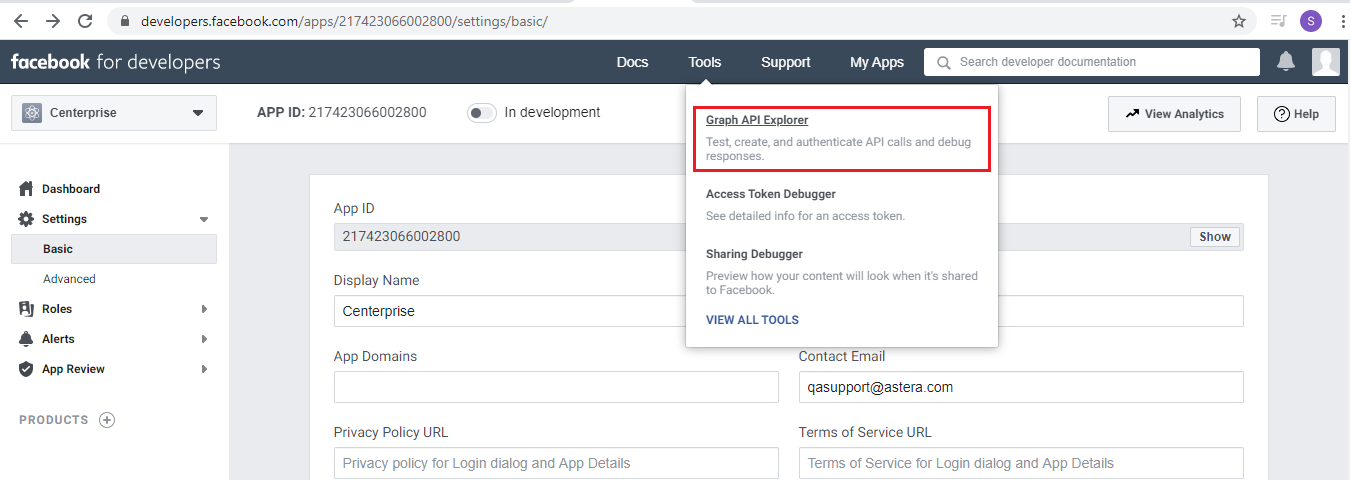
6. Click on Settings > Basic to get the relevant credentials.
Reference Url: https://developers.facebook.com/apps/217423066002800/settings/basic/
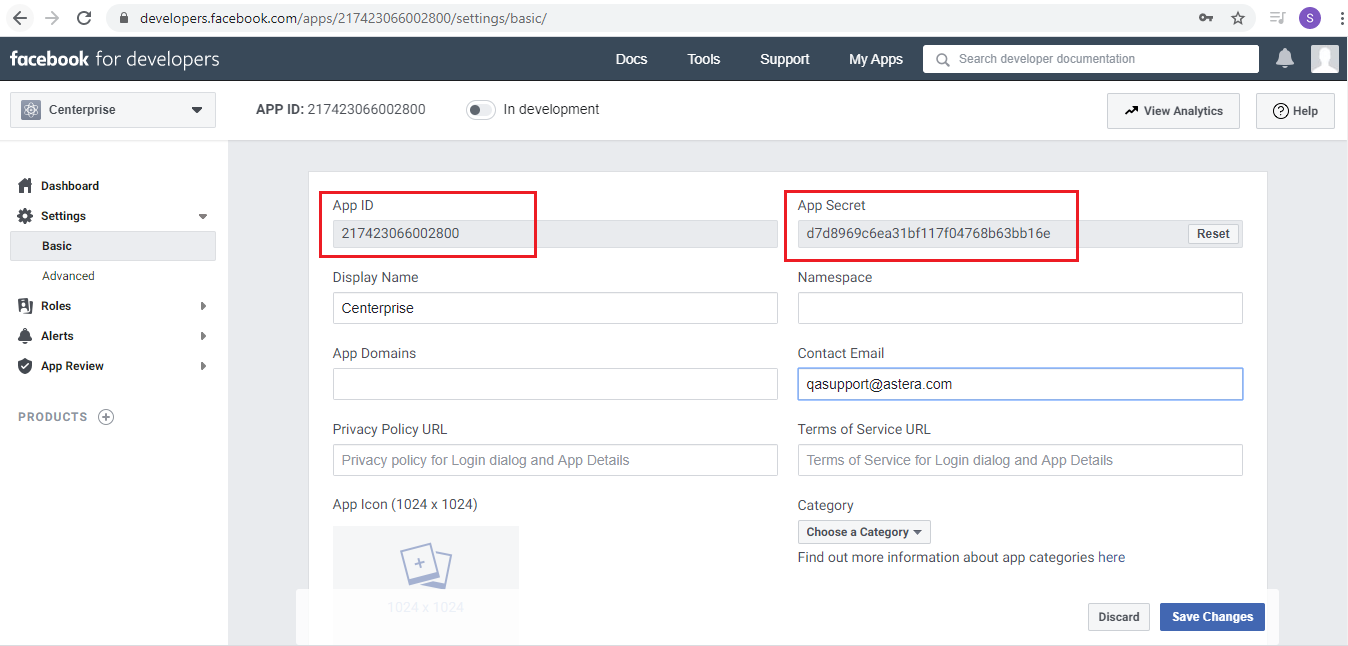
7. Here you can see the App ID and App Secret. Save them to use them later for authentication.
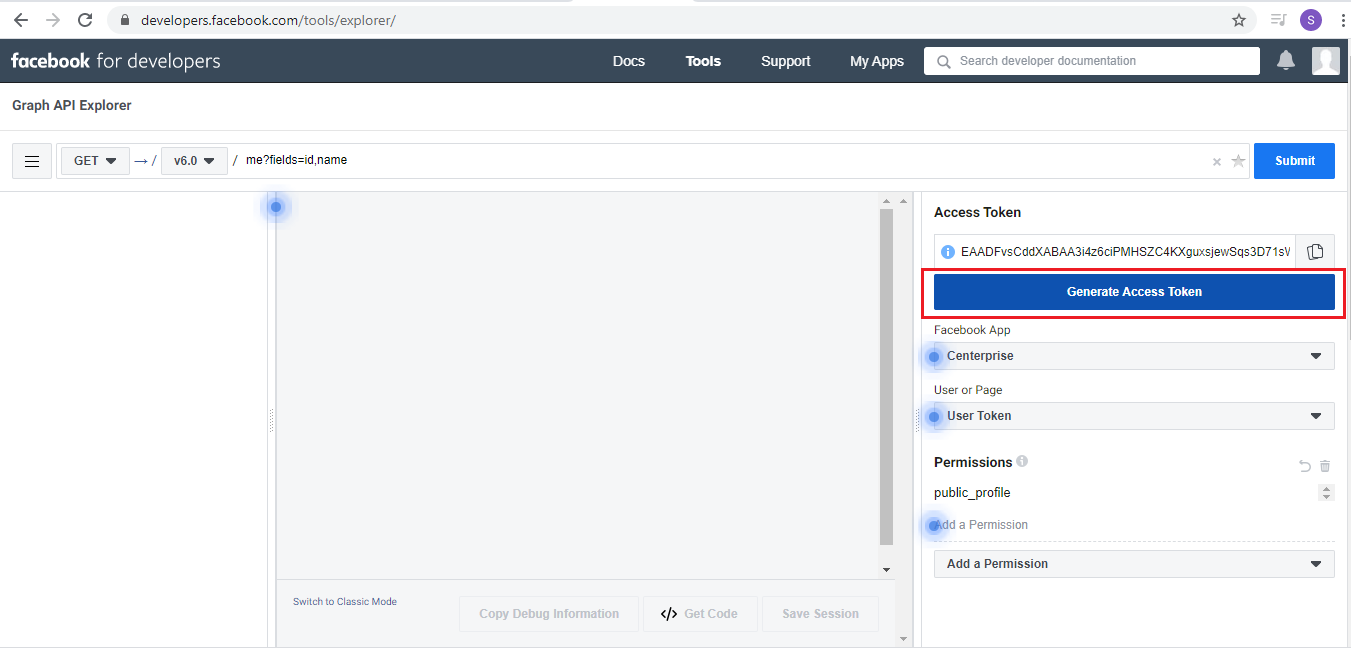
8. To use Bearer Token authentication, go to Tools > Graph API Explorer.
Reference Url: https://developers.facebook.com/tools/explorer/
9. Click on Generate Access Token and copy the token.
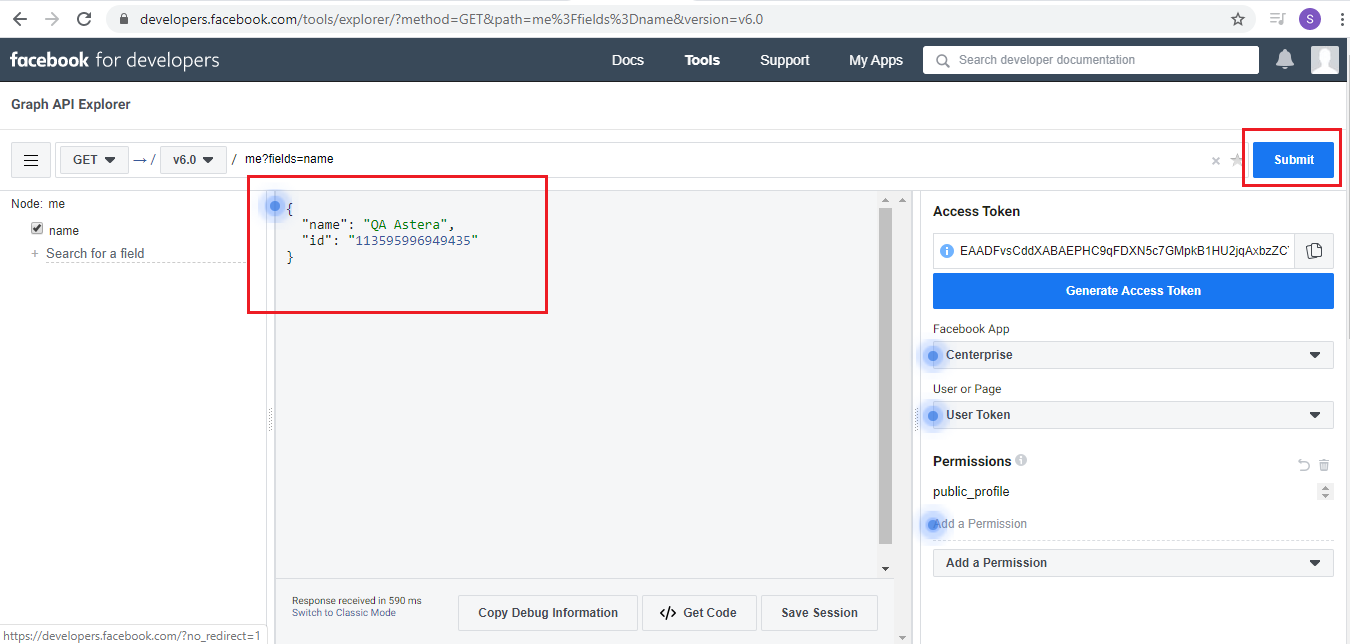
10. To access and try out different APIs, go to Tools > Graph API Explorer.
Reference Url: https://developers.facebook.com/tools/explorer/
11. Select anything from the drop-down list.

12. Click on Submit, to see the results.
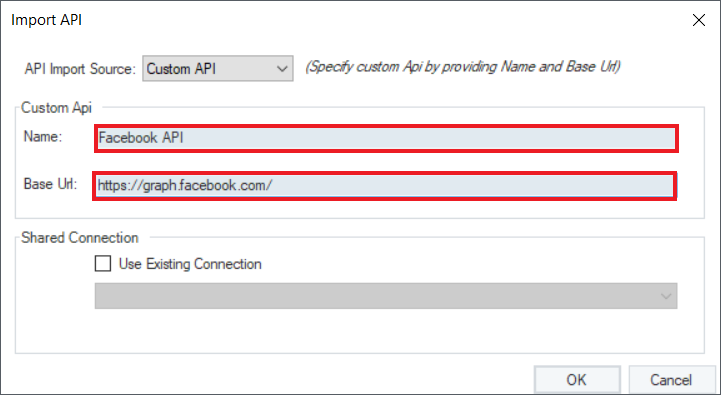
13. Import the API in Centerprise using the Import API option in the REST API Browser (Beta). Select API Import Source as ‘Custom API’ by providing Name and Base Url. To learn more about how to work with custom APIs in Centerprise click here.
Base Url: https://graph.facebook.com/
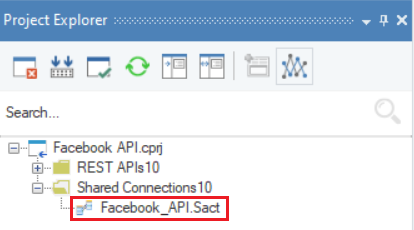
14. Now, you need to authenticate the Facebook APIs to use them in your dataflow. Without authentication, you will get an error. To authenticate an API, go to the Project Explorer and double click on the API’s .sact file under the Shared Connection node.
Facebook’s .sact file will open on the designer. Now, right-click on the shared action file’s header and select Properties. This will open the REST API Connection window, where you can configure the settings to authenticate Facebook’s API.
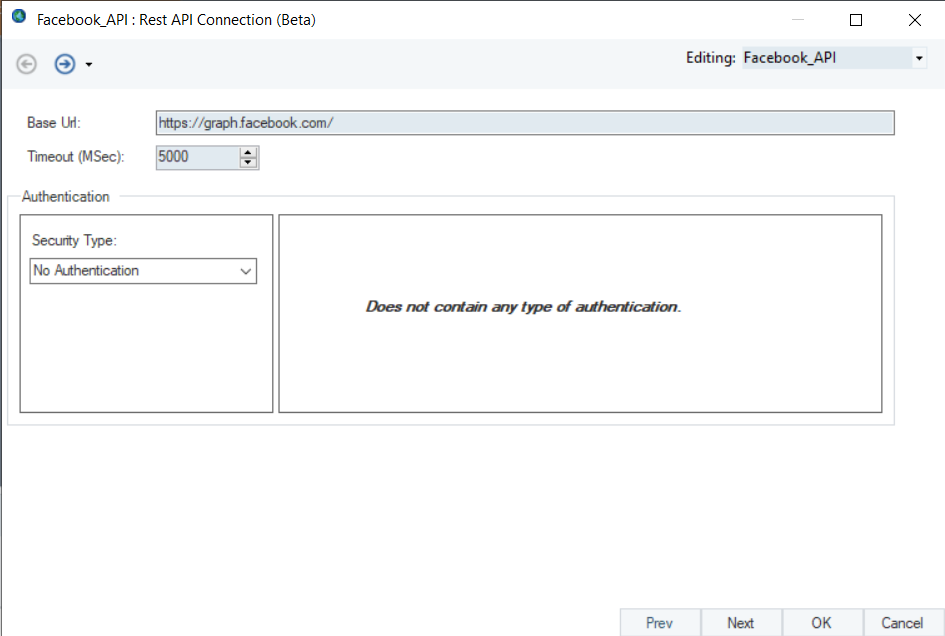
Facebook uses ‘OAuth 2’ authentication with Grant Type ‘Authorization Code’.
Auth Url: https://www.facebook.com/dialog/oauth
Access Token Url: https://graph.facebook.com/oauth/access_token
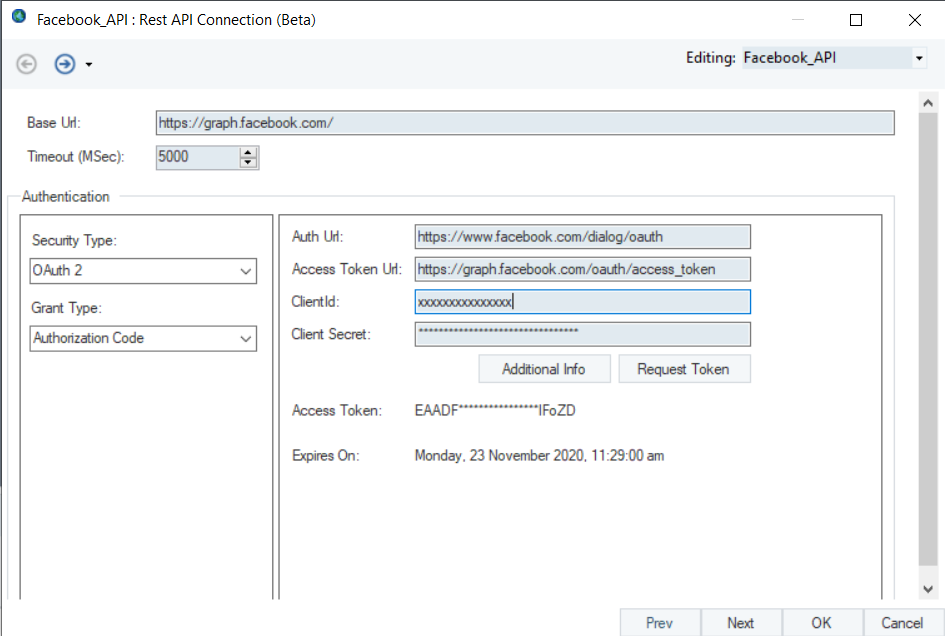
Provide ClientID and secret that you had saved earlier, then click on Request token to generate the access token for Facebook.
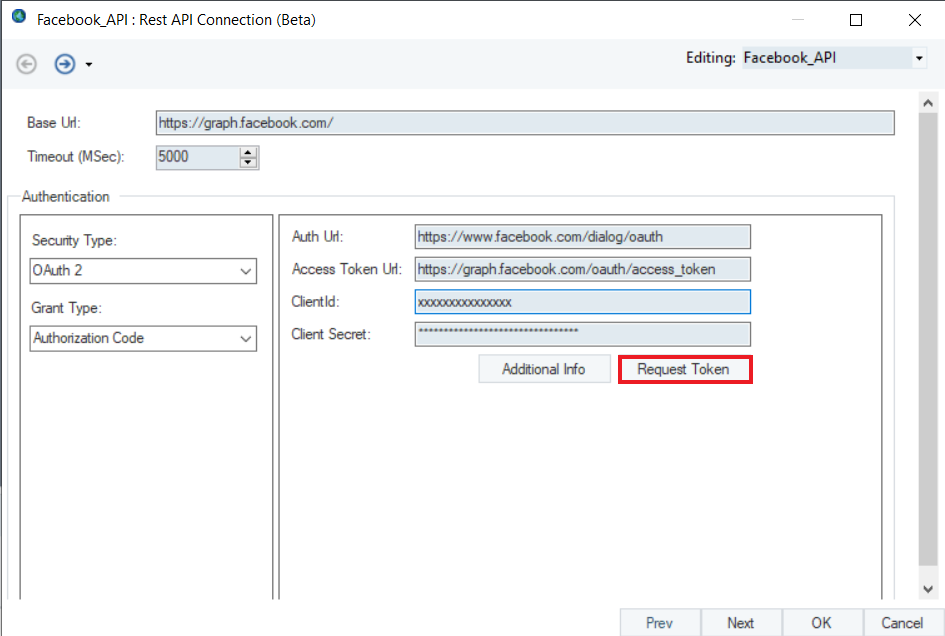
Note: As you click on Request Token, Facebook’s login window will open where you will have to provide your credentials to generate the access token to access Facebook API.
15. Save the shared action file after authentication and you are ready to use Facebook APIs in Centerprise. For more information on how to use a Custom API in Centerprise, click here.
This concludes authenticating the Facebook APIs in Astera Centerprise.