Join Transformation
Join transformation joins records from two record sets. The join functionality is similar to standard SQL joins, but the distinguishing advantage of Centerprise’s implementation is that you can join records from any two sources and not just two database tables.
This article covers how you can use Join transformation in Centerprise.
Sample Use Case
Suppose we have two database tables - Customers and Orders, as shown in the screenshot below, and we want to join these two tables.
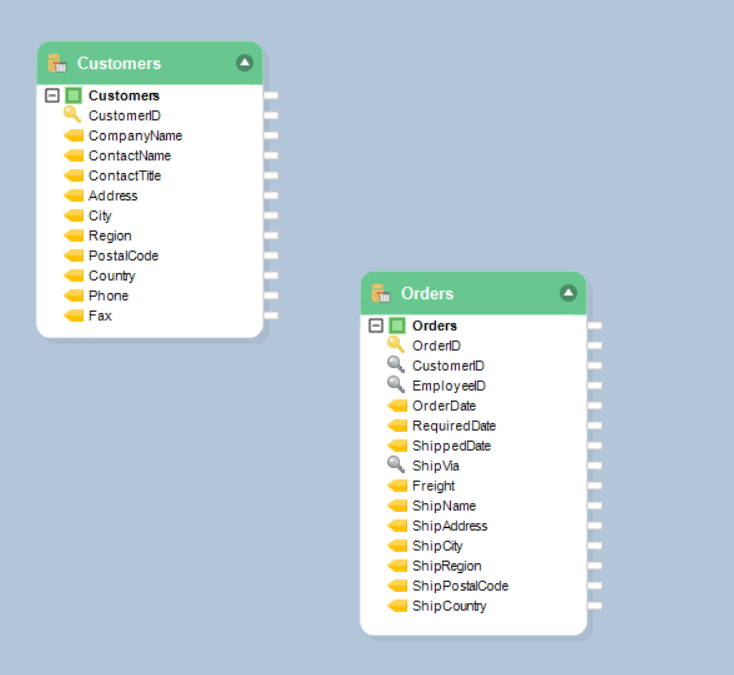
Let’s see how we can join the two tables using the Join transformation in Centerprise:
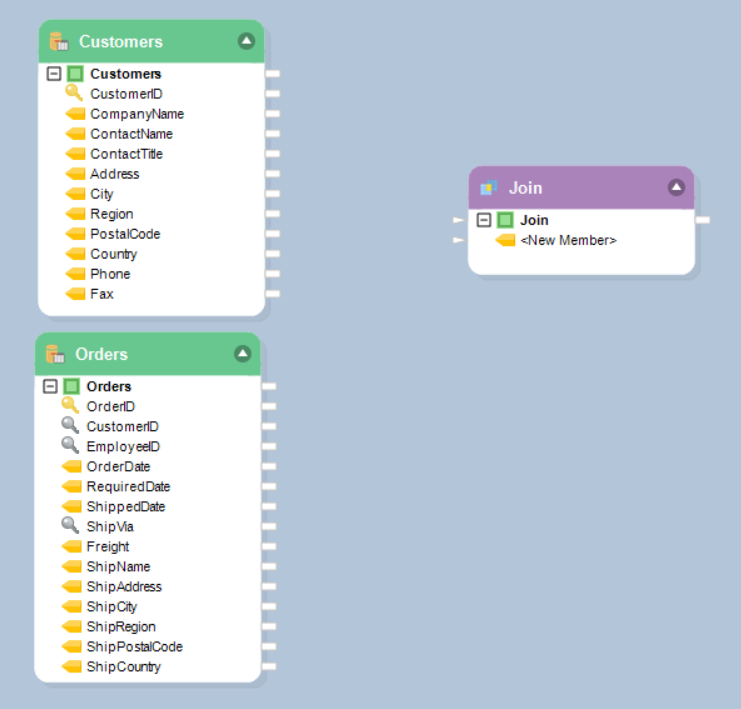
1. Drag-and-drop the Join transformation object from the Transformations section in the toolbox. To open the toolbox, go to View > Toolbox.
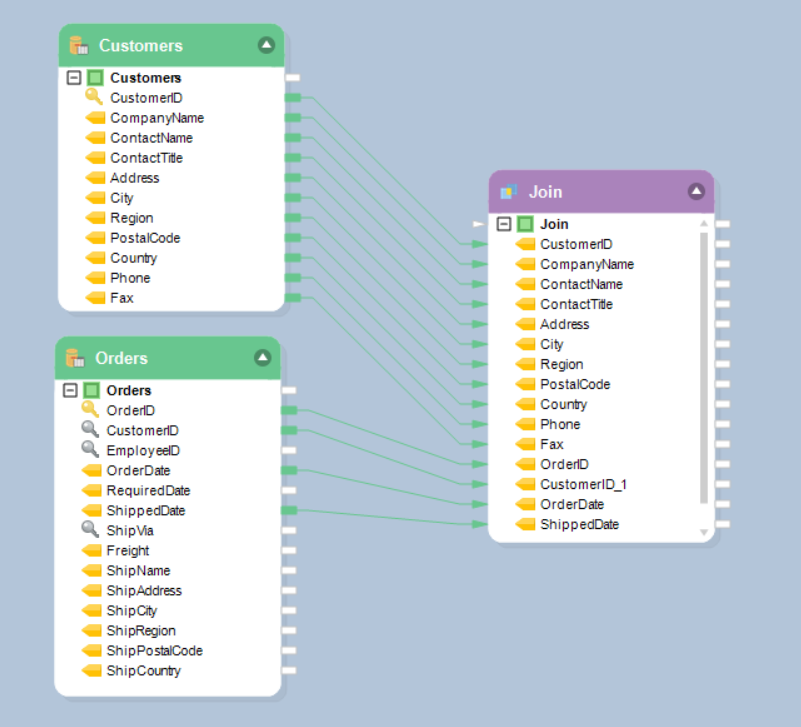
2. Map the fields from the source objects to the Join transformation object.
(Note: To quickly add fields to the layout, drag and drop the node Output port of the object whose layout you wish to replicate into the node Input port of the Join object.)
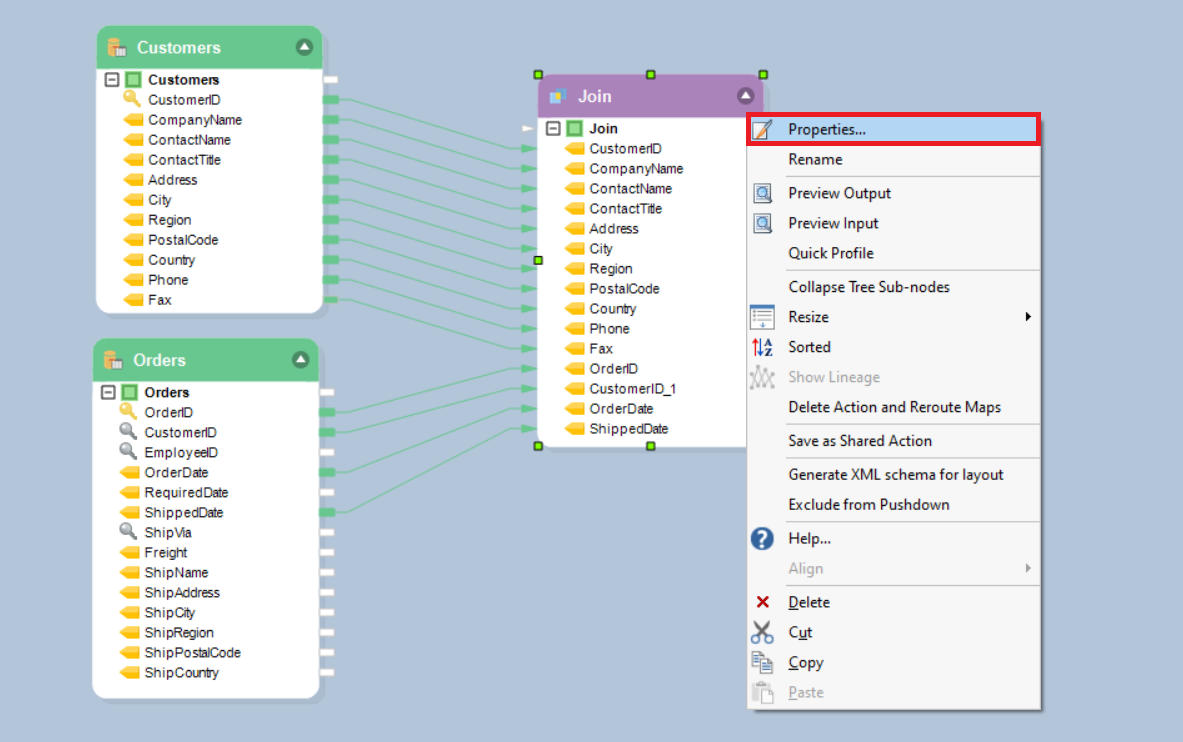
3. To set the properties for the Join transformation, double-click on the object or right-click and go to the Properties.
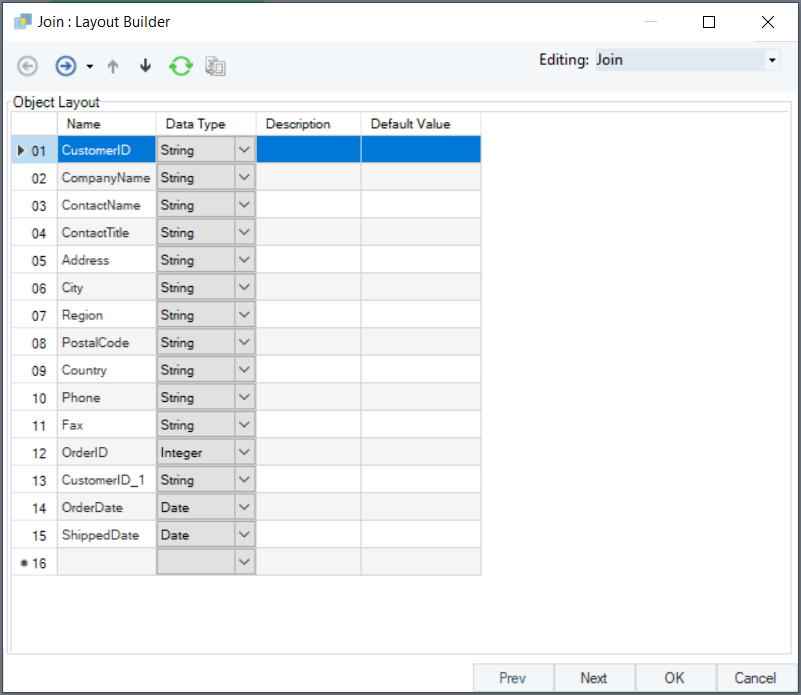
4. The first screen is a Layout Builder screen. You can manage the layout for your transformation (add or remove fields) from this screen. Click Next to go to the next screen.
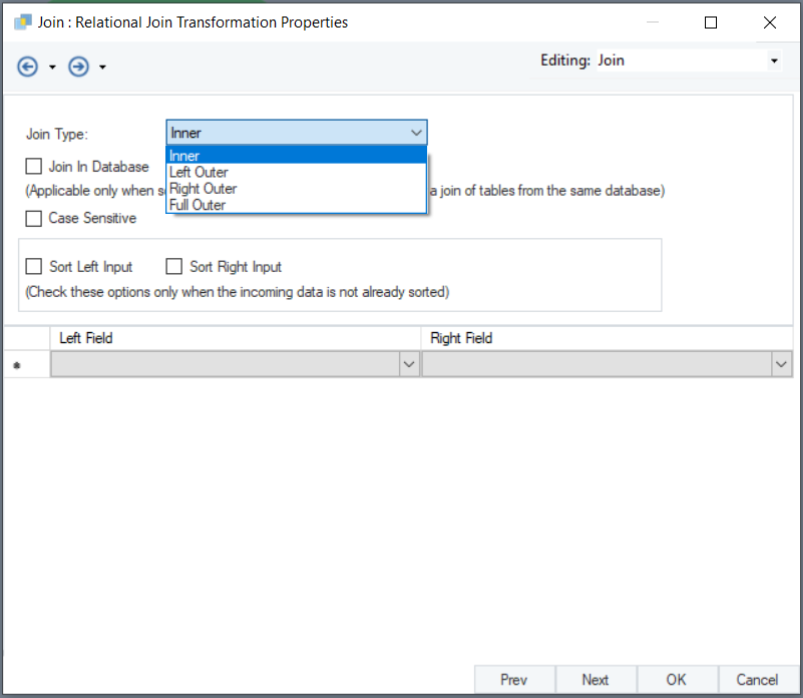
5. The next screen is the Relation Join Transformation Properties screen. Select the Join Type from the drop-down menu. Centerprise supports four types of joins:
- Inner Join – joins records from two record sets based on matching values in key fields. Any unmatched records are discarded.
- Left Outer Join – same as Inner Join, but unmatched records from the left record set (also called ‘first record set’) are preserved, and null values are written for the unmatched record in the right record set (also called ‘second record set’).
- Right Outer Join – same as Inner Join, but unmatched records from the right record set (also called ‘second record set’) are preserved, and null values are written for the unmatched record in the left record set (also called ‘first record set’).
- Full Outer Join - same as Inner Join, but unmatched records from either record set are preserved, and null values are written for the unmatched record in the other record set.
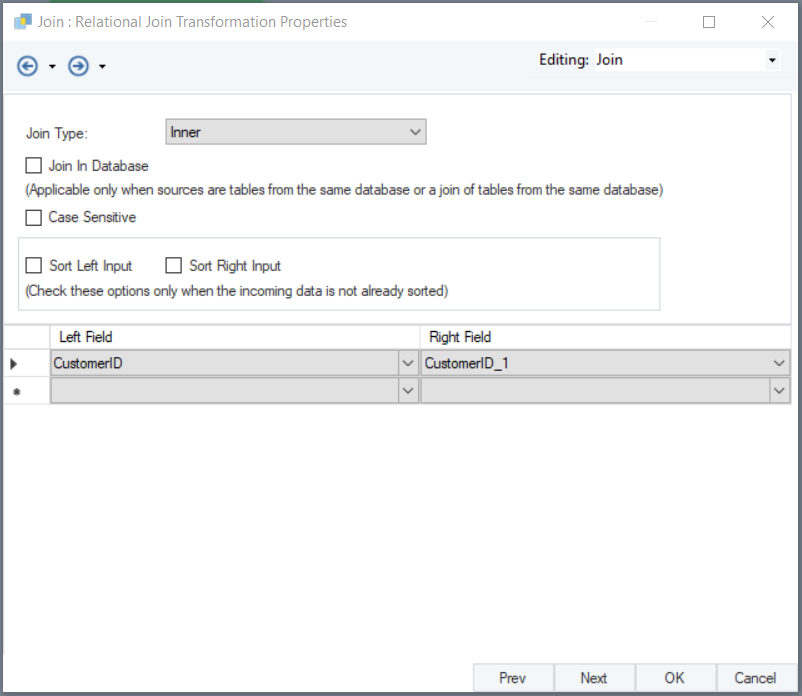
6. Other options on the screen:
- Join in Database: Check the option if you want to join the tables in the database.
- Case Sensitivity: Check the option if you want a case sensitive match of the values in the key fields.
- Sort (Left/Right) Input: Specify whether the left input, the right input, or both, need to be sorted.
7. Select the key fields from the Left Field and Right Field drop-down lists. Click Next and Ok.
Note: You can add multiple fields to create a composite key field.
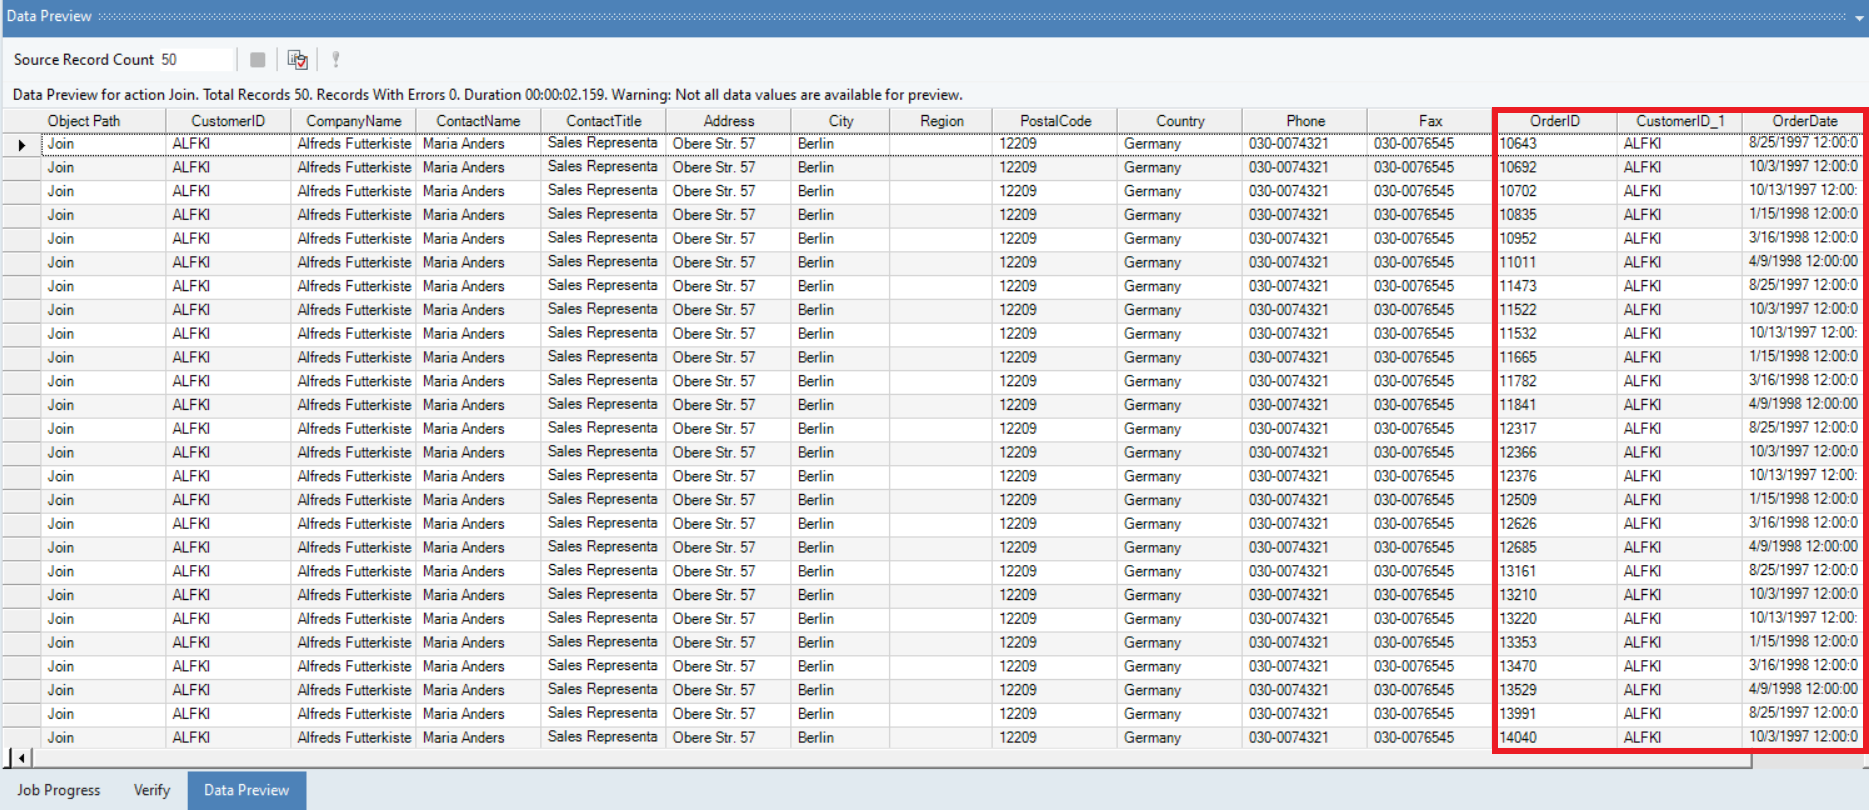
8. You can now preview the output and see the consolidated data.
General Options screen in Join Transformation:
This screen shares the options common to most objects on the dataflow.
Clear Incoming Record Messages
When this option is on, any messages coming in from objects preceding the current object will be cleared. This is useful when you need to capture record messages in the log generated by the current object and filter out any record messages generated earlier in the dataflow.
Do Not Process Records with Errors
When this option is on, records with errors will not be output by the object. When this option is off, records with errors will be output by the object, and a record message will be attached to the record. This record message can then feed into downstream objects on the dataflow, for example a destination file that will capture record messages, or a log that will capture the messages and as well as collect their statistics.
The Comments input allows you to enter comments associated with this object.