Using Dynamic Layout/Template Mapping in Astera Centerprise
The Dynamic Layout/Template Mapping feature in Astera Centerprise enables users to create a template dataflow that can be used to process multiple files and generate copies of the same dataflow, without having to change the mapping links individually for each source dataset. Upon execution, Centerprise will replace the values dynamically and generate a new dataflow automatically for all source files.
Benefits of Template Mapping
- Running your routine processes does not require you to design and map your ETL flows every time.
- ETL pipelines can be run without any dependence on the development environment.
- Template mapping also facilitates scheduling repetitive, routine jobs for automation.
- Using runtime parameters, you can customize your templates to suit your changing requirements.
- Template mapping makes it all the more convenient for non-technical users to customize and deploy these templates in different business scenarios.
In this document, we will learn how to use the Dynamic Layouts/Template Mapping functionality in Astera Centerprise.
Use Case: Auto-Generating Dataflows through Template Guide Maps
Dataflow templates are reusable flows that can be customized using runtime parameters and generate copies of the same flow for multiple source files upon execution.
Let’s understand it with an example.
Here we have around 15 tables in a database and we need to process the data in each of these tables through a dataflow. Following a traditional ETL mapping approach, we would need to design 40 different dataflows and run them separately. Although the records and the layout are different in each table, the data in each table is processed through a similar process that involves the following steps:
- Extracted using the Database Table Source object in Astera Centerprise
- Written into a .csv file using the Delimited File Destination object
Mapping the same flow to different source tables and destinations paths manually can be time-consuming, inefficient, and prone to human errors. However, by designing and creating a dataflow template, you can map the task to the template which will generate a copy of the same dataflow for each table, with unique source and destination paths.
Let’s see how it works in Astera Centerprise.
Creating a Template Dataflow in Astera Centerprise
To create a template dataflow, drag and drop the relevant source object from the sources section in the toolbox. The Dynamic Layout option for template mapping is supported in the Database Table Source, Excel File Source, and Delimited File Source in Astera Centerprise. In this example, our source data is stored in a database table, so we’ll use a Database Table Source object to retrieve our data.
Drag and drop it from the Sources section in the toolbox onto the dataflow designer.
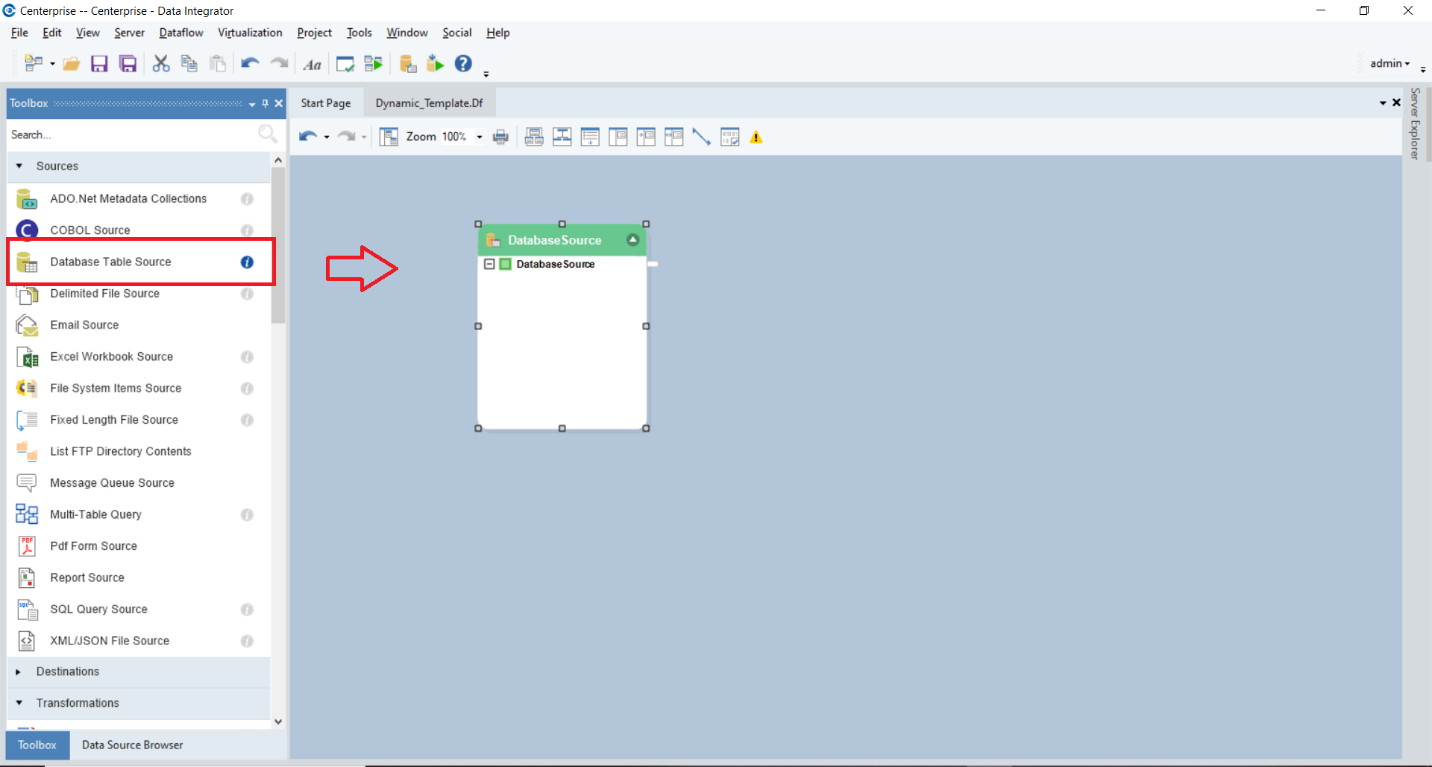
Now, right-click on the Database Source object and go to Properties.
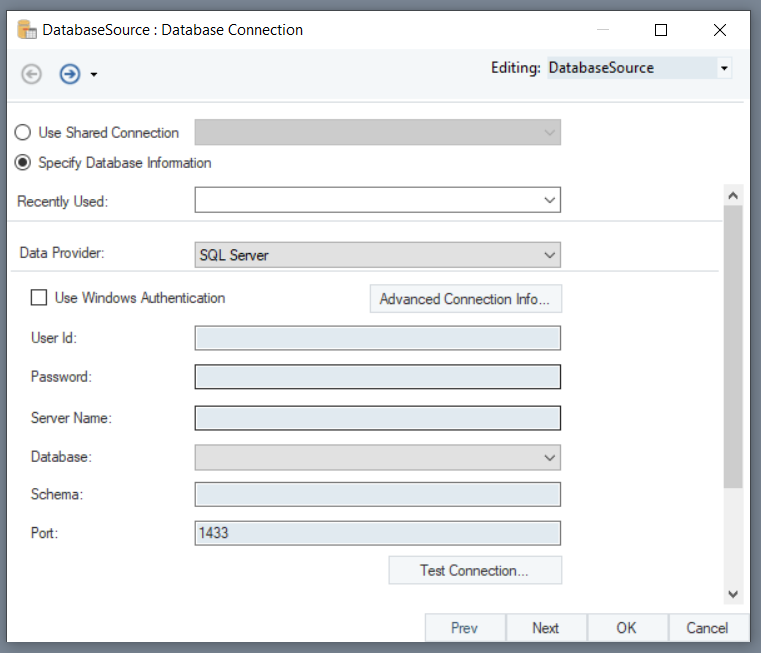
This will open a new window where you need to provide details to configure connection with the database.
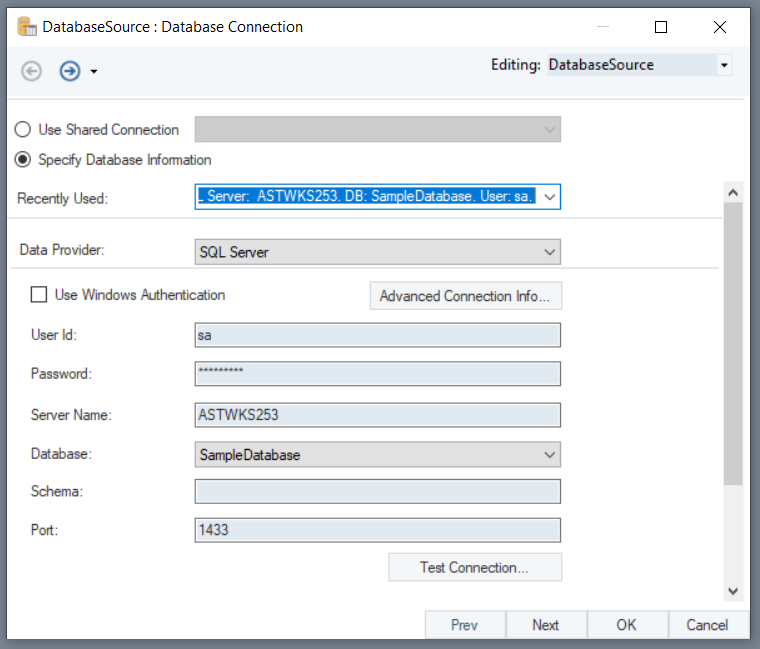
Once the connection is established, click ‘Next’ to proceed to the next screen.
Here, you need to pick a table from the database. In this case, We’ll select the ‘Customers’ table from the list.
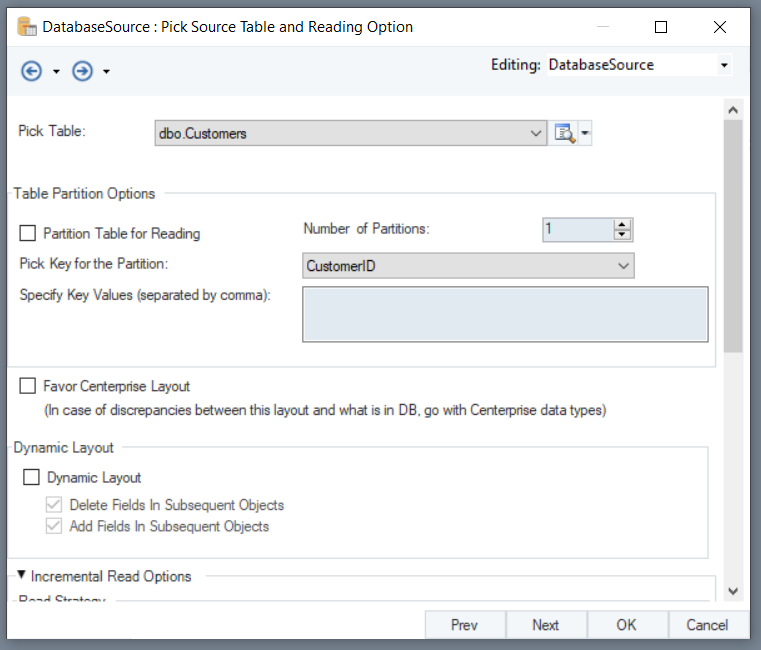
Leave the other options as default and scroll down to the Dynamic Layout section on the same screen.
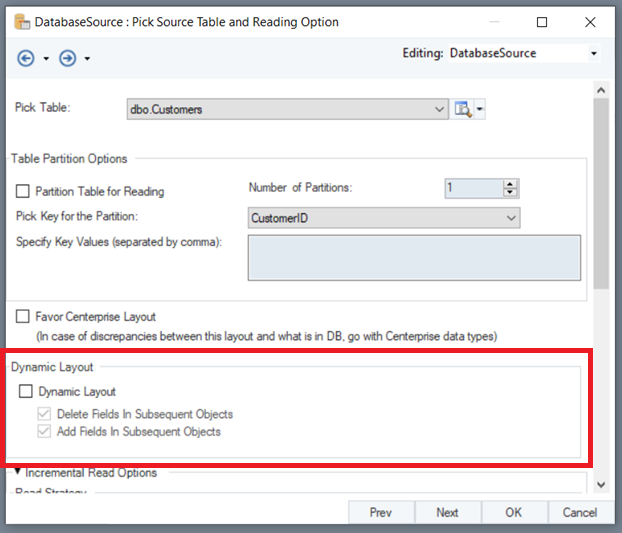
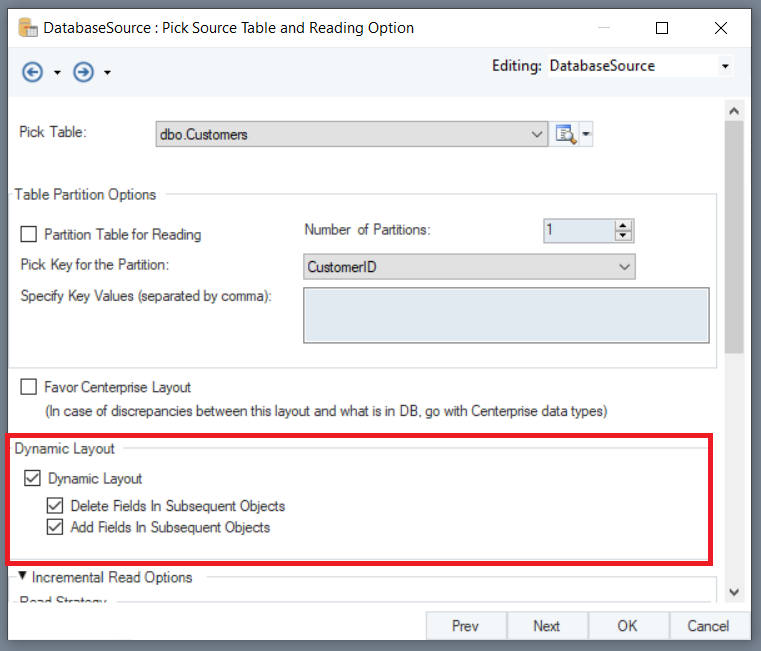
Check the ‘Dynamic Layout’ option. This will enable the other two options in this section.
- Delete Fields in Subsequent Objects: When this option is checked, it will remove all elements already present in the subsequent objects.
- Add Fields in Subsequent Objects: When this option is checked, it will populate the fields from the source table in the subsequent objects.
Both of these options are checked by default and enabled when you check the ‘Dynamic Layout’ option.
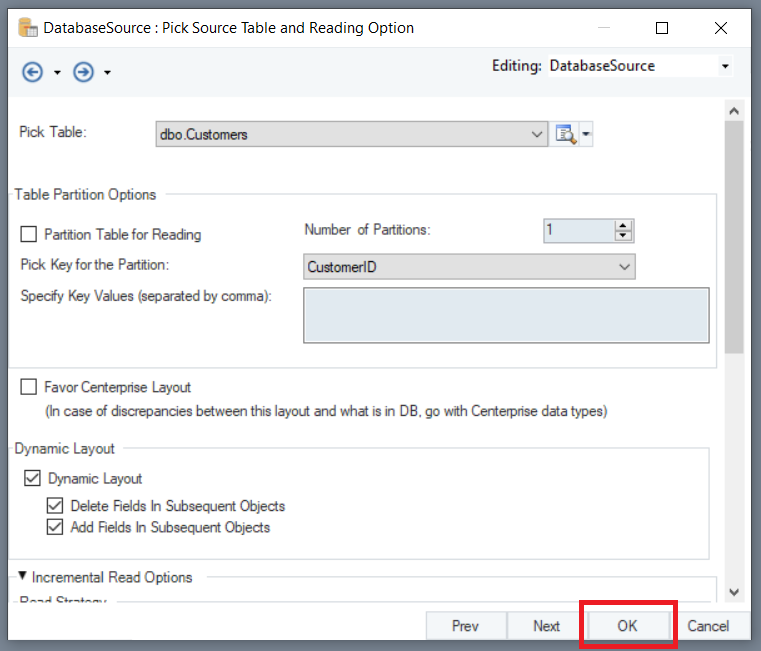
Once done, click OK to exit the Properties screen.
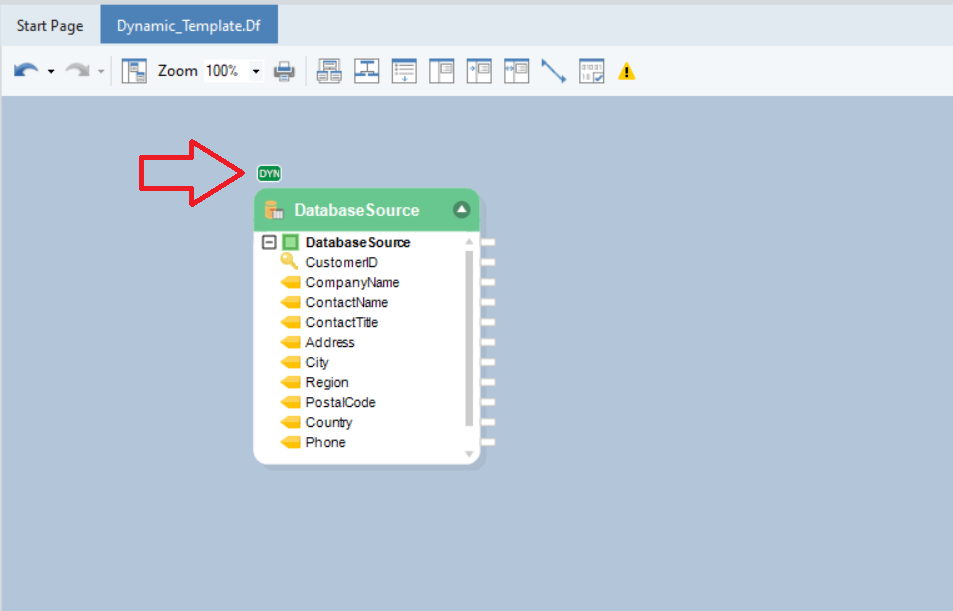
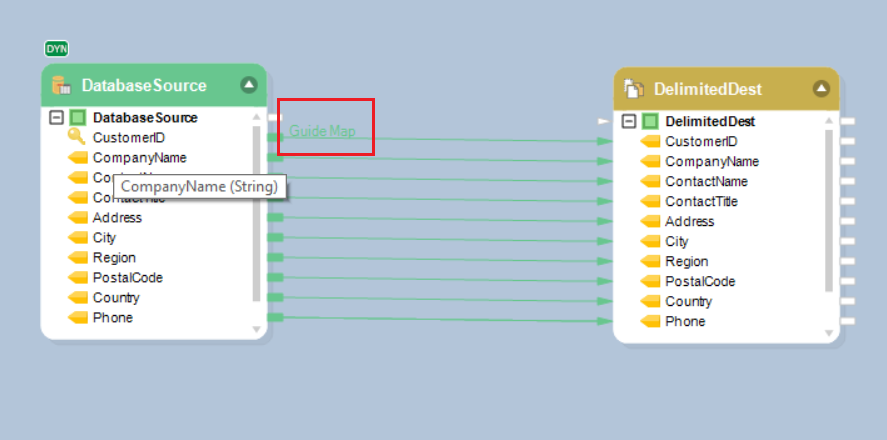
Now if you look at the Database Table Source object, you can see this small icon or flag DYN over the header. This denotes that the source object has been set to work with dynamic layouts.
Now drag and drop a Variable object from the Resources section in the Toolbox and drop it onto the designer.
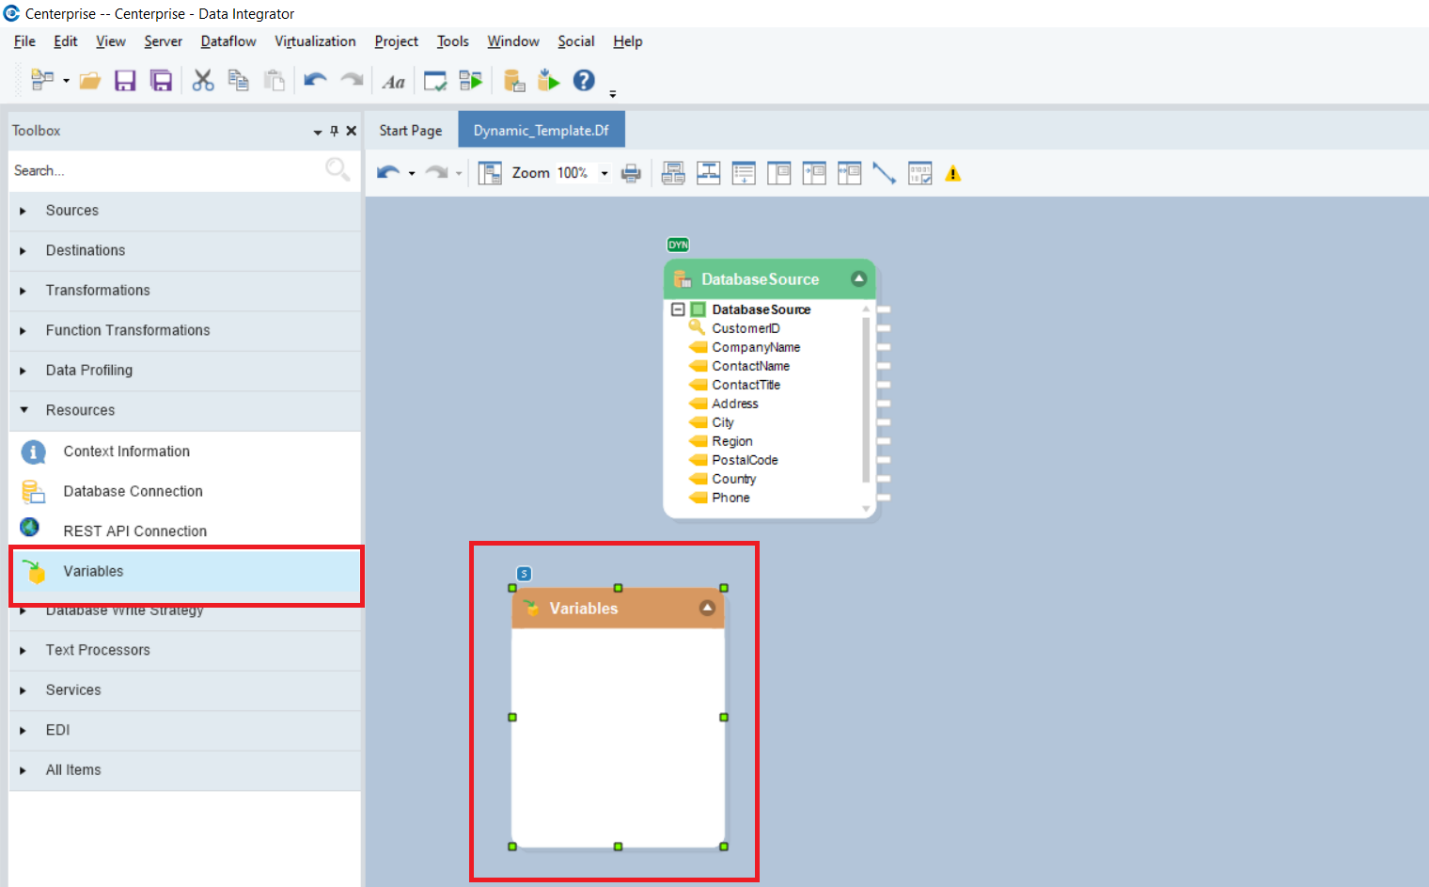
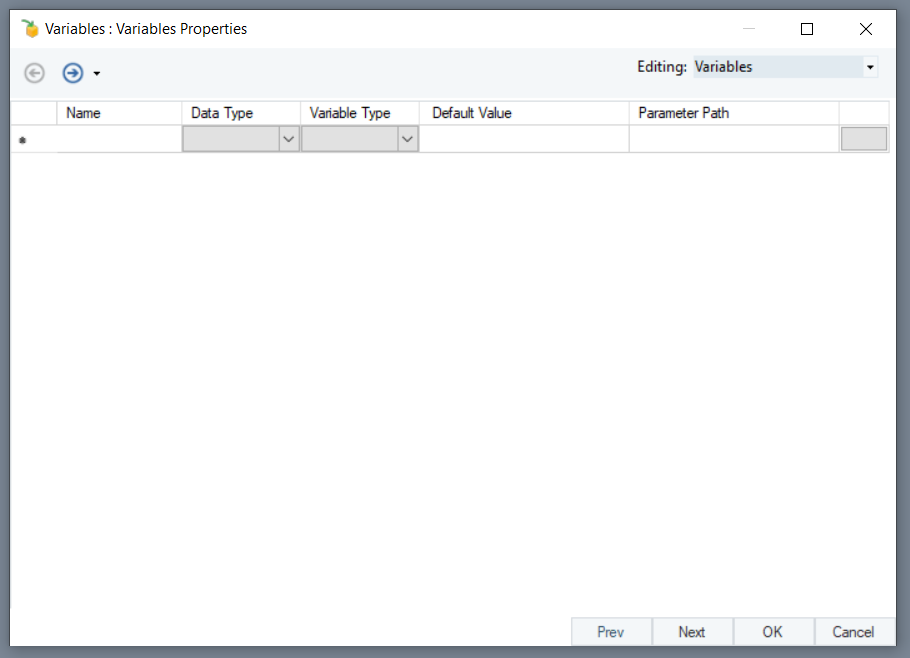
Using this Variable object, we will define input parameters for the Source table. Right-click on the Variable object and go to Properties.
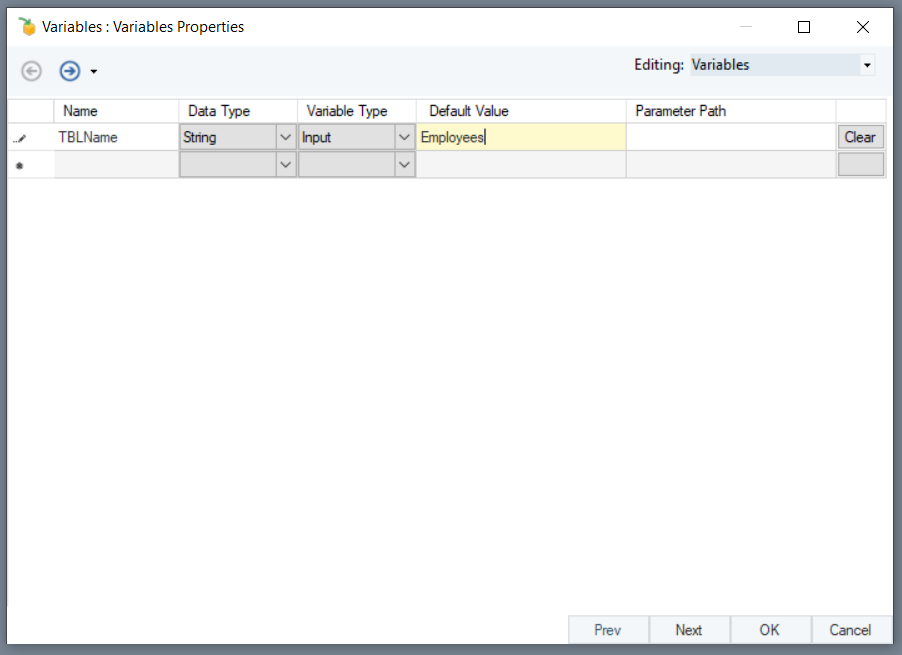
This will open a new window where we will specify the input parameters or variables for Source table.
Name: TBLName
This is the name of the input variable and will be hardcoded in the config parameters of the Database Table Source object.
Data Type: String
Variable Type: Input
Default Value: Employees
The Default Value can be the name of any table in your source database which you want to process on the template dataflow. Here, we have provided the Default Value as ‘Employees’ since we want to process the Employees table through the template dataflow we’re designing.
Once you have specified the parameter details, click OK.
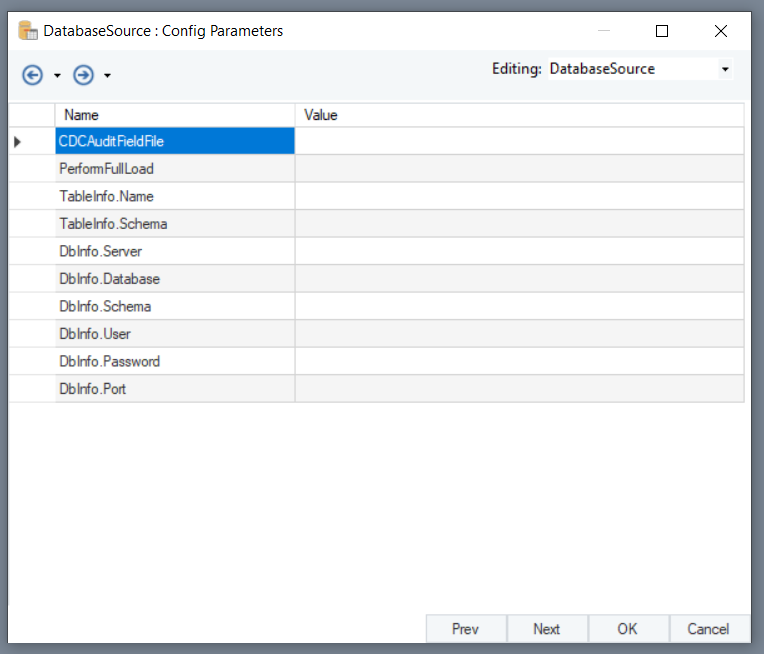
Now go to the Database Table Source object and enter its Properties. Go to the Config Parameters screen.
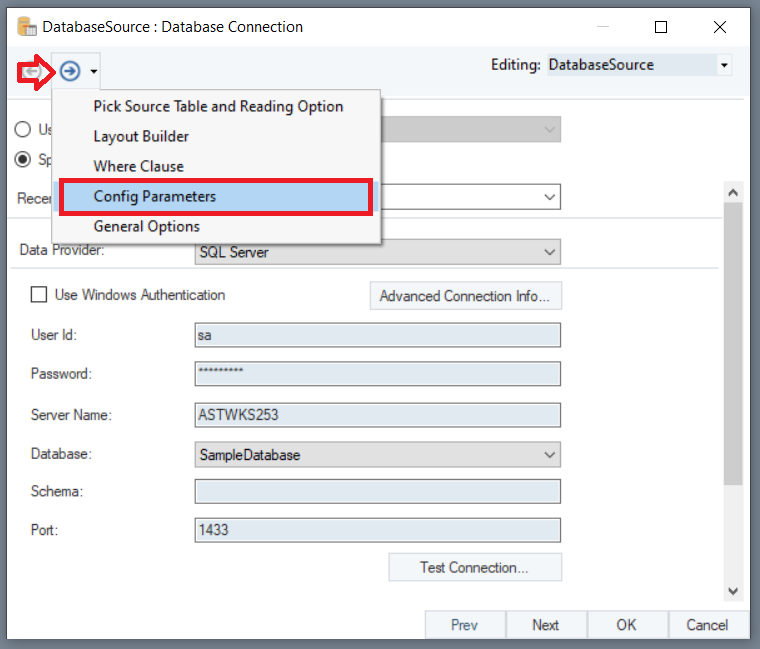
Here, you need to provide details of the parameters you’ve specified in the Variable object.
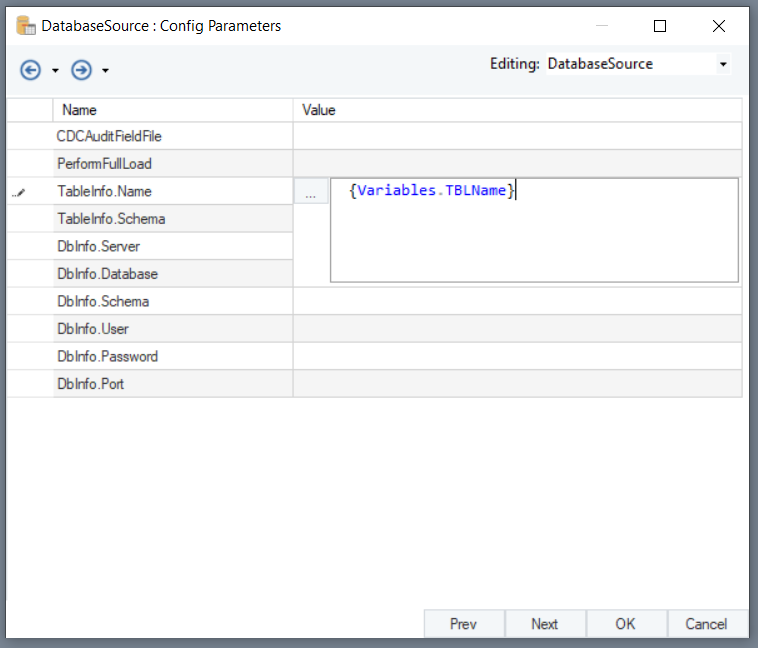
Click on the Value field for TableInfo.Name and write {Variables.TBLName}. Once done, click OK.
Now, as per our use case, we want to write the source data to a delimited file destination. For this, let’s drag the Delimited File Destination object from the Destinations section in the Toolbox onto the designer.
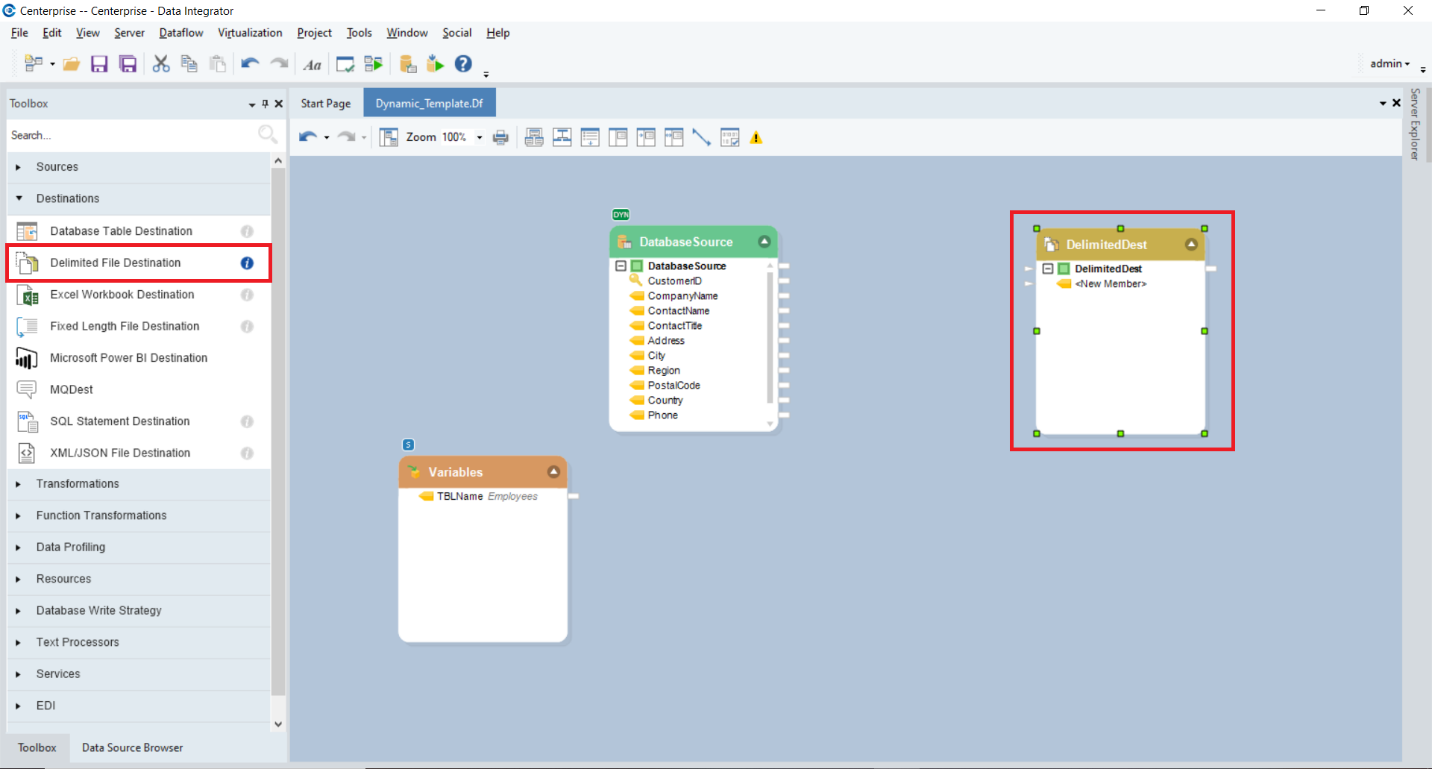
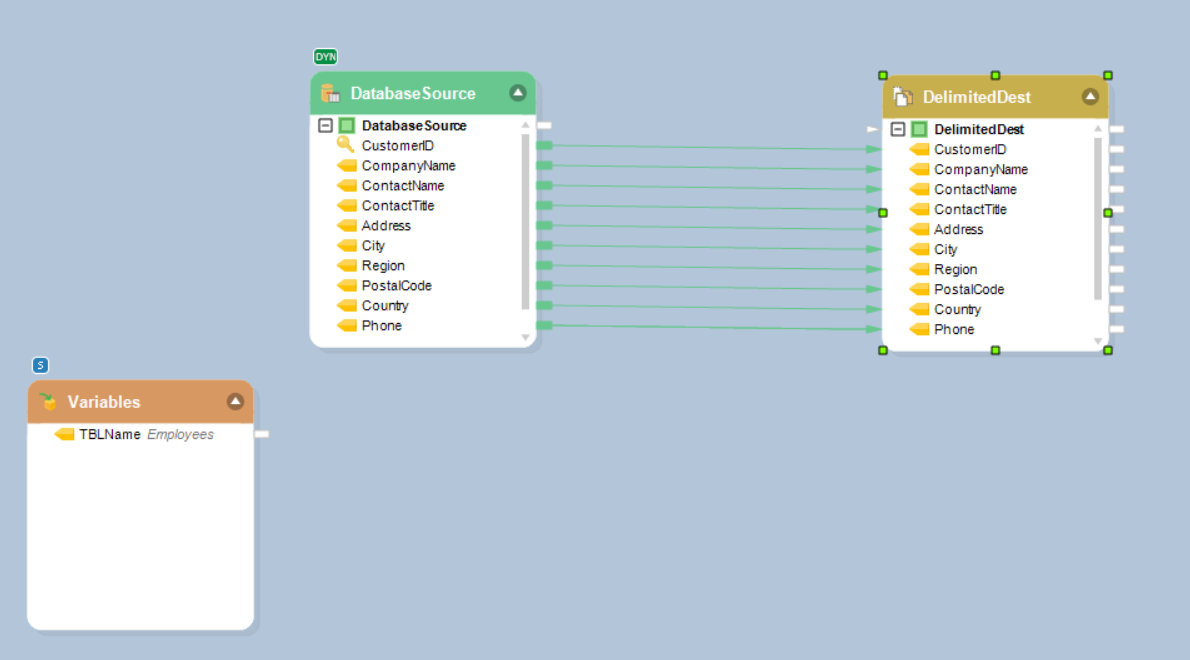
Now map fields from Database Table Source object to Delimited File Destination object.
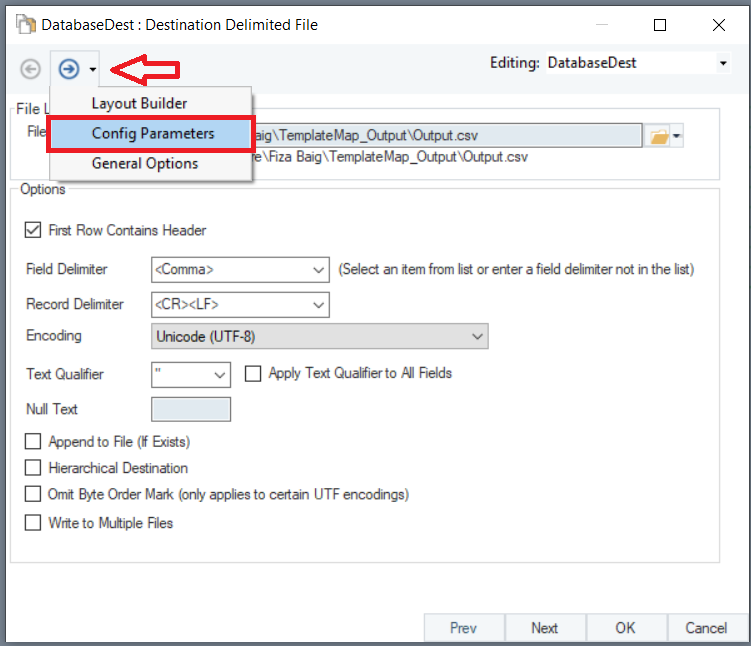
Right-click on the Delimited File Destination object and go to Properties.
This will open a new window where you need to point the path to the location where you want to save your output file. Provide a name and location and click ’Save.’

Since we will be using this dataflow template for multiple tables in our database, the destination file path should be dynamic so that it could generate a new output file with a unique name for each table it processes. To do that, go to Config Parameters screen in the Delimited File Destination object.
Here, you need to provide parameters that will generate a new output file every time a table is processed through the dataflow. Let’s write the following value for Destination File:
\arrakis\share\Fiza Baig\TemplateMap_Output{Variables.TBLName}.csv
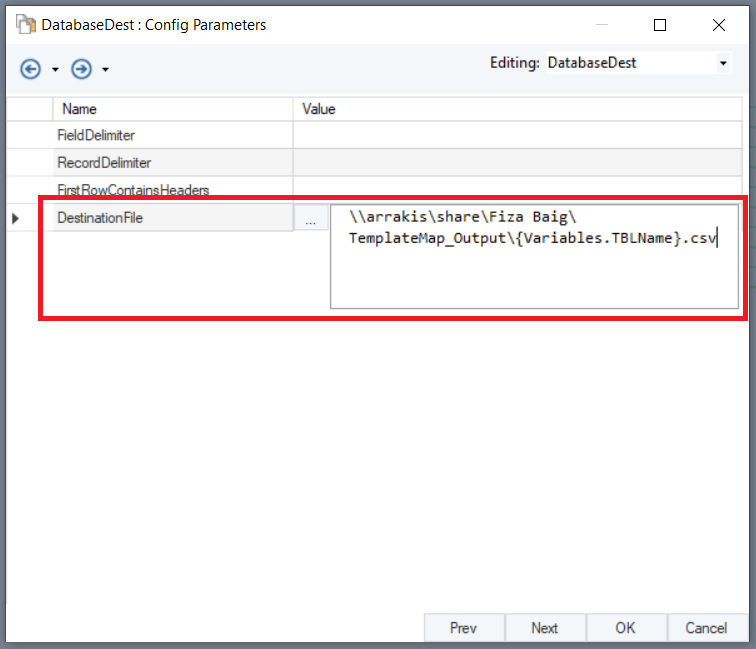
Once done, click Ok to close the Properties window.
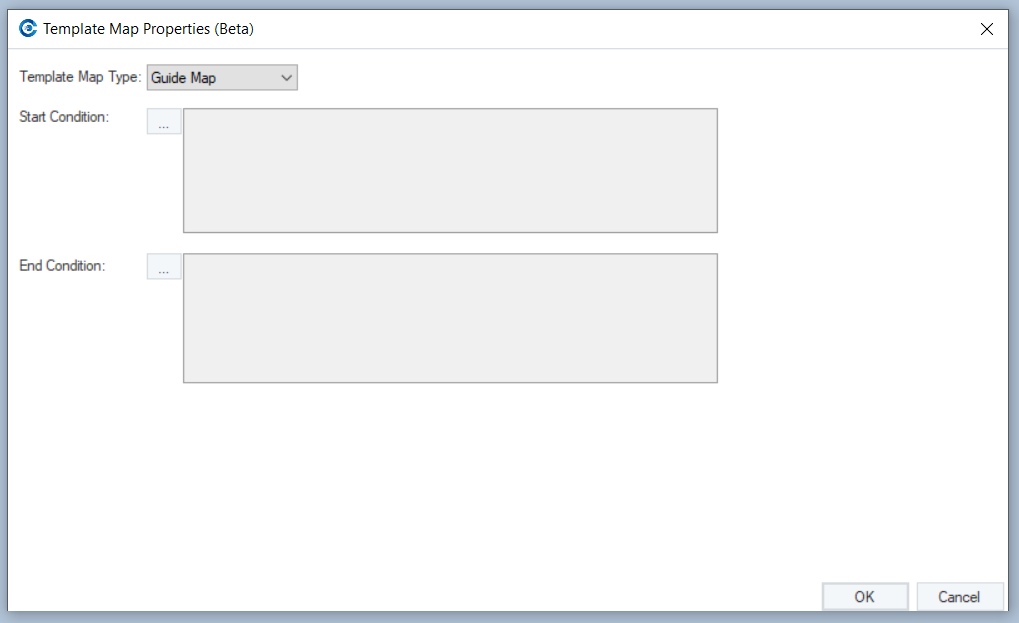
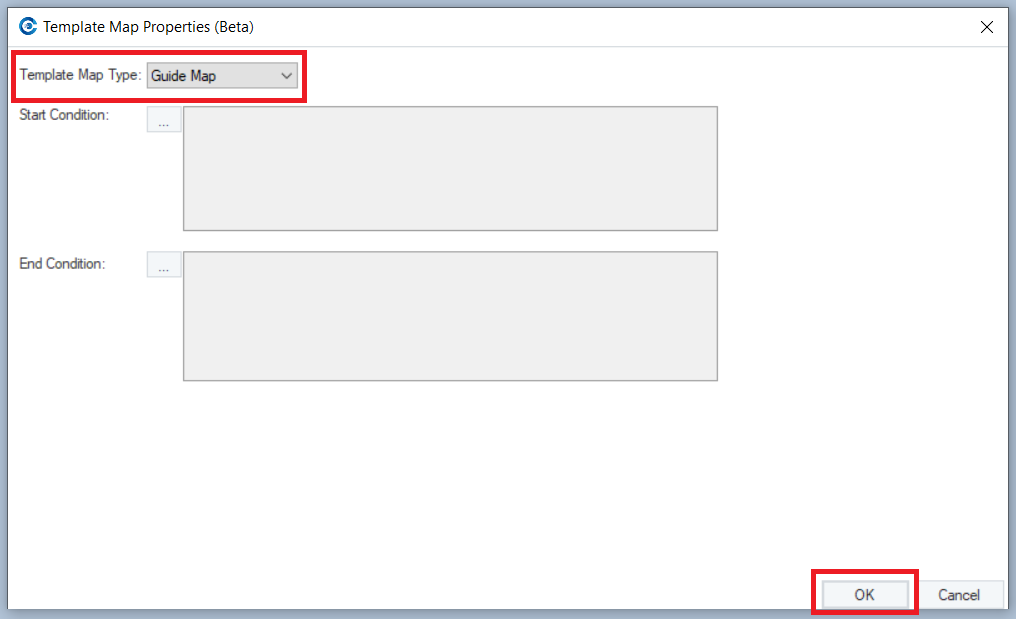
Now right-click on any mapping link connecting a field from source to destination and select Template Map Properties from the list.

This will open a new window where you need to specify the template map type.
Click on the Template Map Type drop-down list. You can see two options:
- Guide Map: This mapping link serves as a pointer between two objects in a dataflow and determines how the data flows between them. The Guide Map works independent of the different fields in a source object. As in, it merely defines the path of the data from source to destination and has nothing to do with whichever field it is mapped to.
- Conditional Map: Conditional Map specifies a set of conditions for a particular field in Source and Destination file layouts.
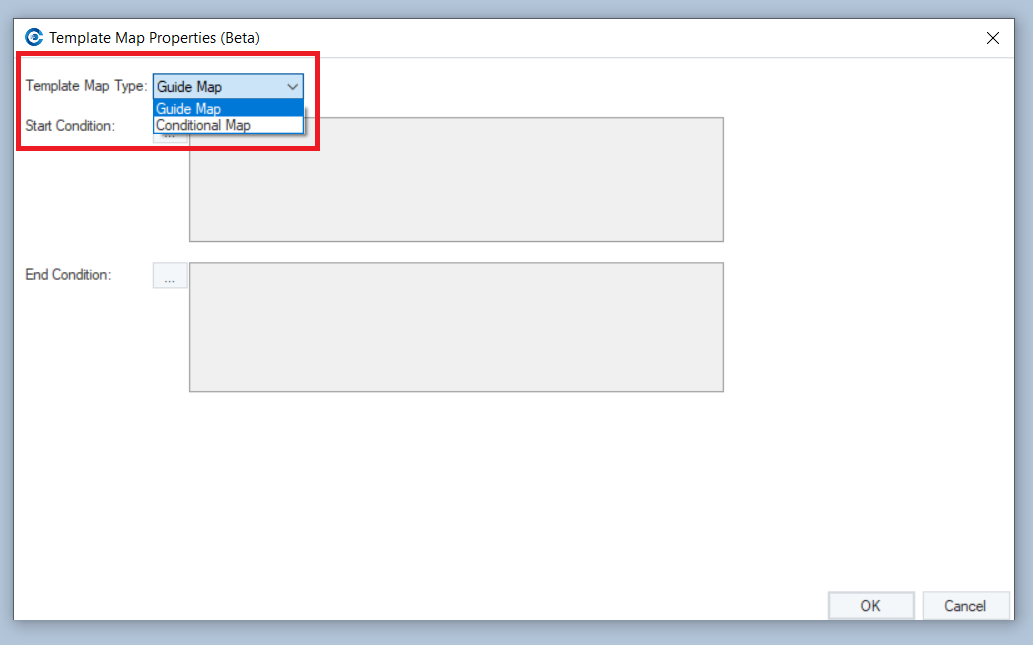
Let’s select Guide Map as our Template Map Type and click OK.
You can now see Guide Map written over the mapping link.
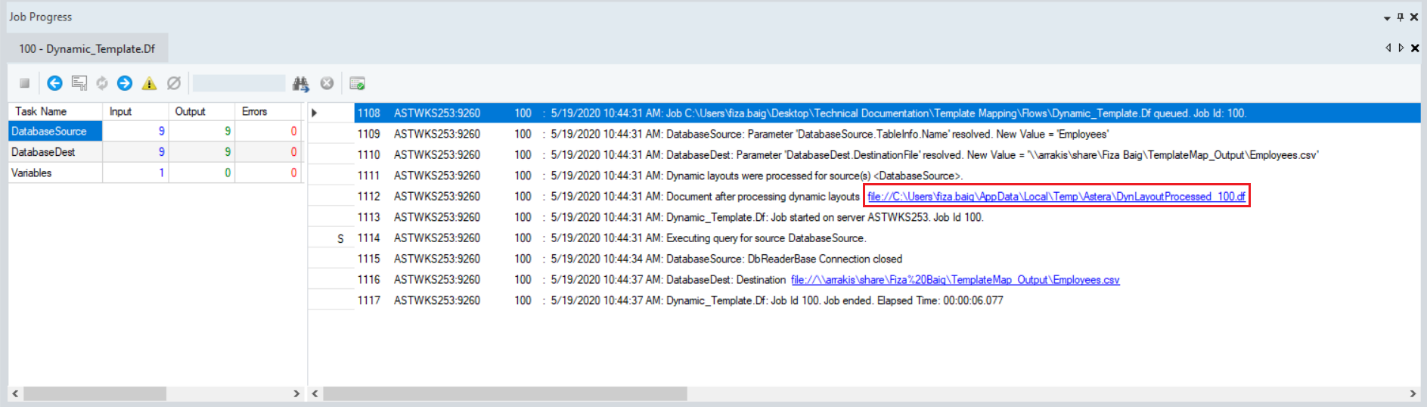
Our template dataflow is ready. Now let’s run the dataflow. You can observe the progress in the Job Progress window.
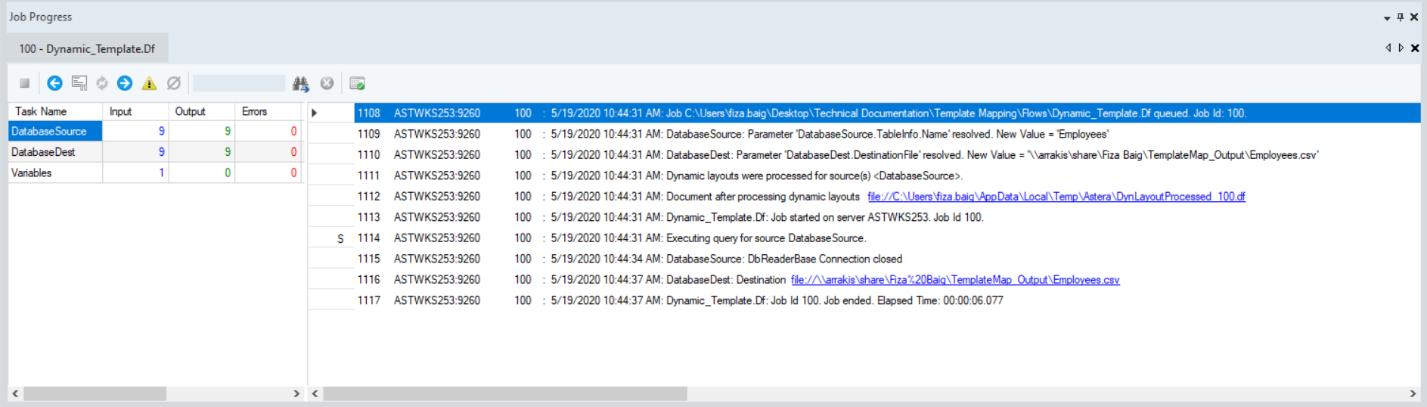
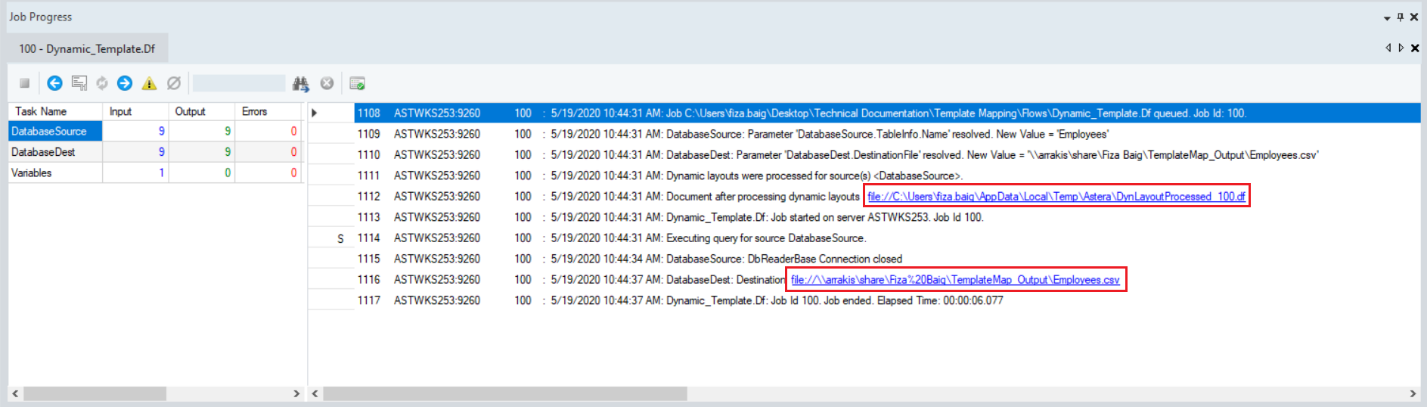
If you look at the job trace, you can see that Centerprise has generated a new dataflow (DynLayoutProcessed.df) based on our template dataflow. The output file too, which is a CSV file in this case, has been generated at the specified location. You can find clickable links to the new dataflow as well as output file in the job trace.
Note: To be able to access and open the new dataflow in Centerprise, you need to be logged on to Astera Integration Server. For this, go to Services > Astera Integration Server 8 > right-click > Properties > Log on.
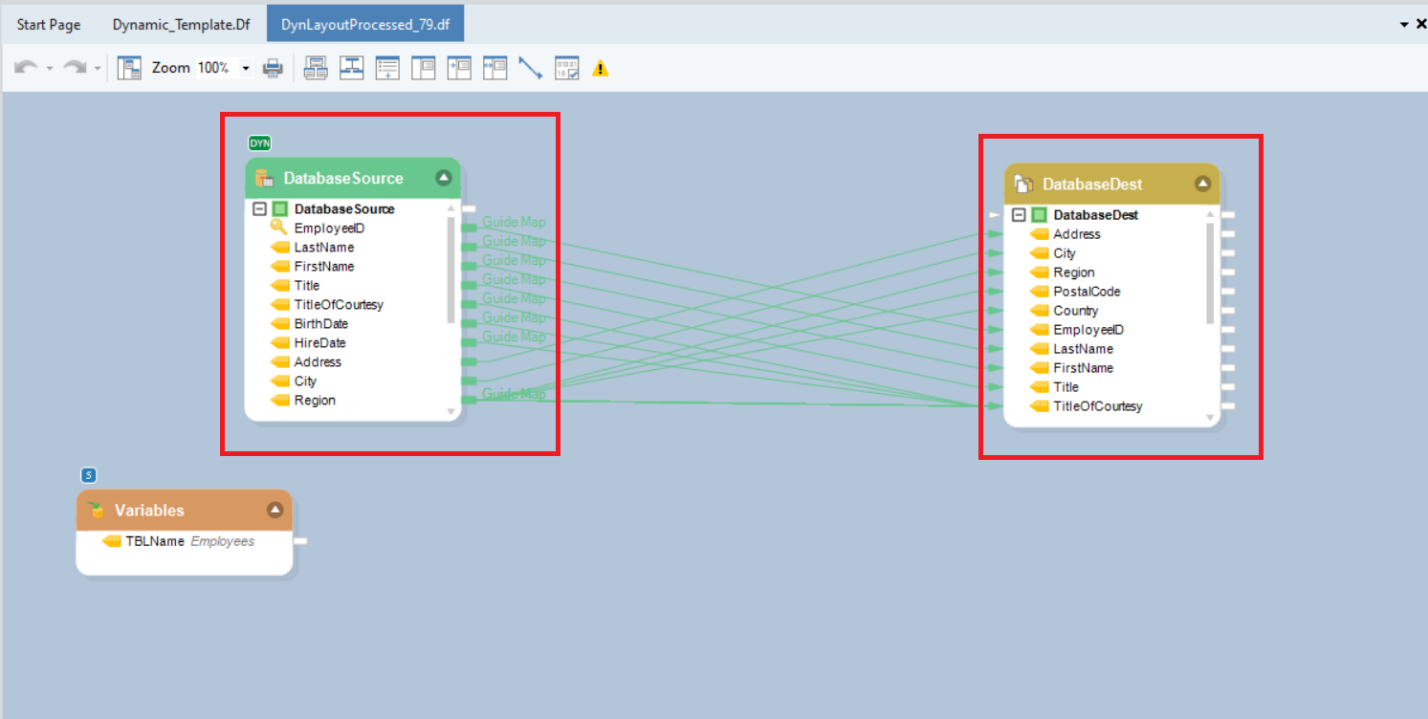
Let’s open this new dataflow in Centerprise by clicking on the link in the job trace.
You can see that this new dataflow that has been generated automatically is the exact copy of the template dataflow we created in the previous steps.

Based on the Default Value ‘Employees’ in the variable object, the Database Table Source object has automatically picked the table from the database, replacing the Customers table in the template dataflow, and has populated the fields from the Employees table in the Source as well as Destination objects.
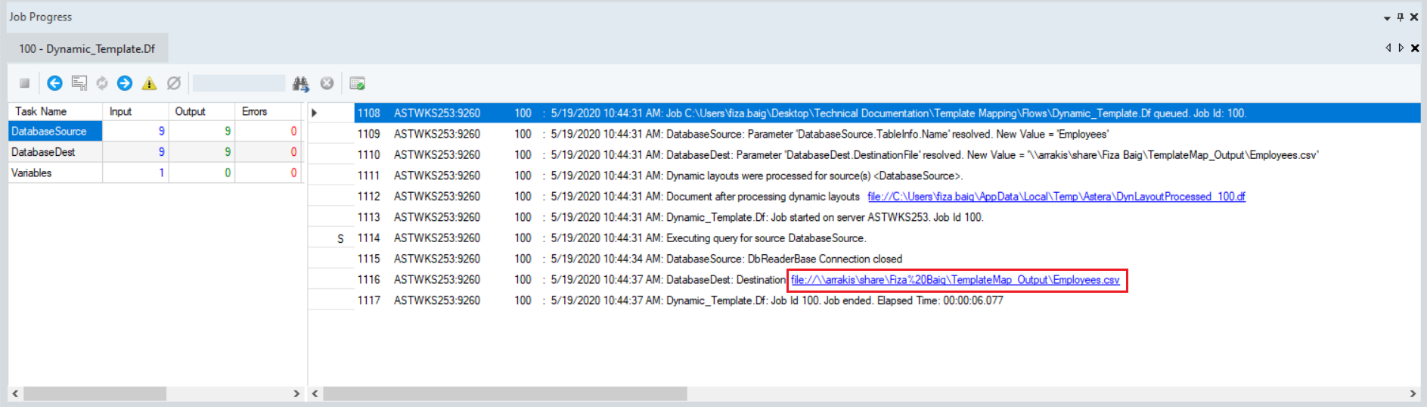
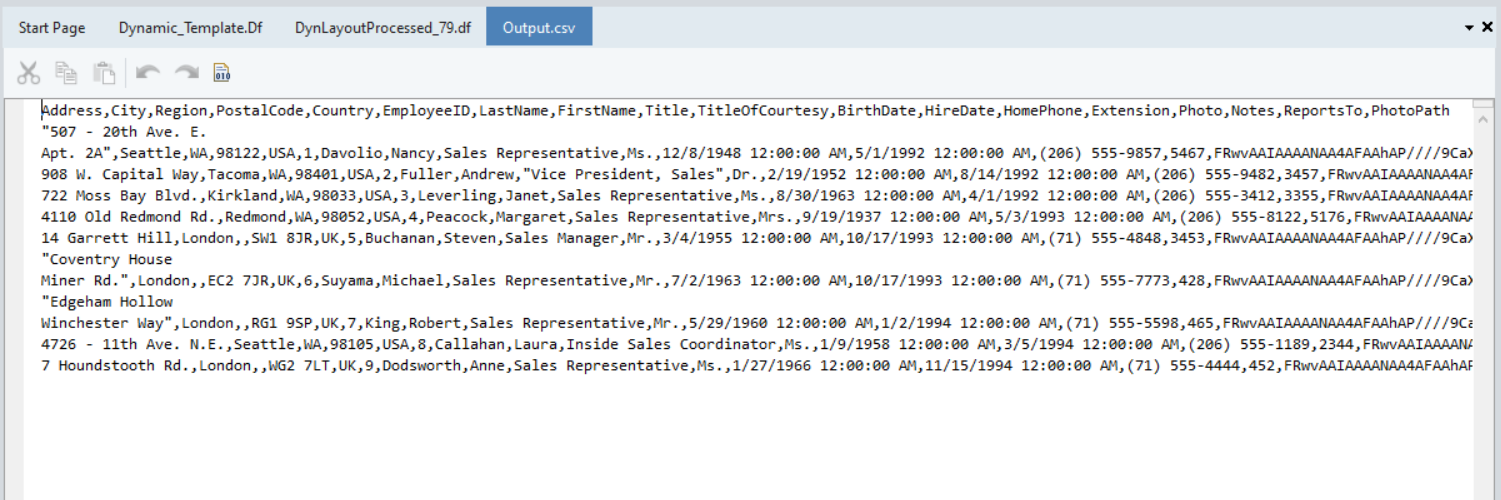
Click on the output file link in the job trace to open the CSV file in Centerprise.
You can see that records from Employees table have been written into the output file.
Automating Template Maps for the Entire Database
Our source database contains multiple tables and we want to run all of them through the same process we defined in our template dataflow. We can orchestrate this entire process for automation using the workflow and scheduler component in Astera Centerprise.
Let’s see how it’s done.
Open a new workflow by going to File menu > New > Workflow.

This will open a new workflow window in Astera Centerprise.
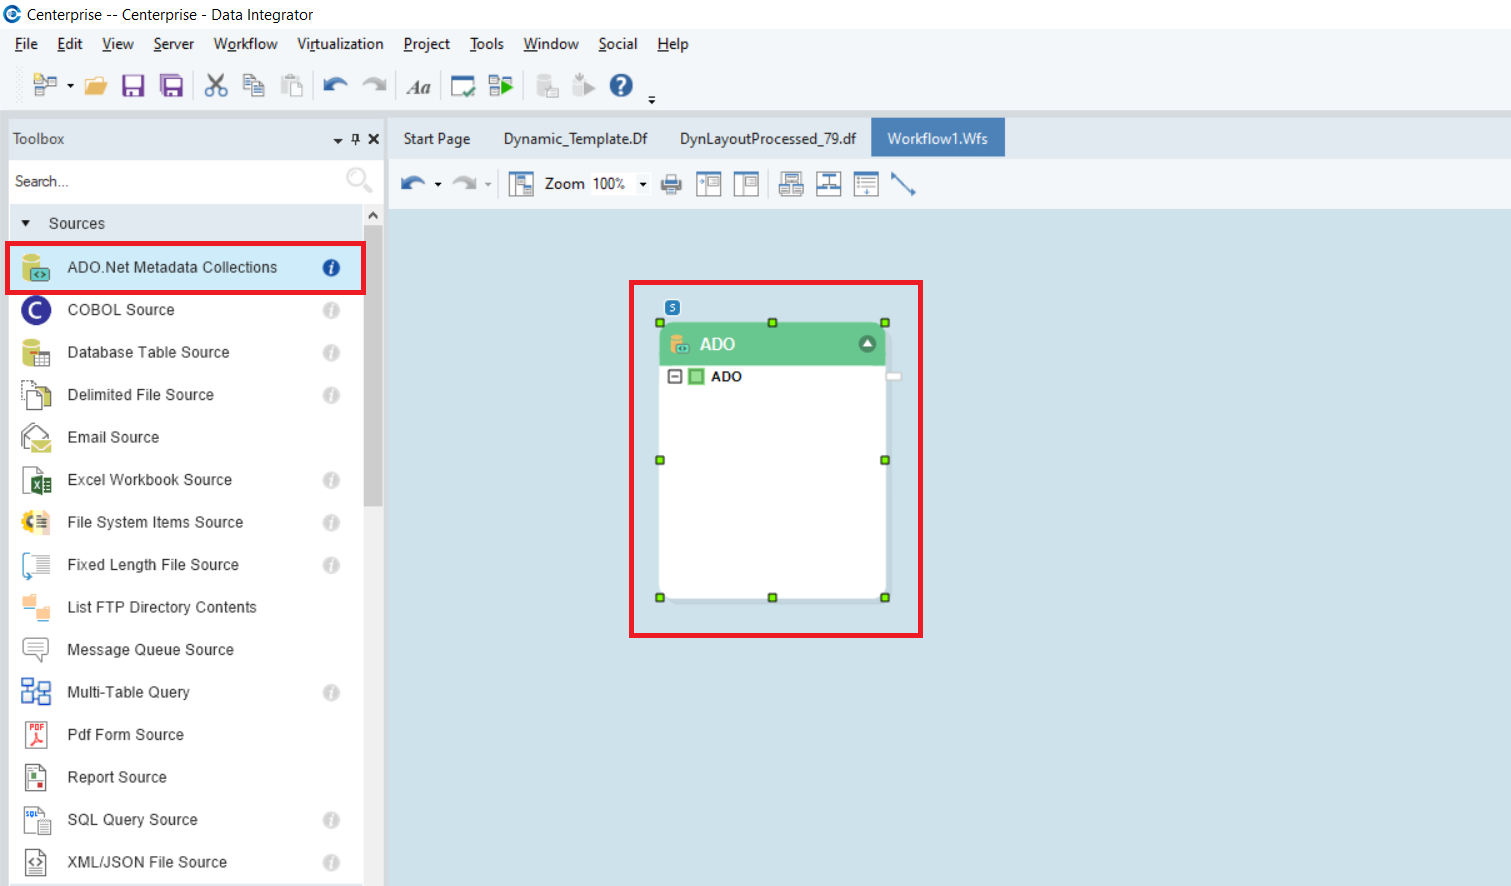
Drag and drop the ADO.Net Metadata Collection object from the Sources section in the Toolbox and drop it onto the designer. The ADO.Net Metadata Collection object provides metadata to the database we want to read the data from. However, if you are working with file sources such as Excel or Delimited, you can use the File System Items Source to provide metadata for your source files.
Right-click on the ADO.Net Metadata Collection object and go to Properties.
This will open a new window where you need to provide details to establish connection with the database. Once the connection is established, click Next.

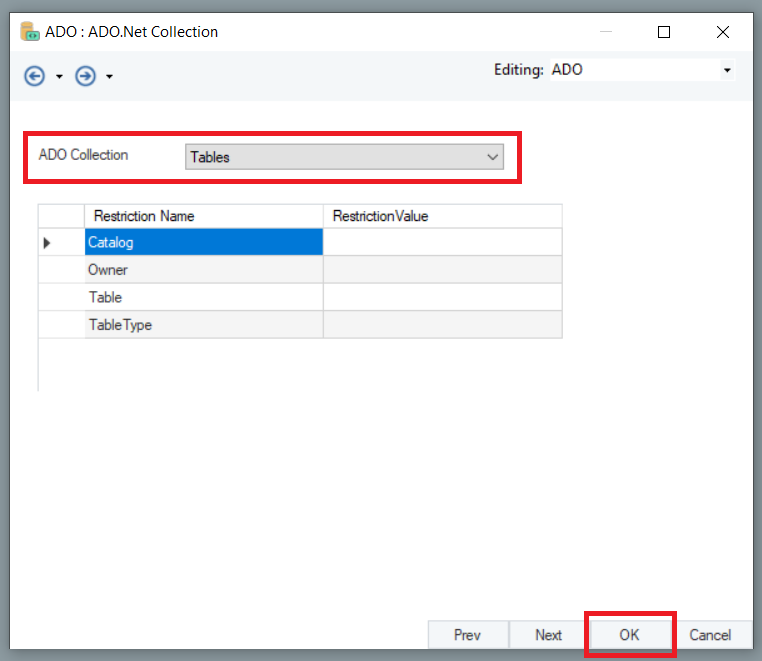
Here, you need to select the ADO Collection from the list. Click on the drop-down and select ‘Tables’ from the list.
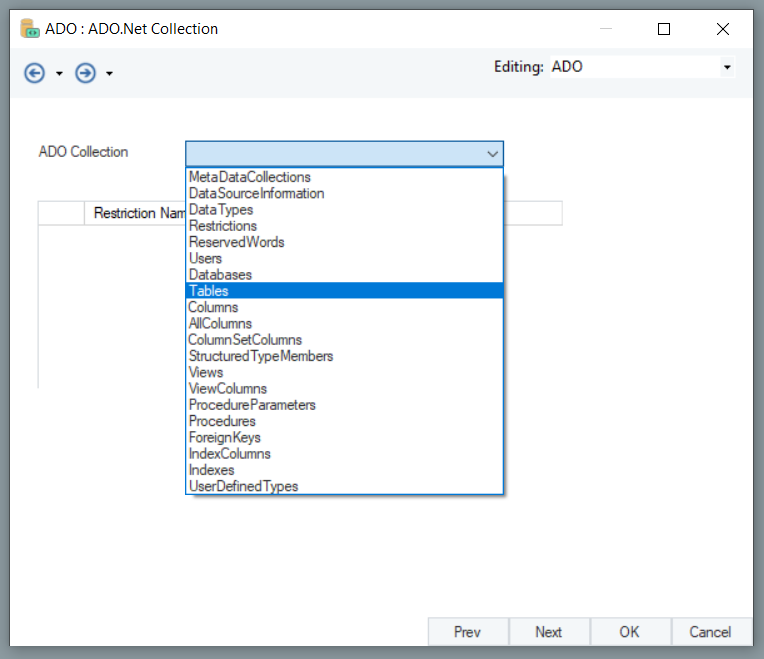
This will provide us metadata about the tables in the database. Now click OK to exit the window.
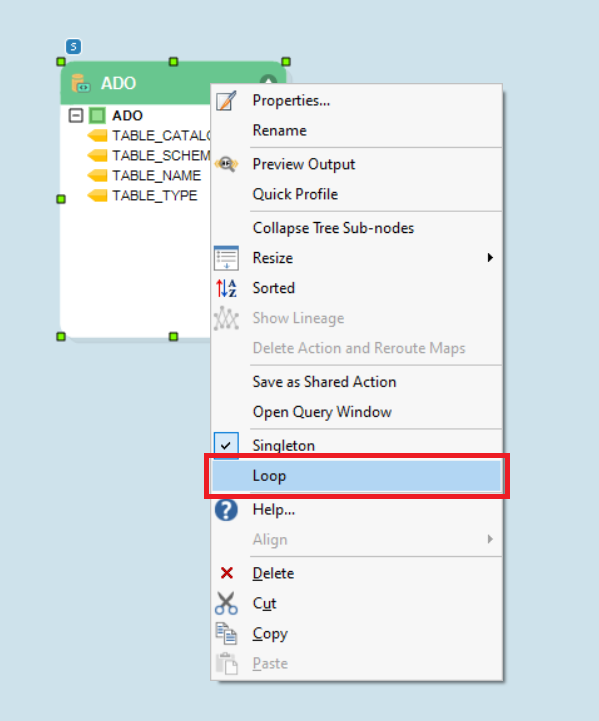
Right-click on the ADO.Net Metadata object again and set it to run on loop. This is because we have multiple tables in our database, and we want to process them all through the dataflow.
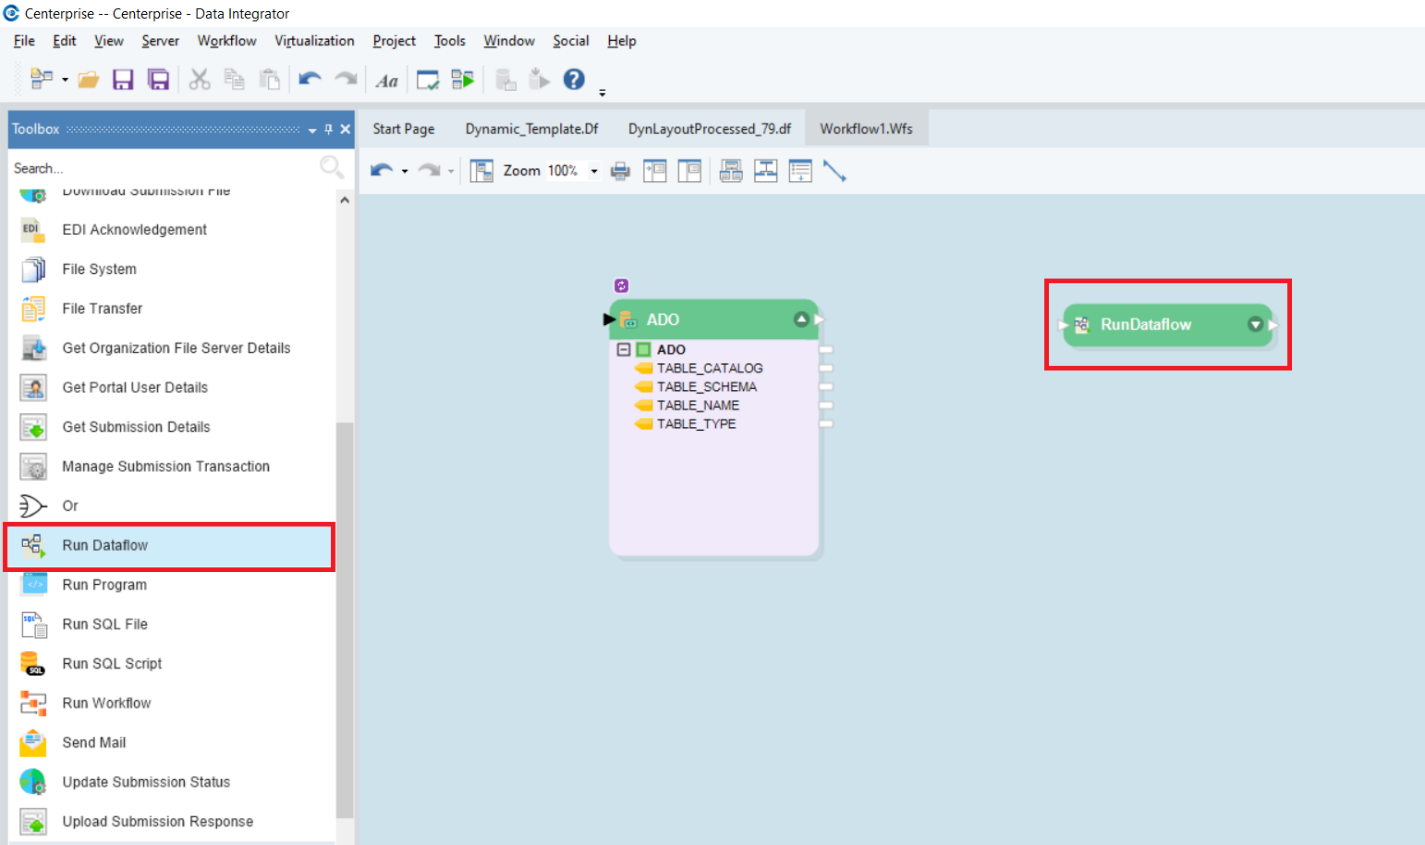
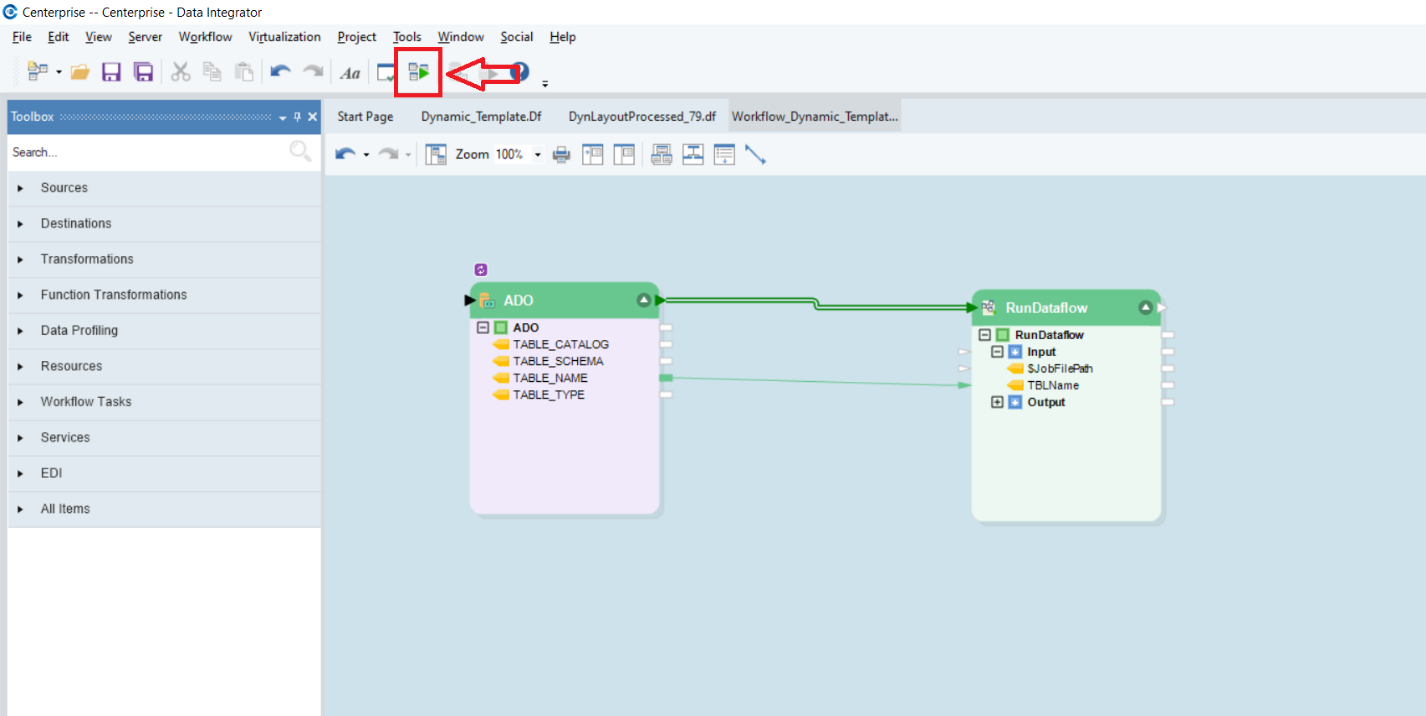
Now, drag a Run Dataflow task object from the Workflow Tasks section of the toolbox and drop it onto the designer.
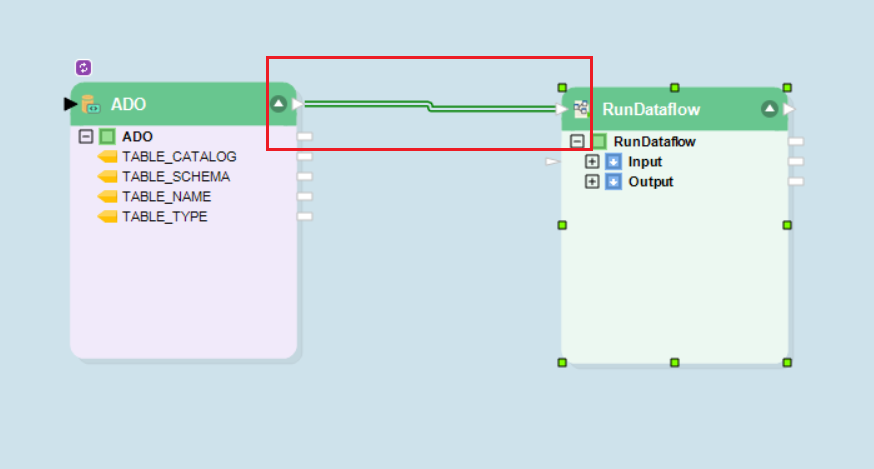
Map the Ado.Net object from the header node to the RunDataflow task.
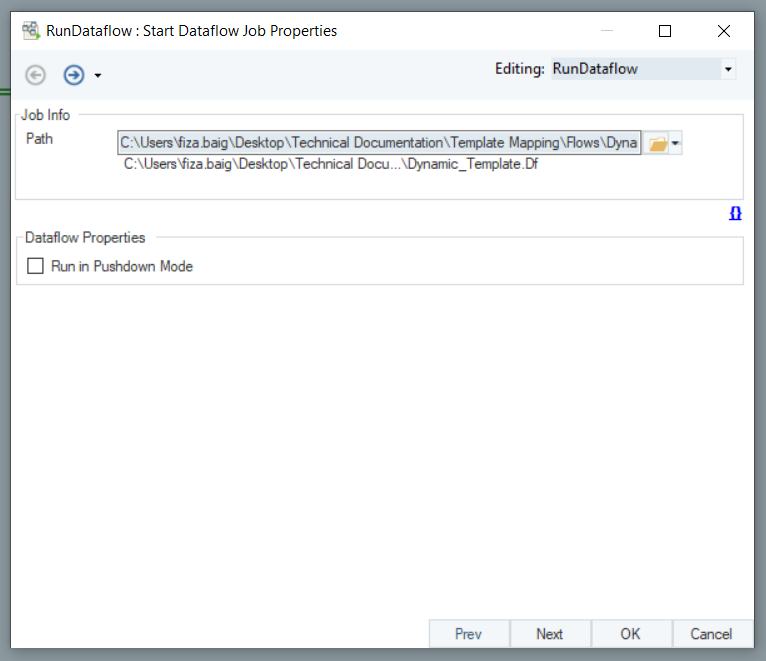
Now right-click on the RunDataflow task header and go to Properties.
This will open a new window where you need to provide the path to the template dataflow. Click Ok.
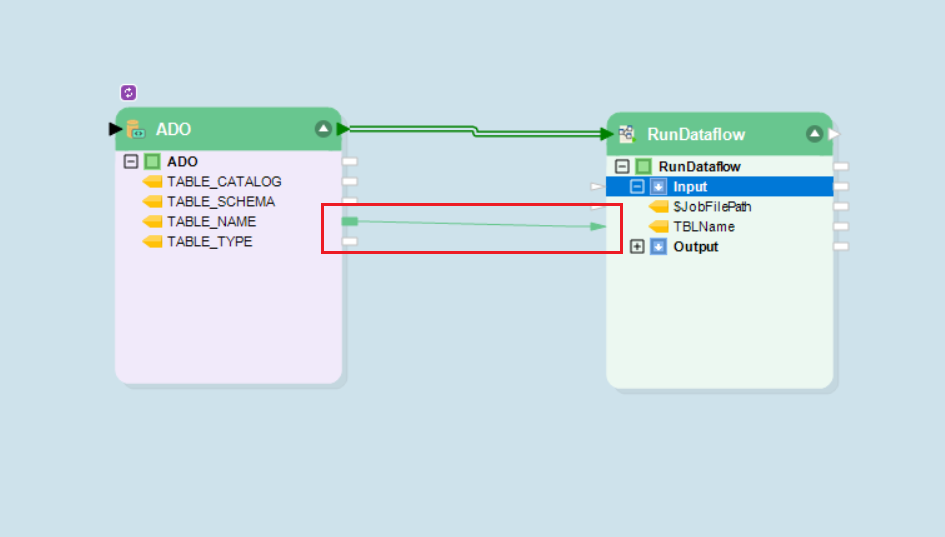
Now expand the Input node inside the RunDataflow task object and map ‘TABLE_NAME’ field from ADO.NET object to the ‘TBLName’ field in the RunDataflow task object.
Our workflow is now ready for run. Save it to your desired location and click the Run button in the main toolbar.
This will start the job. You can see the progress in the Job Trace window.
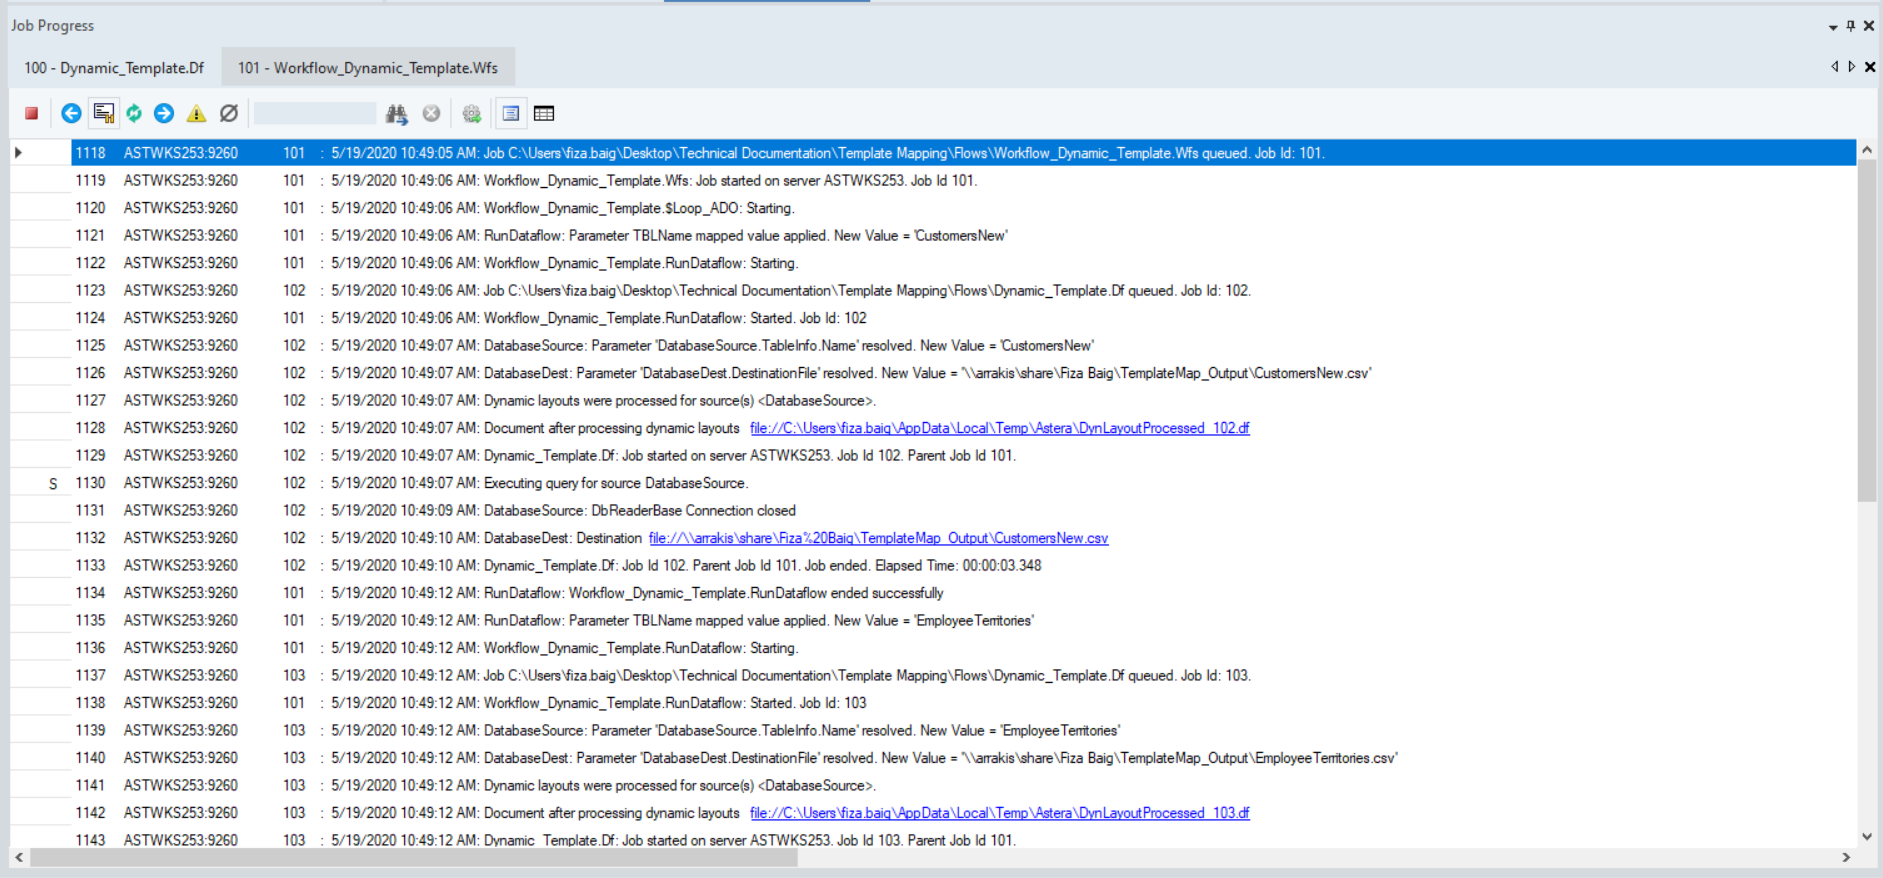
You can see that all the tables in the database have been processed sequentially through the template dataflow and a new dataflow has been generated automatically for each table. You can open these dataflows as well as output files by clicking on the links in the job trace.

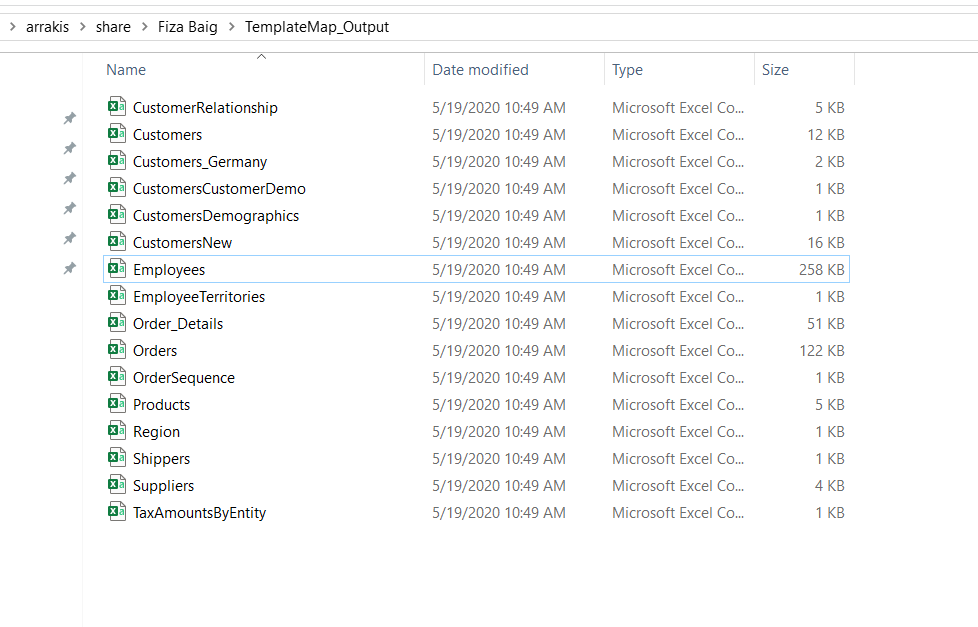
The output files too have been generated at the specified location.
As mentioned earlier, you need to be logged on to Astera Integration Server to be able to access and open the auto-generated dataflows in Astera Centerprise.
The workflow can now be deployed on Centerprise’s built-in Scheduler to be executed automatically, at a time and frequency of your choice.
This concludes using the Dynamic Layout/Template Mapping Feature in Astera Centerprise. Please note that this is a beta version of the feature. The functionality is still in testing phase and could change as we get user feedback on this feature. Should you have any suggestions or feedback, or come across a bug, please report to our Support site or email at support@astera.com.