Scheduling Jobs on the Server
Astera Centerprise comes with a built-in scheduler that allows you to run your jobs automatically as per the defined settings. There are various options to set the the frequency of a schedule such as Run Once, Hourly, Daily, Weekly, Monthly, and When file is Dropped. Once you create a job schedule, it will run according to the defined frequency and command.
Scheduled jobs run silently on the server in the background. A new tab in the Job Progress window will be added for each scheduled job that has started running. Results of the scheduled jobs are stored in the Job Log in the same way as for the regular jobs.
Optionally, you can set an email notification to signal the start and/or the completion of a scheduled job. An additional email can notify the selected recipient for any errors that occurred during the job.
Opening the Job Scheduler
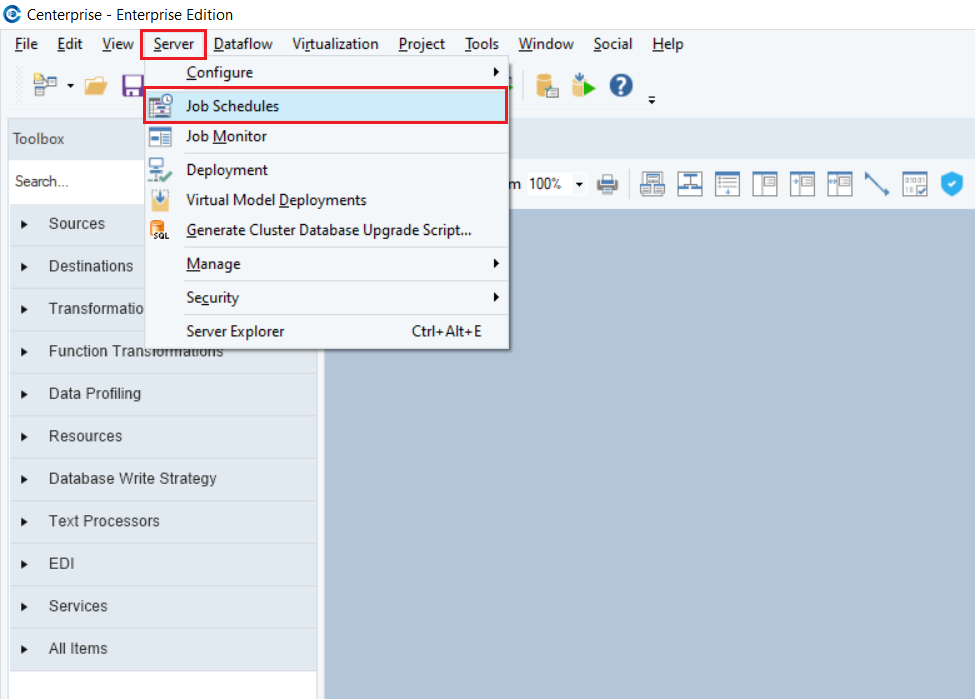
To open the Job Scheduler, go to the main menu bar > Server > Job Schedules.
The Scheduler will open in a new tab.
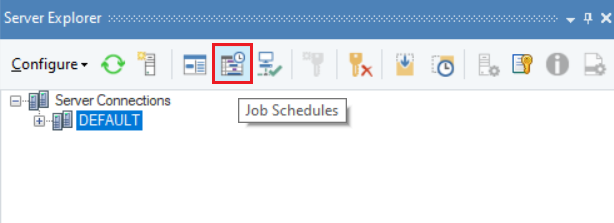
Another way of opening the Job Scheduler is through the Server Explorer.
Go to Server Explorer > Toolbar and you will find an icon for Job Schedules.
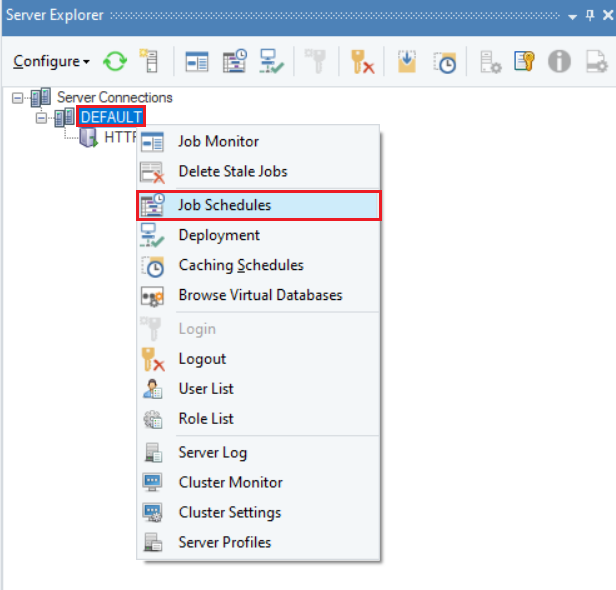
Or, you can also right-click on the Default Server node and find Job Schedules in the context menu.
Adding Schedule Tasks
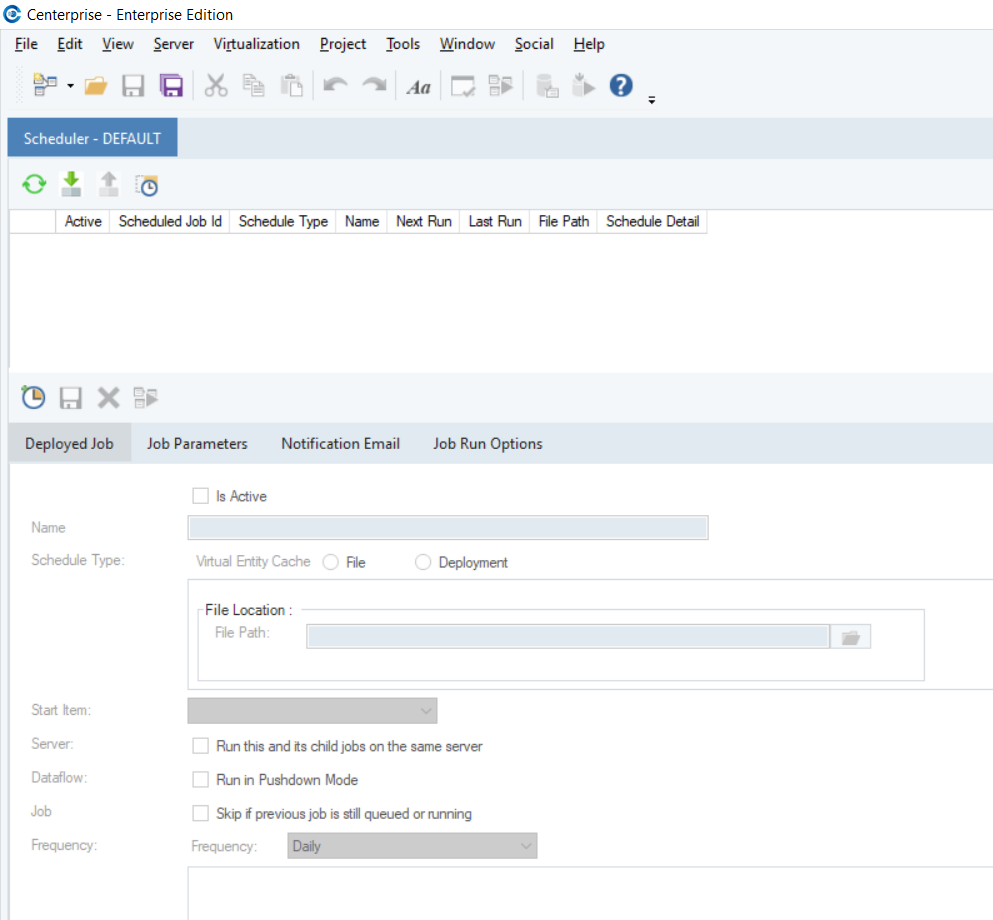
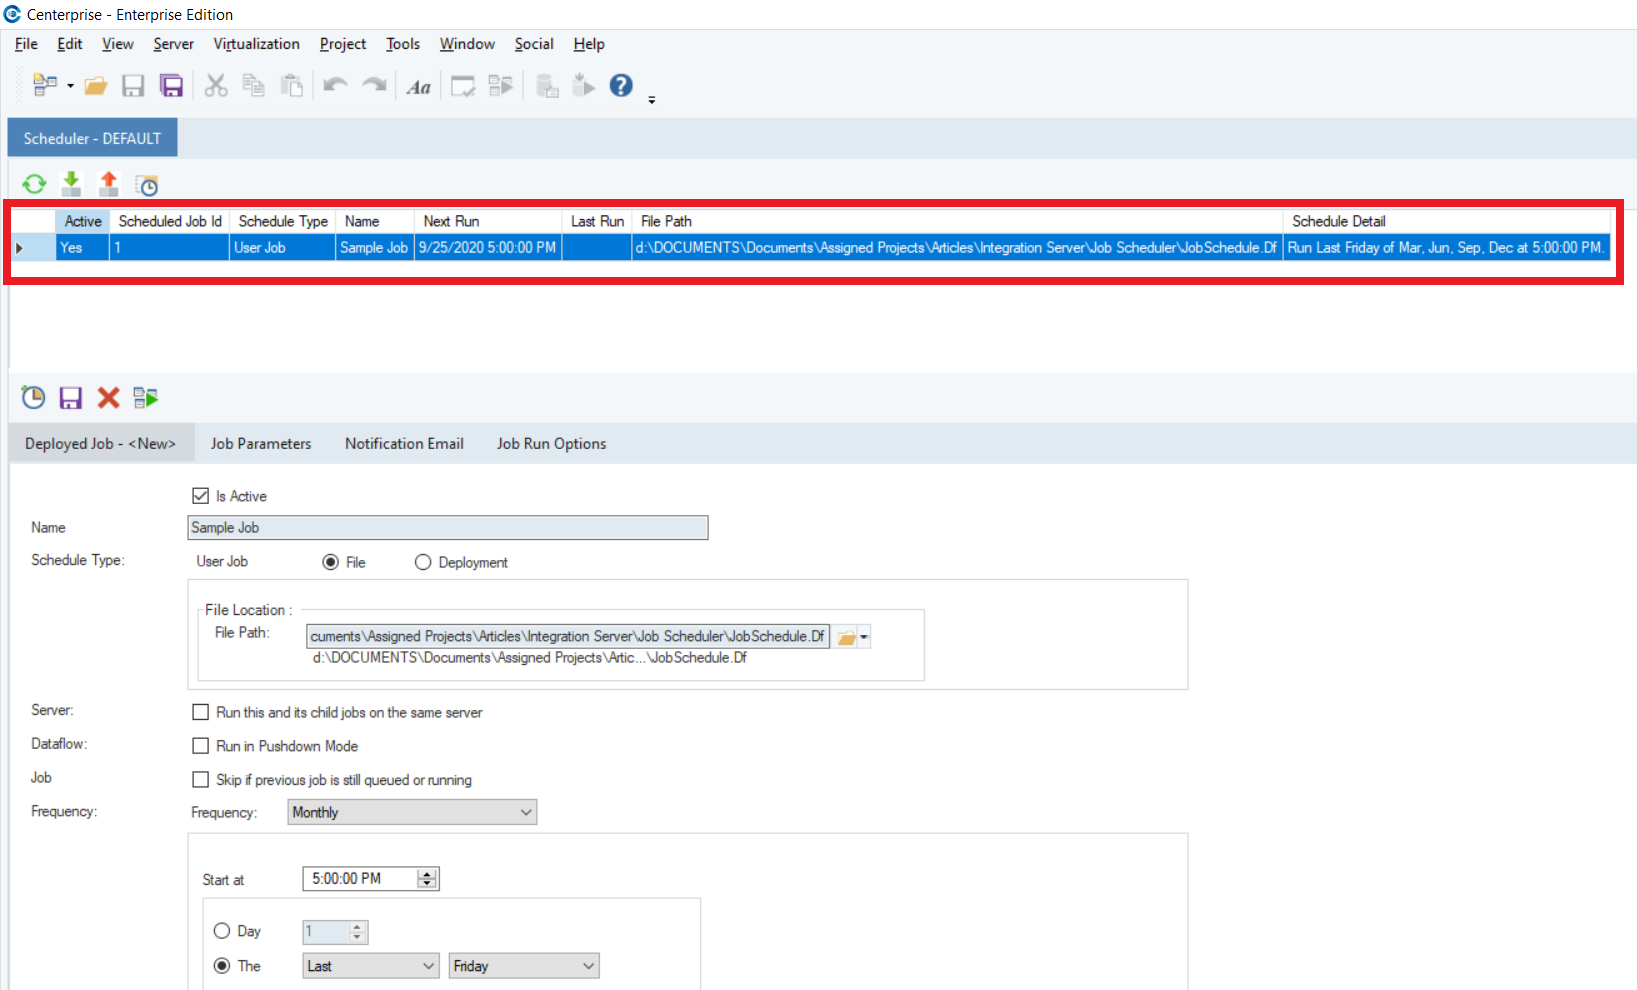
1. To add tasks in the Scheduler, go to the Icon Bar in the Scheduler and click on the first icon that says Add Scheduler Task.
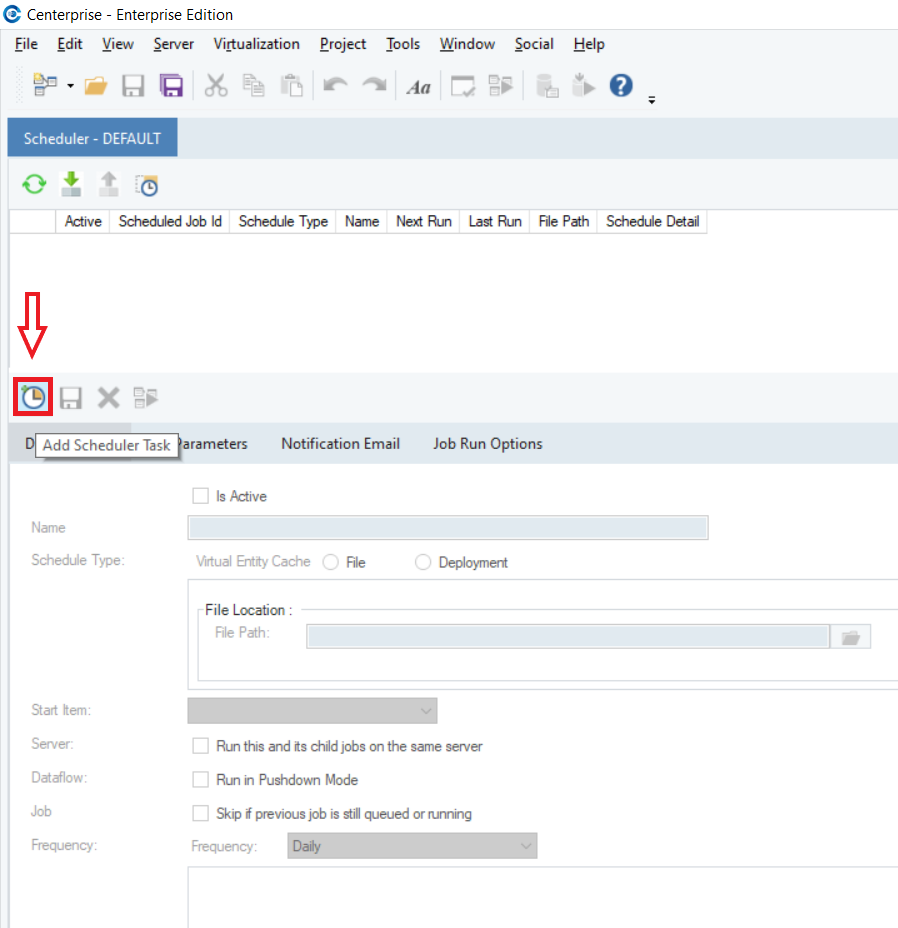
Once you click on the icon to add a task, the Deployed Jobs tab is going to get active.
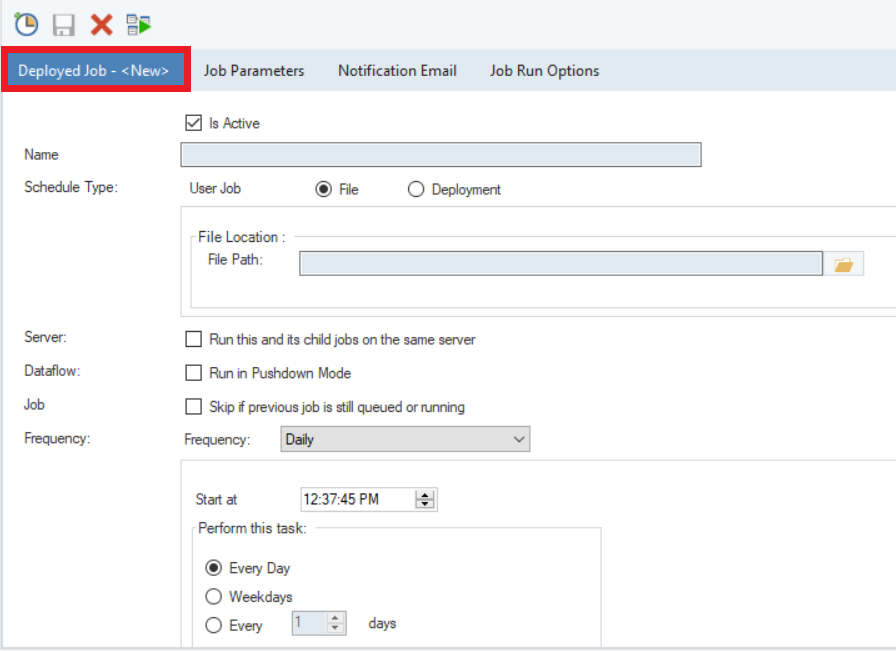
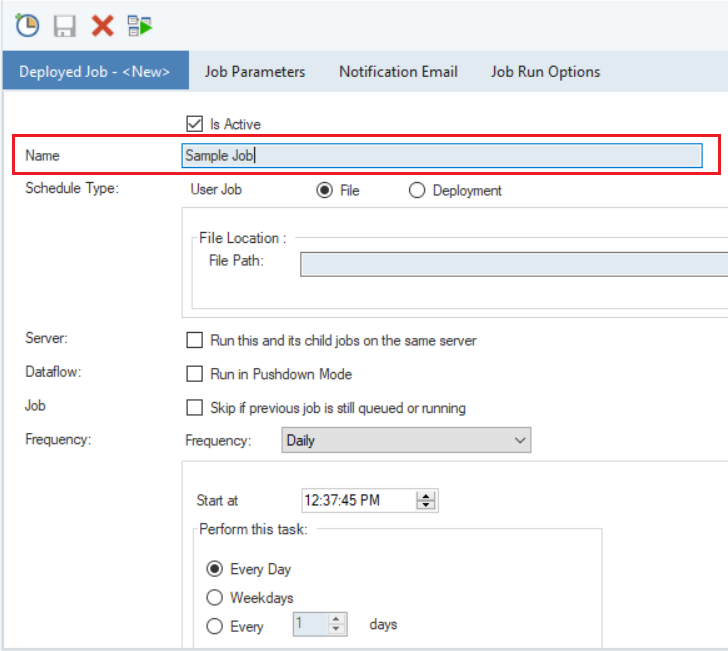
2. Provide a name to your job in the Name bar.
In this case let’s name this job as “Sample Job”
3. Next, you need to select the Schedule Type for the schedule.

There are two Schedule Types:
- File: This option is selected when you want to create the schedule for a dataflow, dubflow or workflow.
- Deployment: This option is selected when you have to deploy a project.
In this case, we’ll select the File type for scheduling the task.
4. In this File Location, provide the Full Path to the file that you want to schedule.
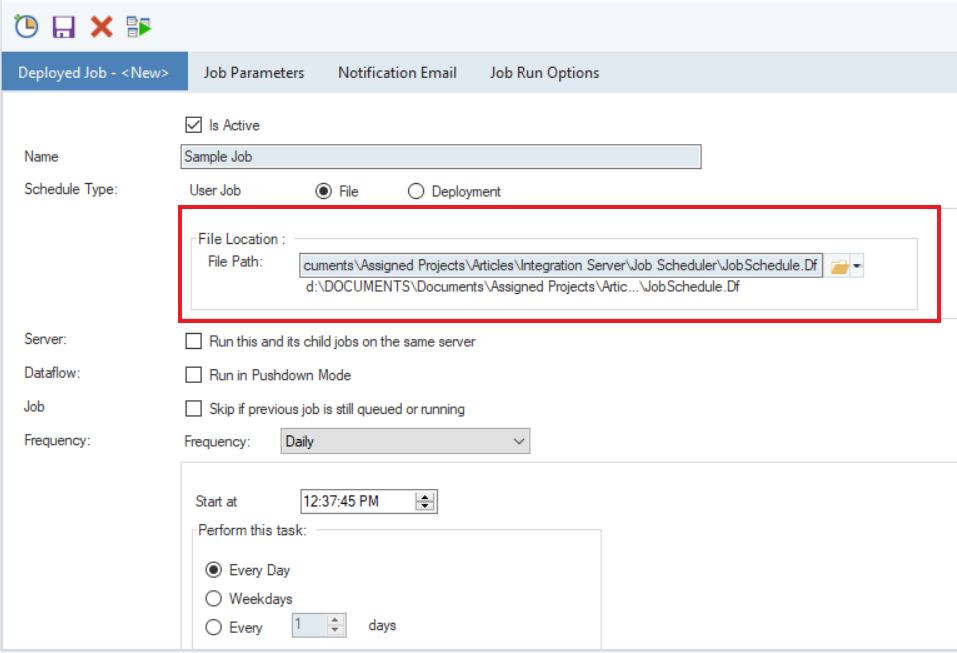
There are some other options as well for Server, Dataflow and Job which you can select according to your requirements.
5. Once the file path has been provided, you can set the Frequency of the schedule.
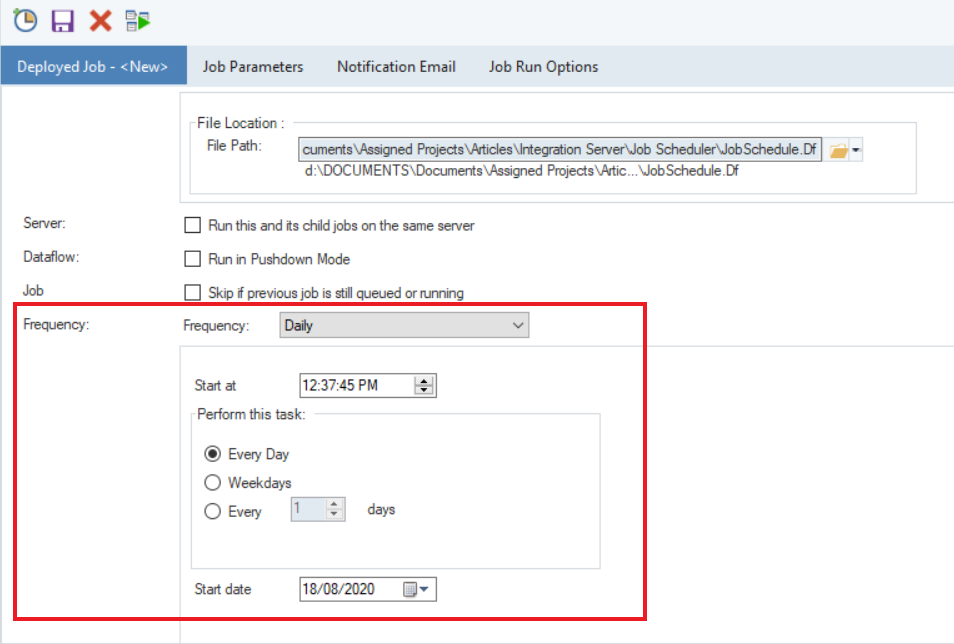
There are different Frequency options to set your schedule.
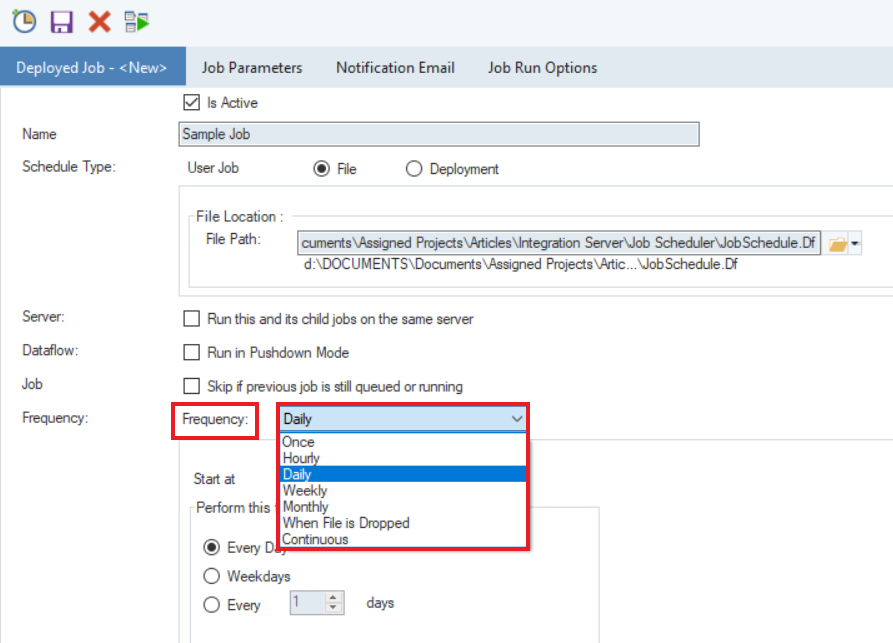
Let’s discuss these one by one:
Once
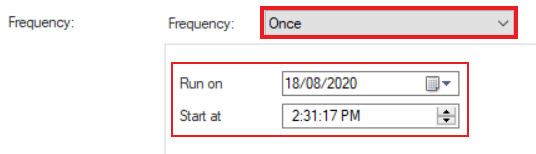
- Run on: This is to set the date for the one time run.
- Start at: This is to set the time for the one time run.
Hourly
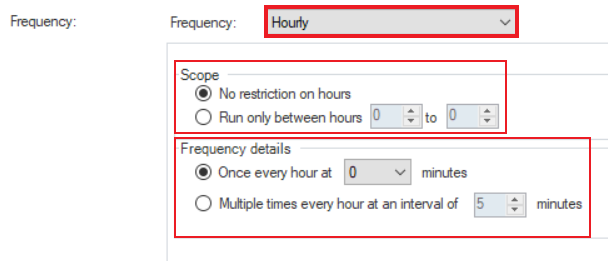
- Scope: You can select No restriction on hours or specify the hourly window in the Run only between hours option.
- Frequency Details: You can specify the minutes in the hour by selecting the Once every hour option or select Multiple times every hour and specify the minutes interval.
Daily
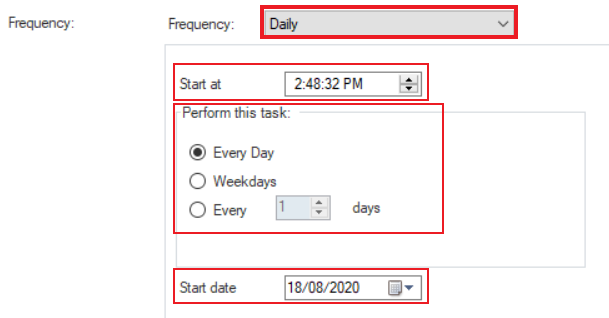
- Start at: You can set the exact time you want the schedule to run.
- Perform this task: You can select whether you want this task to be performed everyday of the week by selecting Every Day, or select Weekdays so that the task does not run on weekends, or you may give the number of days that you want the task to run on by selecting the last option.
- Start Date: You can set the exact date on which you want the schedule to run.
Weekly
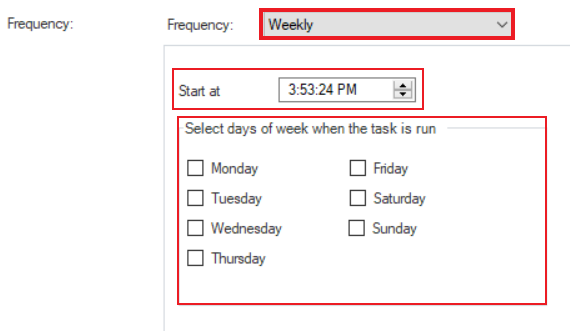
- Start at: You can specify the exact time when you want the schedule to start each day.
- Select days of the week when the task is run: You can check the specific days of the week on which you want the schedule to run.
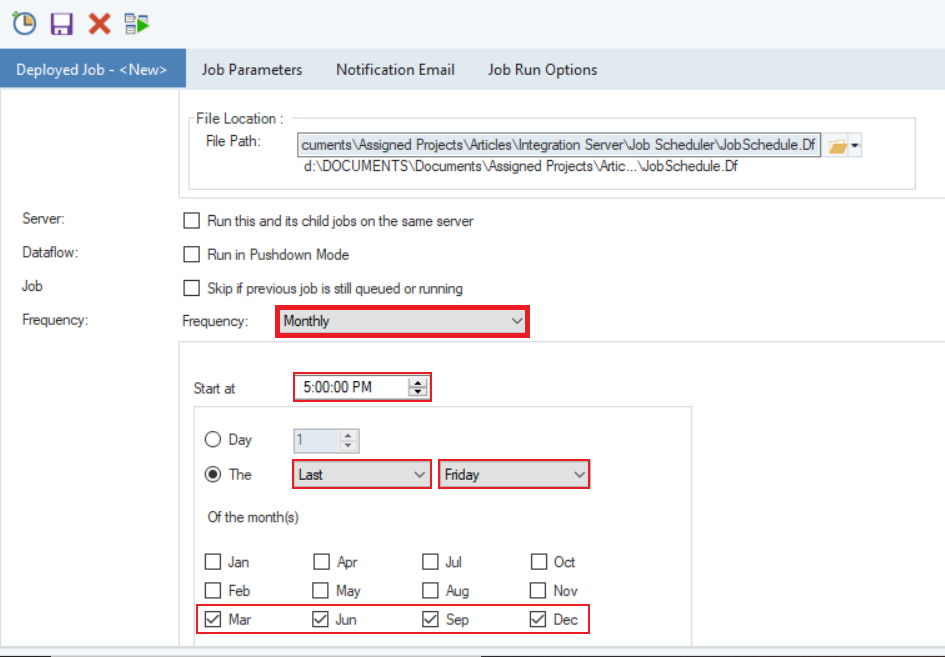
Monthly
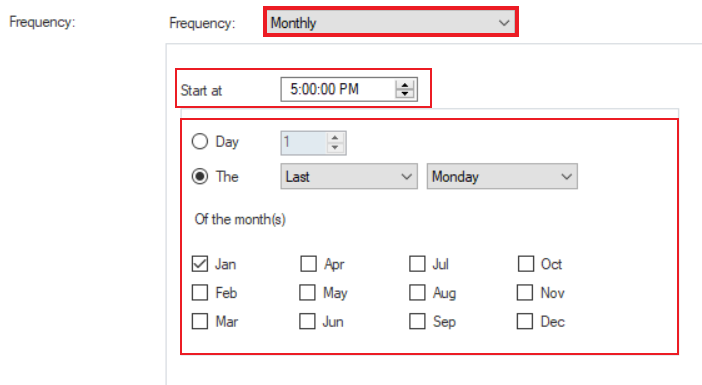
- Start at: You can specify the exact time when you want the schedule to start each month.
- Day: You can specify the date of the month that you want the task to run. Or you can select from the generic options for one specific day of the week such as First, Second, Third, Fourth, and Last.
When File is Dropped
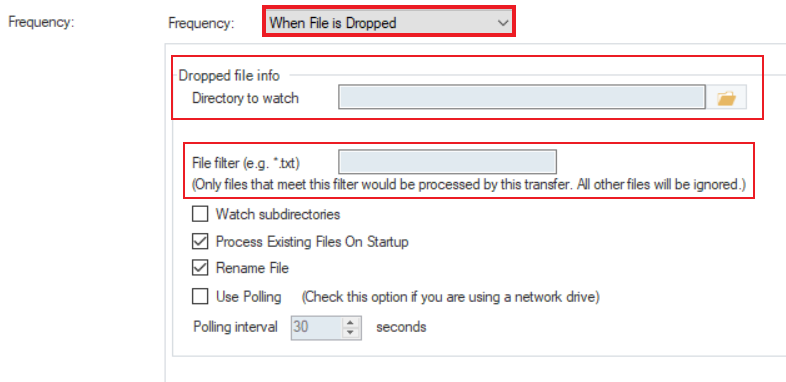
- Dropped File Info: You can provide the directory path that the scheduler needs to watch for file drop to start the job.
- File Filter: You can filter out specific file formats to be picked from the specified directory.
Continuous
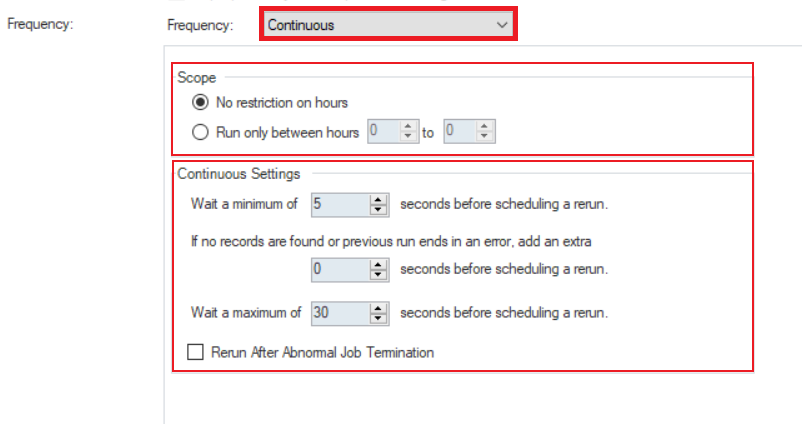
- Scope: You can select No restriction on hours if there is no specific time frame to run the job or specify an hourly window in the Run only between hours option.
- Continuous Settings: You can select options for Rerun, Erroneous Records and Job Termination to run the job continuously.
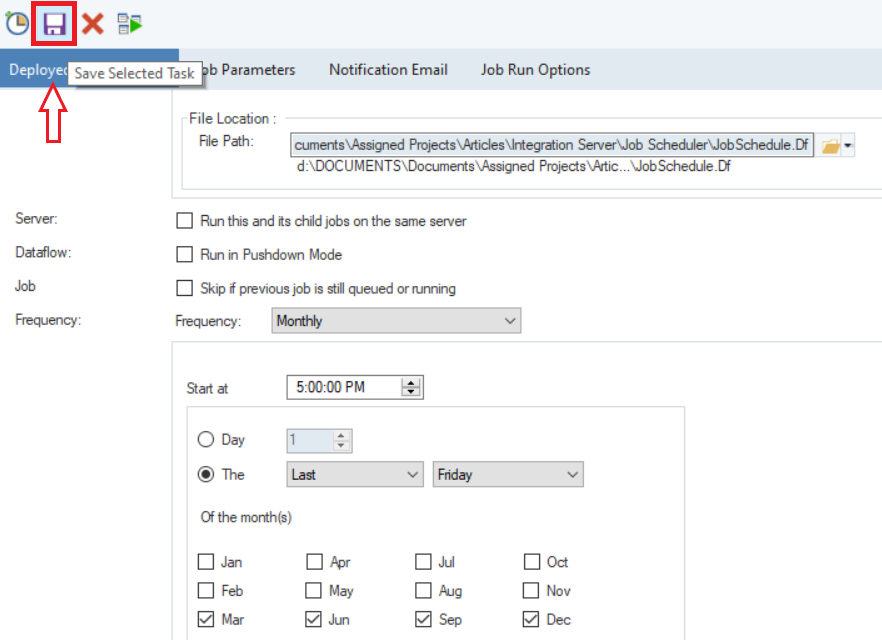
In this case we will set the Frequency of schedule to be run Monthly on every last Friday of a quarter at 5 pm.
Other Scheduling Options
There are some other scheduling options in the scheduler which you can set while scheduling a job.
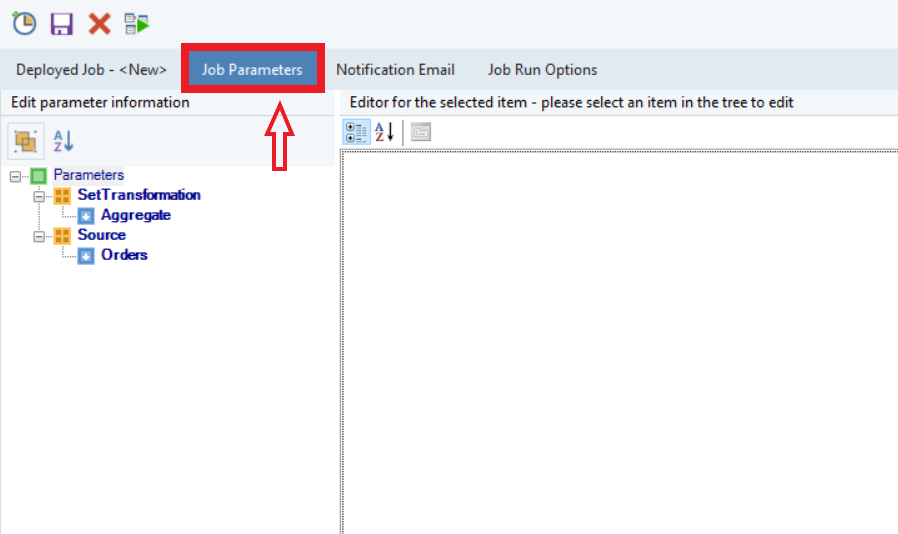
Job Parameters
In this tab, you can specify parameters for the objects used inside the dataflow or workflow that you have scheduled.
Notification Email
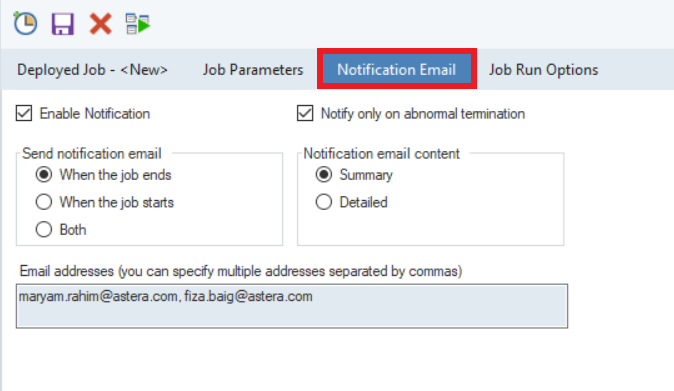
Using Notification Email tab, you can select Enable Notification option to configure emails notifications for a scheduled job.
- Notify only on abnormal termination: Select when you want the email only to be sent for a failed job.
- Send Notification Email: Select when your notification email should be sent When the job ends, When the job starts or Both.
- Notification Email Content: Depending on the level of information you need in the notification email, you can select from two modes: Summary and Detailed.
- Email Addresses: You can provide a single or multiple email addresses in the dialog box.
In this case, we will Enable Notification for a Summary, When the job ends and we will add two email addresses.
Job Run Options
You can specify run options such as Pushdown Hints if you want to run the schedule in pushdown mode. You can also enable Optimization for dataflows.

6. Our schedule task has now been configured. The next step is to save the schedule for it to run on the server. To do that, click on the Save Selected Task icon in the icon bar.
7. You can now see your saved schedule task in the Job Schedules.
You have successfully scheduled a job in Astera Centerprise.