Connecting to Snowflake Database
Snowflake is an enterprise-ready data warehouse designed for the cloud. It uses a central data repository that makes data management easier, secure, and more accessible. Astera Centerprise provides native connectivity to Snowflake databases through its database objects. The connectivity can also be established through the Database Table Source, Database Table Destination, SQL Query Source, Database Lookup, SQL Query Lookup, and Database Write Strategies in Astera Centerprise.
In this article, we will cover:
1. A use case where Snowflake is being used as a database in Astera Centerprise
2. Connecting to Snowflake databases in Centerprise
3. Different data loading and reading options for Snowflake databases in Centerprise
Use Case
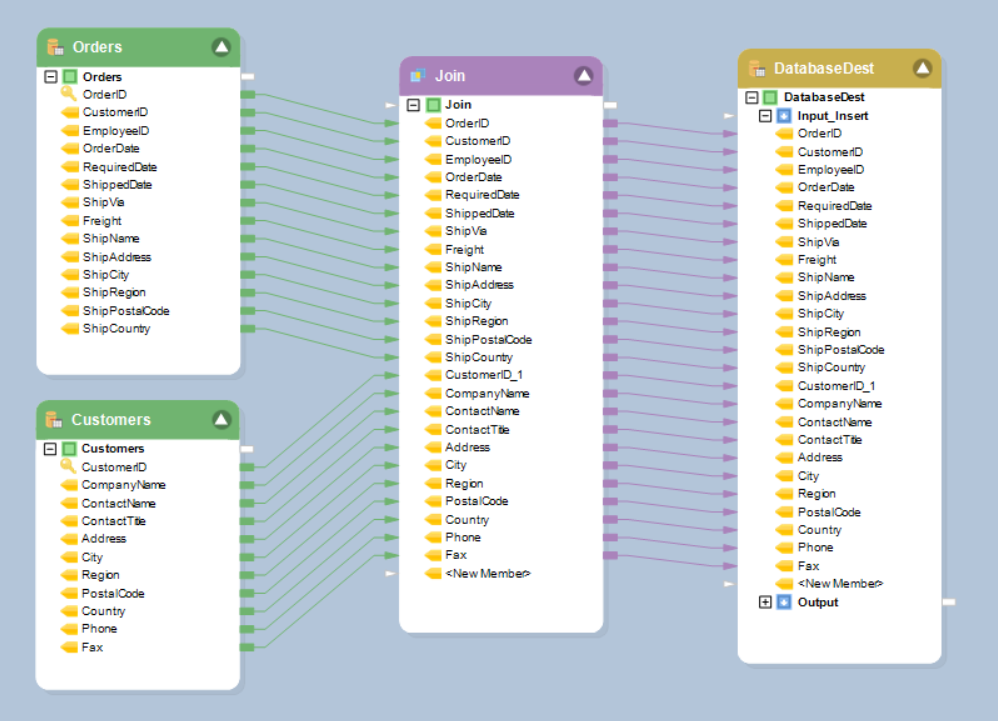
We have some sample Orders and Customer data stored in a Snowflake database. The data contains multiple fields containing orders and customer information. We want to join both the tables to have a consolidated view of this information.
We’ll be using the Database Table Source object to source data from the Snowflake database.
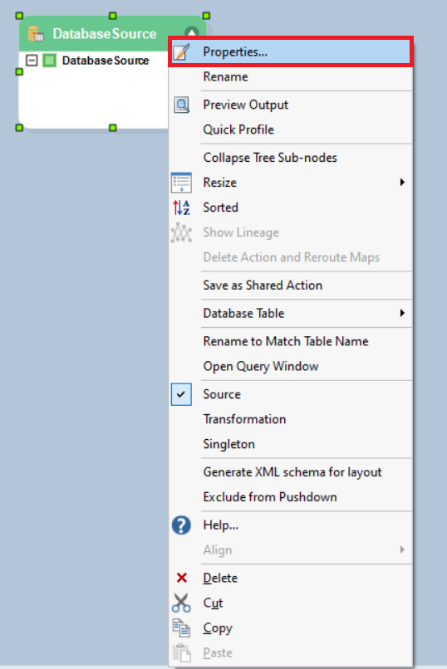
1. To configure the Database Table Source object, right-click on its header and select Properties from the context menu.
This will open a new window where you can configure connection with the Snowflake database.
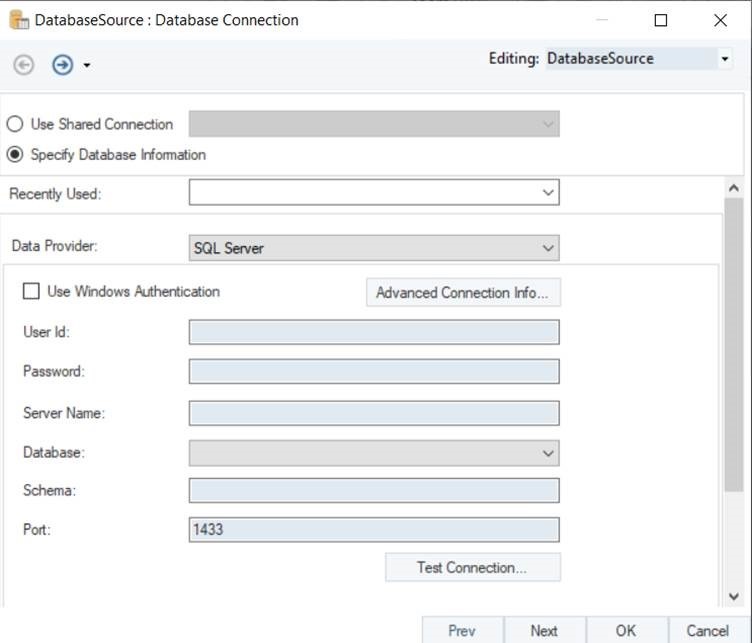
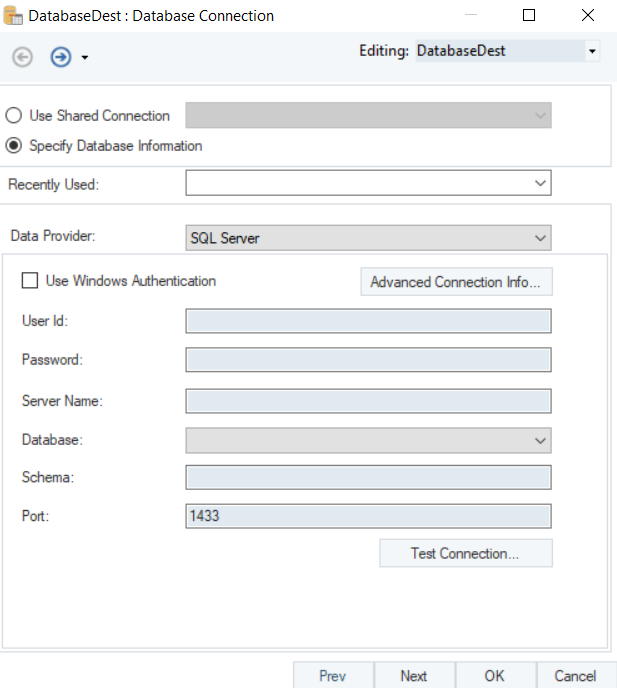
2. The first step is to select the Data Provider. Select Snowflake as your data provider from the drop-down list.
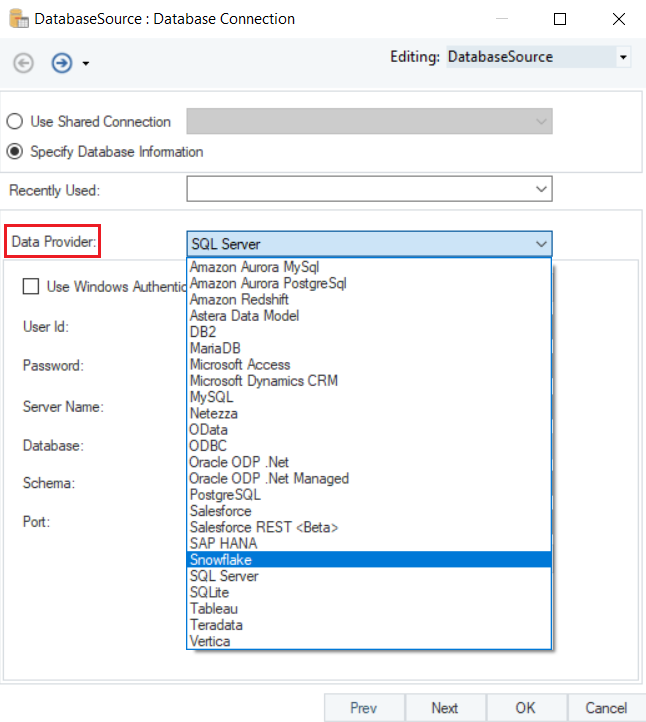
- Put in the required credentials for your Snowflake account.
1. User ID
2. Password
3. Server Name
4. Account
5. Database
6. Warehouse
7. Schema
8. Role
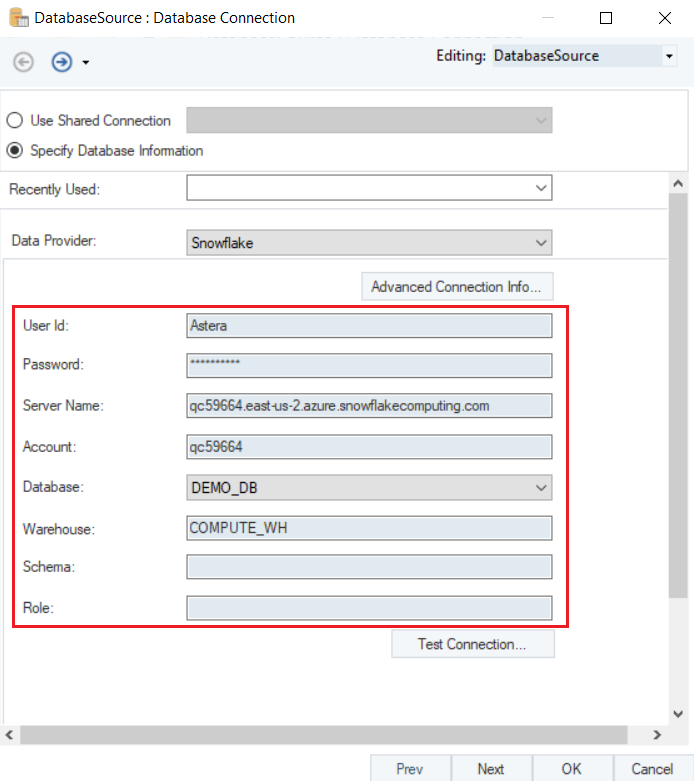
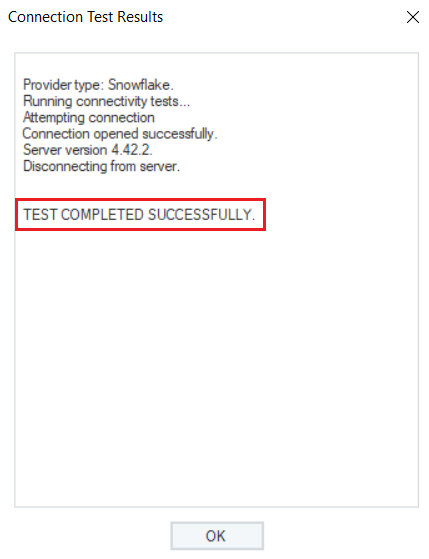
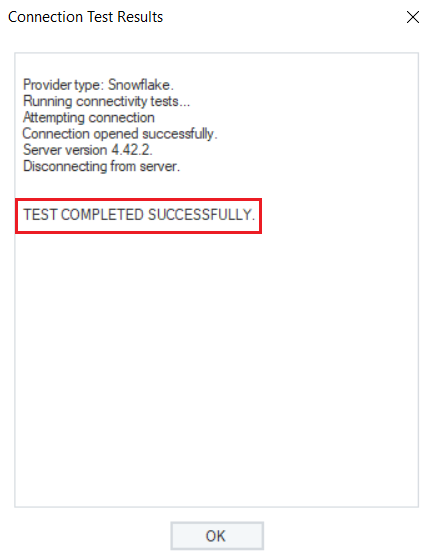
- Test Connection to make sure that your database connection has been established and click Next to proceed to the next screen.
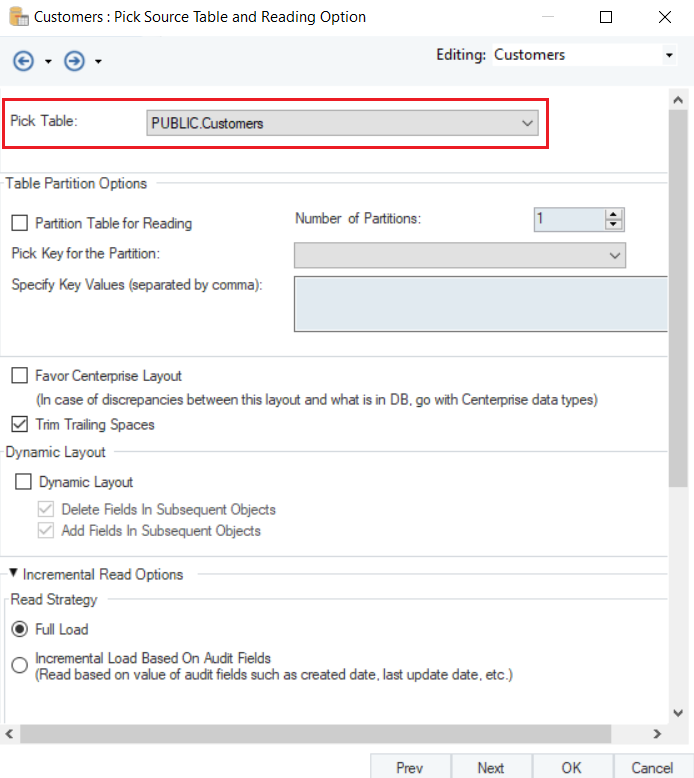
3. Here, you can Pick Source Table and modify Reading Options for your Snowflake database.
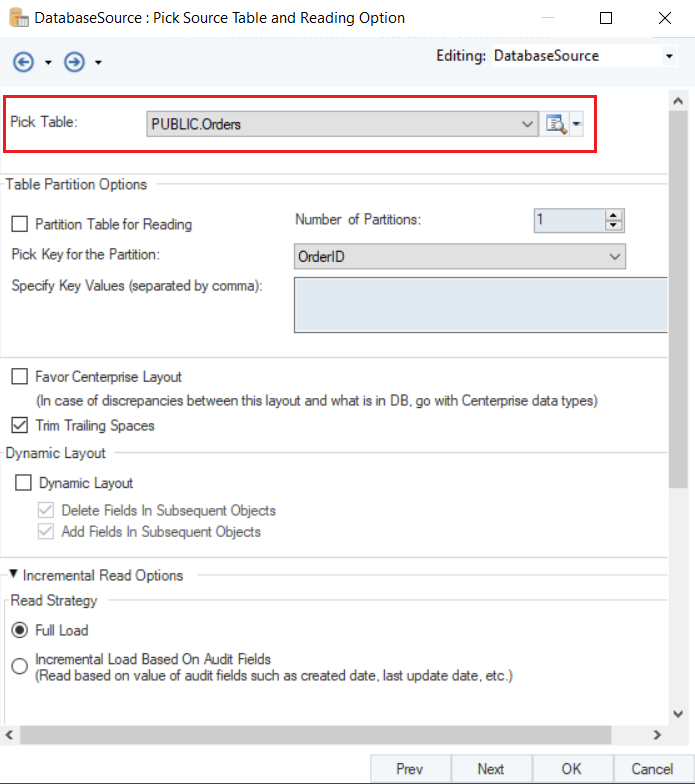
Note: In this case, we will select the Orders table.
To learn more about data reading options in a database table source, click here.
Since we want to join two tables, we’ll get the Customers table on the dataflow using the same steps.
- You can use the Recently Used option on the connection screen to connect to the Snowflake database using the previously used credentials.
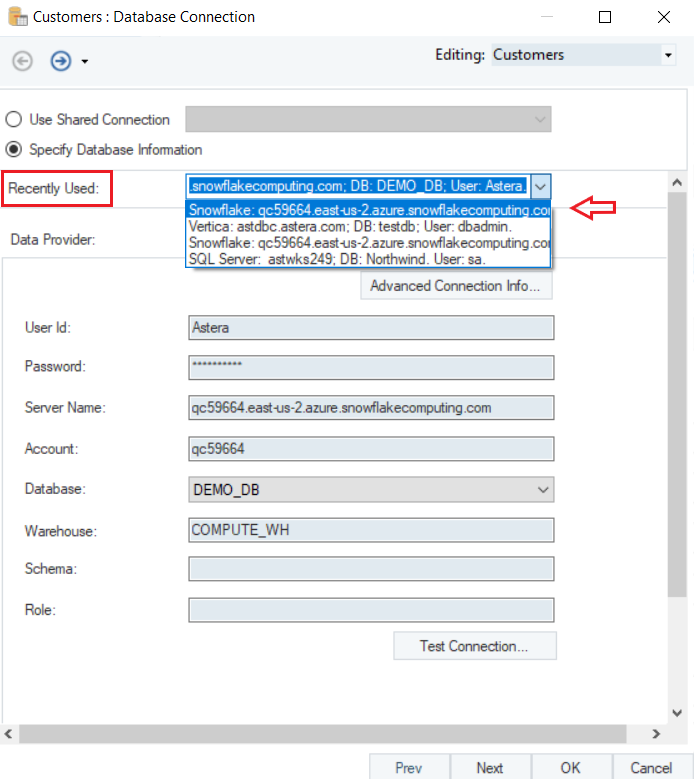
On the Pick Table screen, we will pick the Customers table from the database.
4. Now, we will use the Join transformation and provide the key fields for both the tables in the dataflow.
To know more about how the Join Transformation works in Astera Centerprise, click here.
![]()
5. Next, we will write this data to our Snowflake database using the Database Table Destination in Astera Centerprise.
To configure the Database Table Destination object, right-click on its header and select Properties from the context menu.
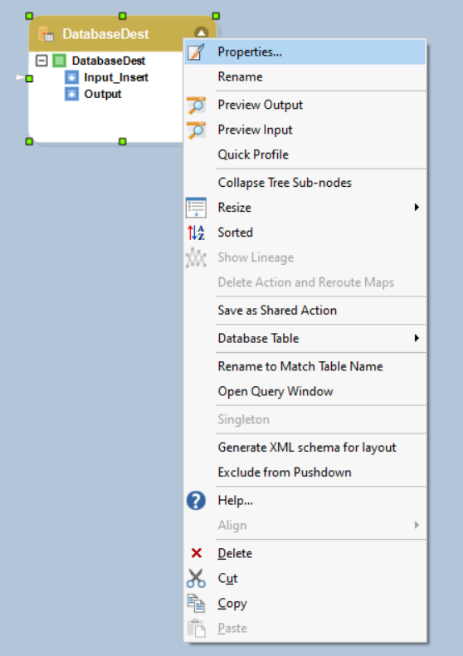
This will open a new window on your screen.
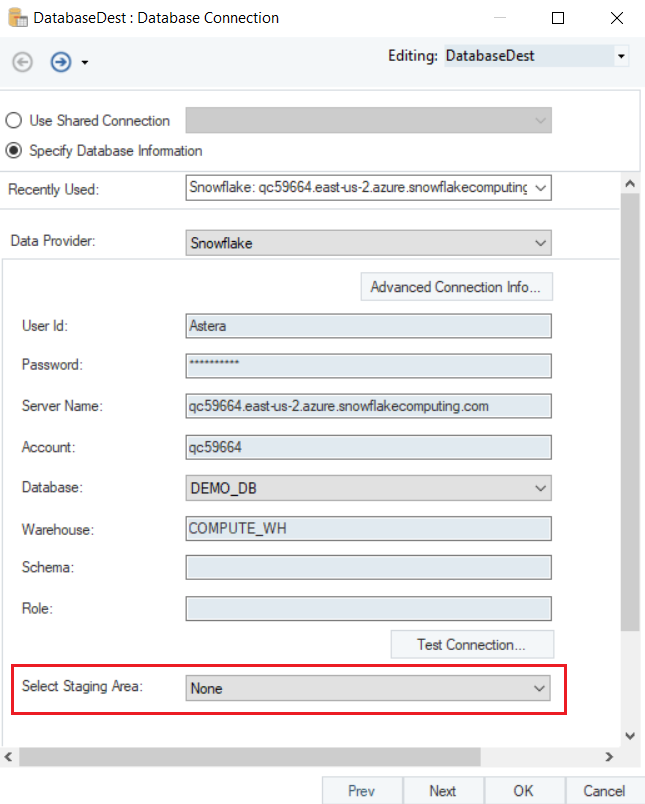
Here you can configure the properties for the Database Table Destination object.
Since we have previously used Snowflake database to extract our source data, we can use the Recently Used credentials to connect to it again.
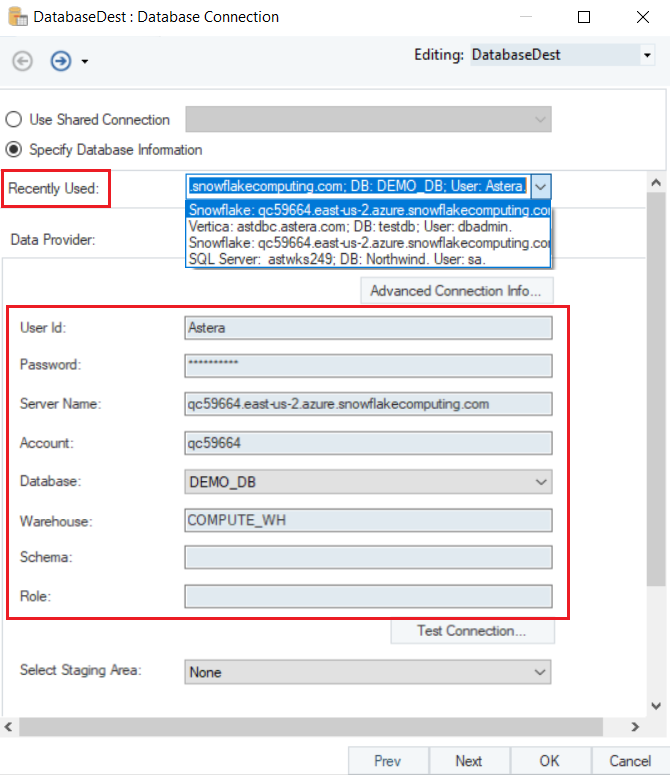
All the credentials have been filled in automatically.
- Test Connection to make sure that your database connection is successful.
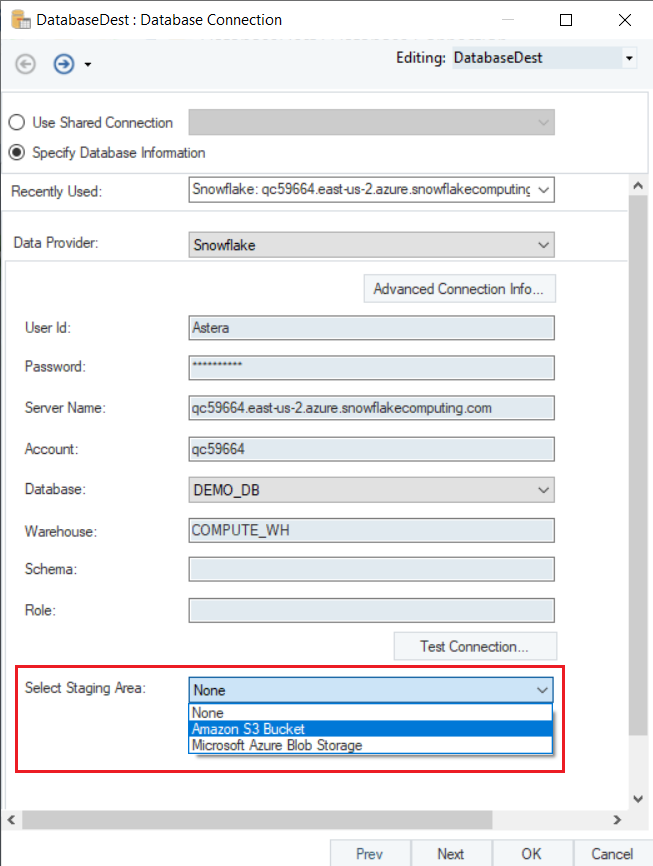
There is an option on the database connection screen for Snowflake where you can select the Staging Area.
A staging area is a cloud storage location outside the Snowflake environment that allows greater flexibility in loading data to Snowflake. A stage specifies an area where temporary batches of data files are stored (i.e. “staged”) so that these files can be loaded into tables.
Astera Centerprise provides connectivity to both staging areas for bulk insertion:
- Amazon S3 storage
- Microsoft Azure storage
Select the Staging Area from the drop-down list.
Note: In this case we will use the Amazon S3 Bucket for staging.
Once the staging area is selected, you will be required to enter the following credentials:
1. S3 Key
2. S3 Secret
3. S3 Bucket
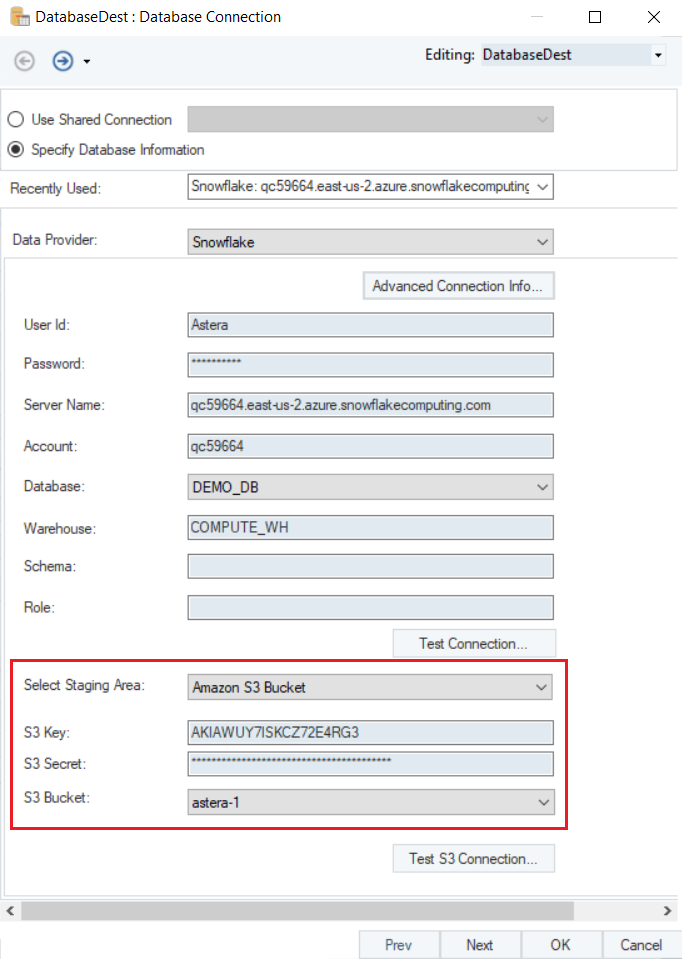
Now, Test S3 Connection to see if the Amazon S3 Bucket has been connected.
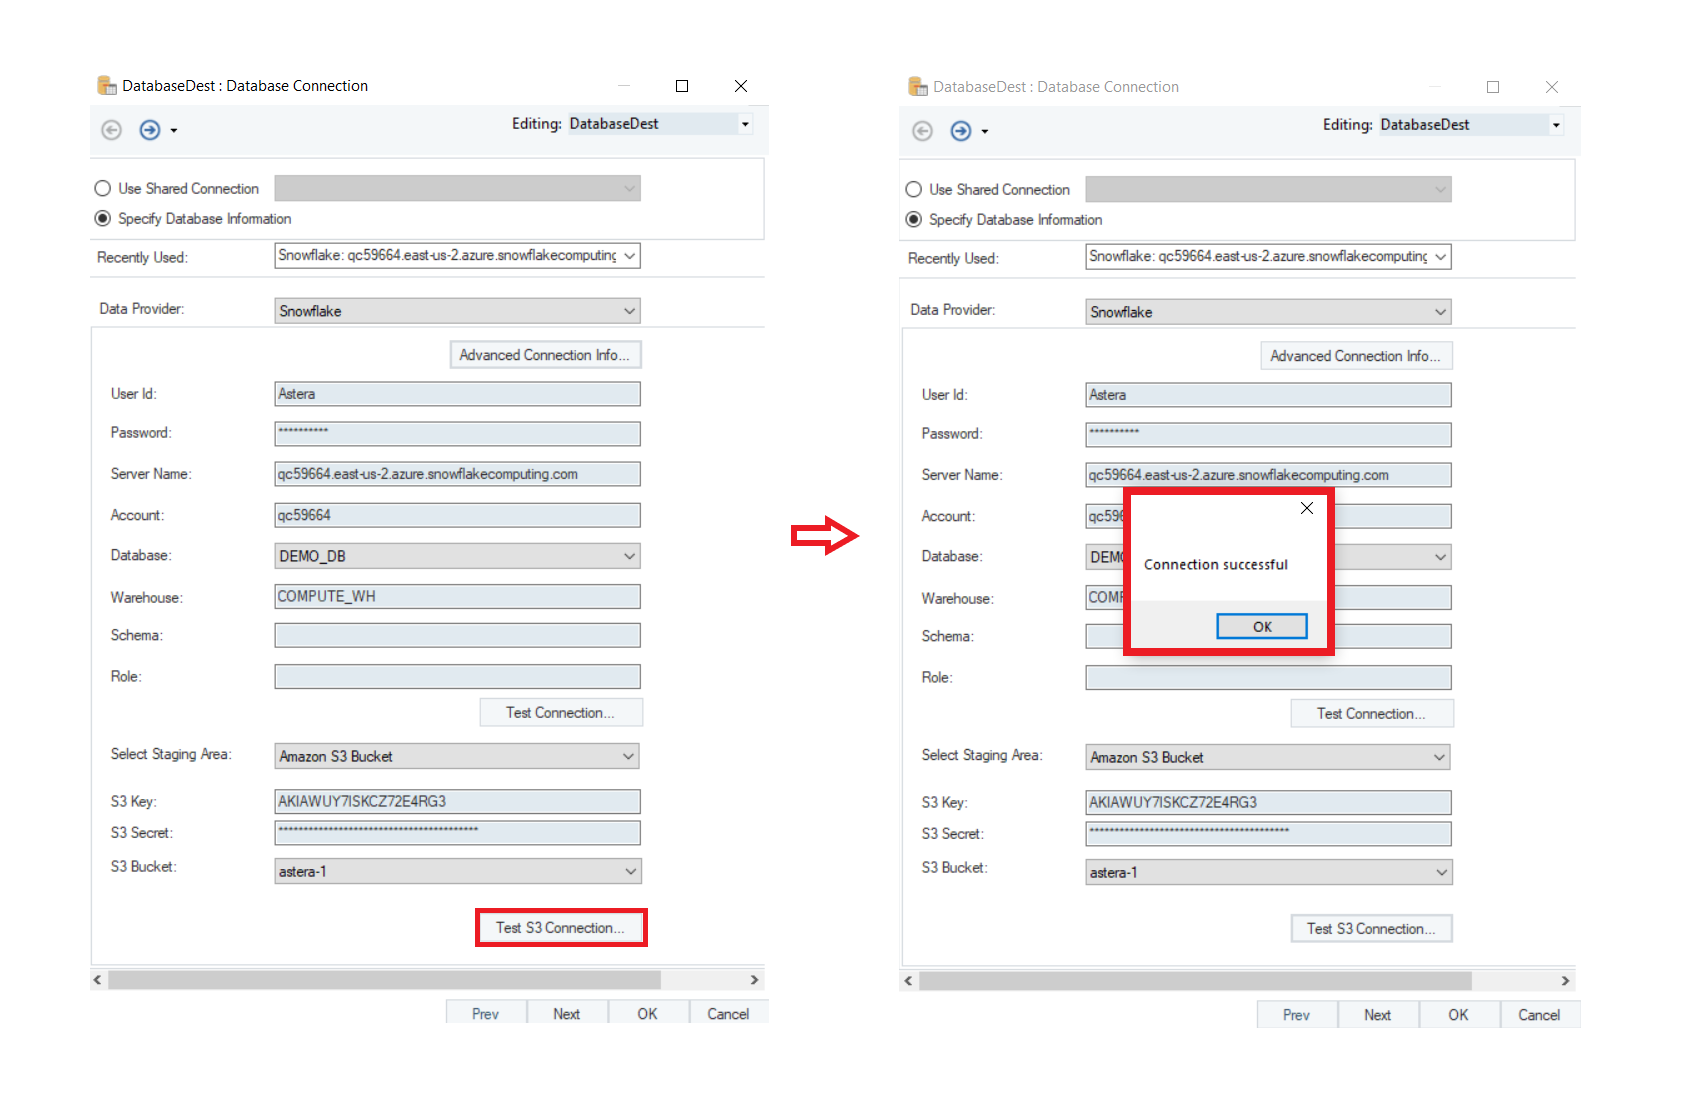
6. Once the connection is successful, click OK. Now click Next to move to the next screen.
You can Pick Table or Create Table and modify Writing Options for Snowflake Database on the Properties screen.
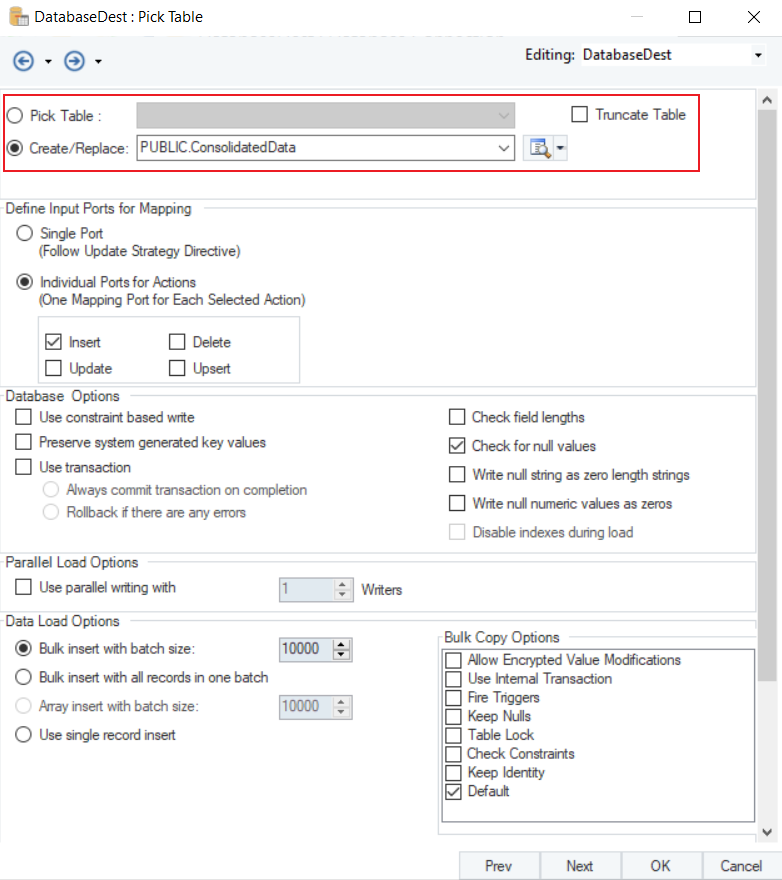
Note: In this case, we will create a new table and name it as PUBLIC.ConsolidatedData, where Public is the schema for the database.
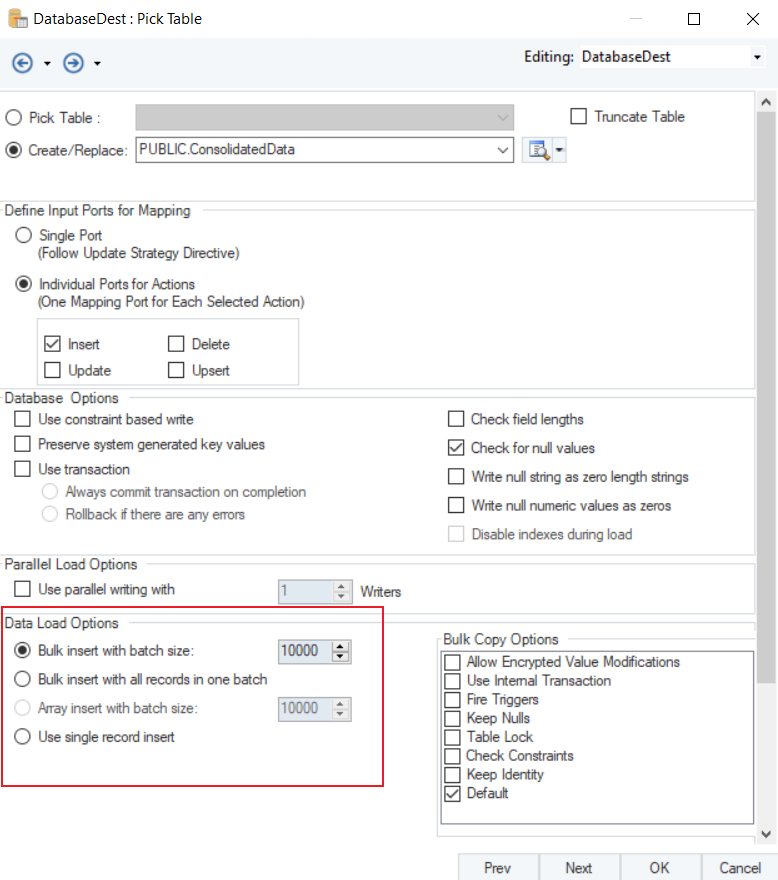
Since we selected the staging area, we will set the Data Load Options as Bulk Insert.
To read more on the different data writing options available for a database table, click here.
Once you’ve set the data reading options, click OK.
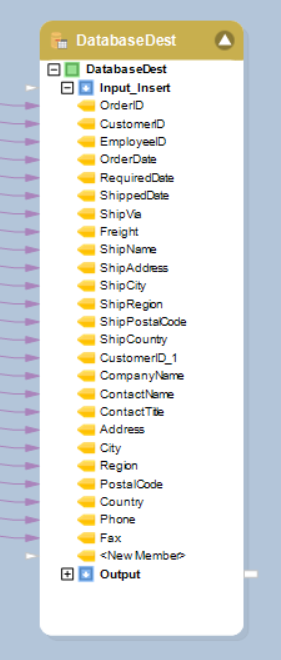
We have successfully configured Snowflake as our database provider for the Database Table Destination object. The data will now be written to the Snowflake database once the dataflow is run.
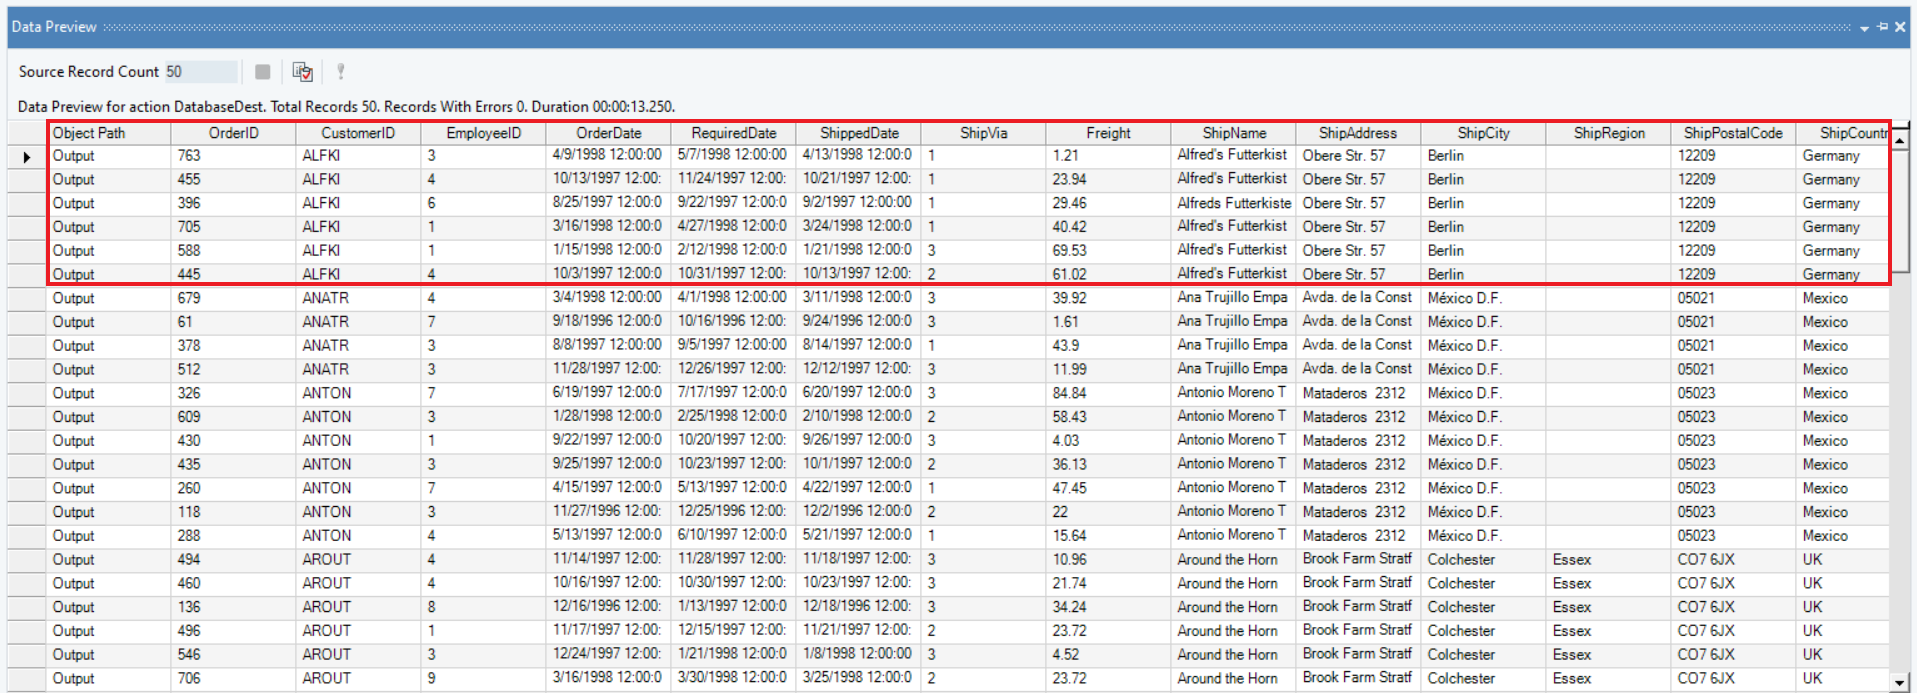
If we now preview the data in the database table, we can see that the details for all the orders placed by customers have been written into the destination table.
We have successfully connected to Snowflake Database and completed our use case in Astera Centerprise.