Using Subflow in Astera Centerprise
The subflow feature can be seen as a ‘black box’ inside a dataflow. It simplifies and streamlines the dataflow design, increases reusability, and achieves an easier-to-understand view of the dataflow. Unlike dataflows, a subflow cannot run on its own. You must call a subflow in a dataflow for it to be executed.
A subflow can be nested, meaning that you can call a Subflow transformation object in another subflow.
Over time, if the logic inside your subflow changes, you can modify the subflow, and use it in the same dataflow as before. This saves the user from making repeated changes in the dataflow when the subflow is being called multiple times. This will be clearer when we study the example use-case given below.
Use-Case
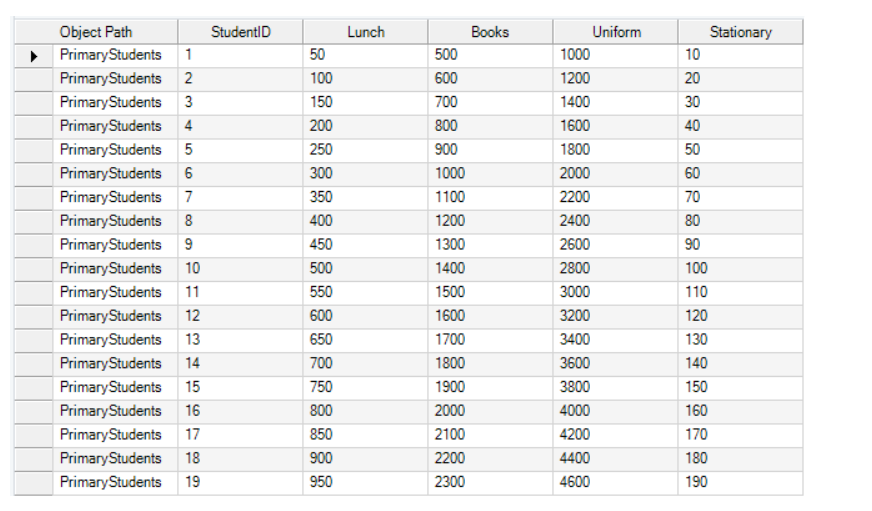
In this example, we have datasets of Student Allowance for three different classes: Primary, Secondary, and High School Students, stored in three separate Excel files. For each student in a particular class, we have four allowance categories: Lunch, Books, Uniform and Stationery.
Here is a preview of the data for Primary School Students:
First, we want to clean the data by removing duplicate records. Next, we want to find the total amount a student gets (sum of all 4 categories) and find the following statistics for each class and save it in separate Excel destinations:
- Average total allowance
- Minimum total allowance
- Maximum total allowance
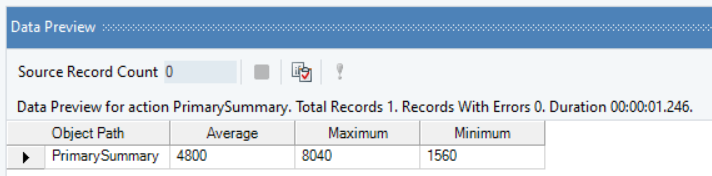
Here is the desired sample output summary for Primary School Students:

The logic implemented in the dataflow to get the output shown above is as follows:

Observe that performing the same process three times for each class of students would be repetitive. Therefore, we will use the Subflow object to create the repeating logic.
Creating a Subflow
1. Open a new subflow.
a. To open a new subflow, go to File > New > Subflow or press the shortcut keys Ctrl+Shift+S.
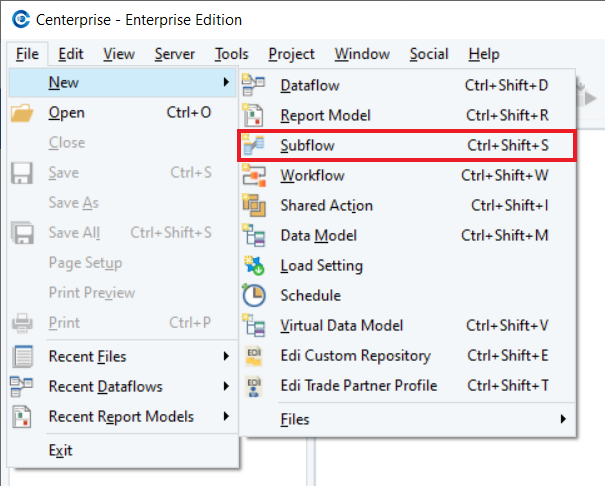
b. Alternatively, you can also expand the dropdown button in the main toolbar and select Subflow as shown below.
![]()
Subflow Input and Output
The Subflow Input object makes it possible to feed data into the subflow from an upstream object on the dataflow that calls the subflow. The Subflow Output object is used to send data to the downstream dataflow object connected to the subflow.
You can find the Subflow Input and Subflow Output objects in the Subflow section in the Toolbox.
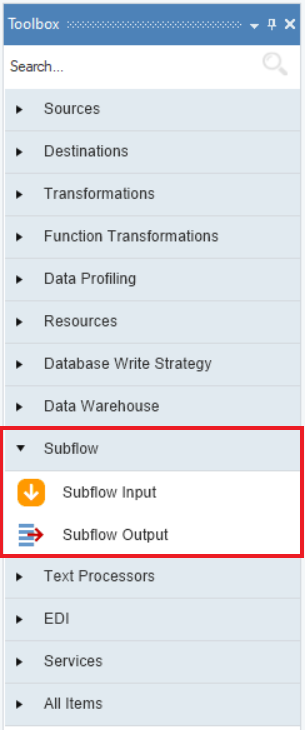
Note: The Subflow section will only appear in the Toolbox if a Subflow file is open.
Drag and drop these items onto the subflow designer to use them.
Subflow Input
The Subflow Input object is a connector controlling the input layout of your subflow. Any data that is fed into the subflow will pass through the Subflow Input when the subflow is called by a dataflow or another subflow.
In our example, we need our subflow to take the student allowance details as the input using the Subflow Input object. We can also use any other source object, such as Excel Workbook Source.
1. Right-click on the Subflow Input object and go to Properties.

2. Add appropriate data fields, along with their data types, in the Layout Builder, and click OK.
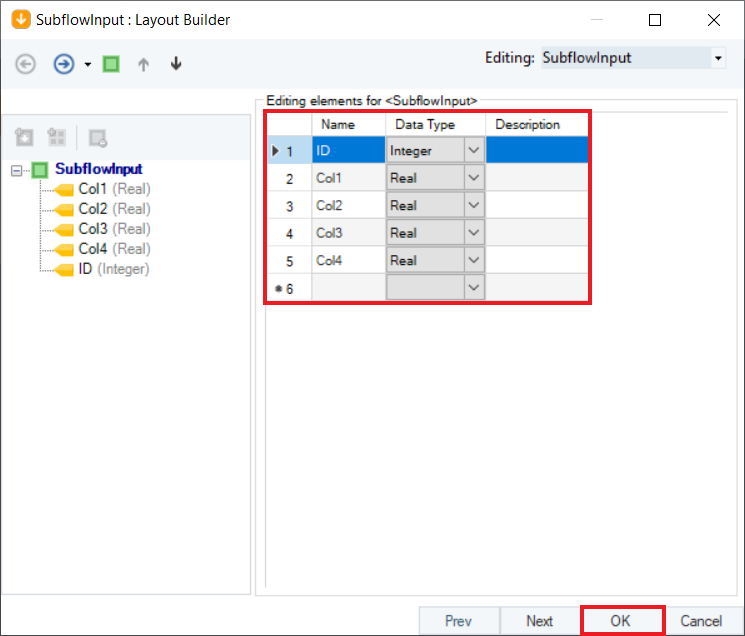
3. Your Subflow Input object is now configured and ready for use.
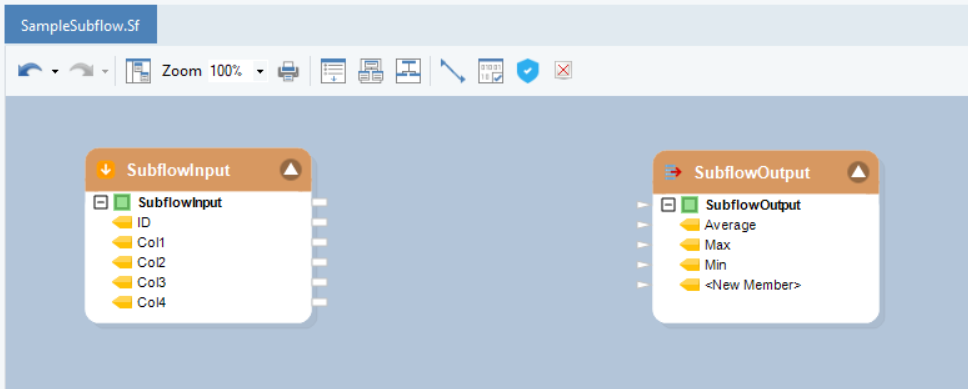
Subflow Output
The Subflow Output object is a connector controlling the output layout of your subflow. Any data that leaves the subflow will pass through the Subflow Output when the subflow is called by a dataflow or another subflow.
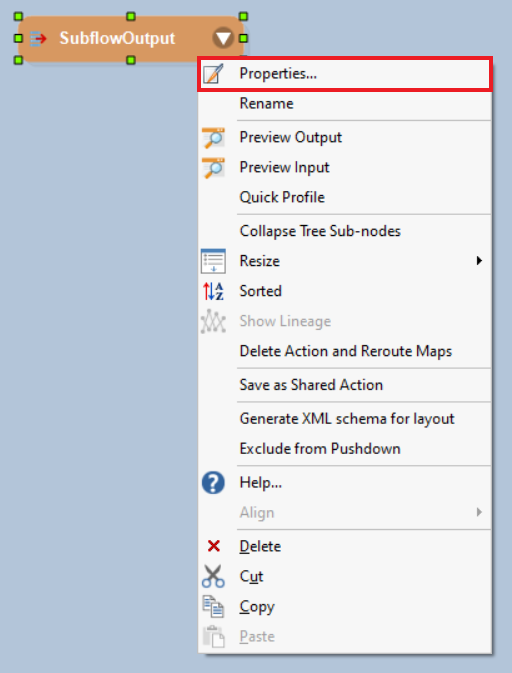
1. Like the previous step, right-click on the Subflow Output object and select Properties.
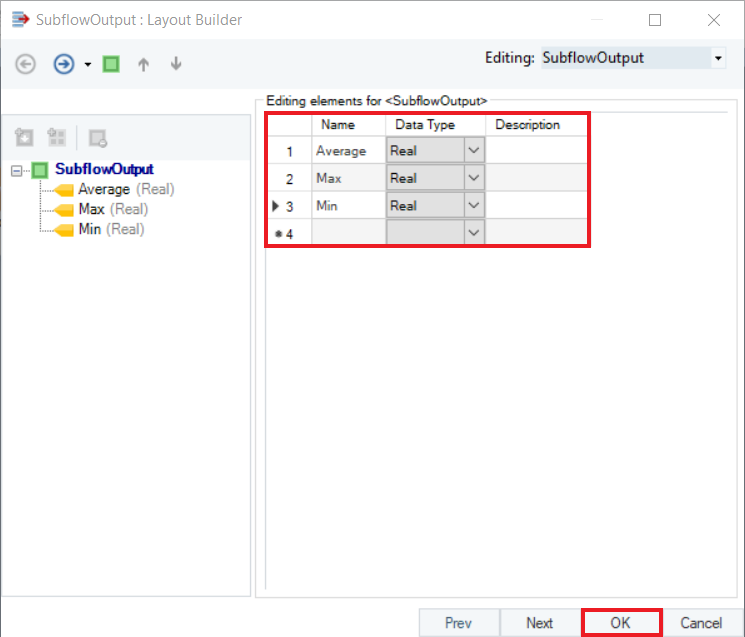
2. Add appropriate data fields, along with their data types, and click OK.
3. Your Subflow Input and Subflow Output objects are now configured.
Designing a Subflow
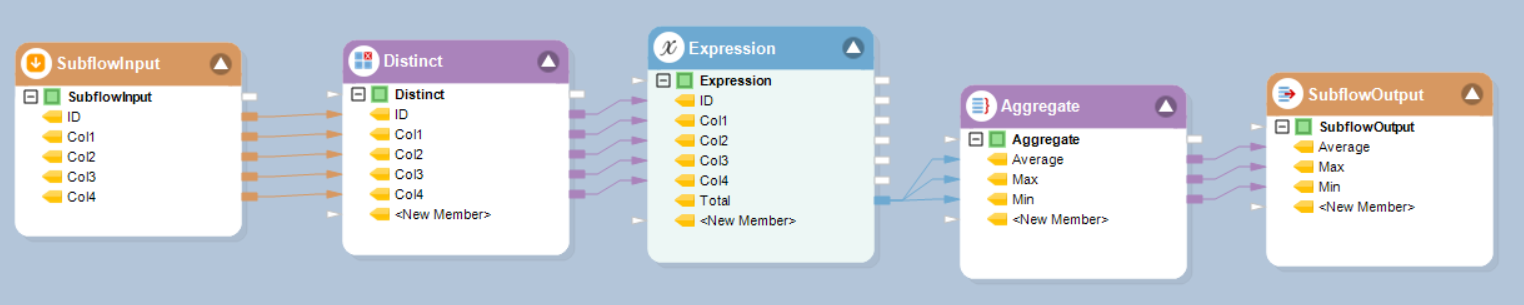
Add required objects between your Subflow Input and Subflow Output objects and map the respective data fields.
In this case, we have added the following transformations:
- Distinct: To remove all duplicate records and keep only records with distinct ID.
- Expression: To find the Total for each student by summing the amount in all four columns (Col1 + Col2 + Col3 + Col4).
- Aggregate: To find the Average, Min and Max total allowance of a student.
Once done, save your subflow in the relevant directory with an appropriate name. Here, we are naming it as SampleSubflow.Sf.
Using the Subflow Transformation Object in a Dataflow
1. Make a new dataflow, import data from the respective Excel Workbook Source, and create data fields in the respective Excel Workbook Destination. Your designer would look like this:

2. Then, drag-and-drop the Subflow object from the Transformation section of the Toolbox onto the designer.
![]()
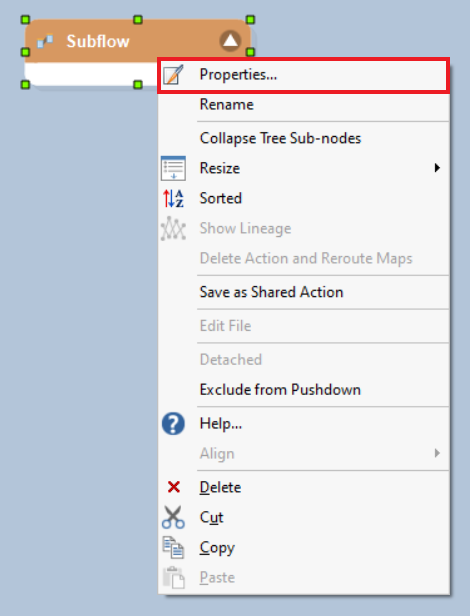
3. Right-click on the Subflow object and go to Properties.
4. a. Copy and paste the path of the directory where the SampleSubflow.Sf is saved.
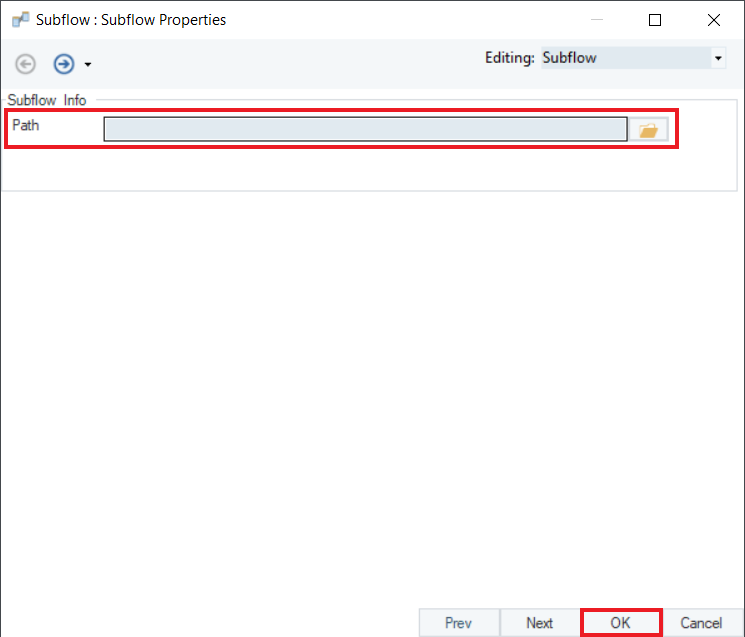
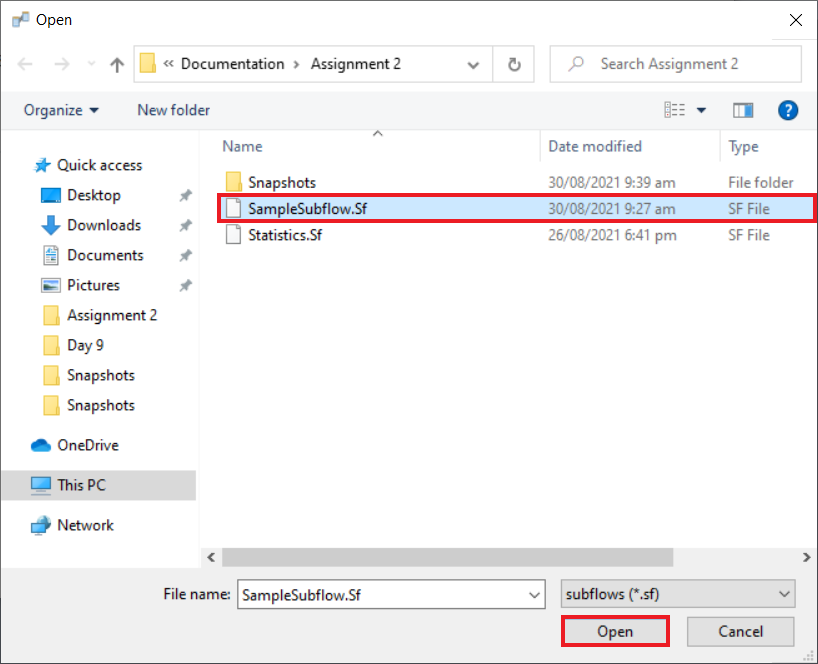
b. Alternatively, you can click on the folder icon on the right of the textbox to locate the file, SampleSubflow.Sf, in your local directory. Click Open.
Click OK in the Properties window.
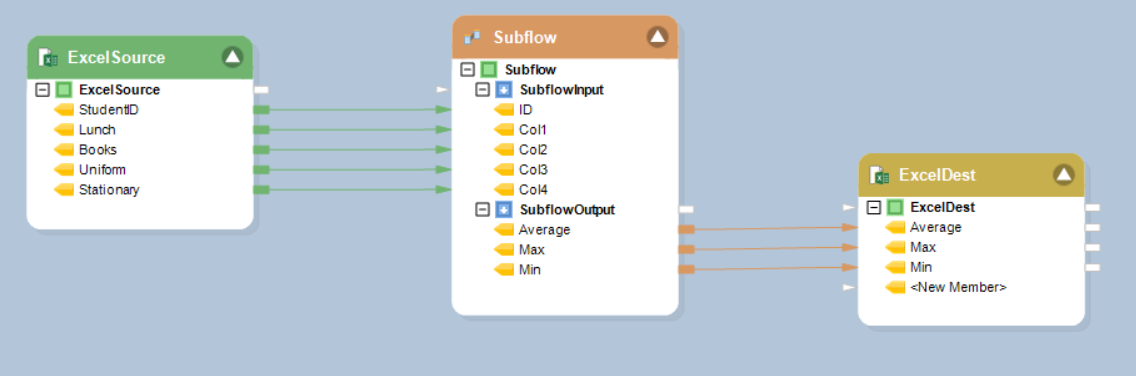
5. Your Subflow transformation object is now configured and ready for use. You can now map appropriate data fields from and to the Excel Source and Excel Destination respectively.
6. Right-click on the ExcelDest object and select Preview Output. It should display the Average, Maximum and Minimum total allowance for Primary School Students.
7. Repeat the same steps given above for the other two datasets containing information of student allowance for Secondary School Students and High School Students.
This concludes our discussion on the functionality of the Subflow Input, Subflow Output and Subflow transformation objects in Astera Centerprise.