Language Parser
In v8.2 of Astera Centerprise, we have added language parser functionality to the Expression Builder to enable advanced expressions such as interpolated string and verbatim. This will enable users to compile different values from incoming datasets into an expression and present it as an interpolated string in the output.
In this article, we will look at a use case and understand how the language parser works in Astera Centerprise.
Use Case
We have some employee data from a fictitious organization stored in an Excel spreadsheet. We will work with that data to create:
- An interpolated string
- A verbatim string
We will be using the fields in the Employee data Excel sheet and interpolate the data into an EmployeeInfo string. After string interpolation, we will create a new field to apply escape characters inside an expression transformation object through a verbatim string.
Astera Centerprise also provides an extensive and detailed support for error information that may occur while data parsing and string interpolation. We will use some examples to see how error information works in Astera Centerprise.
Follow through the steps below to see how it works:
1. Retrieve the source data.
Note: In this case, the source data of Employees is stored in an Excel file. We will extract it using the Excel File Source object in a dataflow.
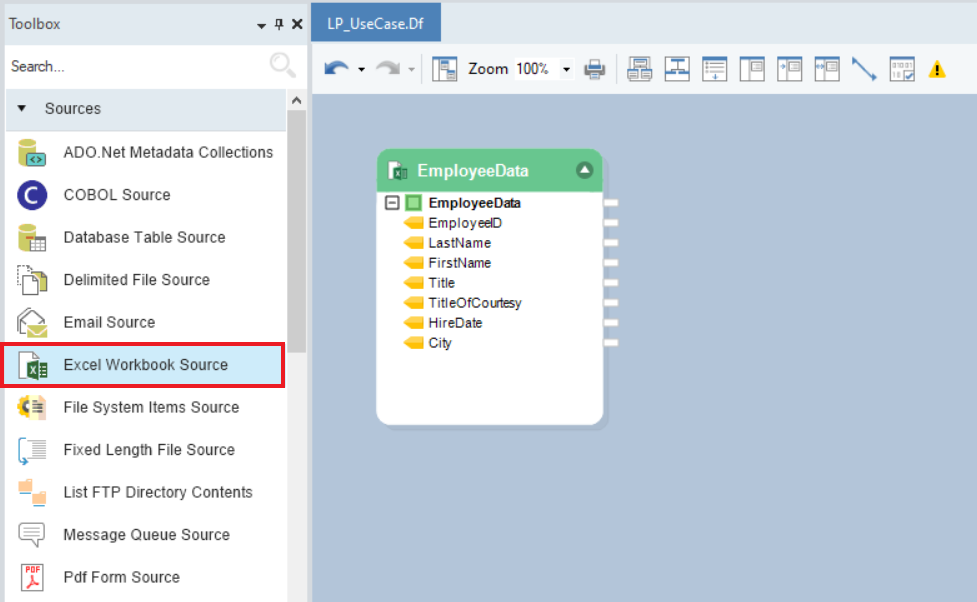
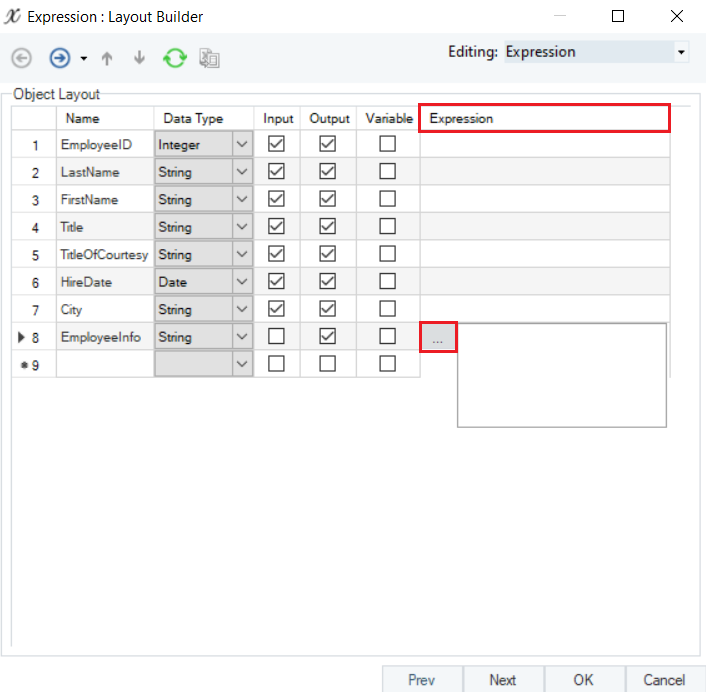
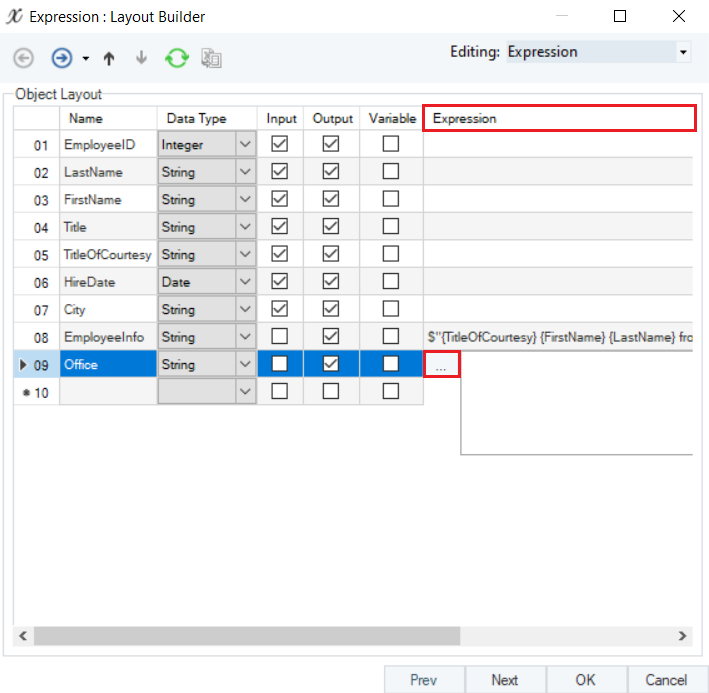
2. Next, get the Expression Transformation object to create string expressions. Map fields from the Excel source object ( EmployeeData).
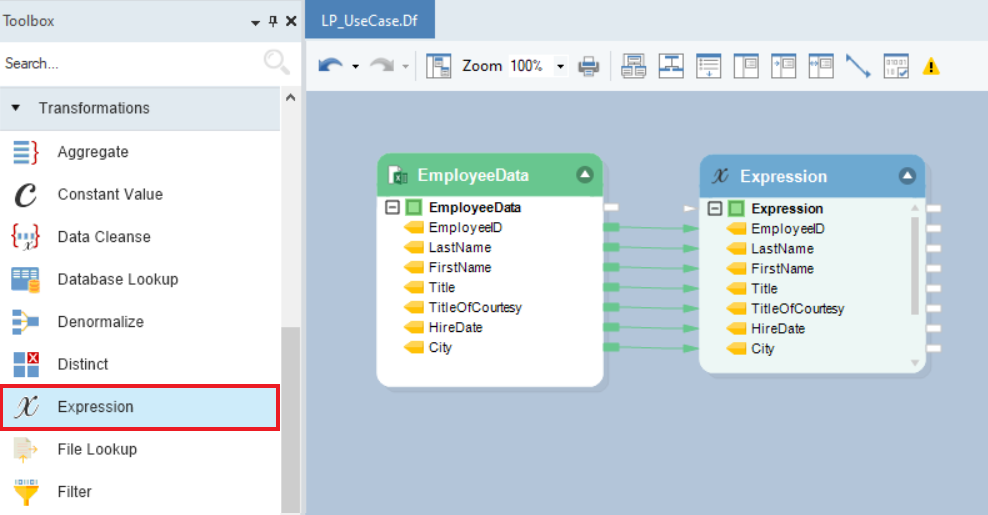
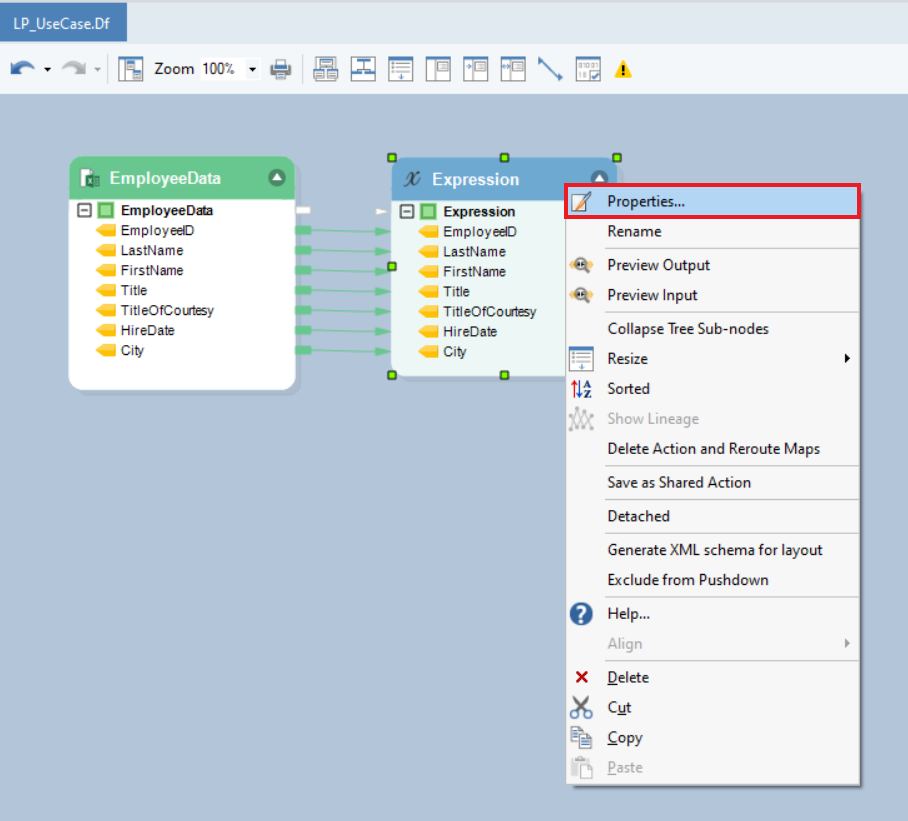
3. Right-click on the Expression transformation object and go to Properties. A Layout Builder will open from where you can go to the Expression Editor and define the expression for each field.
Interpolated String
Let’s discuss how to create an interpolated string in an Expression transformation object.
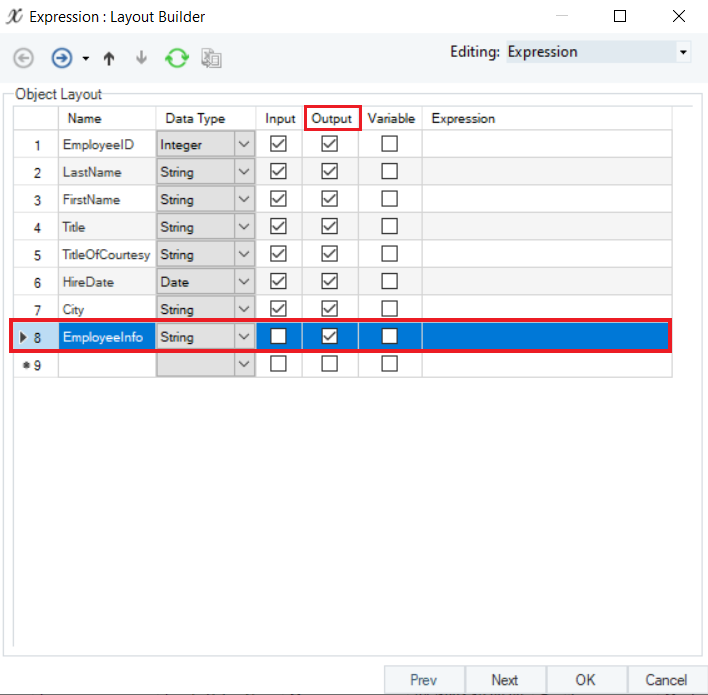
1. Create a new field in the Layout Builder. Since this field will only return an output, we will check the Output box and set the data type as ‘String.’ In this case, we have named the new field as EmployeeInfo.
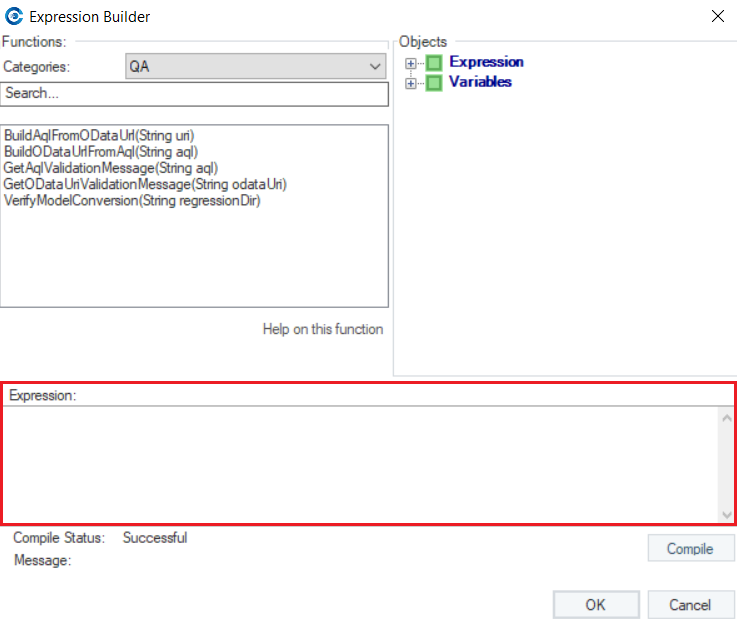
2. In the Expression Editor, we will define the Interpolated String Expression for the new field. You can either write the expression in the given field or click on the ellipses in the left corner of the field to go to the Expression Editor.
3. The interpolated string expression will be built in the Expression box.
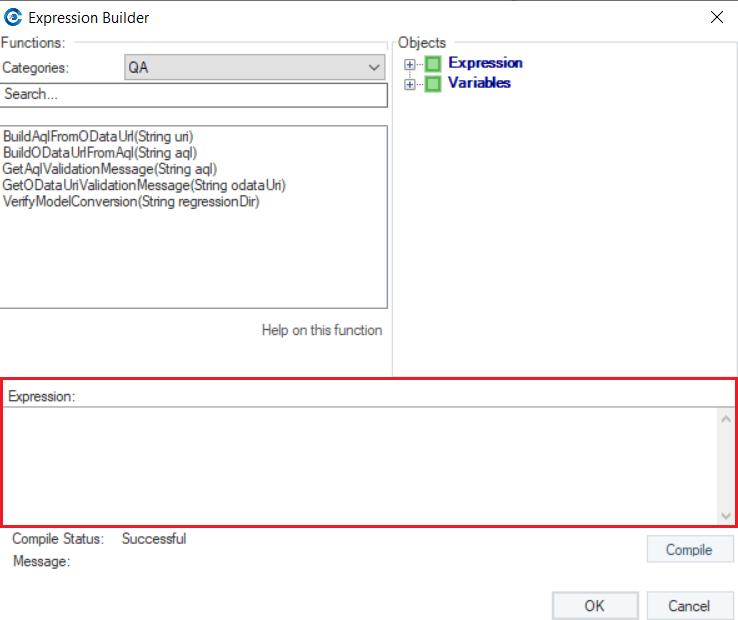
It is important to note that an interpolated string expression starts with a dollar ($) sign. The $ notation denotes the parameters or the variables in the string which will be parsed dynamically during the preview and runtime for each record in the source file.
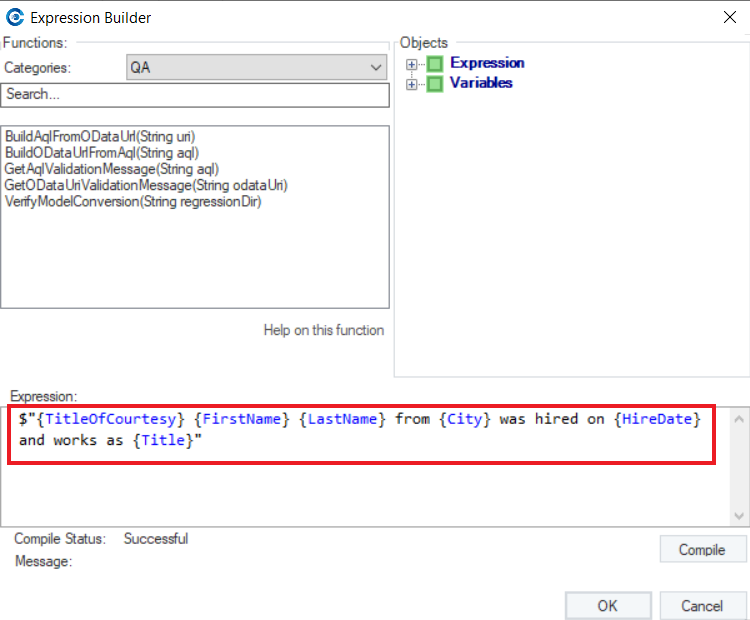
Here, we will create an interpolated string using the EmployeeID, LastName, FirstName, Title, TitleOfCourtesy, HireDate and City fields from our source data.
The interpolated string expression in this case will be written as:
$”{TitleOfCourtesy} {FirstName} {LastName} from {City} was hired on {HireDate} and works as {Title}”
During both the preview and the runtime, the variables or the parameters enclosed in {} will take input from the source data and return the output for each record in new field ‘EmployeeInfo.’ Here’s an example of the parameter and the source value for the first record:
| Field Name | Source Value |
|---|---|
| TitleOfCourtesy | Ms. |
| FirstName | Nancy |
| LastName | Davolio |
| City | Seattle |
| HireDate | 01/04/06 |
| Title | Sales Representative |
Hence, the output of the interpolated string for the first record will return as: “Ms. Nancy Davolio from Seattle was hired on 01/04/06 and works as Sales Representative.”
4. Now if we look at the preview, you can see that a new field ‘EmployeeInfo’ has been created and the interpolated string output for each record has been returned in that field.

Verbatim String
Let’s go over how to use a Verbatim String with a line break in an Expression transformation object.
1. Create a new field in the Layout Builder for the verbatim string. Since this field will only give an output, we will check the Output box and set the data type as ‘String’. In this case, we will name the new field as office.
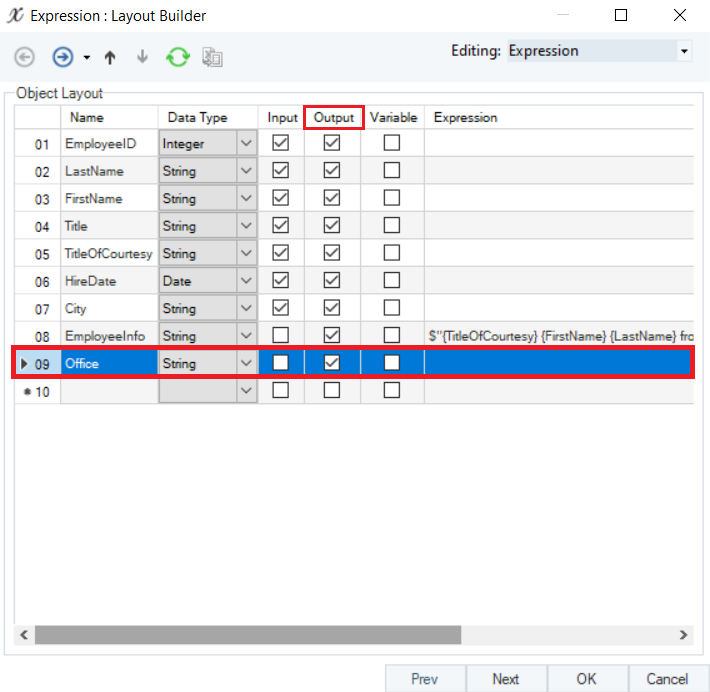
2. In the Expression field of the Layout Editor, we will define the verbatim string expression for that field. You can either write the expression in the corresponding expression field or click on the ellipses in the left corner of the field to enter the Expression Editor.
3. The verbatim string expression will be built in the Expression box on the Expression Builder screen.
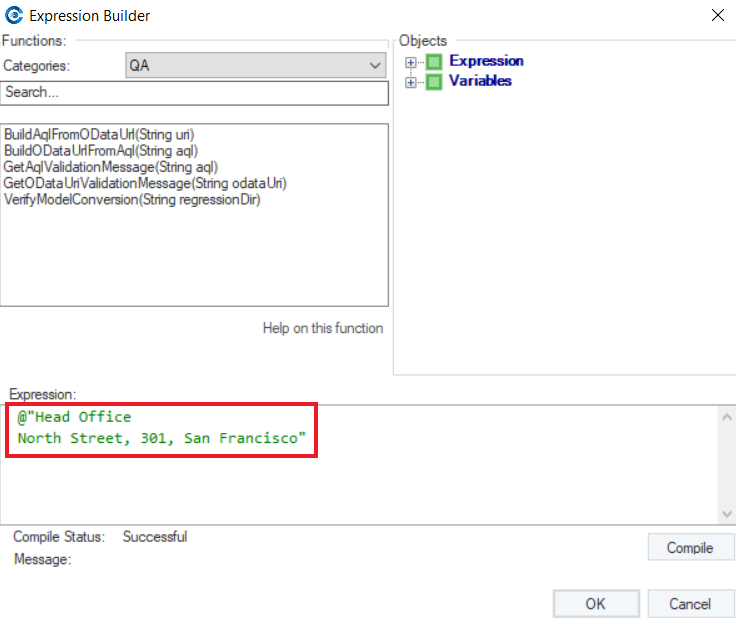
4. It is important to note that verbatim string only works with an at the rate (@) sign before the expression and returns the value as it is, throughout the output field.
In this example, we want the following output to be returned in the Office field that we created:
Output:
Office
North Street, 301, San Francisco
The verbatim string expression to achieve this output will be written as:
@”Office
North Street, 301, San Francisco”
5. The output preview will show the verbatim string upon hovering over values in the verbatim field or you can also export it to any destination to view the data.

Error Info
The error information feature in Centerprise has now been improved to provide more comprehensive information about errors to the users in real time. The information that it now provides is more precise and specific which helps in debugging errors as you build expression logics.
Let’s work on a few examples to explore how the error information functionality has been improved and how it can help in resolving errors and successfully compiling expressions in the Expression Builder.
Note: Three of the common error messages are being discussed below, there can be other error messages as well.
1. Unexpected Token:
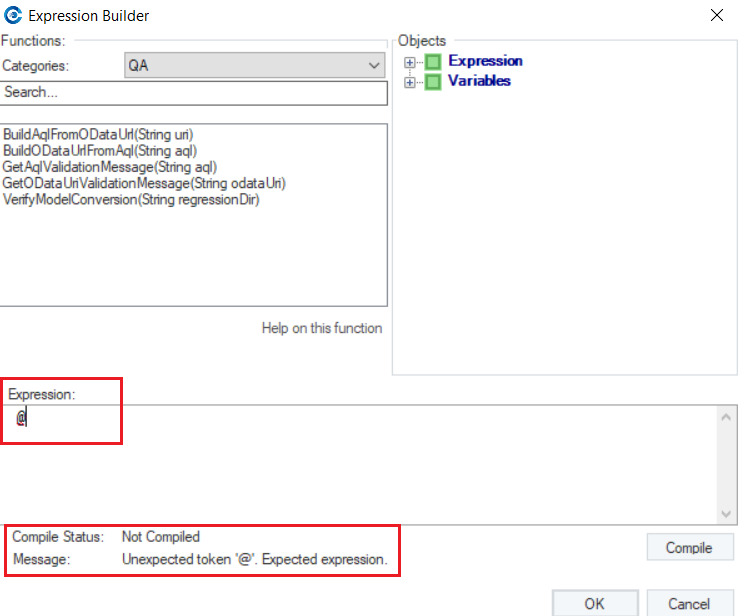
For an incomplete expression, it will instantly notify that the expression status is Not Compiled and further gives a message explaining that there is an unexpected token which expects an expression further to compile the expression successfully.
2. Unterminated String Literal:
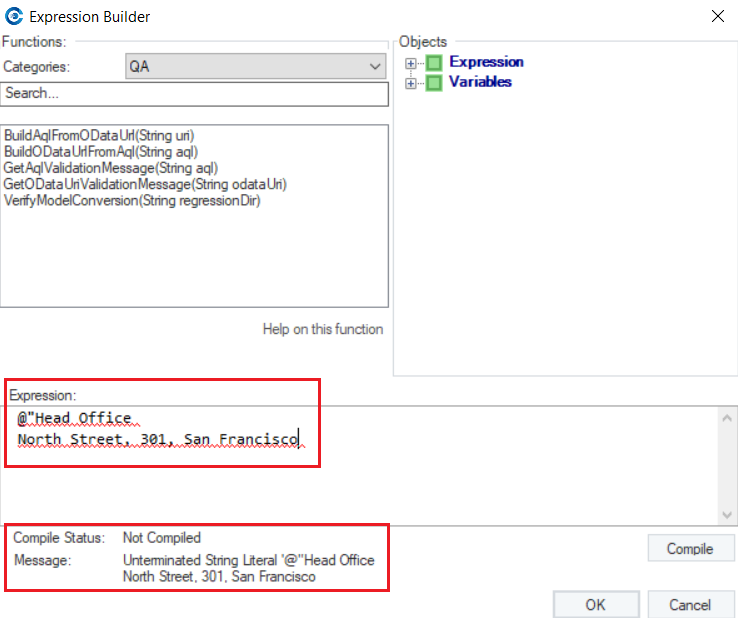
Unterminated String Literal means that a string variable is not closed properly, either because of an un-escaped character in it, or a line break. Hence, it won’t compile till the expression is closed.
Successful Compilation of the Error:
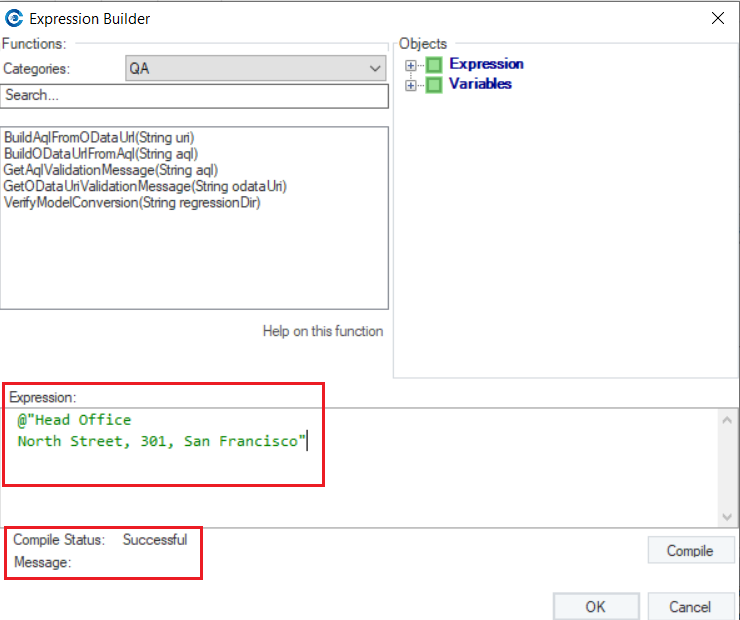
The string has now been closed and the Compile Status has been updated to Successful.
3. Invalid Identifier
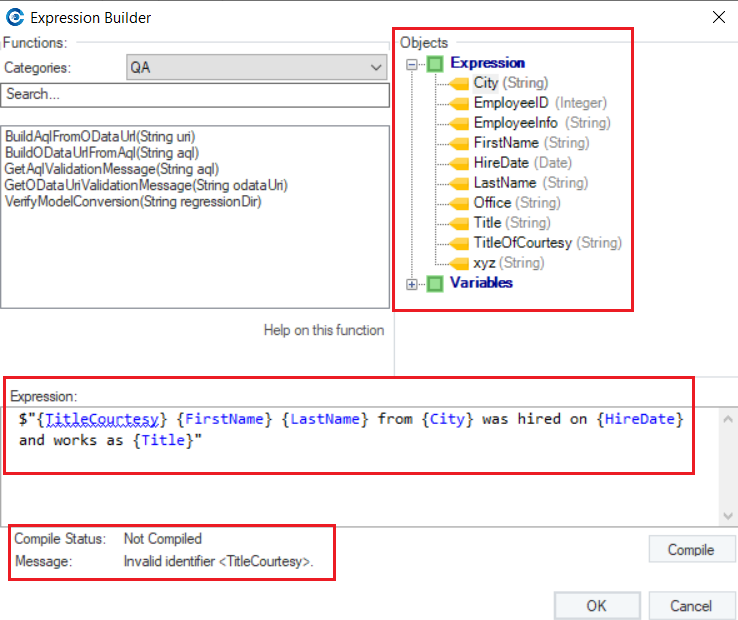
The Invalid Identifier message appears when a field name is not valid. If you look at the given object, there is no field by the name “TitleCourtesy”; hence the invalid identifier error. The available field is TitleOfCourtesy.
This concludes using the Language Parser functionality in Astera Centerprise.