Denormalize Transformation
You can create many-to-one mappings with the help of Denormalize transformation in Centerprise. Denormalizing, also known as pivoting, allows you to combine a number of records into a single record (simply stating, it brings data from rows to columns). It is useful for reducing the number of tables in the schema, which simplifies querying and possibly improves reading performance.
Sample Use Case
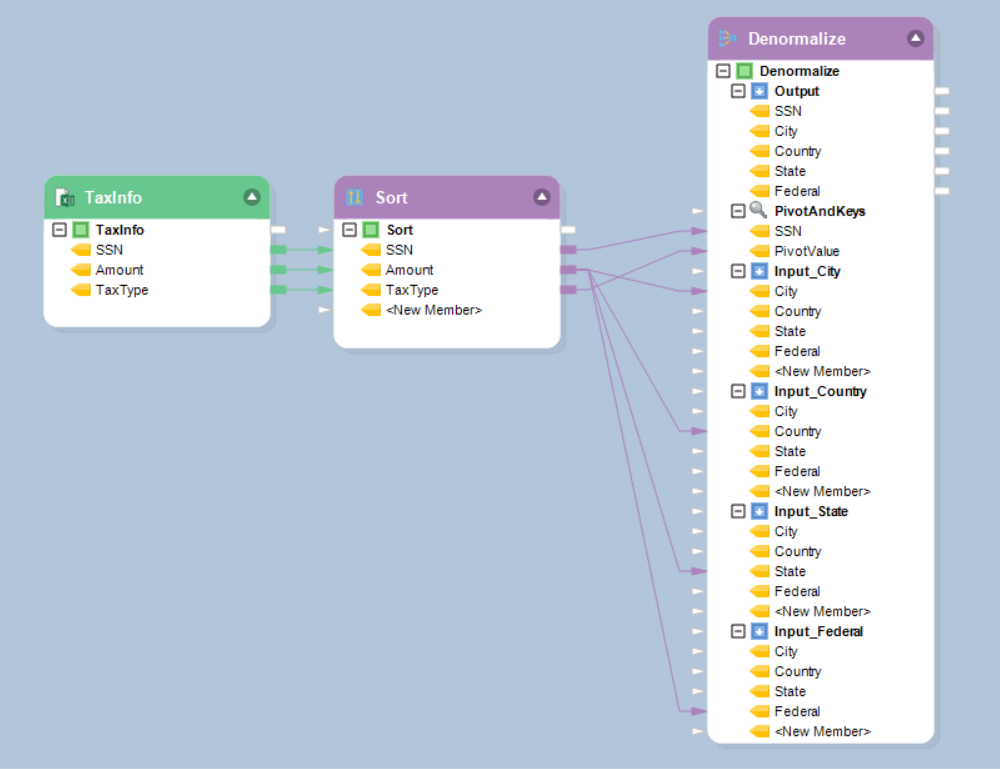
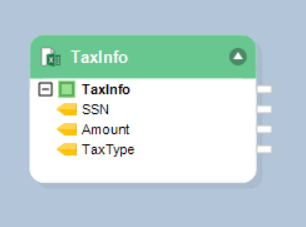
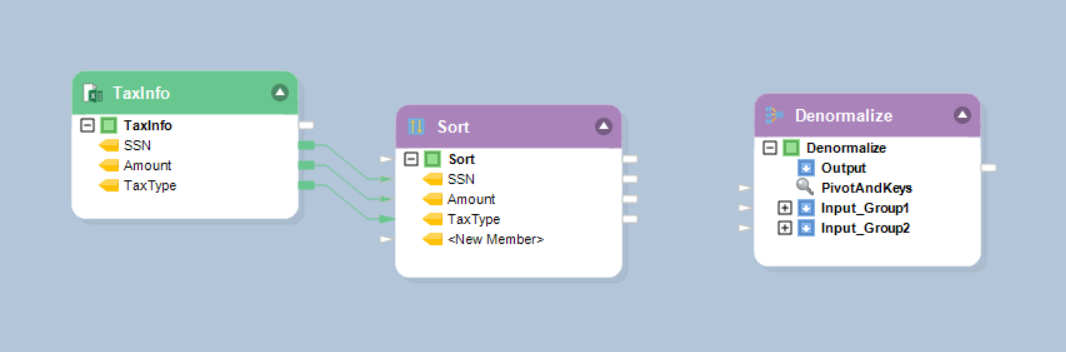
The source data contains information about taxes (City Tax, County Tax, State Tax, and Federal Tax) and SSN (Social Security Number) of taxpayers.

Now, we want to reduce the number of rows and create separate fields for City tax, County tax, State tax, and Federal tax.
Let’s see how can we use Denormalize transformation to achieve the task.
How to Use Denormalize Transformation
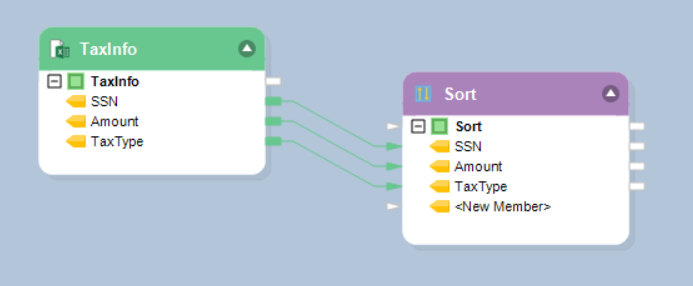
1. Sort the source data based on the key field, which is the SSN field in this case.
2. Drag-and-drop the Denormalize transformation from the Transformations section in the Toolbox.
3. Right-click on the Denormalize transformation object and select Properties from the context menu.
Following properties are available for the Denormalize transformation:
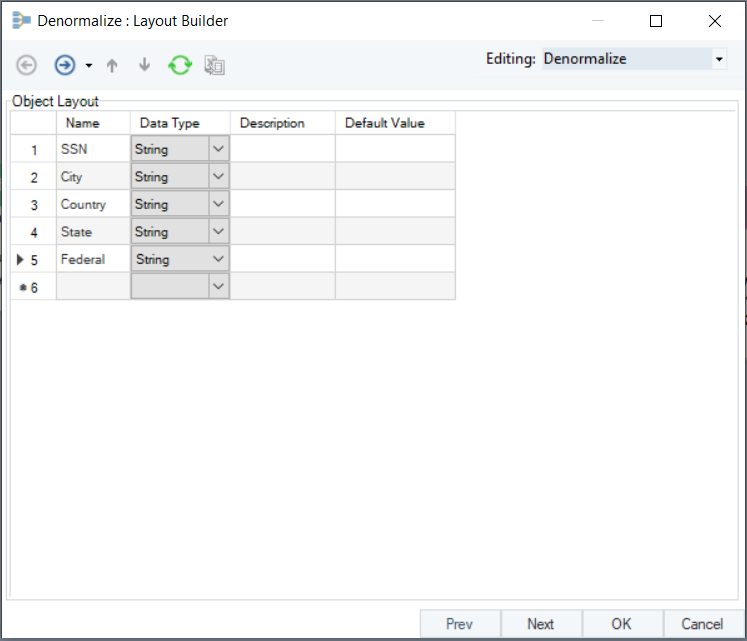
Layout Builder Screen:
Layout Builder screen is used to add or remove fields in the field layout, as well as select their data type. The fields added in the Layout Builder will show in the Output node inside the object box, as well as in all Input nodes corresponding to the number of mapping groups created (see below), with the exception of the key field(s).
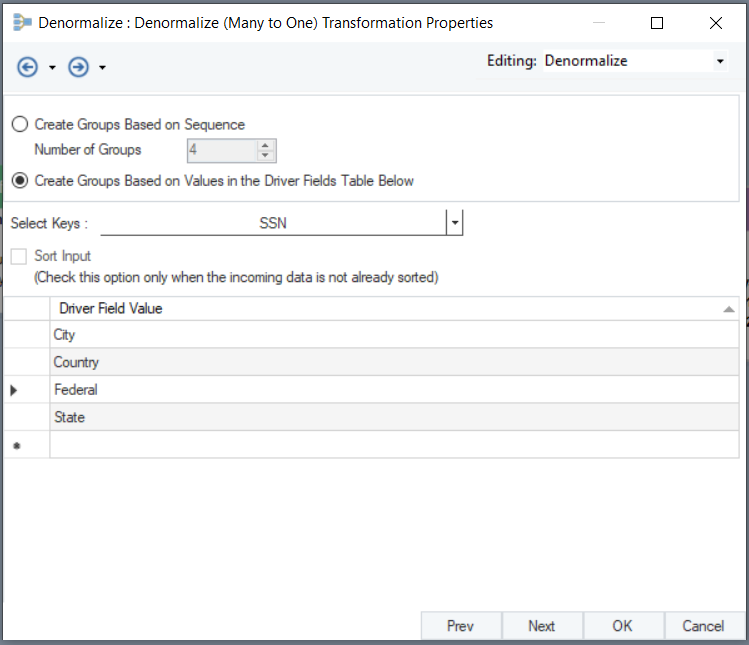
Denormalize (Many-to-One) Transformation Properties Screen:
Select Keys: Using Select Keys dropdown, select the field or fields that uniquely identify the record. These keys will be used to match the records between the normalized source and the denormalized destination.
Sort Input: Turn this option on only if the values in the matching field (or fields) are not already sorted.
Driver Field Value: Enter the pivot values for your Denormalize transformation. Using the example below, the pivot values would be City, State, Federal, and Country.
Note: Entering driver key values is required prior to mapping the Denormalize object. For each entry in the Driver Field Value grid, a new Input mapping group is created in the object box.
General Options Screen:
This screen shares the options common to most objects on the dataflow:
Clear Incoming Record Messages
When this option is on, any messages coming in from objects preceding the current object will be cleared. This is useful when you need to capture record messages in the log generated by the current object and filter out any record messages generated earlier in the dataflow.
Do Not Process Records with Errors
When this option is on, records with errors will not be output by the object. When this option is off, records with errors will be output by the object, and a record message will be attached to the record. This record message can then feed into downstream objects on the dataflow, for example a destination file that will capture record messages, or a log that will capture the messages and as well as collect their statistics.
The Comments input allows you to enter comments associated with this object.
After you have configured the properties, click OK.
4. An input mapping node will be created for each value specified in the Driver Field Value grid.
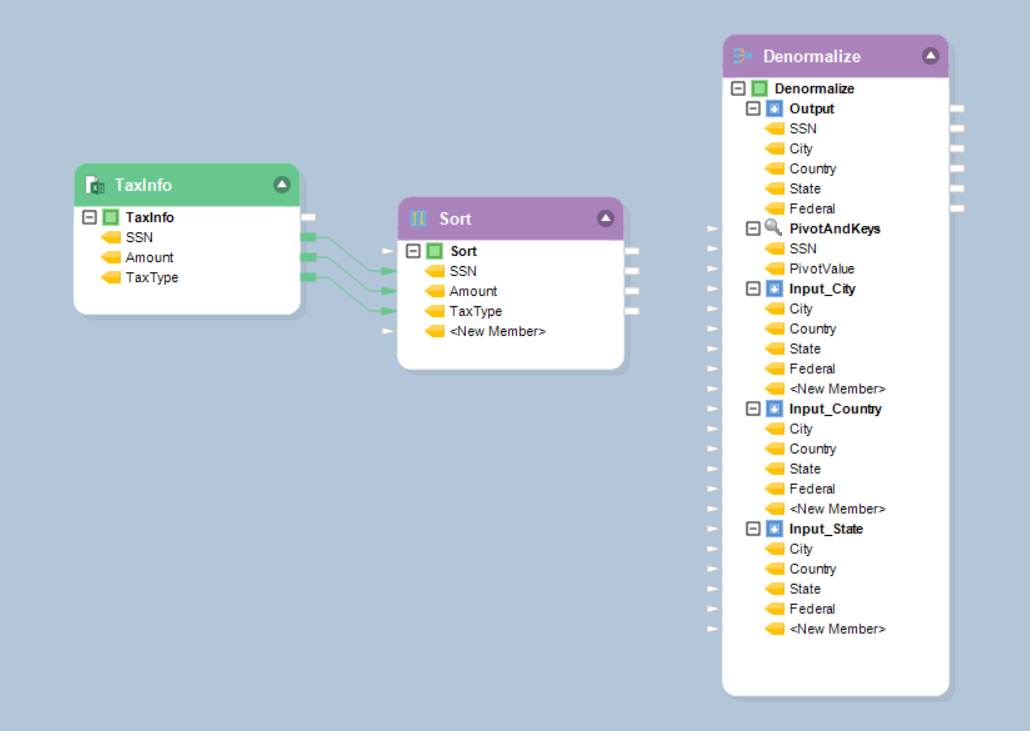
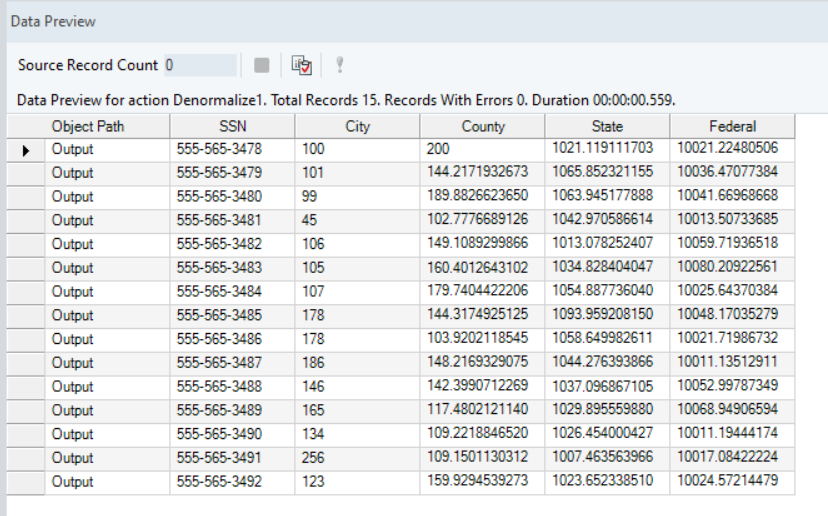
5. Map the fields and preview the output to view the denormalized data.