Merge Transformation
Merge transformation in Centerprise is designed to merge data fragments from disparate sources, based on some predefined logic, and present it in a consolidated form to draw actionable insights.
Sample Use Case
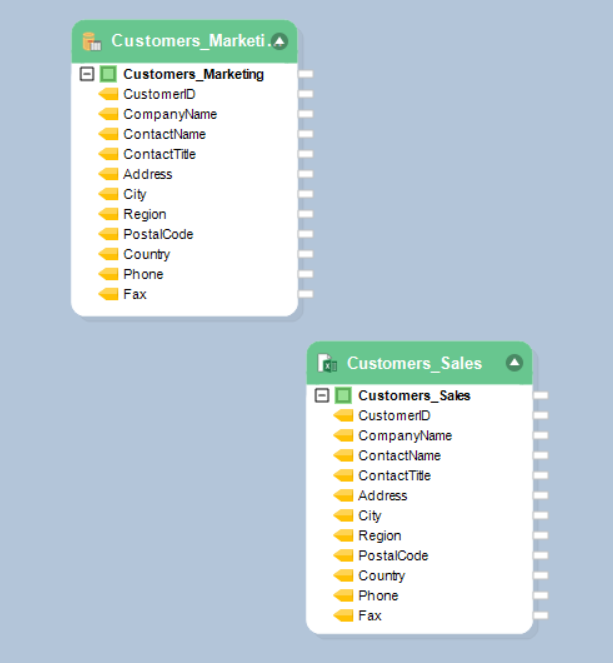
Let’s assume that there is an organization that maintains customers’ data in two different departments – Marketing and Sales. Marketing department stores information in a database table and Sales department maintains an Excel sheet for storing customers information. We want to merge the information from both the sources, so that we have consolidated data.
Steps to Use Merge Transformation in Centerprise Data Integrator
1. Drag-and-drop the relevant source objects from the toolbox to the designer. (Click here to find how to set up sources.)
(Note: In this case, the marketing department has the customer information stored in a database, whereas the sales department records customer information in an Excel file. Therefore, we will use the ‘Database Table Source’ and ‘Excel Workbook Source’ as source objects.)
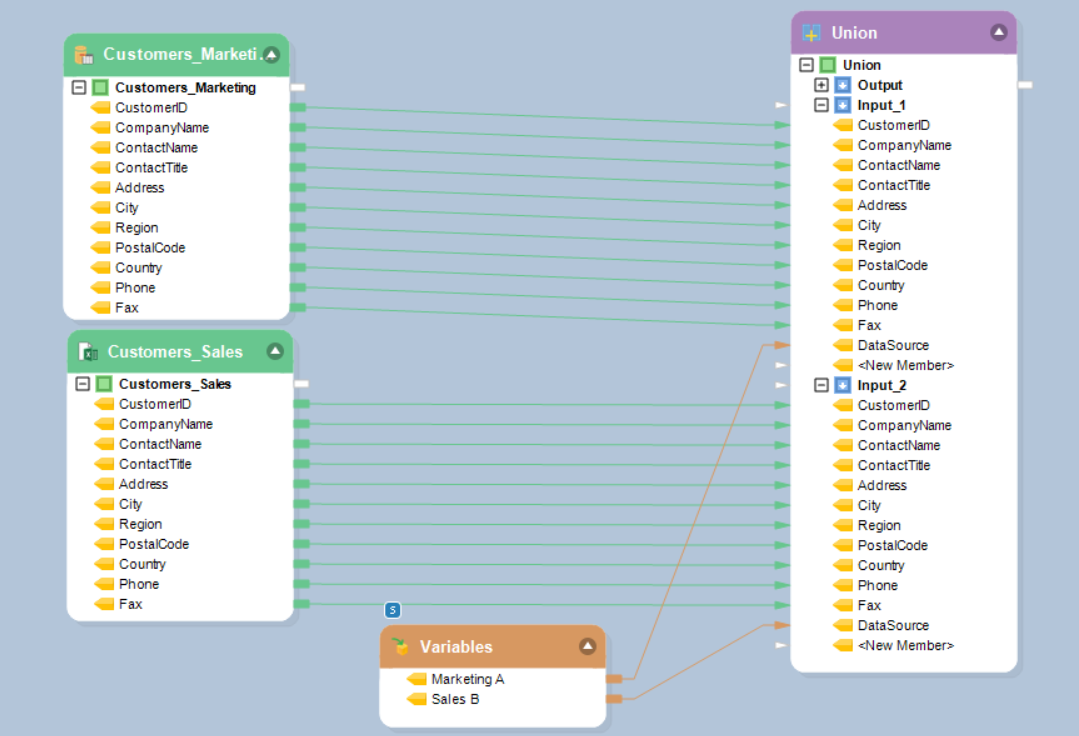
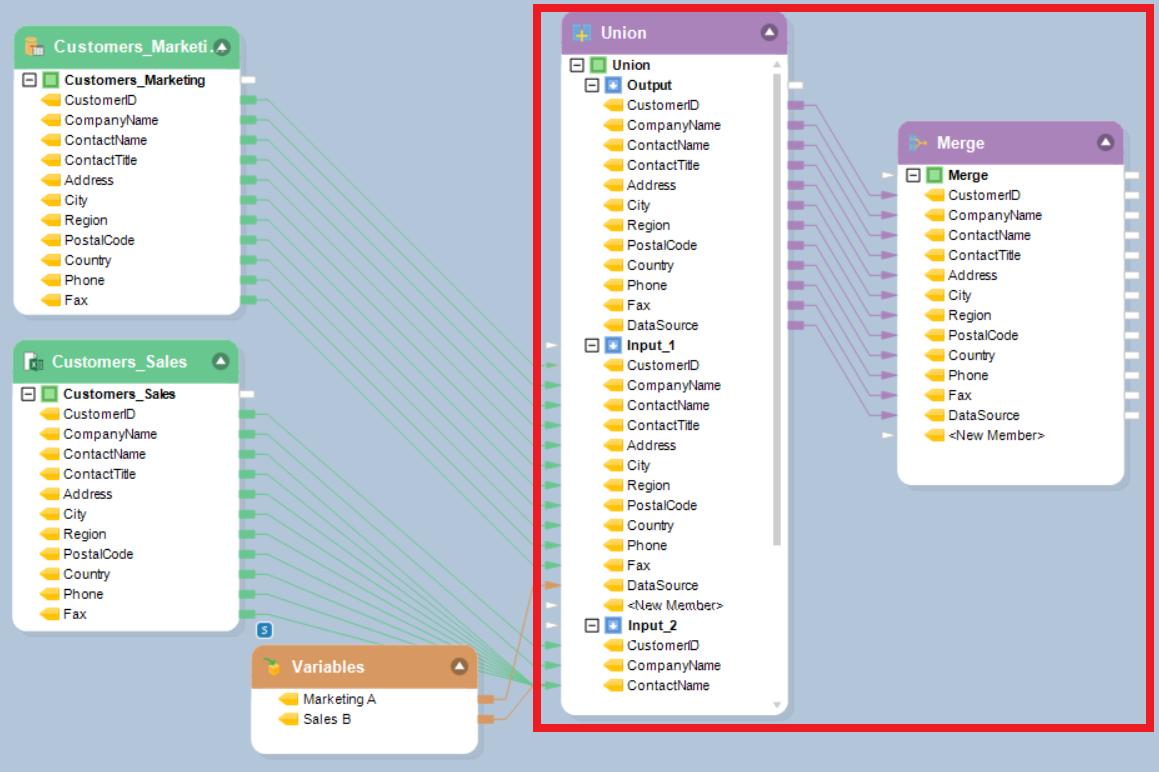
2. Merge transformation merges data from a single source only, we will first combine both the records using the ‘Union’ Map the fields from the data sources to the Union transformation object and add a new field ‘DataSource’ to keep track of which information is coming from which source.
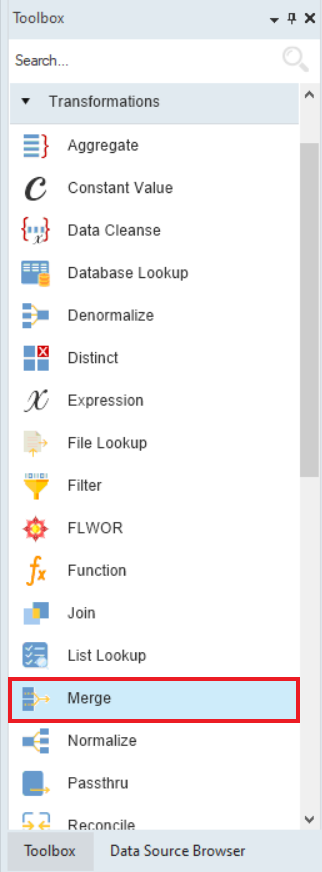
3. Drag the Merge transformation object from the transformations section in the Toolbox and drop it on to the data flow designer.
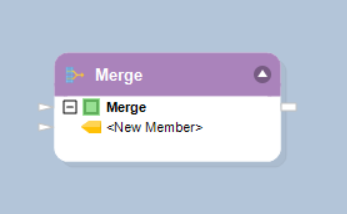
This is what a Merge transformation object looks like:
4. Map the Union transformation output to Merge transformation.
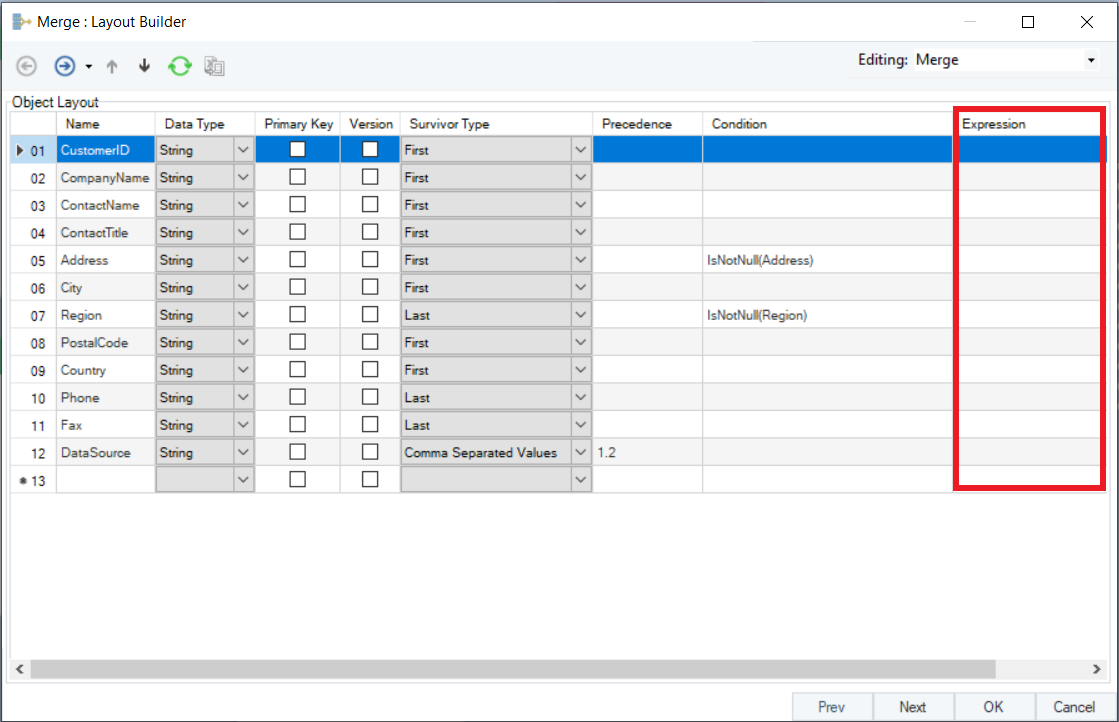
5. Right click on the Merge transformation object to set up transformation properties on the ‘Layout Builder’ This is what a Layout Builder window looks like:
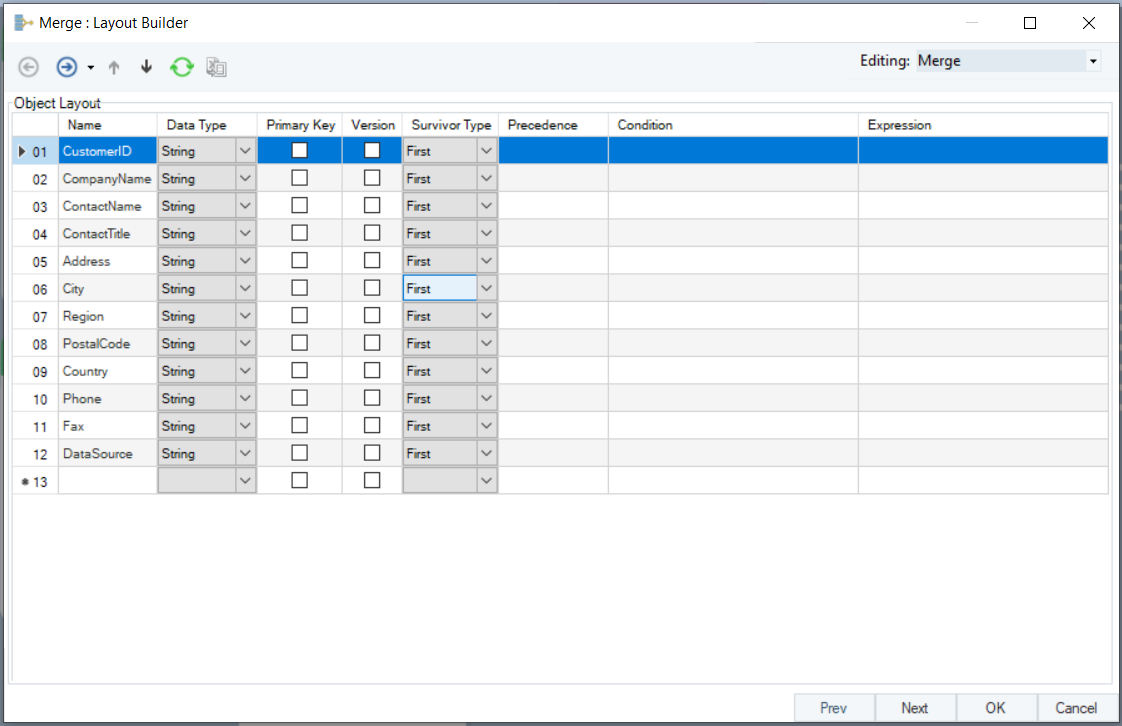
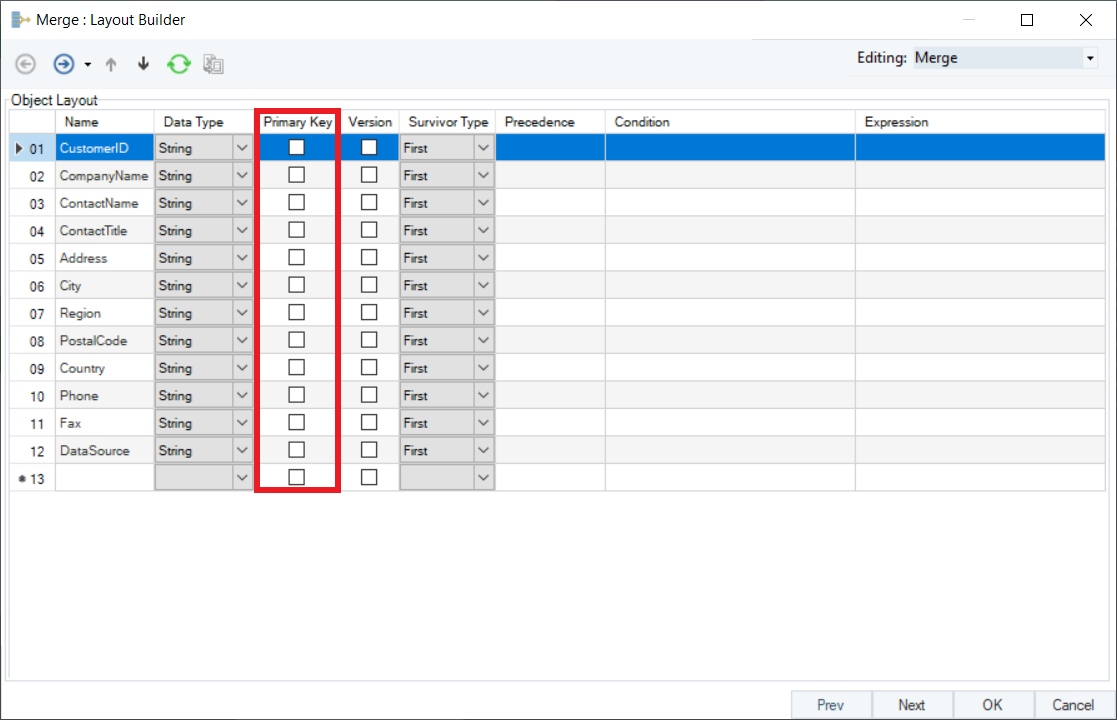
6. On the ‘Layout builder Screen,’ specify the primary key. The ‘Primary Key’ is a common identifier that identifies similar records from various sources and merges the information against these records.
(Since we are consolidating different customer records, we will set up ‘Customer ID’ as the primary key in this case.)
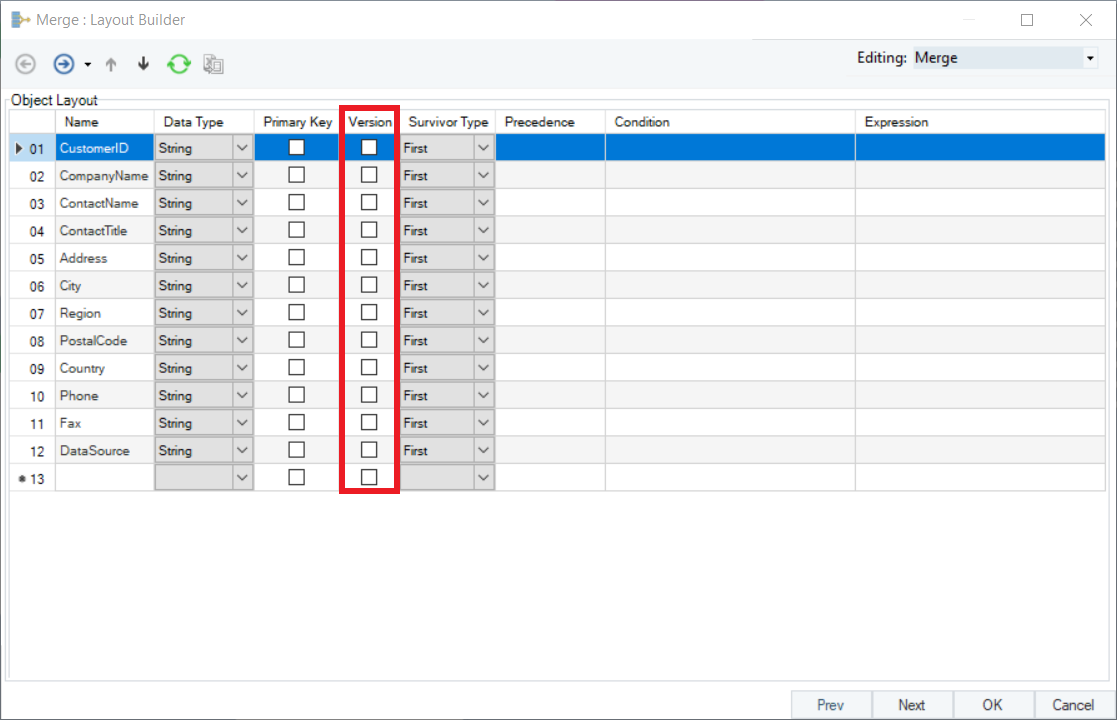
7. Next, you have to specify the field to be used as Version. If your data is coming from multiple sources, the Version field shows which source the data is coming from in the final merged output. In this case, we will use the ‘Data Source’ field we added in the Union transformation as the version field.
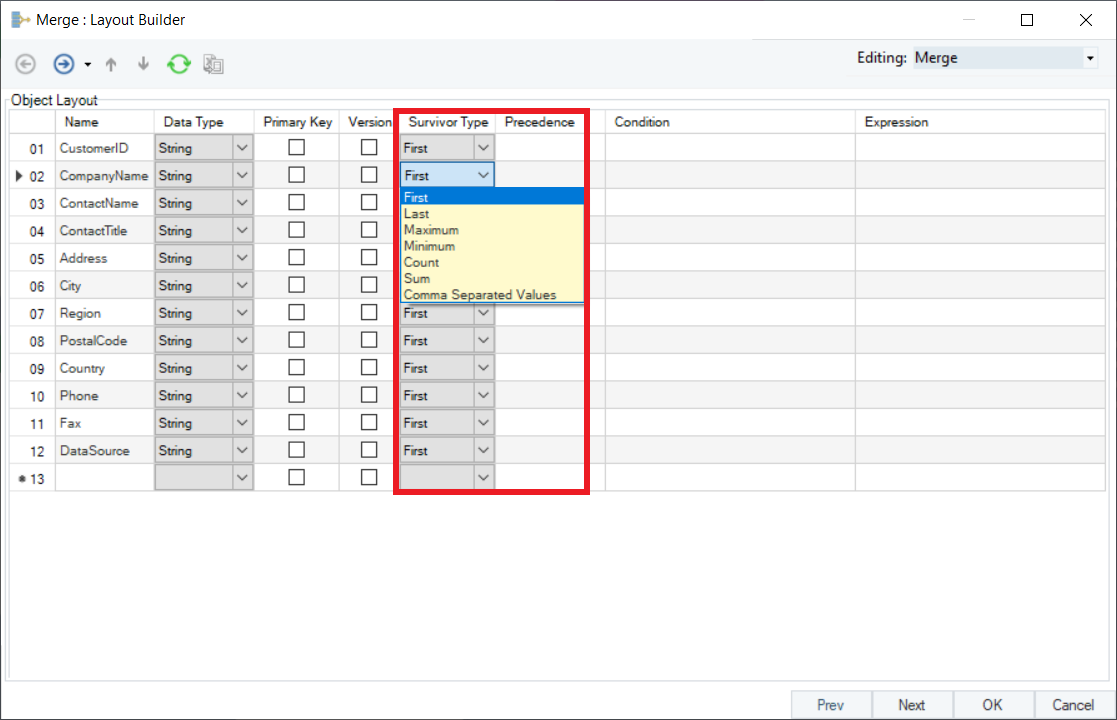
8. Next, specify the Survivor type for each field. Survivor type allows you to choose the survivor values – the values you want to retain from your data sources – for each field. Survivor Types are set as ‘First’ by default. However, depending on your case, you can choose the Survivor Type from the following options:
| Survivor Type | Description |
|---|---|
| First | Returns data from the first data source for that field |
| Last | Returns data from the last data source for that field |
| Maximum | Returns the maximum value from all available input data sources |
| Minimum | Returns the minimum value from all available input data sources |
| Count | Returns the total count number of all values that exist in the field |
| Sum | Aggregates the values that exist in that field in all the input sources and then returns the arithmetic sum of those values |
| Comma Separated Values | Separates the values that exist in that field in all the input sources with a comma and then return that representation. This option is only available when the output field is assigned String data type. |
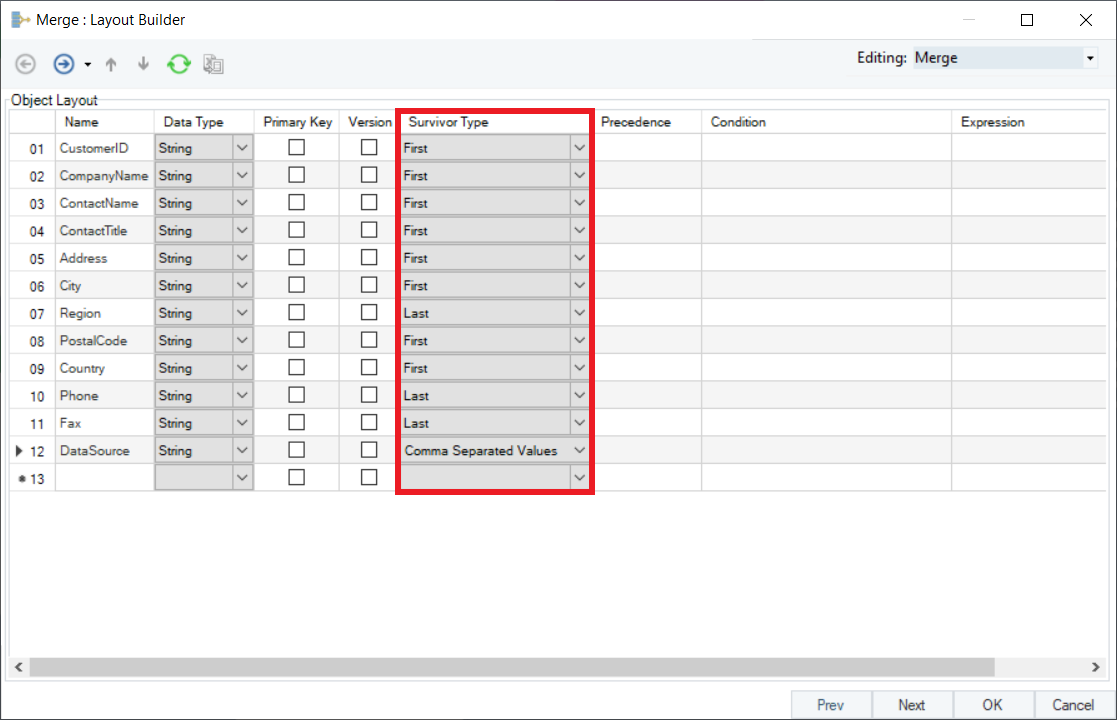
Since CustomerID, CompanyName, and ContactName records are common in both the source files (Customers_Marketing and Customers_Sales), we will set the Survivor Type as ‘First’ for these fields. For the other fields with missing records, the survivor type will be set as follows:
| Field | Survivor Type |
|---|---|
| ContactTitle | First |
| Address | First |
| City | First |
| Region | Last |
| PostalCode | First |
| Country | First |
| Phone | Last |
| Fax | Last |
| DataSource | Comma Separated Values |
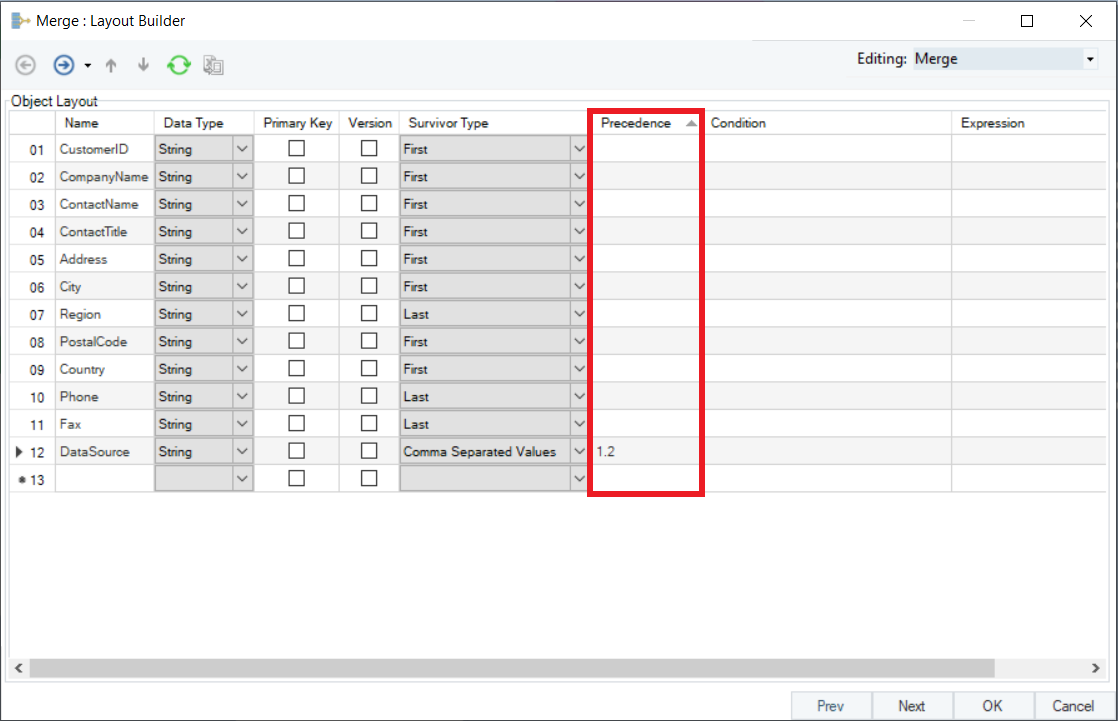
9. Once you have set the Survivor Type, specify ‘Precedence’ for each field. Precedence is the order in which you want the source data to be assessed. For instance, we have common data fields in both the sources, but different and missing records. We can set appropriate precedence value to bring data from the desired data source.
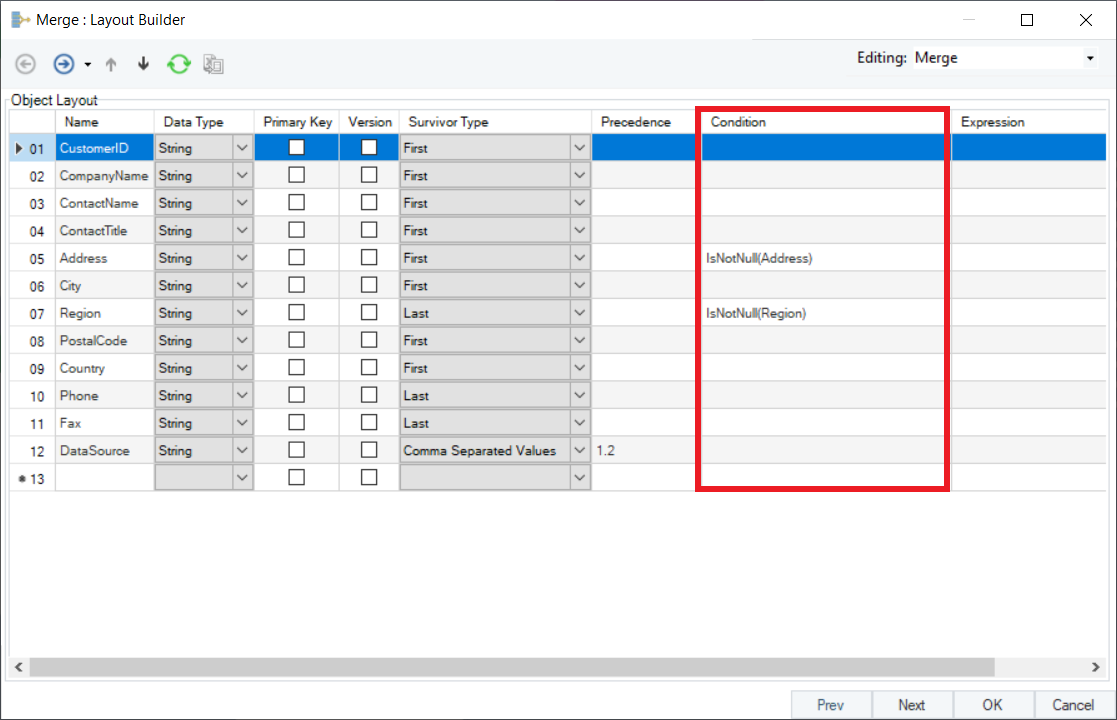
10. Next, you can set a specific condition, and the Merge transformation will process records based on the criteria specified for a particular field.
(In this case, we have specified ‘IsNotNull’ for Address and Region fields since we want none of these fields to be empty or have missing records.)
11. Depending on the requirements of the business case, you can add a logical expression in the ‘Expression’ field to process the incoming data value and transform it into the output according to the logic defined. Expression field can be used for mathematical and financial calculations, date and time manipulations, comparisons and conversion functions.
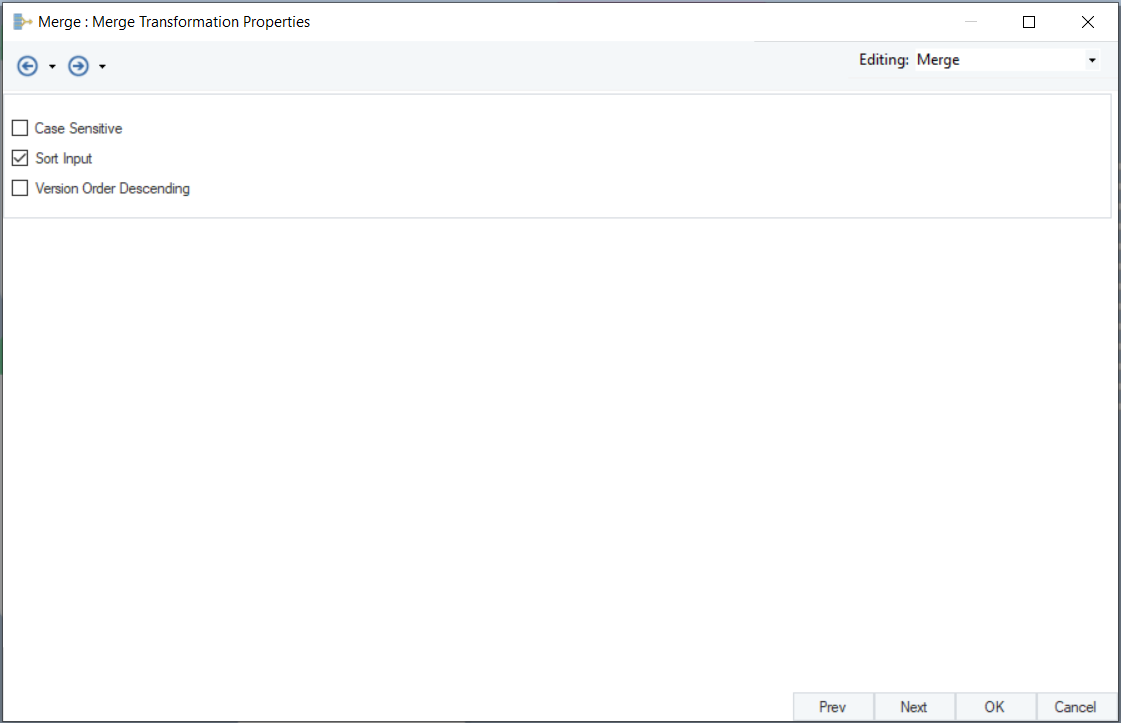
12. Click ‘Next’ to proceed to the ‘Merge Transformation Properties’ Here, you will see the following three checkboxes:
- Case Sensitive – check, if data is to be assessed on a case-sensitive basis
- Sort Input – check, if the incoming data is not already sorted
- Version Order Descending – check, if you want the data to be sorted in a descending version order
13. Click ‘Next’ to proceed to the General Properties window. Here, you can add comments, instructions, or any relevant information about the transformation. This won’t change or alter your transformation action in any way.
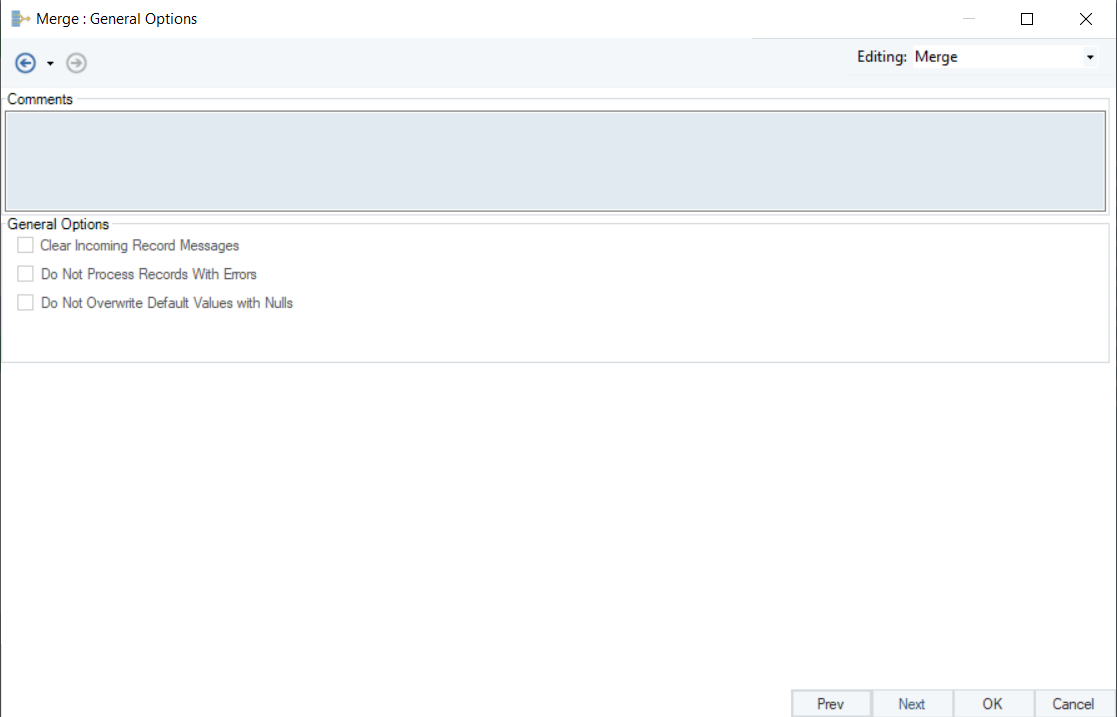
You may also skip this step by clicking ‘OK’ in the previous step (on the Merge Transformation Window) to close the transformation properties window.
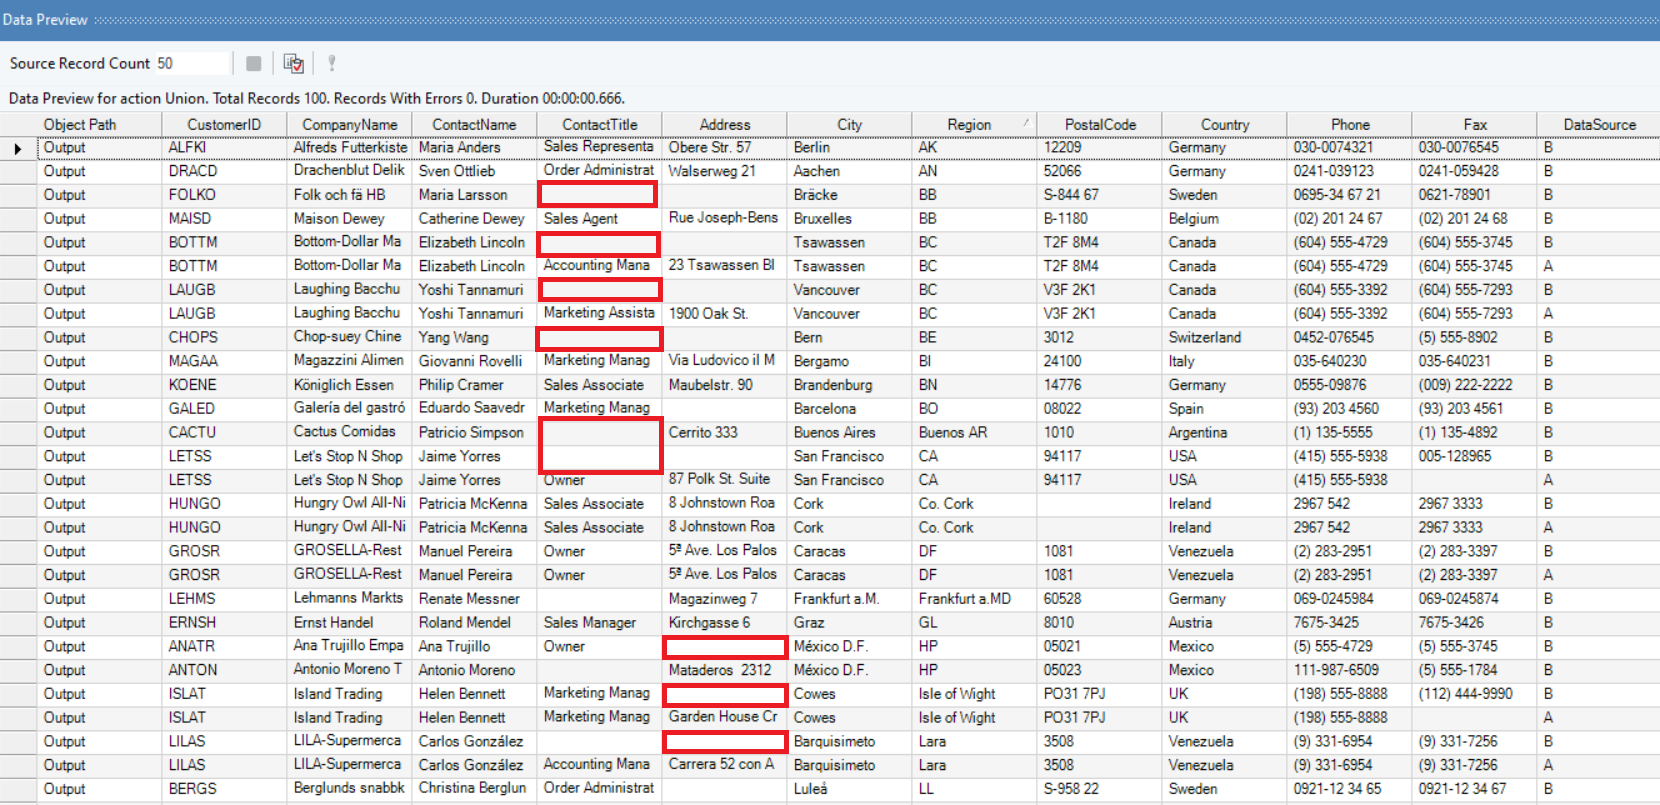
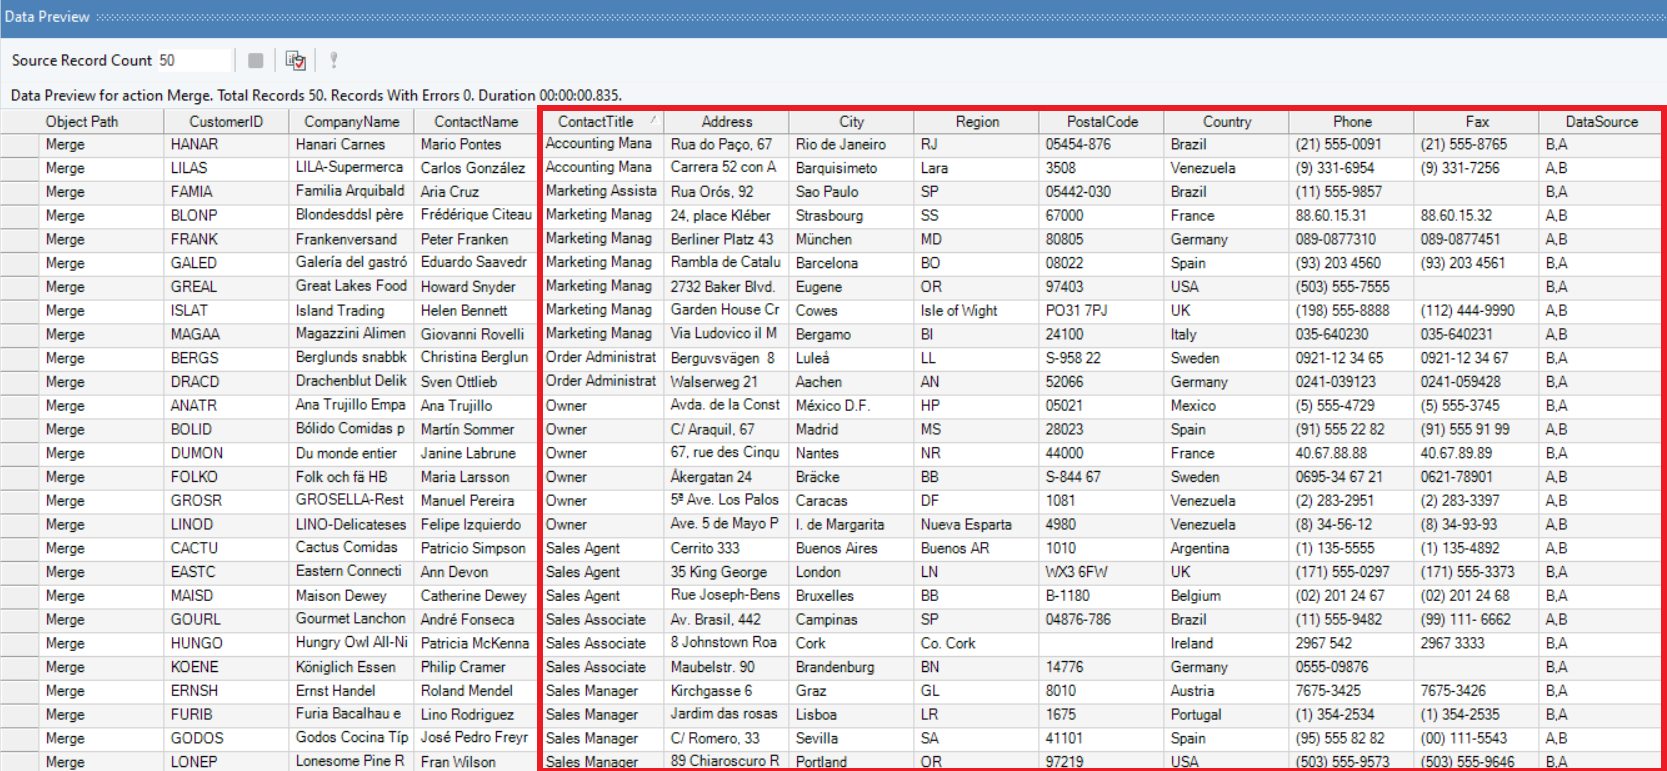
14. To get the output, right-click on the Merge transformation object, and click on ‘Preview Output.’ You will get the merged records based on your specified transformation properties.
Data Preview before applying Merge transformation:
Data Preview after applying Merge transformation:
Usage and Benefits
Merge transformation can be applied in cases where data is sorted into different records. Centerprise makes it extremely convenient for users to get consolidated data that is stored in different sources, while also allowing them the flexibility to choose how the output should look like, through the various transformation properties.