Role-Based Access Control in Astera Centerprise
In many business scenarios, Centerprise client is used by multiple users within an organization, each with a different skill set and job role. Addressing the need for security and access control in such cases, we have implemented a robust role-based security control mechanism in Centerprise 8 that enables administrators to define user roles and assign all the resources they need.
Default User Roles and Assigned Resources
Astera Centerprise 8 is shipped with three standard roles, each with a pre-defined level of access to resources. These roles are Root (Super User), Developer, and Operator. Each role has access to a set of URLs (REST APIs) and UI Commands relevant to the type and nature of their job. The URLs allow accessing the feature/functionality via a REST API call. Whereas the UI commands allow users to see the enabled features and functionalities on the client UI
The permissions and access can be modified for each role by a Super User with admin privileges. Moreover, new roles can be created with custom permission sets. A new role can be quickly created by copying the permissions of an existing role, which greatly simplifies a custom security setup.
Here are the three default role types described in detail.
Root (Super User or Admin)
The Super User has complete access to all types of resources available via REST API URLs and the client user interface (also known as UI commands). The Super User also has the administrative authority to create, edit, and modify other roles as well as grant, revoke or customize access to available resources. You can assign Super User (Root) access to more than one user in Centerprise.
Developer
This role has access to all the APIs and commands required for designing ETL and ELT flows, workflows, report mining, query writing and editing, XML editor, mapping editor, data validation and profiling, as well as deployment. This is to allow users with developer access to design, modify, schedule dataflows, workflows and deploy projects on the server. Moreover, they can modify other scheduled jobs on the server, but do not have the permission to delete them. Some of the resources assigned to the Developer role by default are listed below:
REST API URLs
- Jobs
- Schedules
- Cluster
- Events
- Deployments
- Preview
- Event
- Functions
- Partial access to DB and ServerInfo APIs
You can access Centerprise’s REST API documentation on the following link:
Commands
Design Tools
- *Dataflow* – commands to execute dataflows, create new dataflows and subflows
- *Workflow* – workflow UI commands such as Execute, Stop, Pause, etc.
- *QueryEditor* – query editor commands for foreign/primary key drop, key script create, key script drop, create new query, open query, connect or change connection, increase/decrease indent, execute, etc.
- *XMLEditor* – XML editor commands to format, create new XML/XSD file, new text file, load, clear, and generate schemas
Monitoring UI
- *Trace* – job trace commands to show error info, export trace, find error, error navigation, show SQL statement, etc.
- *Output Control* – clear output command
- *ServerMonitor* – commands for Server Monitor features
- Server Log – commands for server activity and jobs run
- *JobStatus* – workflow job monitor command
Mapping Commands
- *dbConnectionMapsCommands* – database connection maps commands such as add, remove, edit, etc.
- *ServerPathMapping* – add, delete, save, export, import server path mapping
- *MapProperties* – commands for different mapping types and properties (one-to-one, one-to-many, many-to-one)
- *MapEditor* – mapping commands
Scheduler
- *ScheduleFile* – schedule new file command
- *Scheduler* – commands to add, run, remove, save, refresh, import, or export a scheduled task
- *SchedulerLog* – Scheduler log refresh and delete all commands
Operator
The Operator role has been designed for a user responsible for deploying, scheduling, and monitoring jobs to run on the target server. An Operator, by default, is assigned the least level of access presets compared to other role types. They have permission to access commands and REST APIs required to view and export job trace, refresh job lists, manage and track runtime instances of jobs, and execute jobs scheduled on the server.
The Operator role, by default, has access to the following resources:
REST API URLs
- Schedules
- Events
- Deployments
- Partial access to Account, Jobs, Cluster, and Server APIs
UI Commands
- Output Control
- Deployment
- Scheduler
- Partial access to File, Window, QueryEditor, Trace, Server, Server Monitor, and QueryPreview
Accessing Resources Assigned to a Role
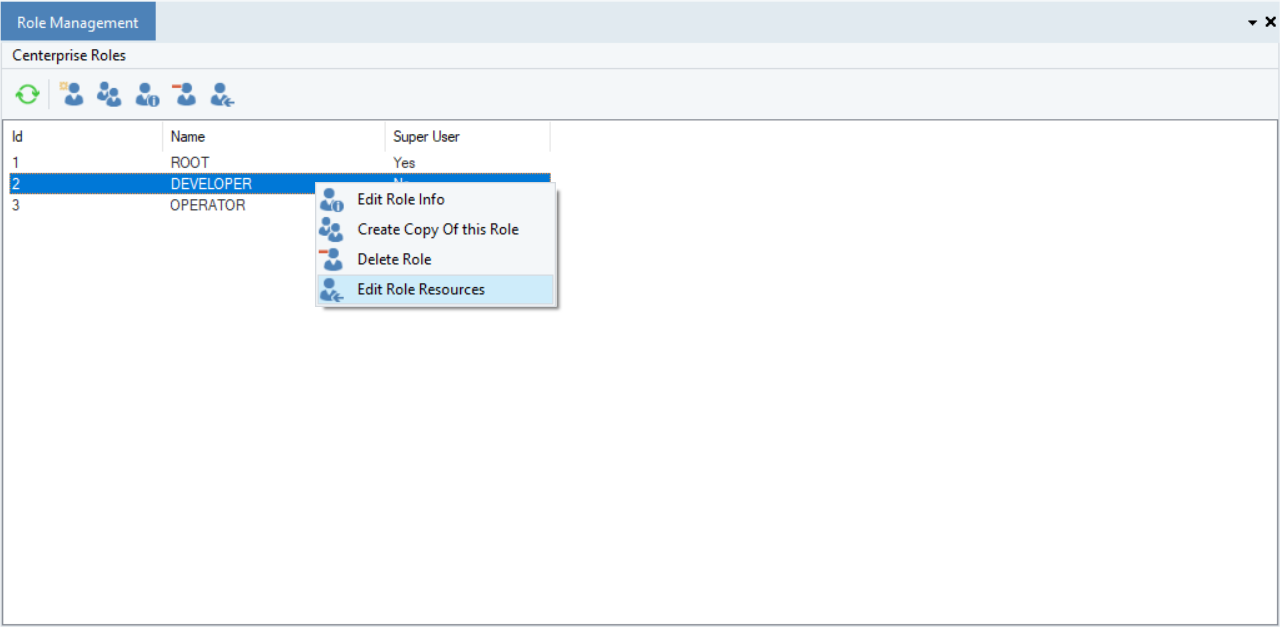
A user with ROOT access has the ability to add, edit or restrict access to resources for any role. To access resources assigned to a role, right-click on any Role in the Role Management window and select ‘Edit Role Resources’ from the context menu. You can open the Role Management window by going to Server Explorer > right-click DEFAULT > Role List.
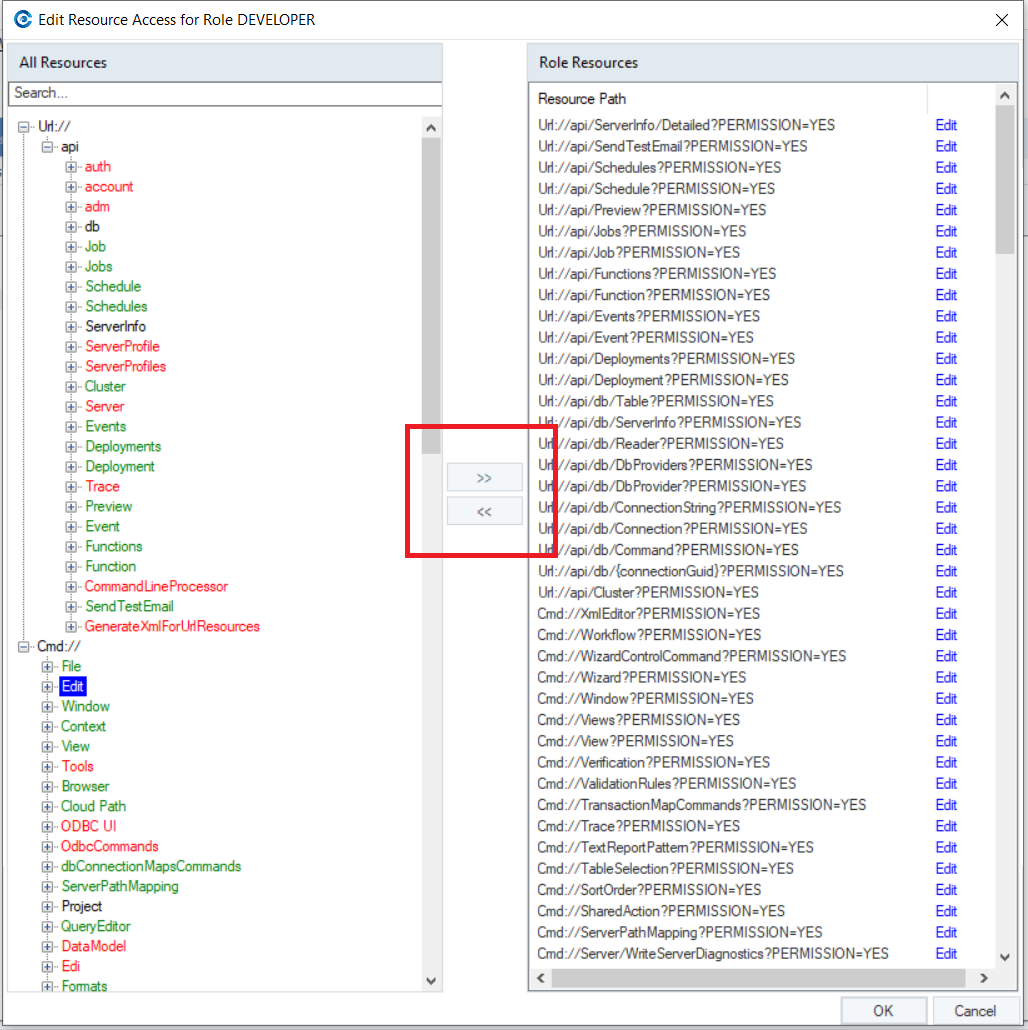
Here, we’re accessing resources assigned to the DEVELOPER role.
This will open a new window where you can edit and modify resource access for the selected role.
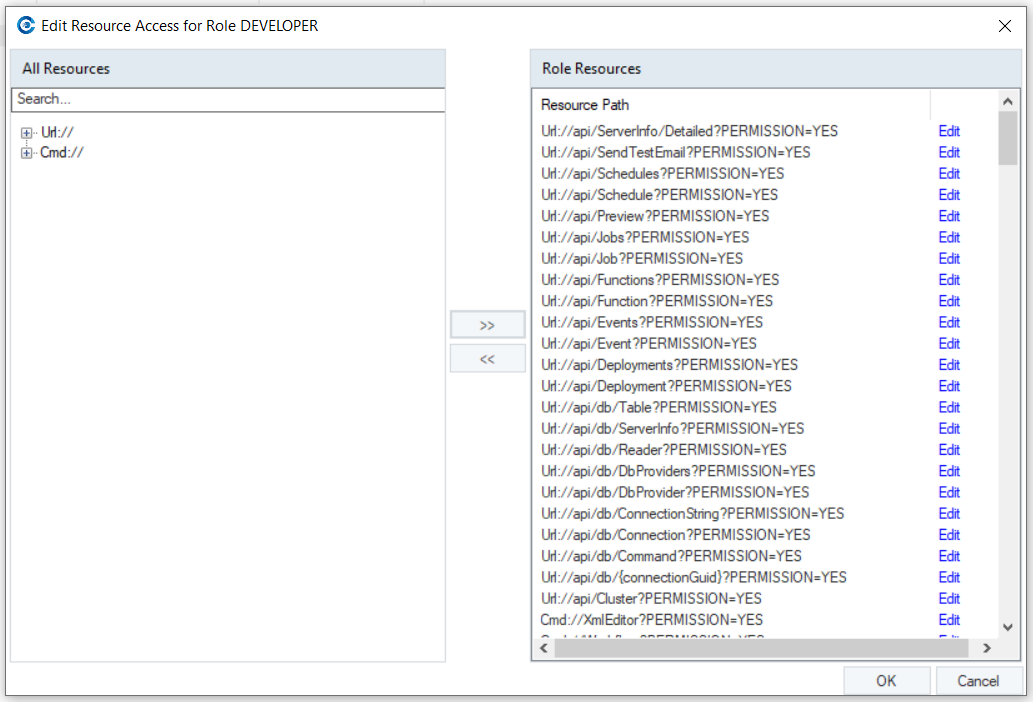
There are two panels on this screen.
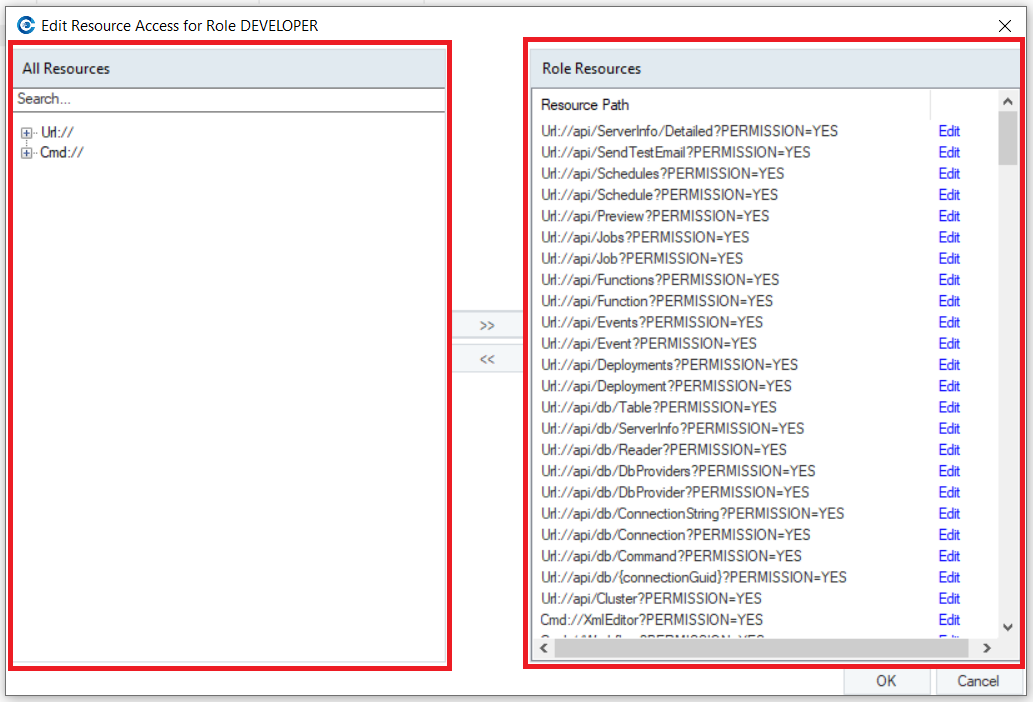
The left panel contains two main nodes:
Url:// - allows accessing the feature/functionality via a REST API call. For instance, ServerInfo can be accessed via the following REST API call:
HTTPS://$servername:9260/api/adm/ServerInfo
Cmd:// - enables users to see the enabled features and functionalities on the client UI
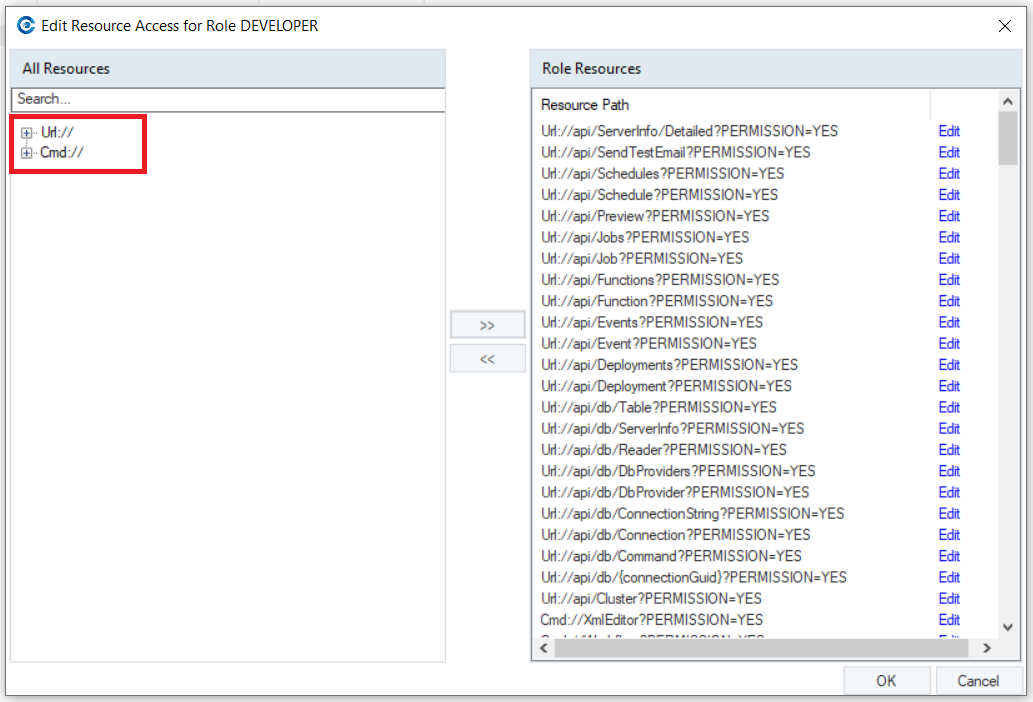
If we expand these nodes, you can see that the panel contains all the resources available in Centerprise.
You will see that the resources listed in this panel appear in three different colors. The color scheme is to distinguish between what resources have been enabled, disabled, or partially enabled for a role.
- Red: Denotes that the resource has been restricted for the role.
- Green: Denotes that the resource has been enabled for the role.
- Black: Denotes that the resource has been partially enabled, with limited access to some features.
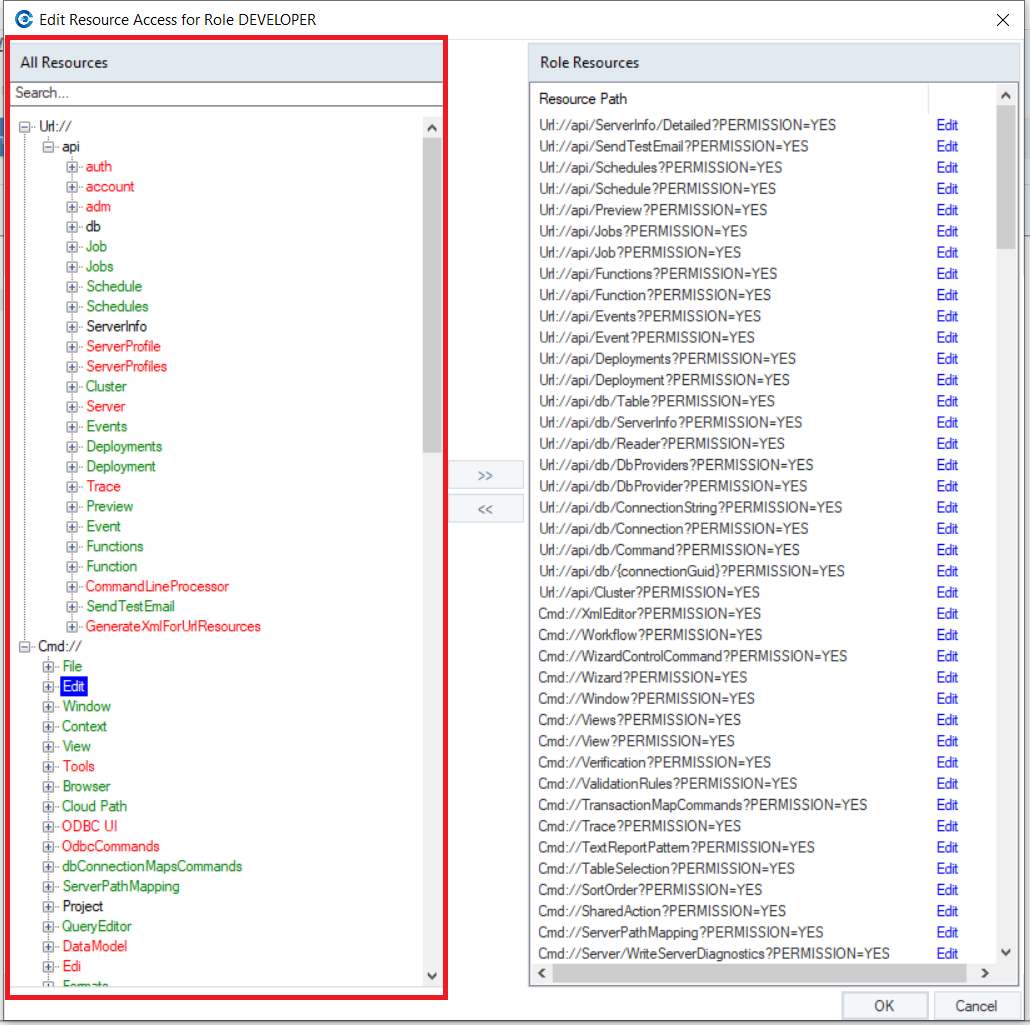
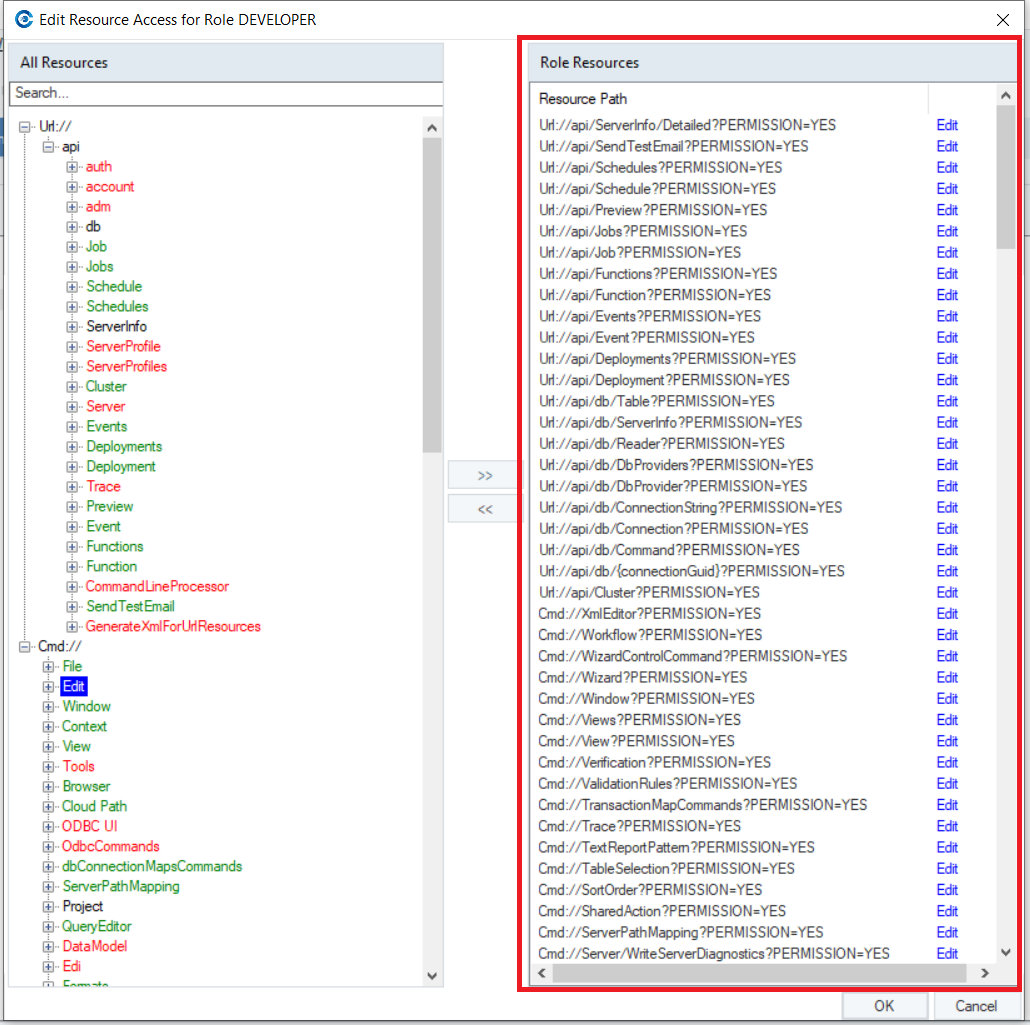
The right panel lists all the resources assigned to a role.
To disable access to a resource, right-click on that resource in the Role Resources panel and click Disallow.
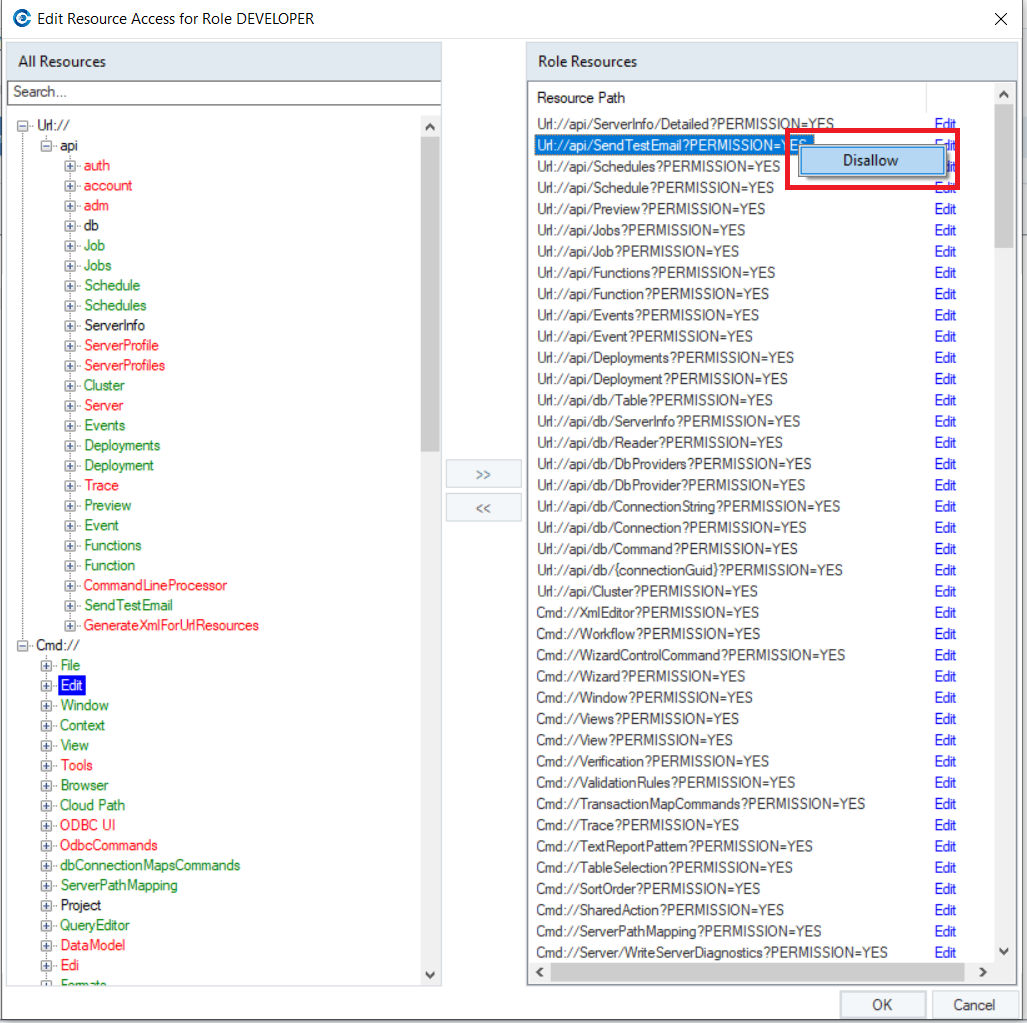
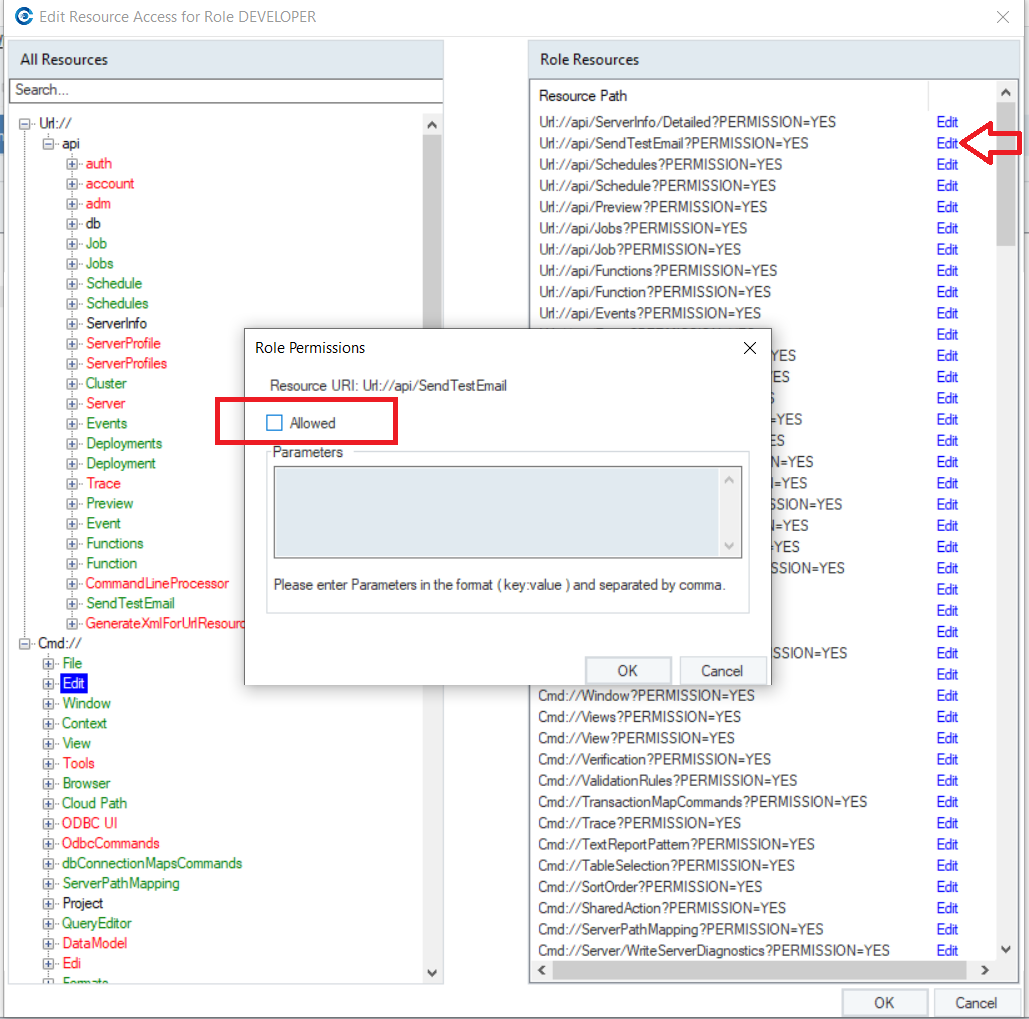
This will disable the selected resource for the user role. Or you can click on the Edit link next to a resource and uncheck the Allowed option, to disable access to a resource.
You can also permit or remove access to resources using these buttons.
URL and CMD Resources Available in Centerprise
REST API URLs
You can access Centerprise’s REST API documentation on the following link:
https://localhost:9260/swagger/index.html
CMD
- *File* – File menu commands, such as Print, Save, SaveAs, SaveAll, Close, FileExit, etc.
- *Edit* – Edit menu commands, such as Cut, Copy, Undo, Find, etc.
- *Window* – designer windows, tabs, dockable panels
- *Context* – context info commands such as copy path, open folder, etc.
- *View* – View menu commands
- *Tools* – Tools menu commands
- *Browser* – Browser commands (Home, Next, Previous, Refresh, Stop)
- *CloudPath* - CloudFilePathCommandConnect
- *ODBC UI* – ODBC UI commands base and connection string commands
- ODBCCommands – ODBC drivers and connection string commands
- *dbConnectionMapsCommands* – database connection maps commands such as add, remove, edit, etc.
- *ServerPathMapping* – add, delete, save, export, import server path mapping
- *Project* – project-related commands
- *QueryEditor* – query editor commands
- *DataModel* – data model commands
- *EDI* – new custom repository, new partner profile
- *Formats* – format maintenance command
- *Development* – development commands to write built-in function, localization, reset package and language picker flag, load and save new colors, generate XML for URI-securable and command-securable resources
- *General Editor* – general command toggle binary mode
- *XmlEditor* – XML editor commands
- *Wizard* – run transfer wizard commands
- *Workflow* – workflow UI commands such as Execute, Stop, Pause, etc.
- *Session* – add a new session, execute session command
- *Dataflow* – dataflow commands
- *Packages* – SFToCRMPackageCommand
- *Resource list command* – show details, refresh resource list
- *ListEditor* – add, remove, save list editor commands
- *Trace* – job trace commands
- *JobStatus* – workflow job monitor command
- *Server* – commands to deploy, schedule, run and remove jobs on server
- *ServerMonitor* – commands for Server Monitor features
- *Views* – toolbar button edit filter
- *Output Control* – clear output command
- *Flow* – flow UI commands
- *Data Mart Tree* – remove, add, rename data mart tree commands
- *DataModelBrowser* – commands for Data Model Browser features
- *EntityList* – base, select all, deselect all entity list controls
- *Data Model Mapping* – data model mapping commands
- *Data Model Sync* – commands for data model sync maps
- *DbBrowser2* – commands for Data Model Browser features
- *Lineage* – commands for data lineage and impact
- *LoadSettings* – new load settings command
- *ScheduleFile* – schedule new file command
- *SharedAction* – create a new shared action command
- *OLAPViewer* – edit, refresh, preview, print, show, stacked, chart totals commands for OLAP viewer
- *ReportMining* – UI commands for report mining features and functionalities
- *TextReportPattern* – alpha, digit, alpha digit, whitespace, non-blank text report commands
- *ConditionRules* – add or remove condition rules
- *Build Layout* – build output layout command
- *WizardControlCommand* – next page, previous page, go to page commands
- Export – commands to write transfer to Excel
- *QueryBuilder* – features, and options in query builder (show filter, sort order, where clause, add and remove a filter, add sort, refresh data model)
- *PickTable* – add tables, stop add, select and deselect all
- *CDC Table* – create all, script all CDC table
- *TableSelection* – table selection commands to show views, select and deselect all
- *List View* – base, add, edit, and delete command for list view
- *AsteraDataGridView* – copy all, delete, find, export to Excel
- *AsteraUltraGridView* – delete, find, ExportToExcel
- *Diagram* – flow diagram commands for auto-layout, collapse, expand all, and various types of zooms
- *Preview* – data preview commands
- *NodeMetaTree* – add segment, element or composite element reference, move up and down, add EDI group, delete meta
- *TransactionMapCommands* – add or delete transaction maps
- *EDIPartnerCommands* – commands to generate test data file
- *EDIMaintenanceCommands* – save, delete, verify an item
- *EDIValidationRuleCommands* – move EDI validation rules up and down
- *EDIValidationCommands* – commands to add, edit, delete EDI validation
- *LayoutGrid* – copy value to all fields
- *MapProperties* – commands for different mapping types and properties (one-to-one, one-to-many, many-to-one)
- *MapEditor* – mapping commands
- *Object Node* – expand or collapse objects on designer
- *Layout Tree* – commands to sort the layout in the alphabetical or original order
- *Profile* – data profiling commands
- *QueryPreview* – commands to show, copy, and refresh queries
- *SortOrder* – add or remove the sort order
- *Filter* – filter commands for the query builder
- *Sequences* – commands to add, save, remove or modify sequences
- *ValidationRules* – data quality commands
- *Verification* – commands to verify flows before execution
- *Deployment* – commands to import, export, add, save, or remove deployments
- *PathInfoReplacementCommands* – path info parameter commands for base, ApplyToAll, Discard, SwitchModeToGrouped, and SwitchModeToListView
- *Scheduler* – commands to add, run, remove, save, refresh, import, or export a scheduled task
- *SchedulerLog* – Scheduler log refresh and delete all commands
This concludes a round-up of role-based access control in Astera Centerprise. Click here to read more on how to create a new role and assign resources in Astera Centerprise.