Authorizing ActiveCampaign API in Astera Centerprise
The ActiveCampaign API is structured around REST, HTTP, and JSON. You can make requests by using URL endpoints particular to a specific resource. The resources in ActiveCampaign are represented in JSON following a conventional schema. In Astera Centerprise, you can configure an ActiveCampaign API using the Import API option present in the REST API Browser.
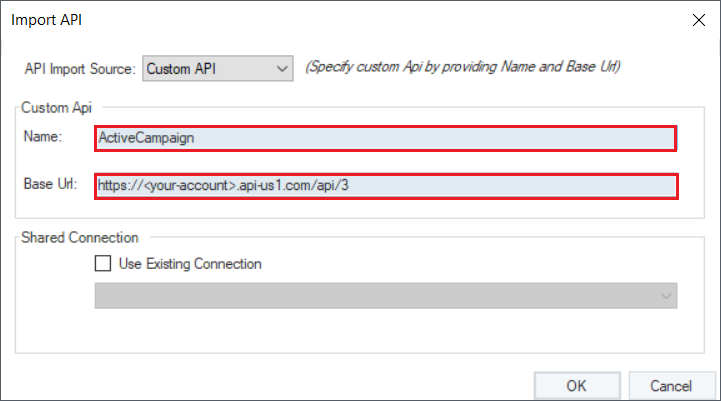
ActiveCampaign doesn’t provide an Open API definition so we will add a request manually by using a Custom API in Centerprise.
To authorize an ActiveCampaign API in Centerprise, follow these steps:
1. Create an integration project in Centerprise by following the instructions provided in this article.
2. Create a custom API and provide Base Url. To learn more on how to work with Custom APIs in Centerprise, click here.
Reference link for Base Url: https://developers.activecampaign.com/reference#url
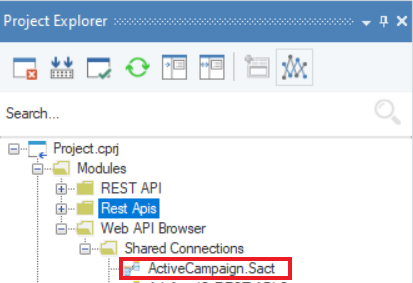
3. Now, you need to authenticate the ActiveCampaign APIs to use them in your dataflow. Without authentication, you will get an error. To authenticate an API, go to the Project Explorer and double click on the API’s .sact file under the Shared Connection node.
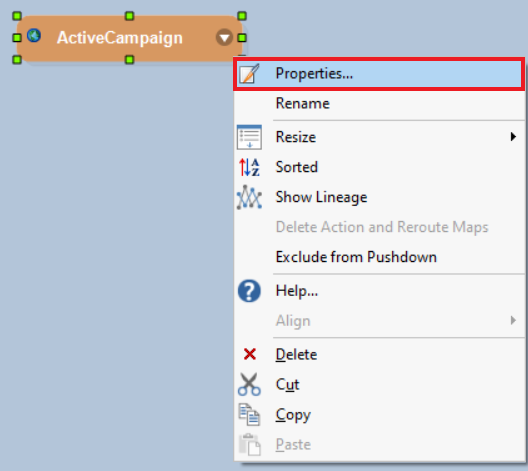
The ActiveCampaign .sact file will open on the designer. Now, right click on shared action file’s header and select Properties.
4. ActiveCampaign uses an ‘API Key’ as Security Type. Specify your Key and Value.
Key: API-Token
Value: {Token}
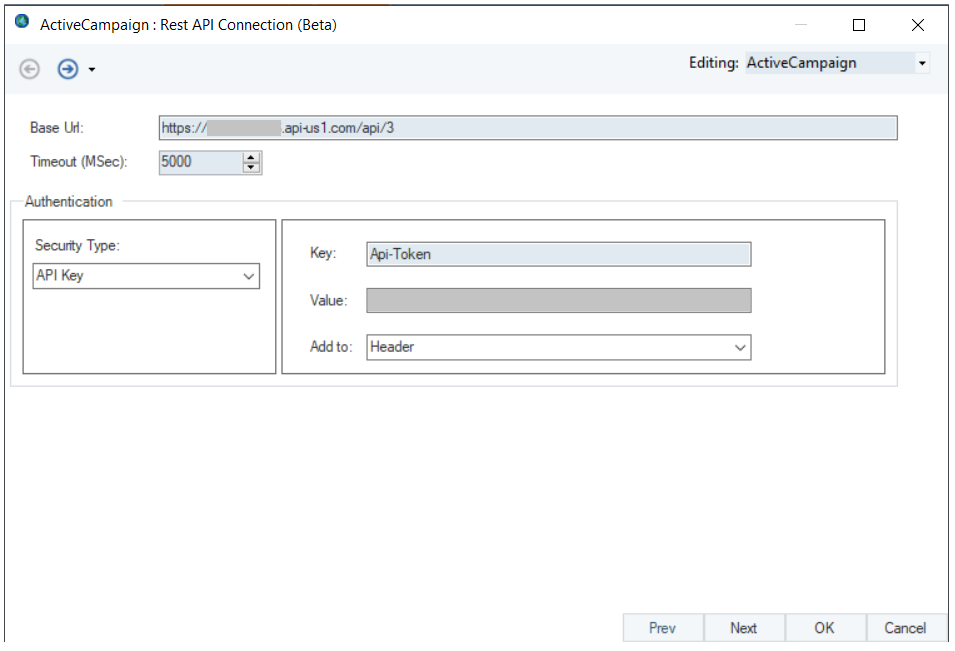
5. Click OK and save the shared action file (.sact).
6. Add methods in REST API Browser panel which you want to use in Centerprise by adding requests and you are ready to use the ActiveCampaign API in Centerprise. You can learn more about it in this document.
This concludes authorizing the ActiveCampaign API in Astera Centerprise.