Source Diff Processor
Source Diff Processor is one of the Database Write Strategies offered in Centerprise. It works like Database Diff processor, however, unlike the Database Diff processor, it is used to perform write actions (such as Insert, Update and Delete) on file destinations. It stores a snapshot of your data processed in the first run in a CDC file. So, the next time you run it, it will only import the new records.
Use Case
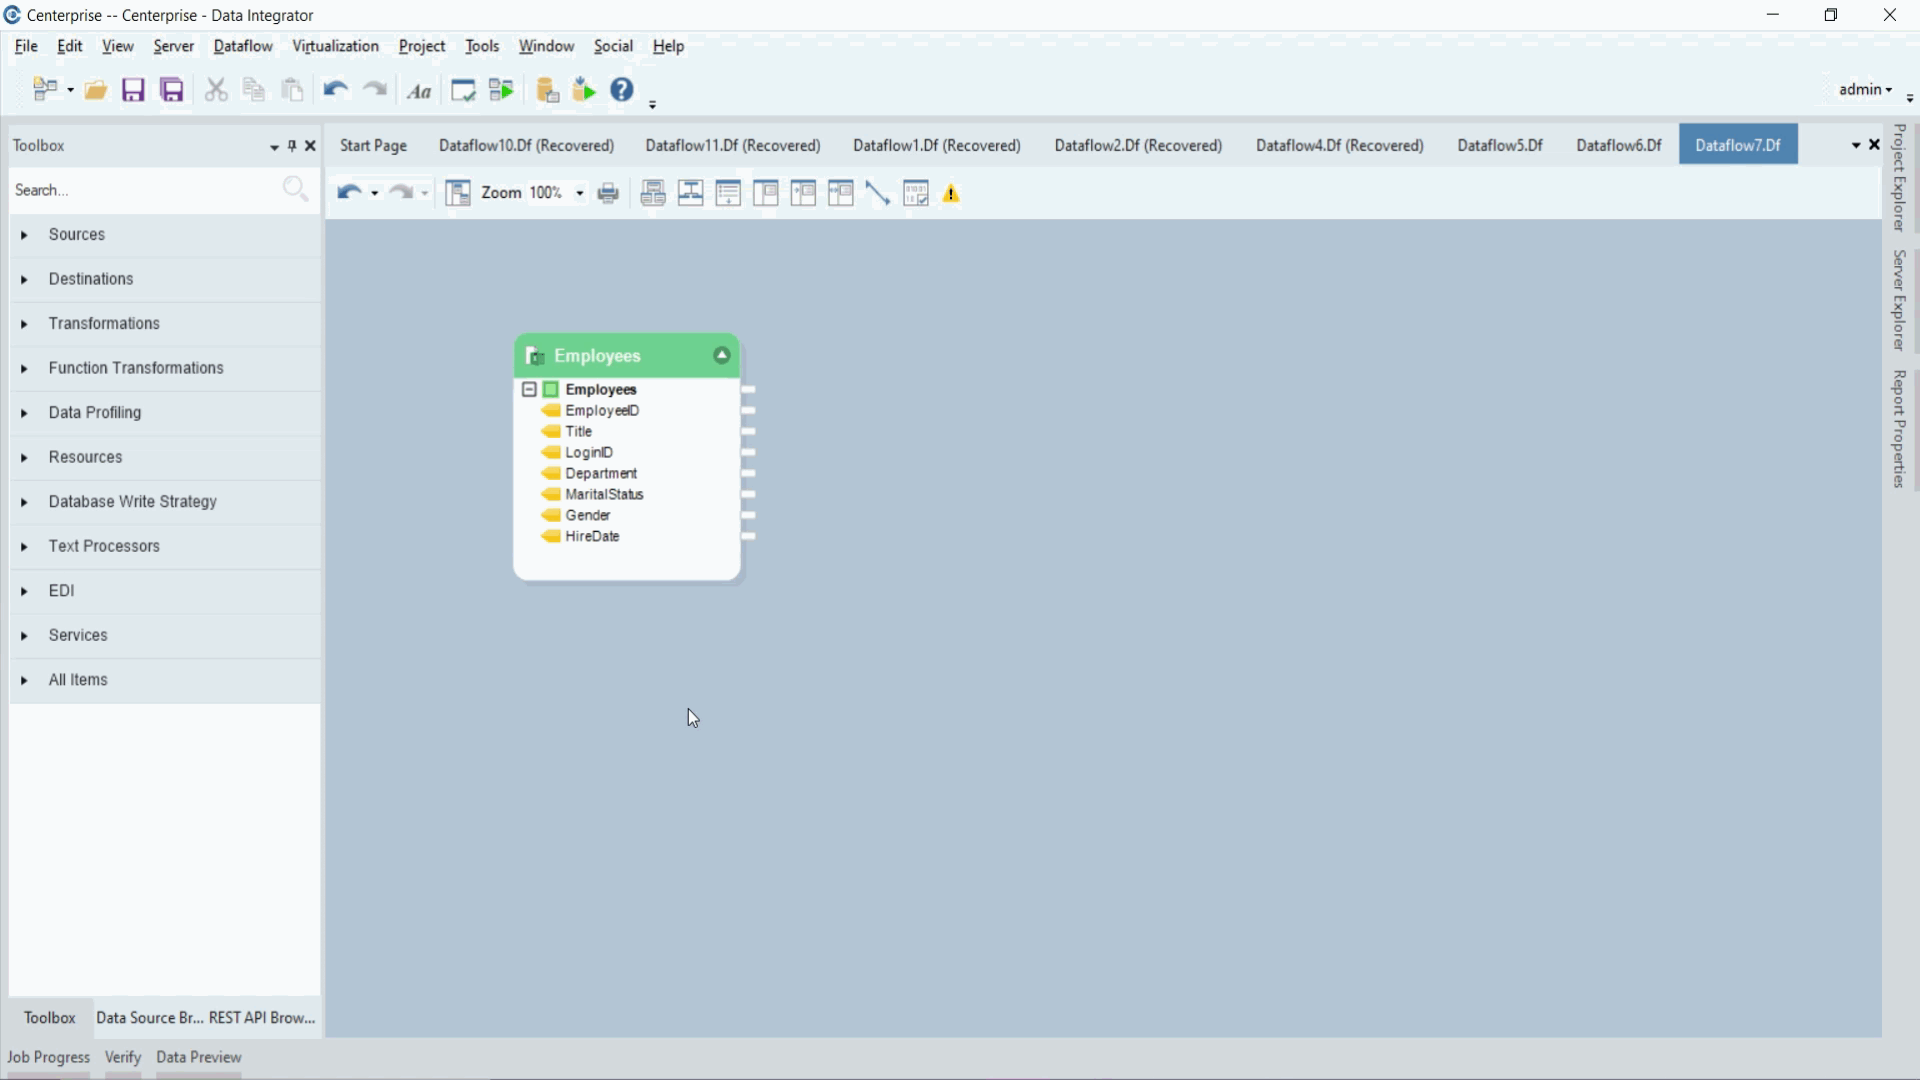
We have a sample employees data coming in from an Excel source. Initially, we had records of 10 employees but later on, 2 more were added in the source dataset. We wish to apply a database write strategy that can read the data incrementally from file sources. To achieve that, we will use the Source Diff Processor in Astera Centerprise.
How to Work with Source Diff Processor
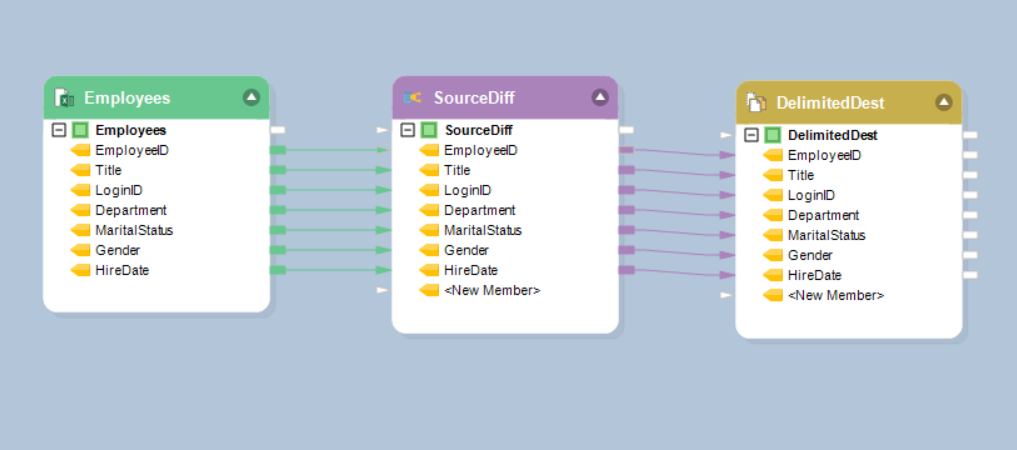
1. Drag and drop the Source Diff Processor object from Toolbox > Database Write Strategy > Source Diff Processor on to the dataflow designer and map the source data to it.
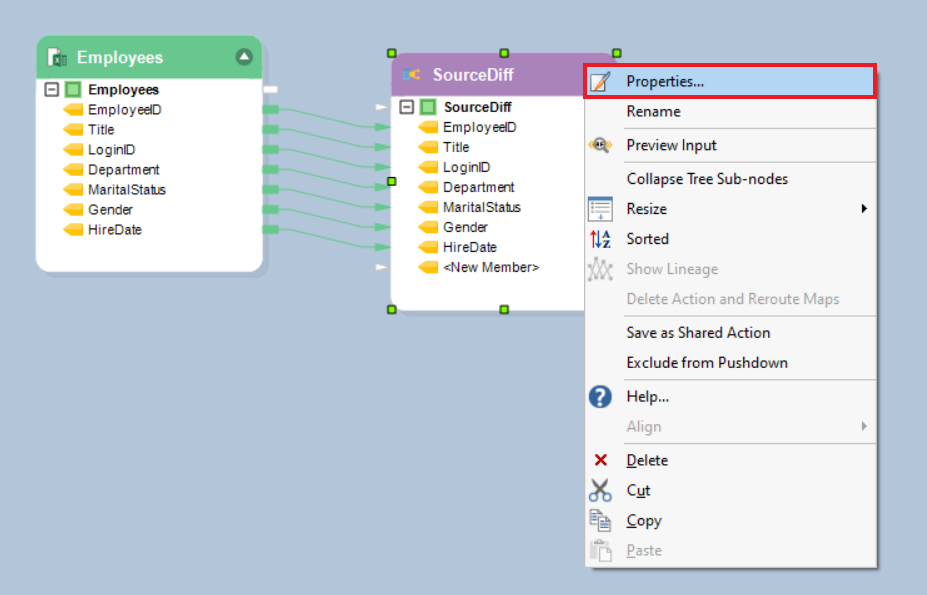
2. Right click on the Source Diff Processor’s header and select Properties.
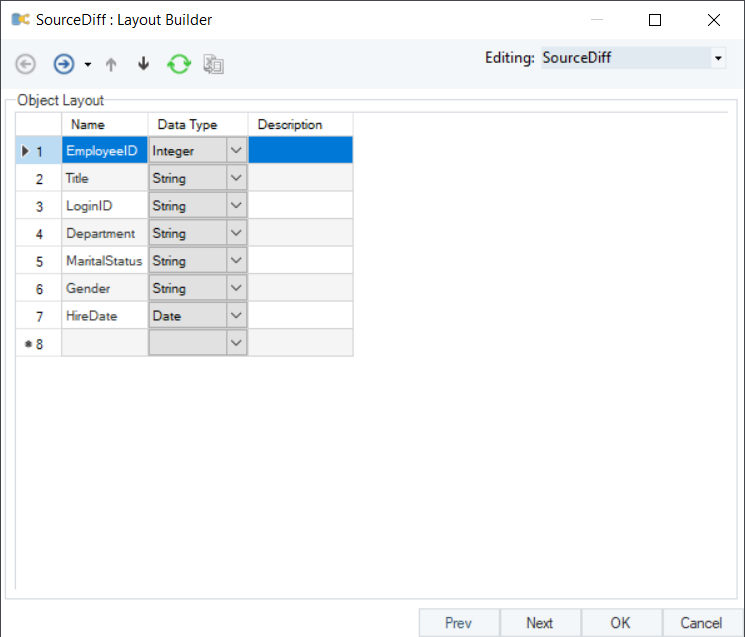
3. A Layout Builder screen will open where you can modify your layout. Click Next.
4. The next screen is be the Incremental Write Options screen.
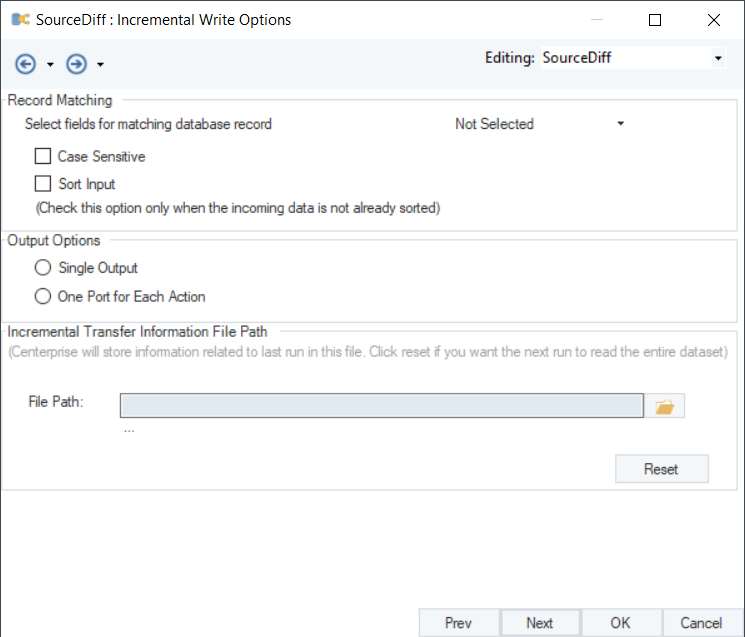
Here, you have to specify the Record Matching Field. The Record Matching Field is used to match and compare the incoming and existing records. We will select EmployeeID as the Record Matching field.
Case Sensitive – check this option if you want to compare records on a case sensitive basis.
Sort Input – check this option if you want to sort the incoming data.
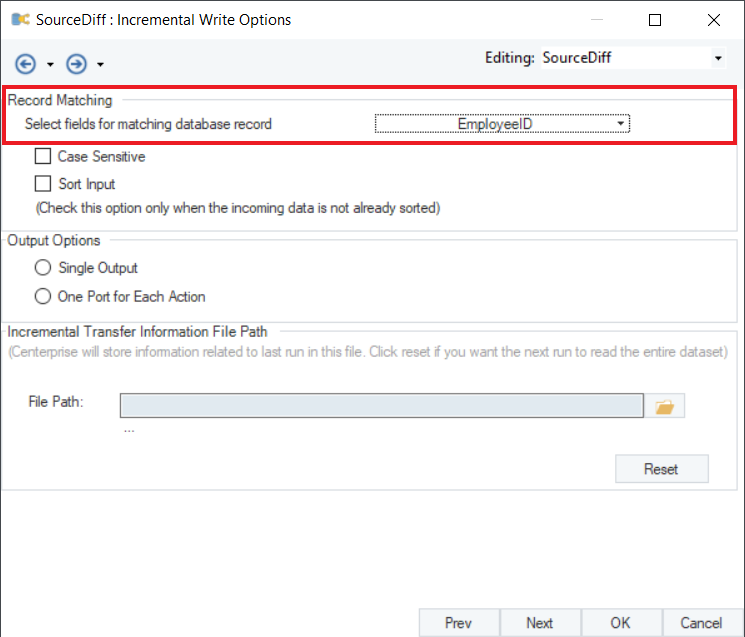
- Now, if the incoming dataset has a new record with a new EmployeeID i.e. the ID is not present in the existing file which is being compared against the incoming file, Centerprise will perform the INSERT action.
- If the EmployeeID is already present in the existing file, Centerprise will compare the records against that ID and will perform UPDATE action in the fields where the information has updated.
- If the EmployeeID is there in the existing file, but not present in the incoming file, it means that the particular record has been deleted. In this case, Centerprise will perform the DELETE action.
In the Output Options section, you can either select the Single Output option or One Port for Each Action.
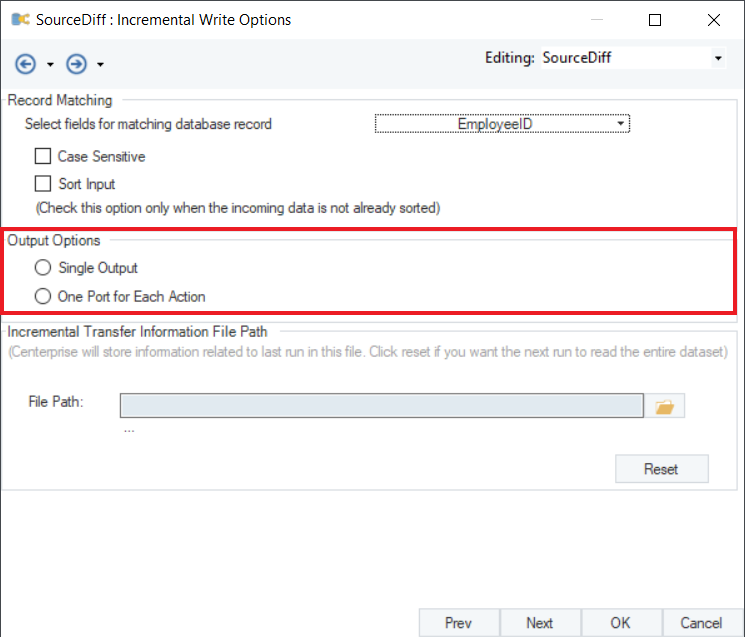
Single Output:
Single Output option is selected if you wish to load your data into the destination without modifying it further on the basis of individual write actions. If you select Single Output, the database action such as INSERT, UPDATE, SKIP or ERROR will be chosen by the database write strategy’s logic rather than specified by the user. Using a single output is recommended when a database write strategy is applied.
One Port for Each Action:
One Port for Each Action is used when you want to further transform or log your data. If you select One Port for Each Action, you will get separate nodes for each Diff action in the Source Diff Processor’s object.
In this example, we will select Single Output.
The third section on the Incremental Write Options screen is the Incremental Transfer Information File Path option. Here, you specify the file path where you want to store information related to the last run.
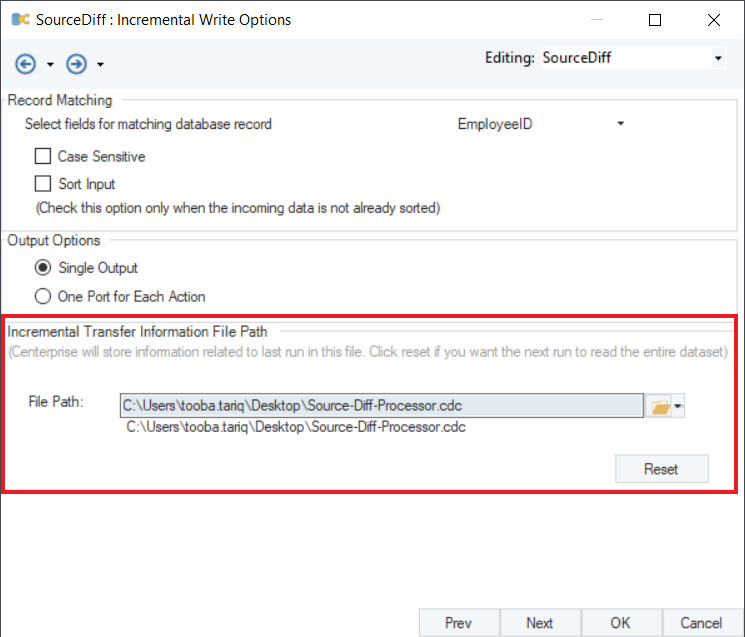
Now if you have worked with Excel and Database table sources in Centerprise, you would have noticed that the Database table source object gives you the option to read incremental changes. However, no such option is available in Excel or other file source objects. This option here in Source Diff Processor enables you to read incrementally from different file formats such as Excel, delimited, and fixed length.
Click OK.
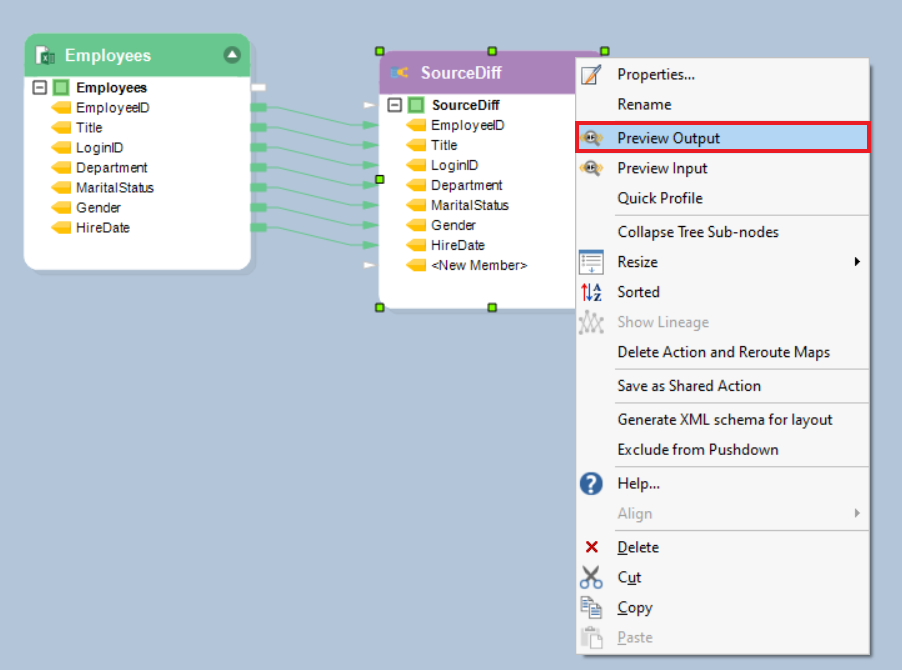
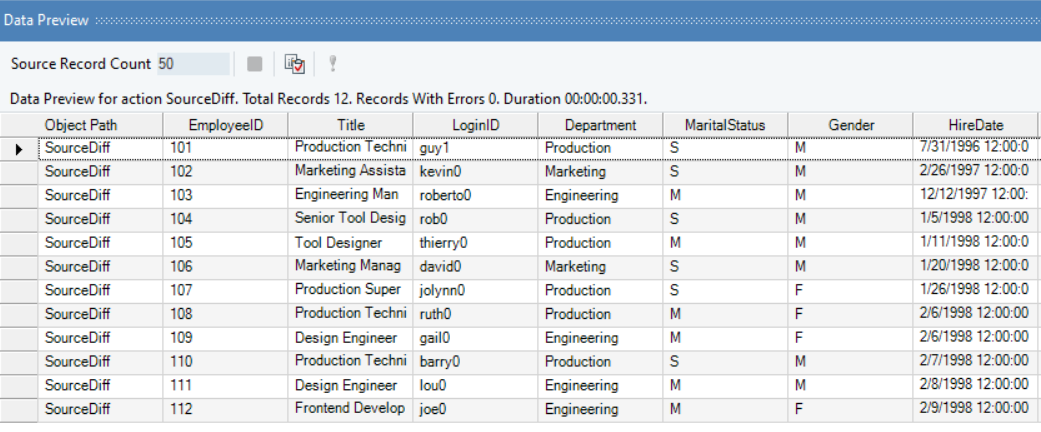
5. Now, right-click on the Source Diff Processor’s header and select Preview Output.
Output preview for Single Output:
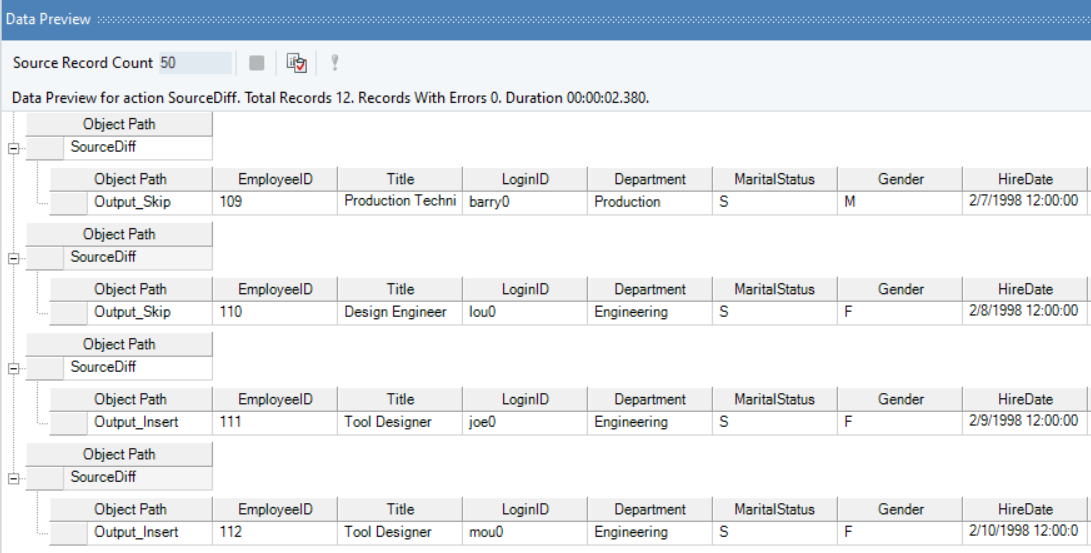
Output preview if One Port for Each Action is selected:
You can now write your data to any destination or perform any transformation on the dataset.
This concludes using the Source Diff Processor write strategy in Astera Centerprise.