Using Astera Centerprise to Create and Orchestrate an ETL Process for Partner Onboarding
The secret to enterprise success lies in the expansion of business networks in a way that maximizes operational efficiency. These networks include suppliers, resellers, vendors, and countless other business partners that provide an open door to vast markets that are inaccessible through in-house logistics alone. However, to secure these advantages, the external data coming in from these partners should be integrated through an efficient, reliable, and scalable process. With Astera Centerprise, you can achieve exactly that.
In this article, we will be looking at a detailed use case that showcases the effectiveness of Astera Centerprise in Partner Onboarding.
Use Case
Wheel Dealers, an online automotive marketplace, will be the subject of our discussion. The WD portal provides customers with a comprehensive list of available cars from multiple different dealerships, with added options to compare features, prices, and other services. The company currently serves over one million customers and acquires data from over 200 different dealerships across New England and the Mid-Atlantic, with tentative plans to add a thousand new vendors from the Midwest and Northeast.
At the moment, Wheel Dealers runs a manual ETL process that requires ample time and resources. Moreover, with major expansion plans in the pipeline, this approach will not suffice in the near future. Using Astera Centerprise, we will be designing an automated data integration solution that extracts data from disparate sources with minimal manual intervention, thus providing Wheel Dealers with a seamless Partner Onboarding experience.
This implementation of an ETL process will employ the use of numerous items/features available in Centerprise, such as the following:
- Dataflow
- Excel Workbook Source
- Variables
- Data Cleanse Transformation
- Data Quality Rules
- Database Table Destination
- Record Level Log
- Workflows
- File Transfer Action
- List FTP Directory Contents
- Expression
- Run Workflow
- Context Information
- Run Dataflow
- Job Scheduler
A Dataflow will be used to create the ETL process, whereas two Workflows and the Job Scheduler will be used to orchestrate it.
Let’s take a detailed look at the methodologies being used.
Creating a Project
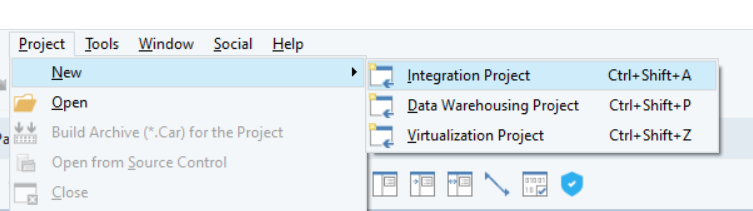
All of the items being used will be consolidated in one Project. To open a new Integration Project in Centerprise, go to Project > New > Integration Project.
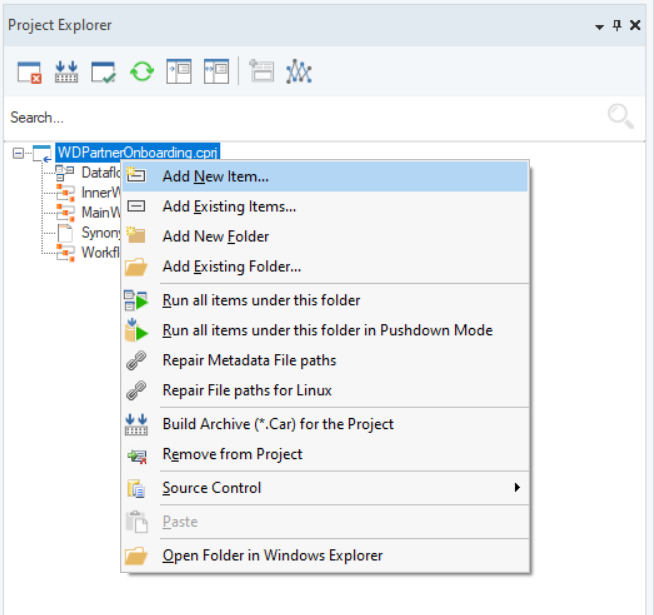
You can add new items to the Project by right-clicking the Project tab and selecting Add New Item.
Creating the ETL Process
As mentioned earlier, we will be creating this ETL Process in one Dataflow[AK1]. The Centerprise Toolbox is packed with various source, destination, and transformation objects that can serve numerous different purposes. For Wheel Dealers, we want to design a system that captures data, presents it in a refined manner[AK2], and uploads it to the dealer database.
Capturing Data
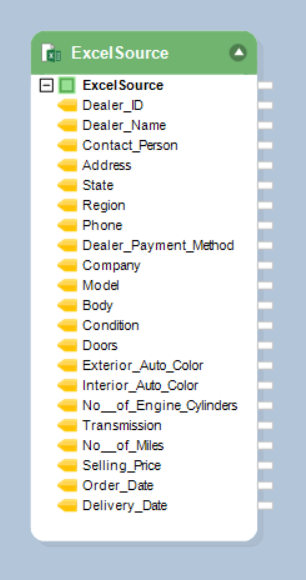
For this demonstration, we will be using an Excel Workbook Source object to capture the partner data. We are assuming that all of the incoming data is in an Excel format. However, any other source object could have been used depending on the nature of the incoming files.
1. While the actual source files will be coming in from an FTP server, we will configure the source object through a template file. This will populate the object with all of the required fields.
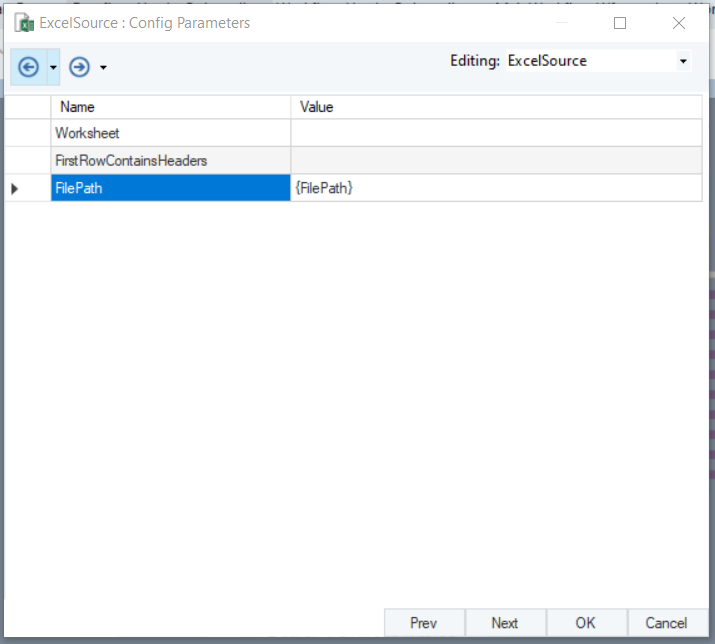
2. To ensure that the source object picks up the files that are received from the FTP server, we will define a different file path at runtime by using the Config Parameters screen in the configuration window.
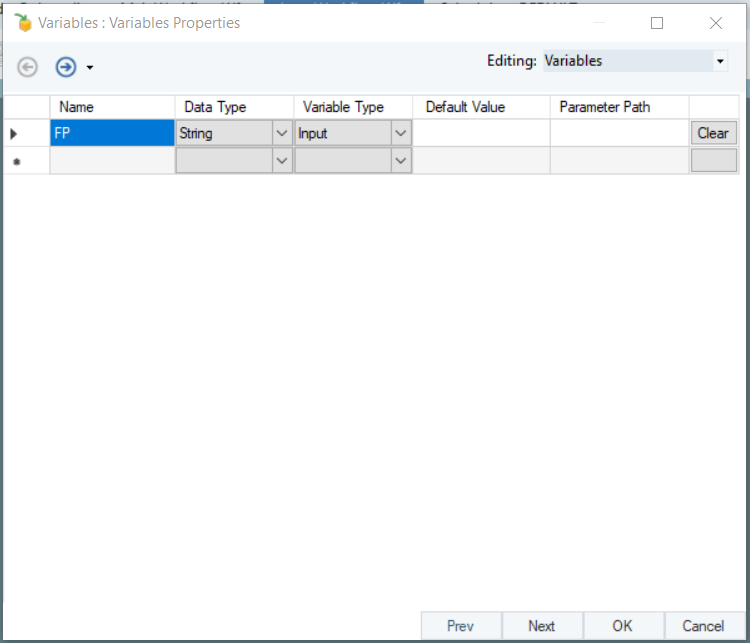
- First, create a file path variable using the Variables object from the Toolbox.
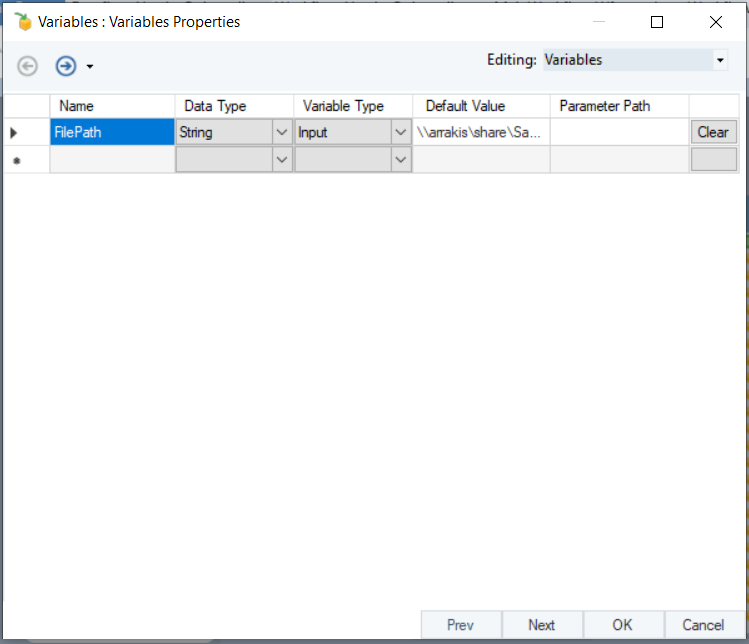
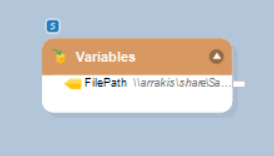
- Enter this variable as a parameterized value in the FilePath section of the Config Parameters screen.
For more information on how you can configure an Excel Workbook Source object, click here.
Cleansing Data
To refine and cleanse Wheel Dealers’ data, we will be using two separate transformations.
1. Sort Transformation will be used to sort the data in ascending order.
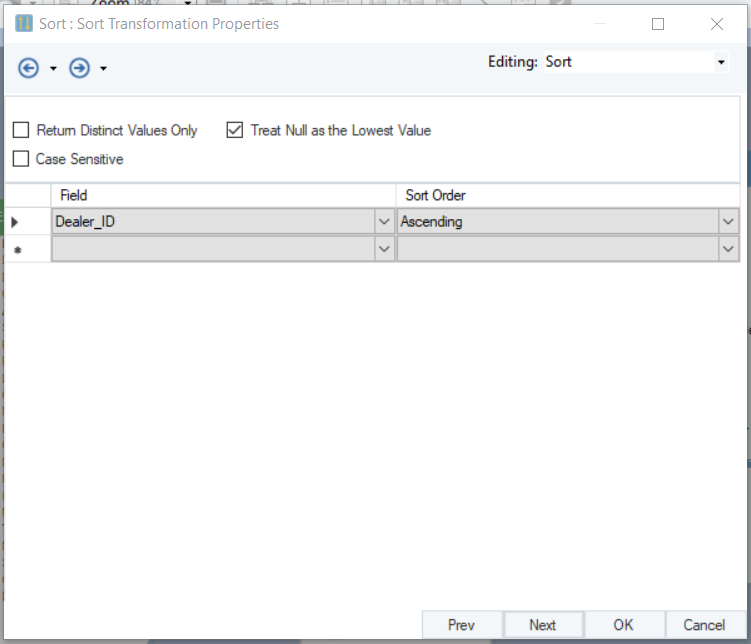
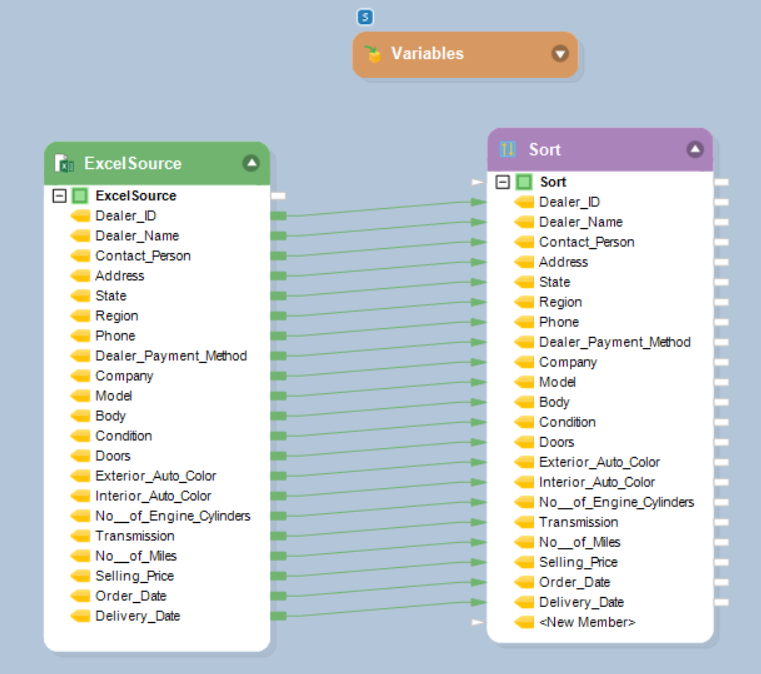
A simple sort will make your data easier to query and analyze, which will consequently reduce burden on the integration server.
For more information on how you can configure and use the Sort Transformation object, click here.
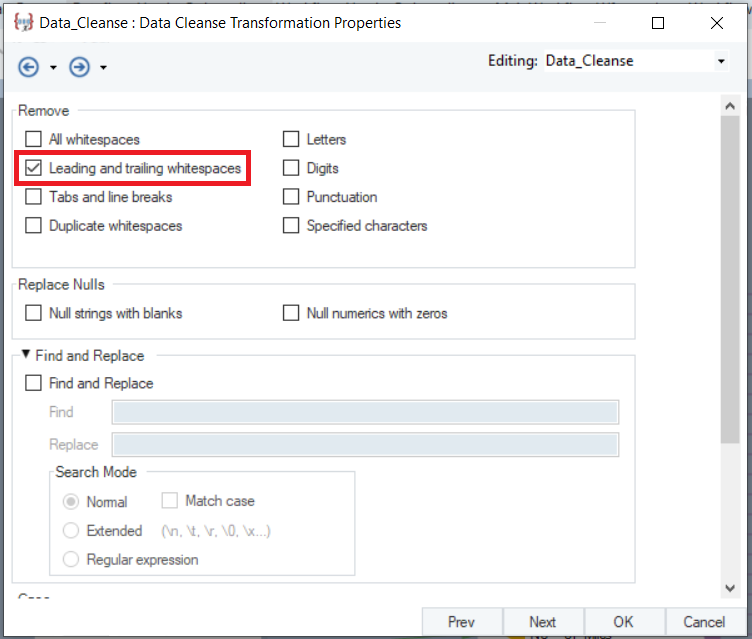
2. Data Cleanse Transformation will be used to further refine the data by removing unwanted characters and spaces.
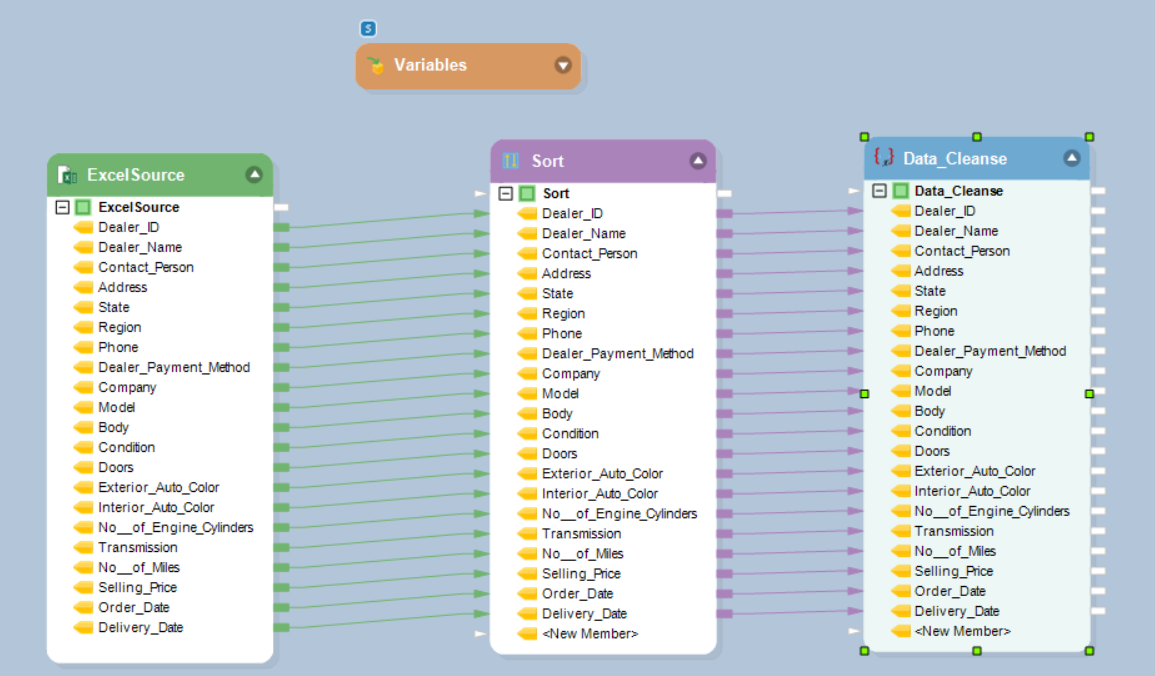
The data received by Wheel Dealers is usually well-formatted. Therefore, we will only be using this transformation to remove leading and trailing whitespaces.
For more information on how you can use the Data Cleanse Transformation object, click here.
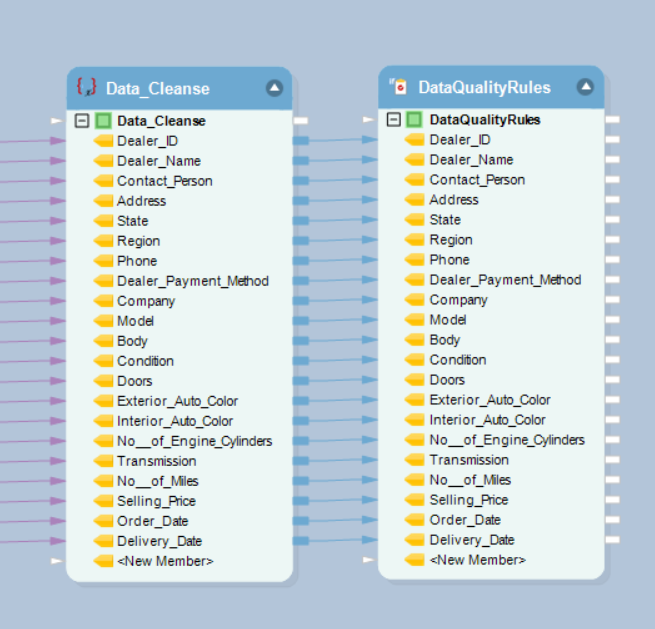
Resolving Errors & Uploading to Database
Wheel Dealers needs a method to fix the errors present in the partner data and integration flows. For this purpose, we will be using the Data Quality Rules and Record Level Log objects. Moreover, the final data will be uploaded to the dealer database by using a Database Table Destination object.
1. Data Quality Rules can be used to define some conditions, known as data quality rules, for incoming records. The records that do not meet these conditions are flagged as errors or warnings.
In this case, we will be applying two data quality rules.
- Rule 1: The mileage of a used car cannot be null.
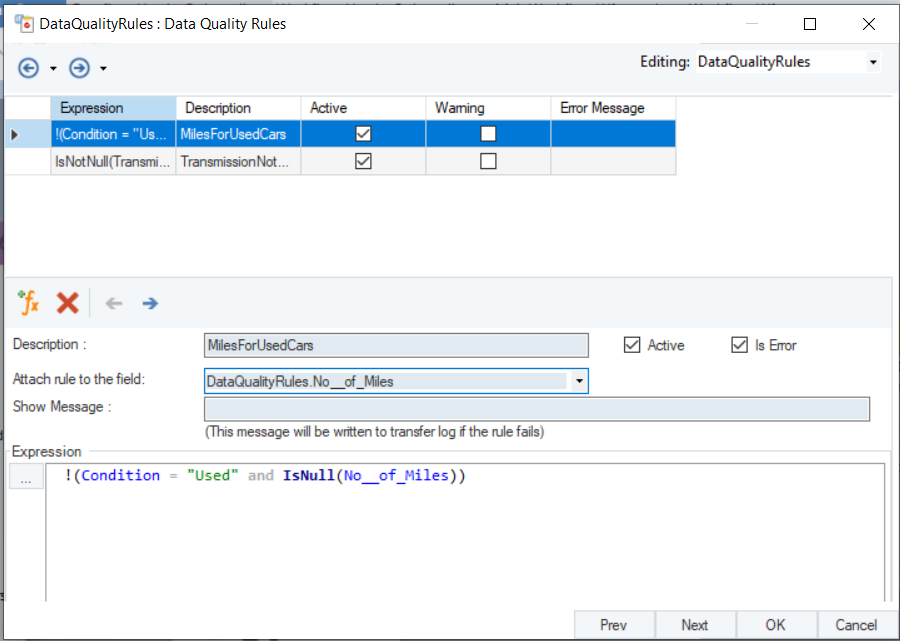
- Rule 2: The transmission cannot be null.
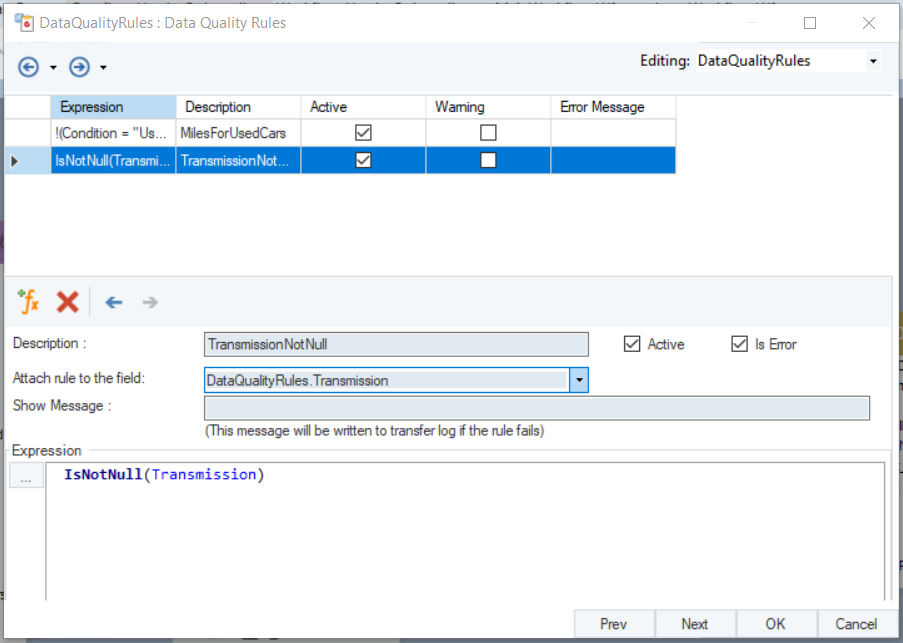
For more information on how to use the Data Quality Rules object, click here.
2. Next, we will use a Database Table Destination object to access the dealer database and upload the dataset to it. For information on how to configure and use a Database Table Destination object, click here.
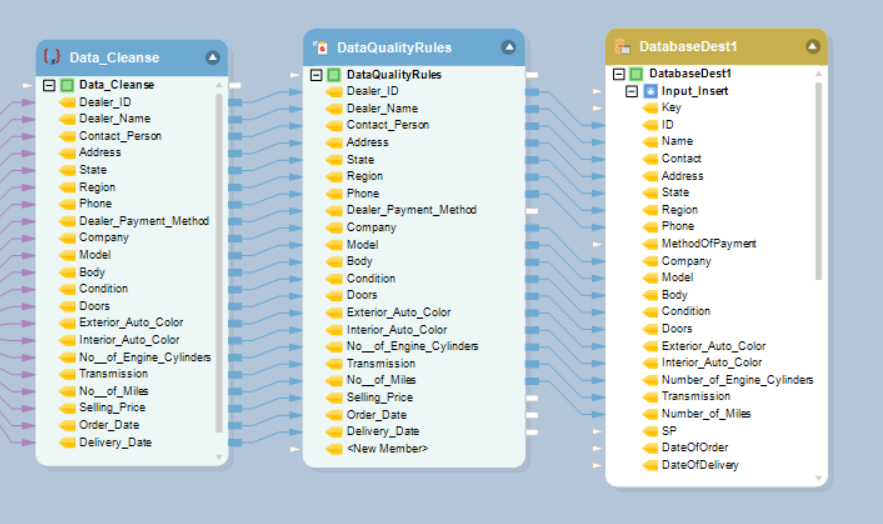
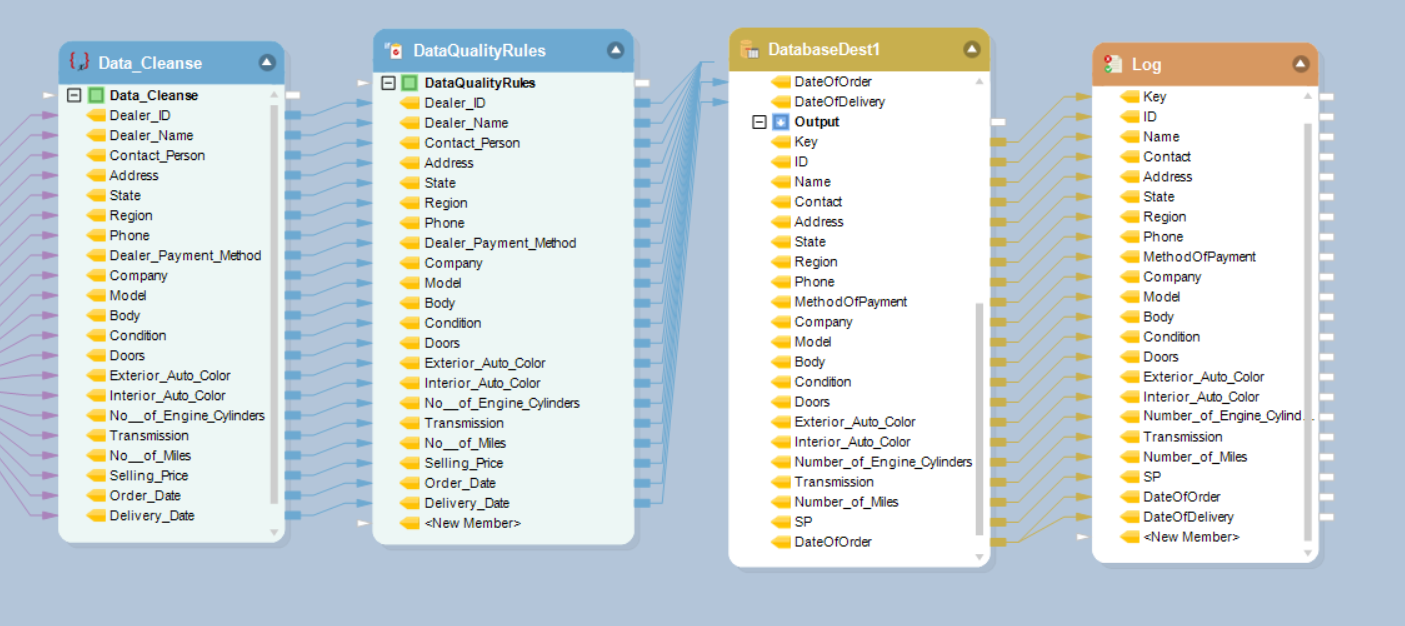
Notice that some of the element names in the Data Quality Rules object are inconsistent with those in the database. With an ample amount of partner data coming in from disparate sources, discrepancies are bound to occur. Despite these discrepancies, Centerprise has still managed to match some of the elements with their counterparts due to naming similarities, for example, ID and Dealer_ID. However, there are still a few elements that have not been matched with any others, such as MethodOfPayment, SP, DateOfOrder, and DateOfDelivery. For these, we will be using the Synonym Dictionary.
- Add a Synonym Dictionary file to the Project and create alternatives for element names, as needed.
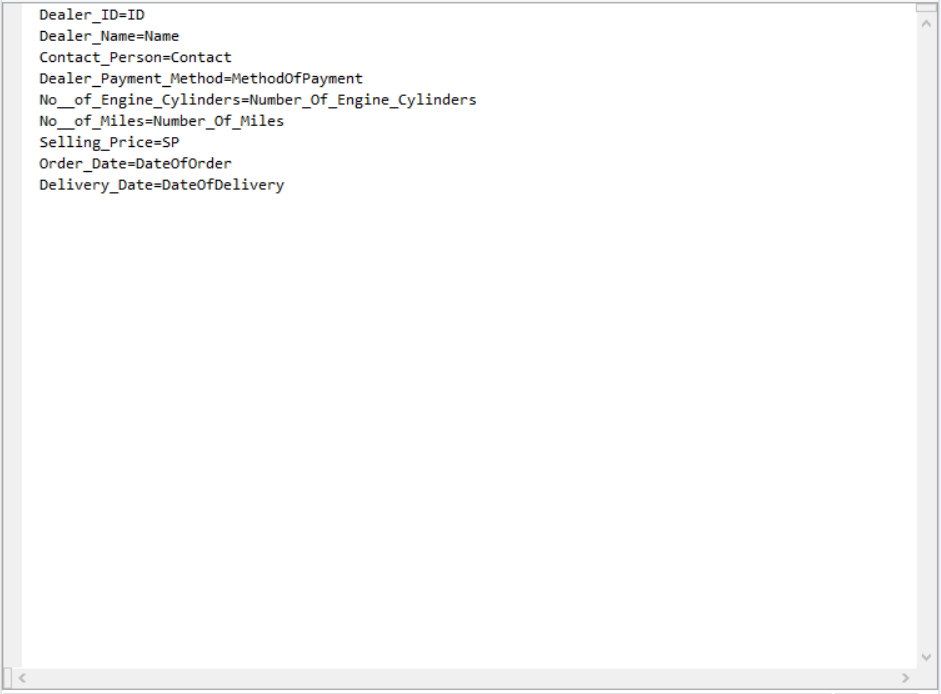
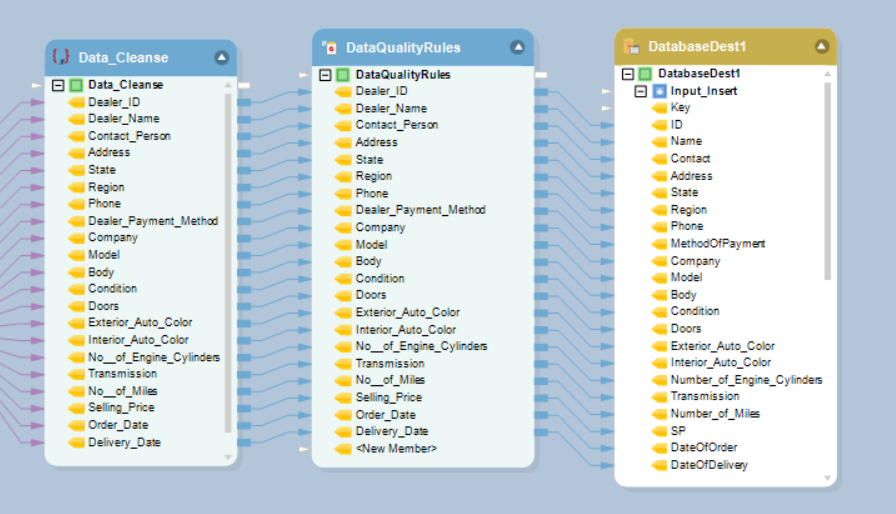
- Press Shift and map the parent node of the Data Quality Rules object to that of the Database Destination object.
For more information on the Synonym Dictionary feature, click here.
3. Finally, a Record Level Log will be used to flag the errors that do not meet the data quality rules that were defined earlier.
Once you preview the output, you can see that the relevant erroneous records have been indicated.
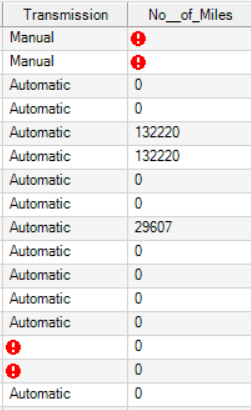
WD’s business analysts can investigate this further and follow up with the concerned dealership.
For more information on how you can use the Record Level Log object, click here.
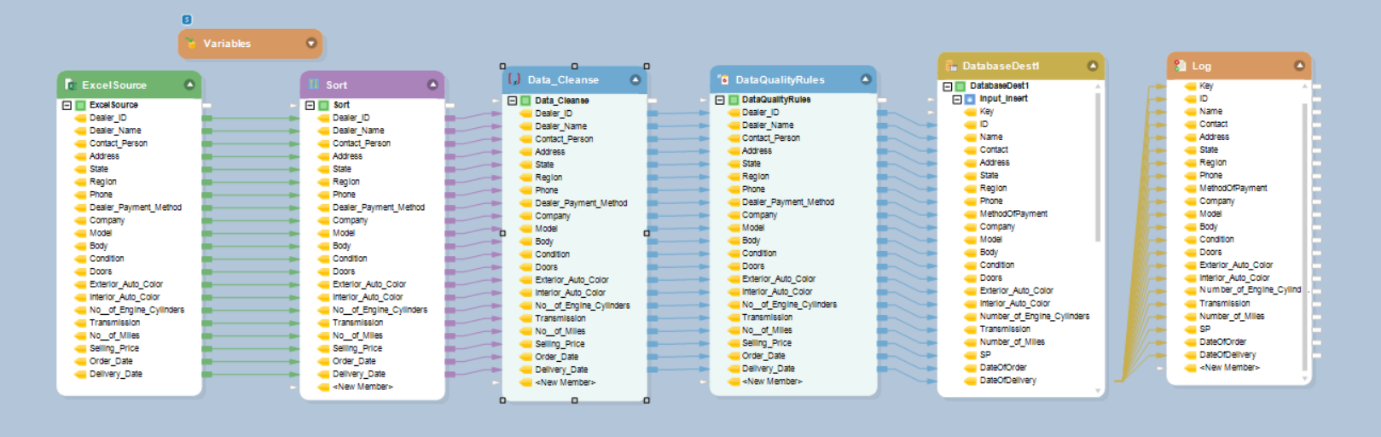
Final Dataflow
The ETL process has now been created. This is what the final Dataflow should look like:
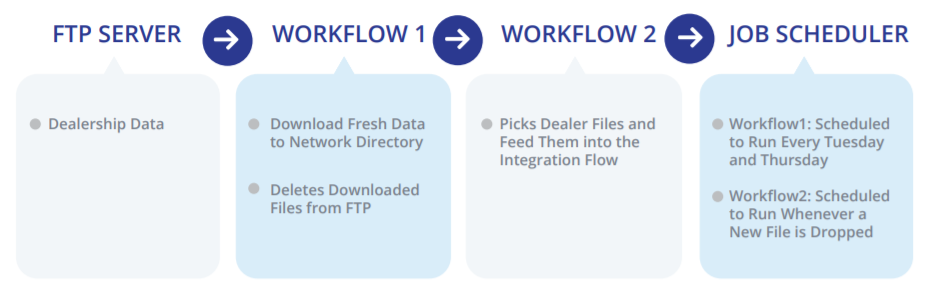
Orchestrating the Process for Automation
The orchestration of this ETL process requires two main Workflows, an inner Workflow, and the Job Scheduler. Wheel Dealers wants to implement self-operating and self-regulating processes wherever possible, so the purpose here is to automate the entire system. Workflows will be used to coordinate how the integration flows are executed; Workflow 1 will collect newly uploaded documents from Wheel Dealers’ FTP server and download them to their local network, whereas Workflow 2 will dynamically pick up the input files and feed them to the Dataflow we have designed. The Job Scheduler will be used to schedule Workflow runs.
Workflow 1
Workflow 1 will consist of a main Workflow and another inner Workflow. The former’s job will be to fetch new files from the FTP server, whereas the latter will download this new data to the local directory while deleting older files to ensure that only fresh partner files are downloaded during each run.
Inner Workflow
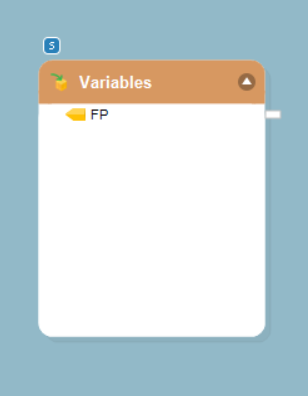
1. First, we will create a file path variable using the Variables object from the Toolbox. This will be used to specify the path of the files coming in from the FTP server.
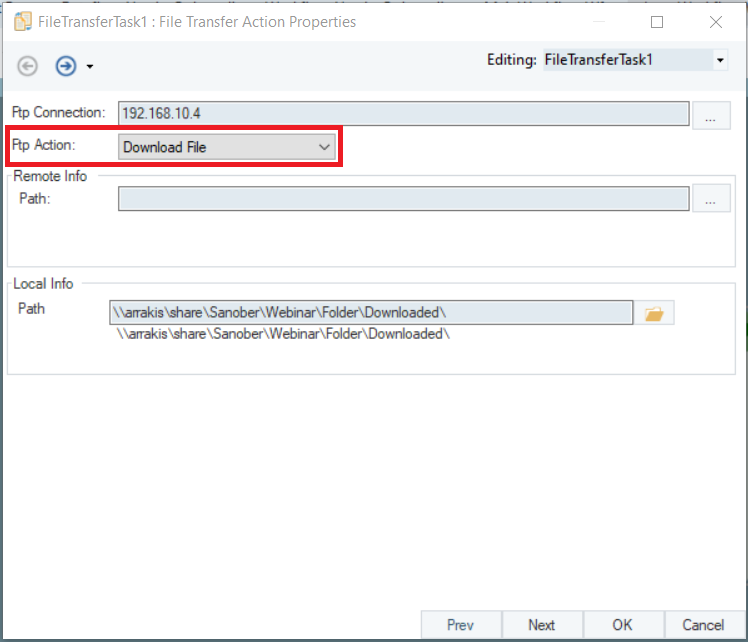
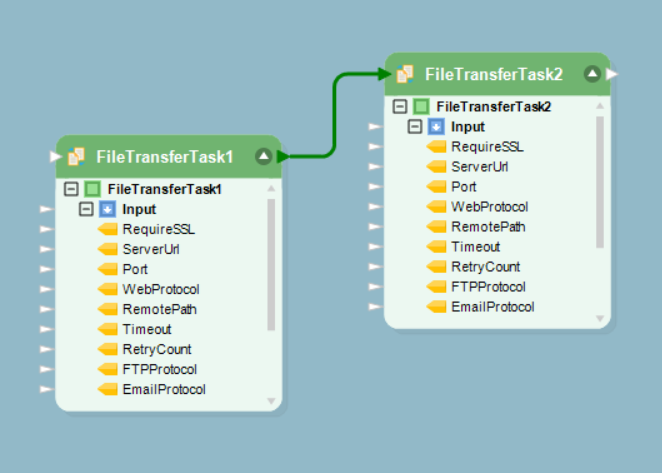
2. The File Transfer object in the Workflow Tasks section of the Toolbox will be used to download and delete the files. Two objects, one for each purpose, will be added to the Workflow designer.
- File Transfer Task 1: Downloading files.
- File Transfer Task 2: Deleting files.
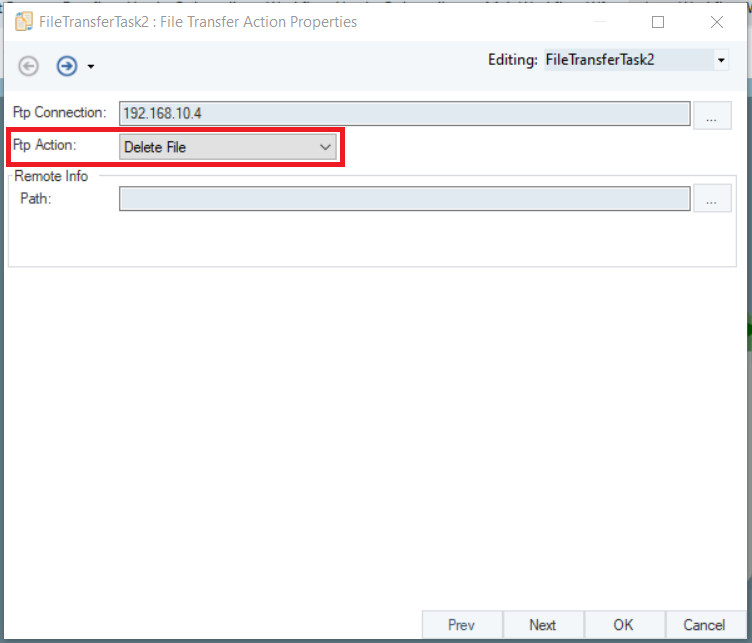
- Connect the File Transfer objects to run sequentially, hence the older files will be deleted once the new files have been downloaded.
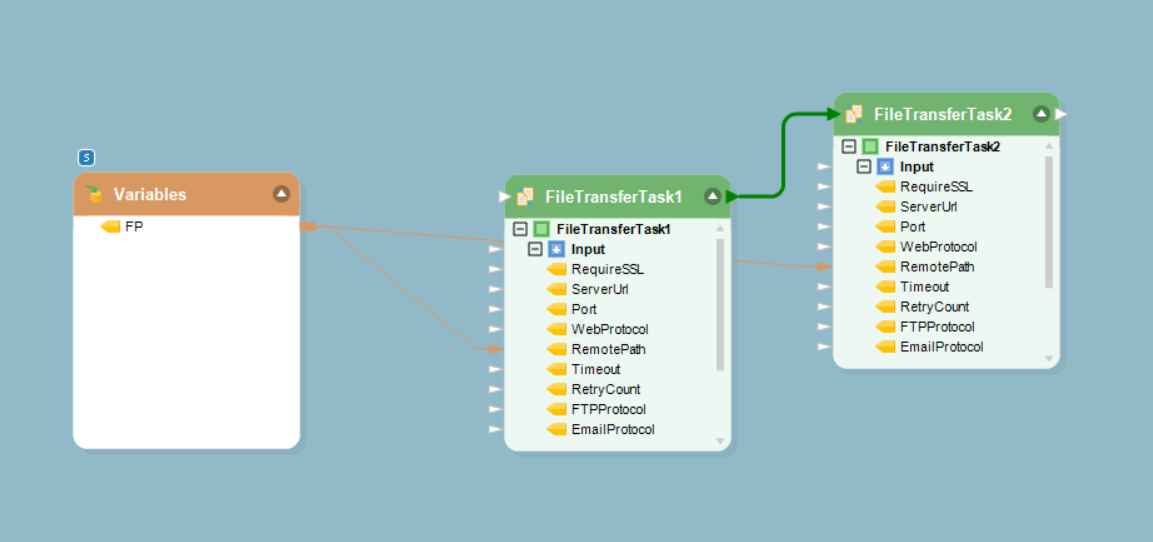
- Map the file path variable onto the RemotePath input element of both File Transfer Task objects. As a result, this is what the final inner Workflow should look like:
Main Workflow
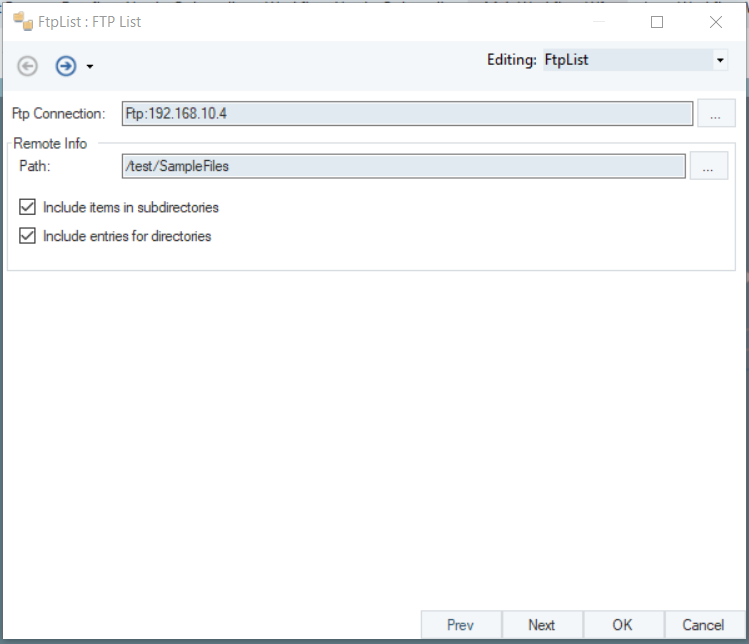
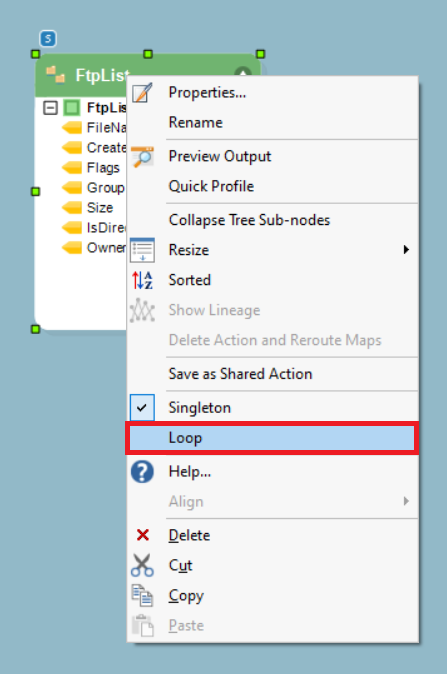
1. First, we will use the List FTP Directory Contents object, present in the Sources section of the Toolbox, to extract data from the FTP server. The object will be used to specify the FTP Connection and the remote path where our required files are present.
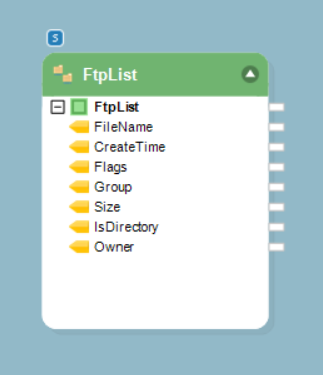
Notice the S on the top-left of the object header. This denotes ‘Singleton’, which means that the object will only work in a single instance and will thus only retrieve one file from the FTP server. However, our purpose is to retrieve all of the new files present. For this to happen, right-click on the object header and select Loop from the context menu.
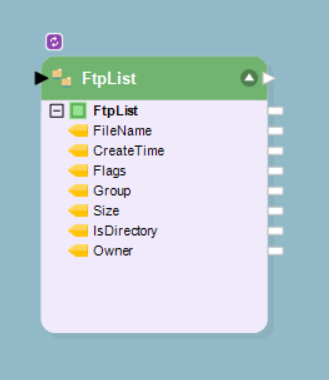
A Loop icon will now appear on the top-left of the object header.
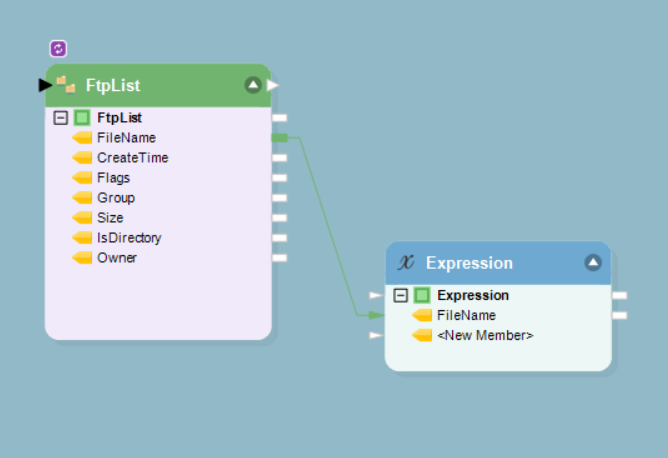
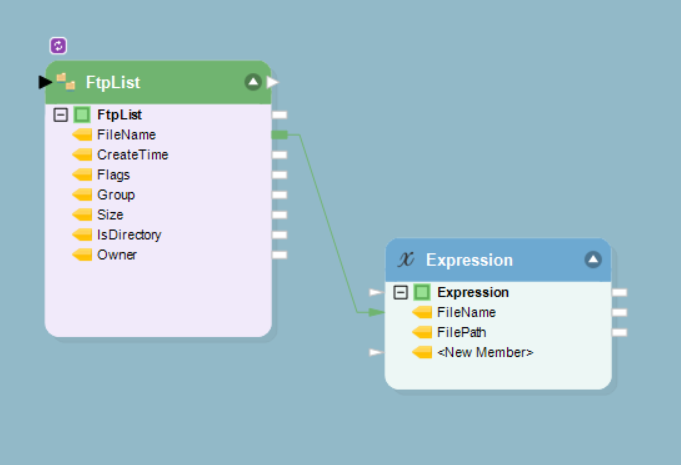
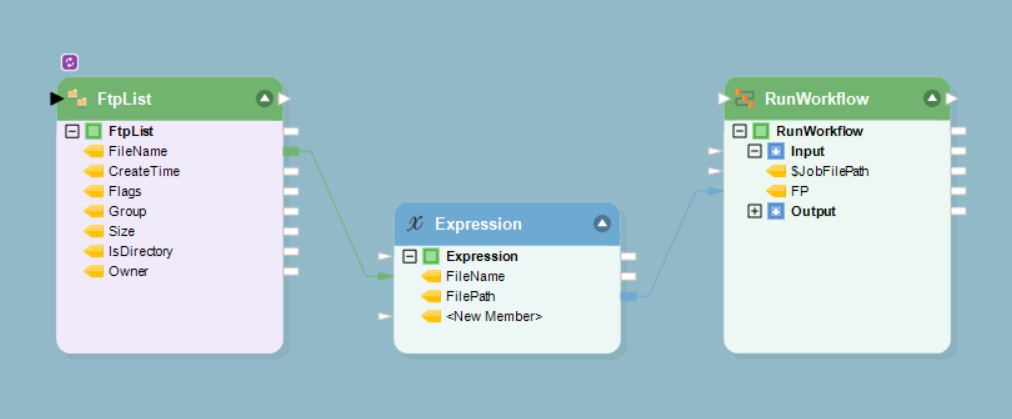
2. The Expression object will be used to concatenate the file names coming in from the FTP Server with the path of the directory, thus creating a complete path for each file after every loop.
- First, map the FileName element from the List FTP Directory Contents object to the FileName element in the Expression object.
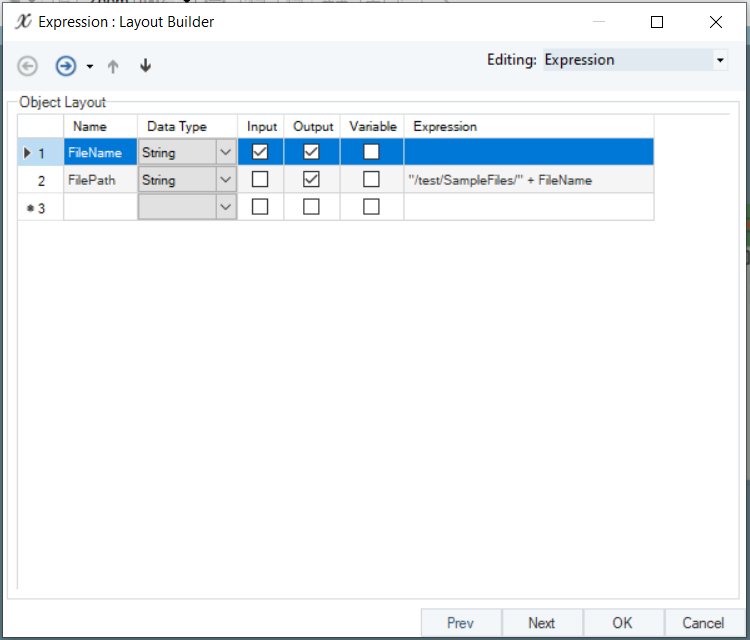
- A new element by the name of FilePath will be created in the Expression object. Using the Expression Builder in the Layout Builder screen, concatenate the directory path with the file name. This will dynamically update the file path as new files are fetched from the FTP server.
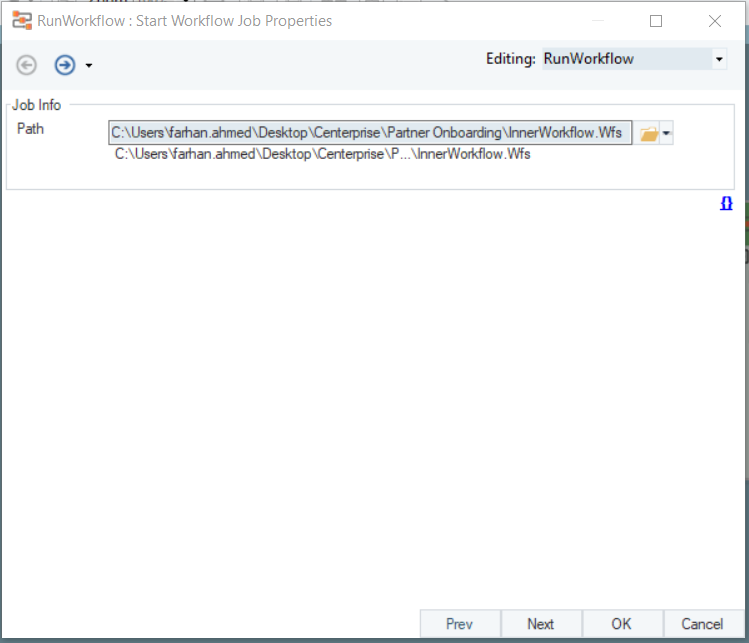
3. The next step is to load the fetched files into the inner Workflow so that they may be downloaded or deleted. For this, we will be using the Run Workflow object from the Workflow Tasks section of the Toolbox.
- Configure the Run Workflow object by providing the file Path for the inner Workflow.
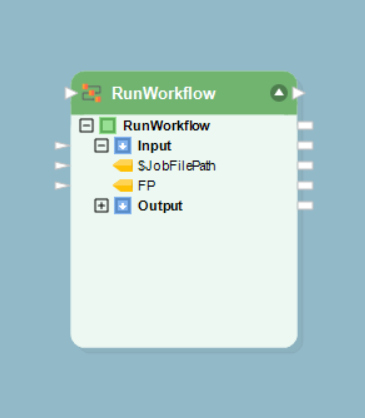
- The FP element in the Run Workflow object denotes the file path variable that we had defined in the inner Workflow. Map the FilePath element from the Expression object onto FP in the Run Workflow object.
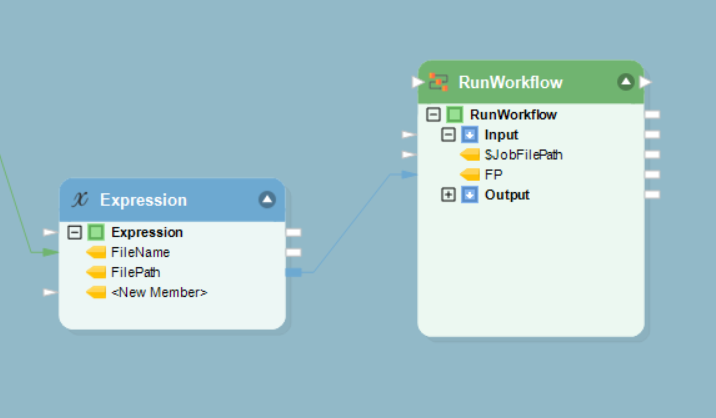
In the inner Workflow, this variable has been mapped onto two File Transfer objects. As a result, their respective actions will take place on the files that are being fetched from the FTP server in a loop.
This is what the final main Workflow should look like:
Workflow 2
Workflow 2 will feed the downloaded partner files to the integration flow that we had designed earlier for cleansing, validating, and consolidating data.
1. The Context Information object in the Resources section of the Toolbox will be used to dynamically provide our Dataflow with the dropped file path i.e. the complete path of files that are downloaded from the FTP server and dropped into a particular folder.

This object, paired with the Job Scheduler, will automate the process of running this Workflow whenever a new partner file is downloaded.
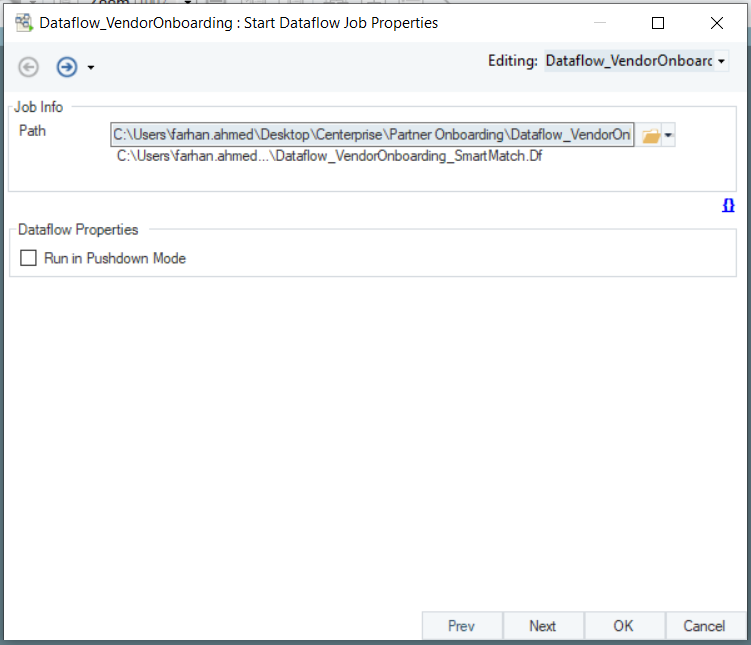
2. The Run Dataflow object in the Workflow Tasks section of the Toolbox will be used to run our Dataflow whenever a new partner file is downloaded.
- Configure the Run Dataflow object by providing the file Path to our Dataflow.
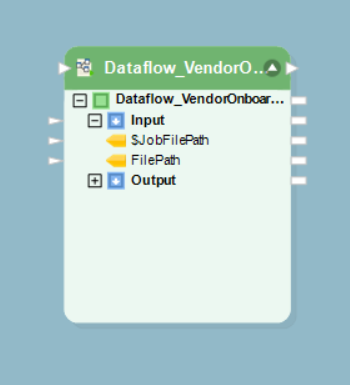
- The FilePath input element in the Run Dataflow object denotes the file path variable that we had defined in the Dataflow. Map the DroppedFilePath parameter from the Context Information object onto FilePath in the Run Dataflow object. As a result, this is what Workflow 2 should look like:
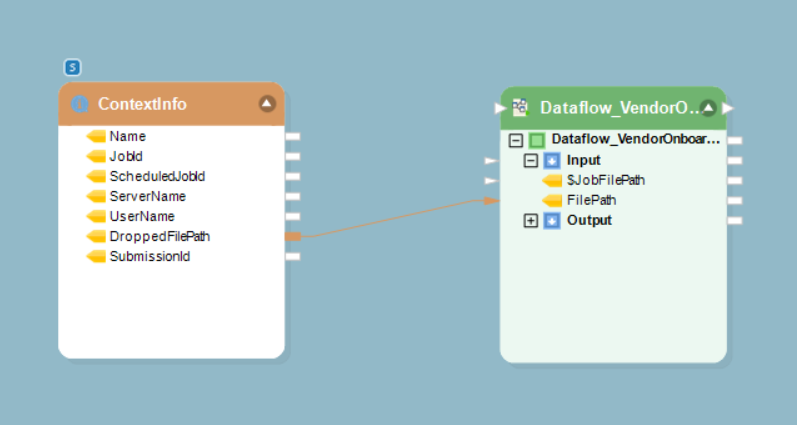
The FilePath variable has been used to dynamically provide the source object in our Dataflow with a file path. Consequently, whenever a new file is downloaded from the FTP server, a new file path will be fed to the source object through this mapping.
Job Scheduler
As mentioned earlier, Wheel Dealers wants to automate its data integration process wherever possible. The Job Scheduler in Astera Centerprise can be used to schedule any job to run at specific intervals or whenever a file is dropped into a folder, without any manual intervention. In this case, we will be making two schedules – one for each Workflow.
For detailed guidelines on how to open and use the Job Scheduler, click here.
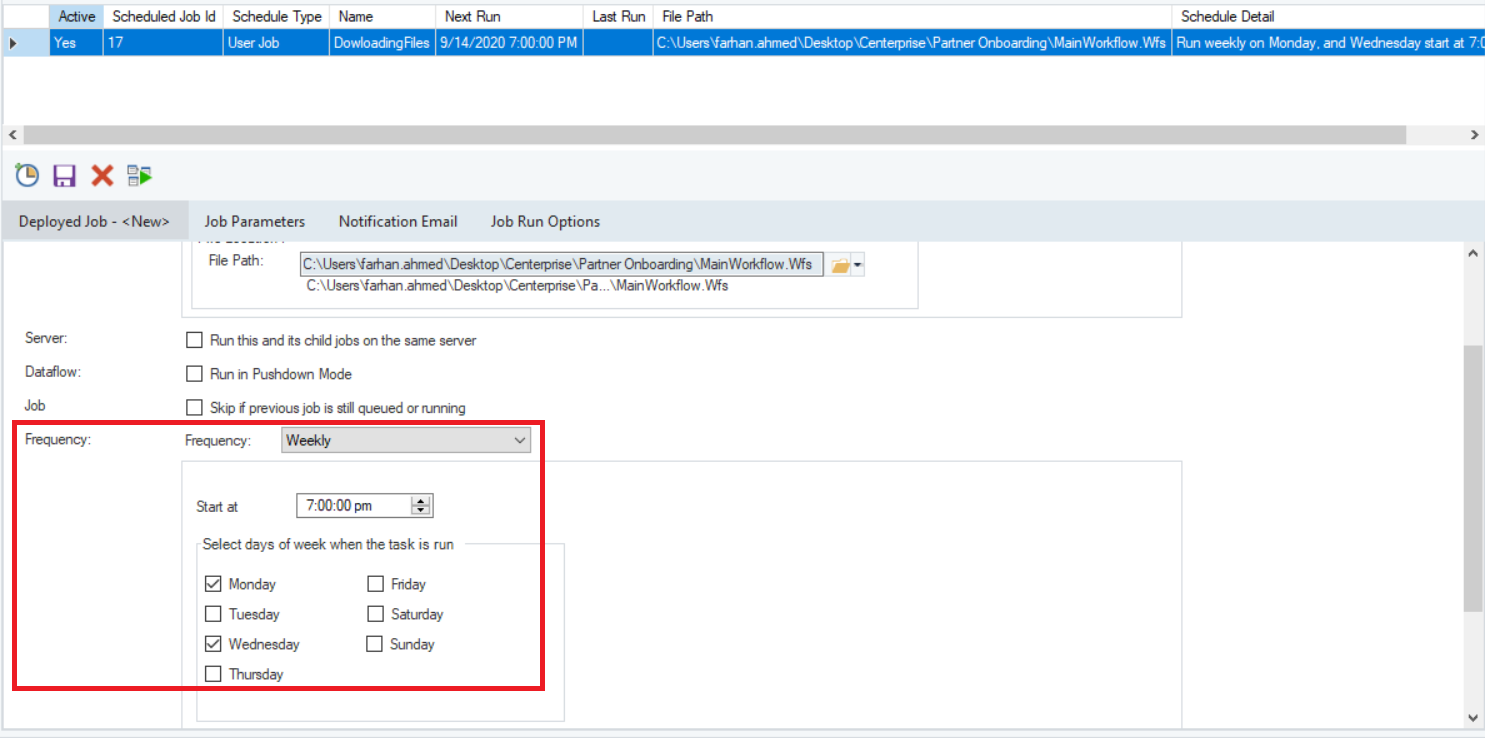
Scheduling Workflow 1
For Workflow 1, we will assume that partner files are coming in on a biweekly basis, specifically on Mondays and Wednesdays. Thus, Workflow 1 will be scheduled to run every week on Mondays and Wednesdays.
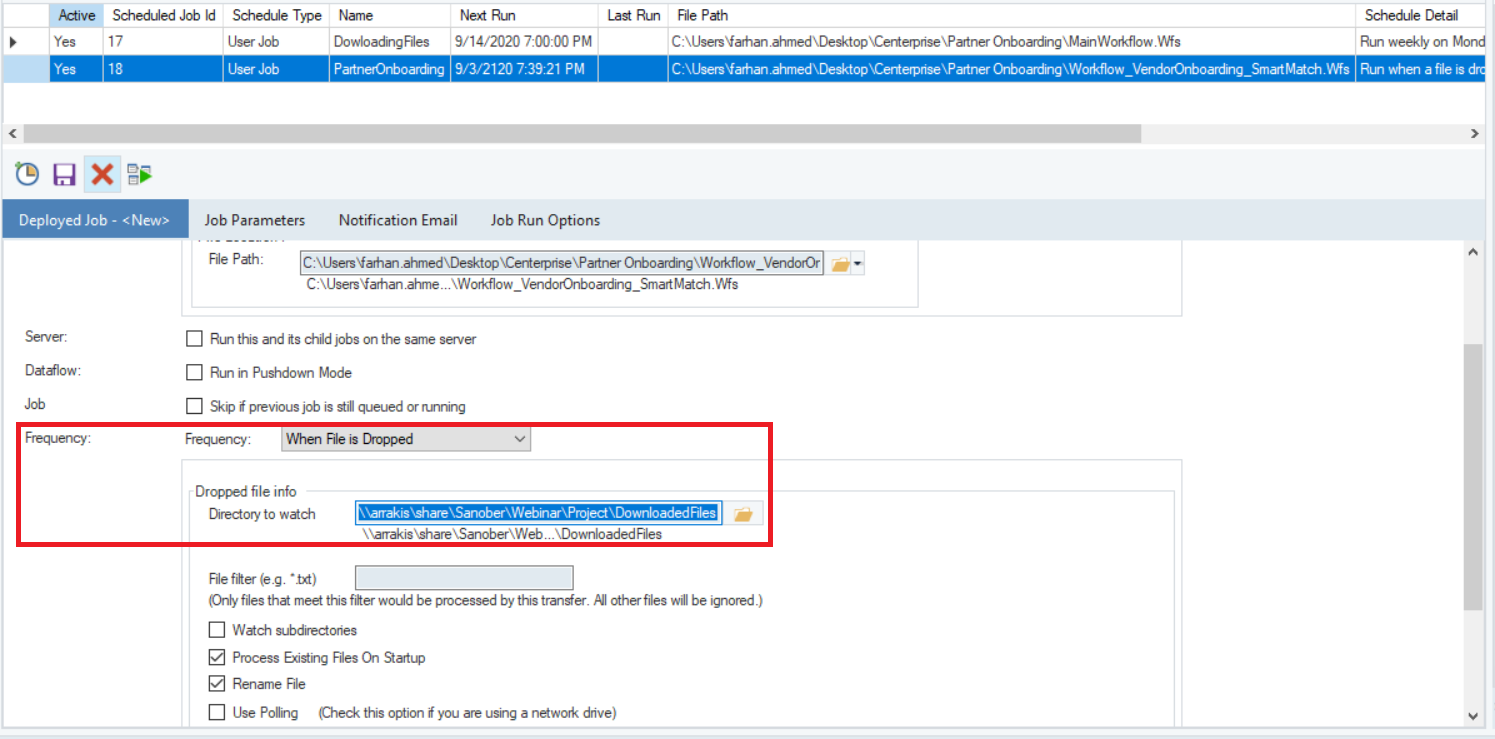
Scheduling Workflow 2
The files being fetched from the FTP server are added to a specific folder. Therefore, we will schedule Workflow 2 to run whenever a new file is dropped into that folder.
Everything is now in place, and Wheel Dealers can rely on this automated ETL Process to handle their Partner Onboarding needs. With Astera Centerprise, most of the tasks associated with Partner Onboarding can be automated, significantly cutting down on the time and resources required.
This concludes creating and orchestrating an ETL process for Partner Onboarding in Astera Centerprise.