Data Profiles
What is a Data Profile?
A data profile provides a comprehensive overview of a dataset. A data profile can be defined as a structured summary of the content and quality of a dataset.
It involves analyzing various aspects of the data, such as its structure, completeness, uniqueness, consistency, and integrity. It also identifies nulls, duplicates, blanks, anomalies, alongside date ranges etc.
In this document, we will look at how to run data profiles in Astera Data Governance.
How to Run a Data Profile?
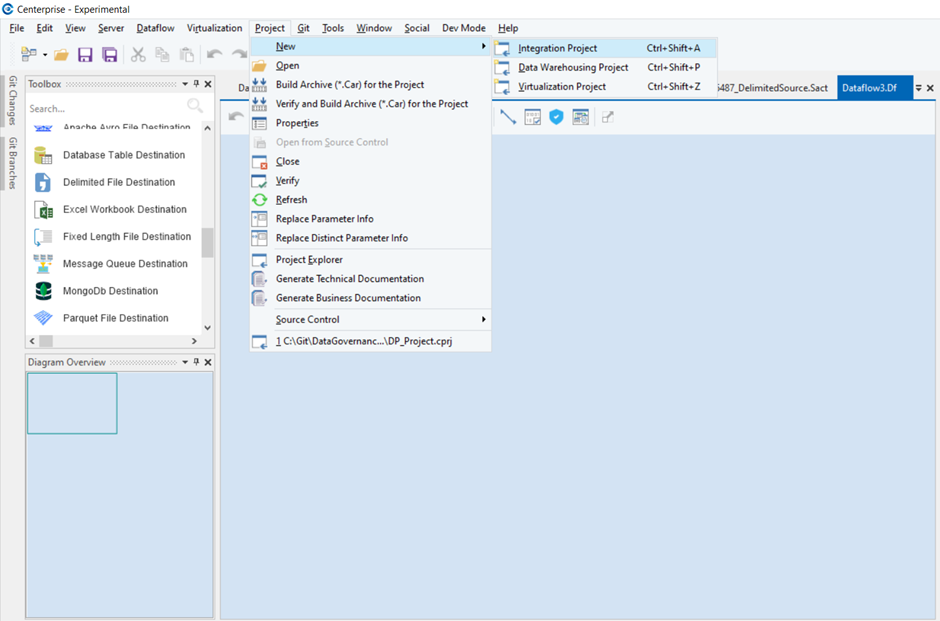
1. Open the Centerprise client application. Then, go to Project > New > Integration Project to create a new integration project.
Note: Data assets can only be deployed from a project.
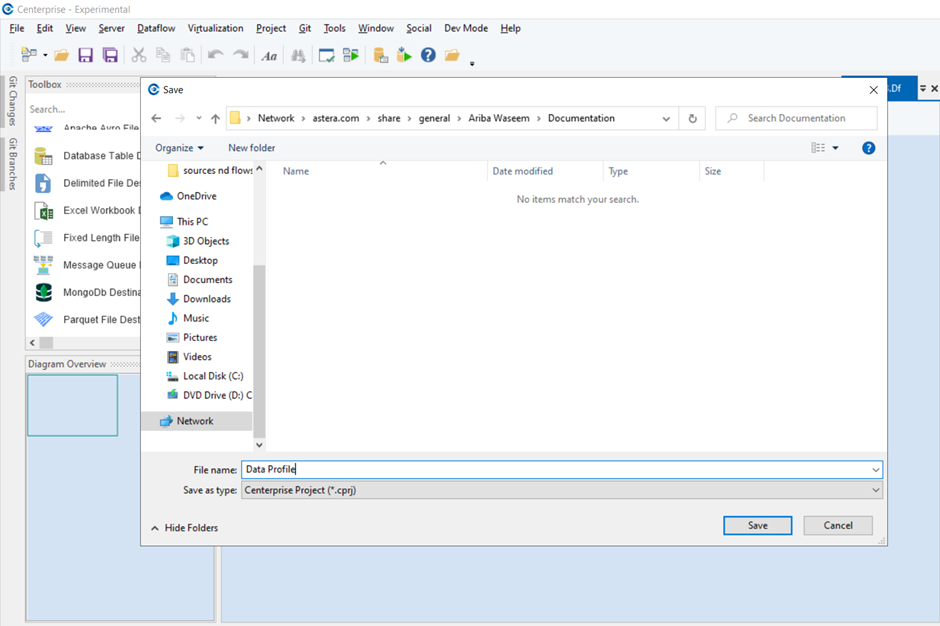
2. Next, we will name this project, “Data Profile”, and click Save to save this project.
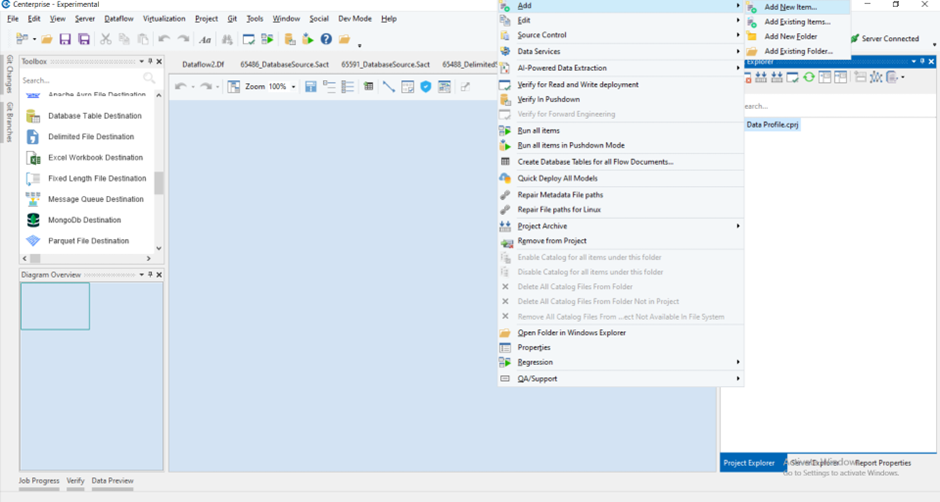
3. Next, in the Project Explorer panel, right-click on the newly created project and select Add > Add New Item.
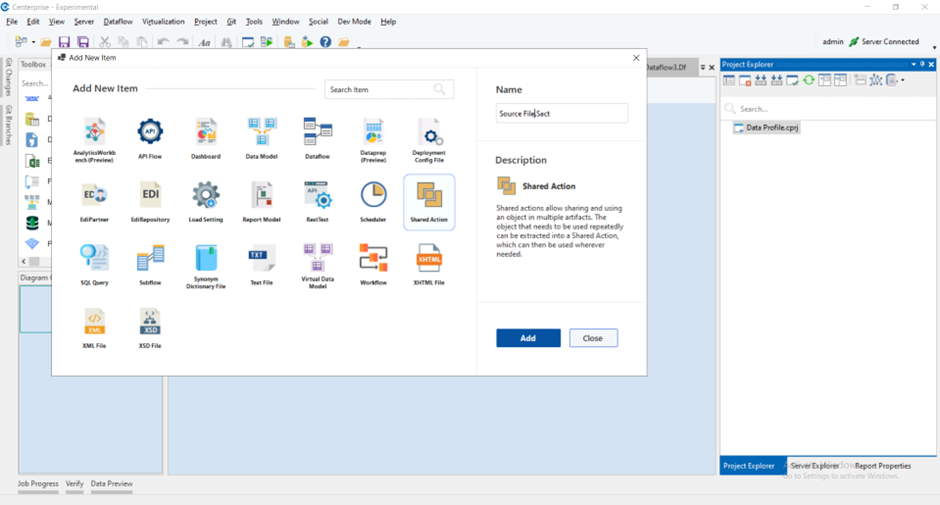
4. In the Add New Item window, select Shared Action and click Add. This item can also be renamed using the Name textbox. This file will be added to the Project Explorer panel, under the Data Profile project node.
Note: Data profiles are only created for artifacts that have a layout.
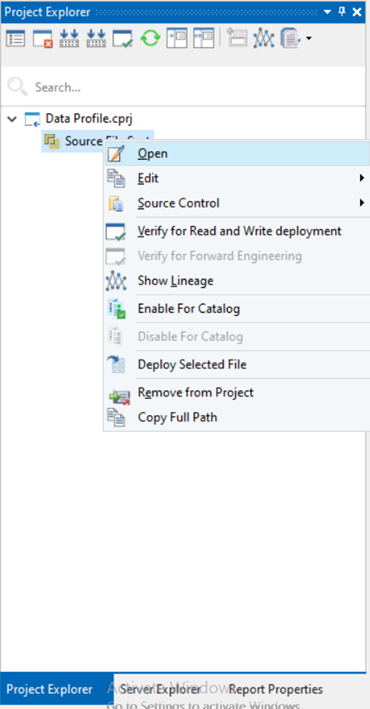
5. The newly created shared action file will automatically open in the designer. If it doesn’t, right-click on the SharedAction file node in the Project Explorer panel and select Open.
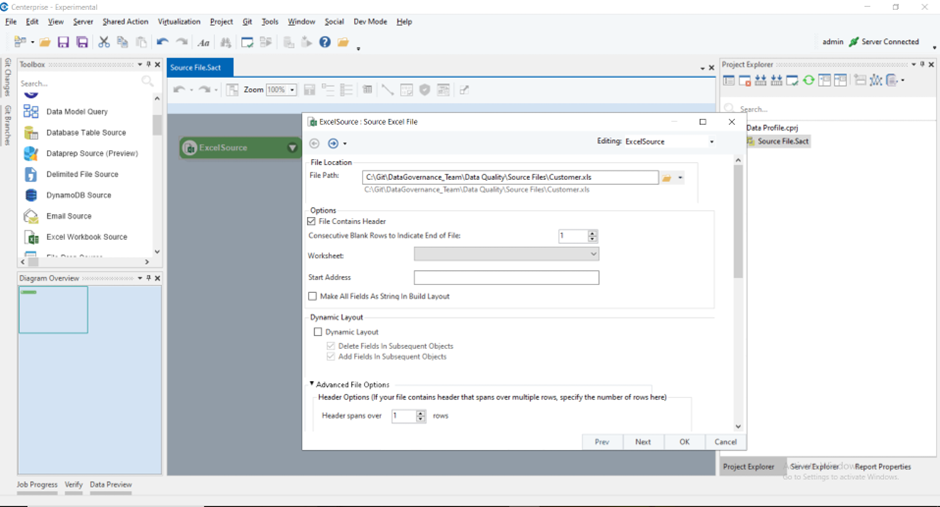
6. Now, we will add a source object onto the designer for the .Sact file. This source file can be an Excel, Delimited, Fixed Length, or Database source. For our use case, we have added an Excel file and configured it.
7. Now, right-click on the SharedAction file – SourceFile.Sact – tab under the toolbar and select Save to save the file.

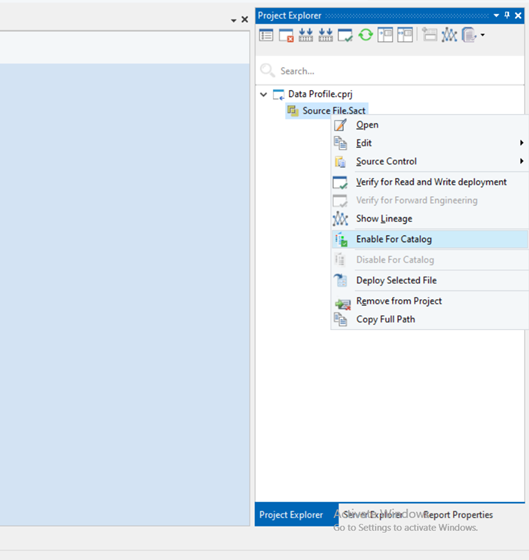
8. Once done, right-click on the SharedAction file node in the Project Explorer panel and select Enable For Catalog. Doing so will add a catalog file to the asset.
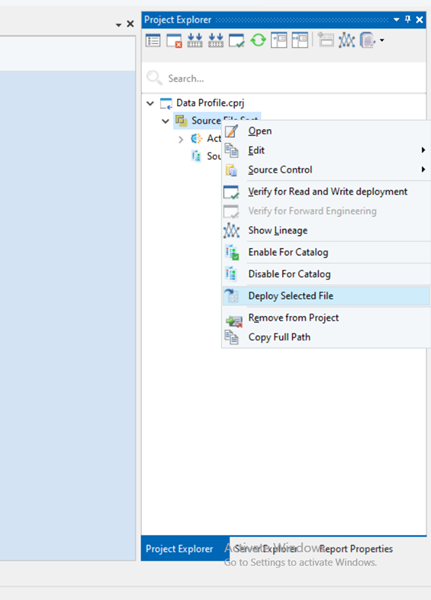
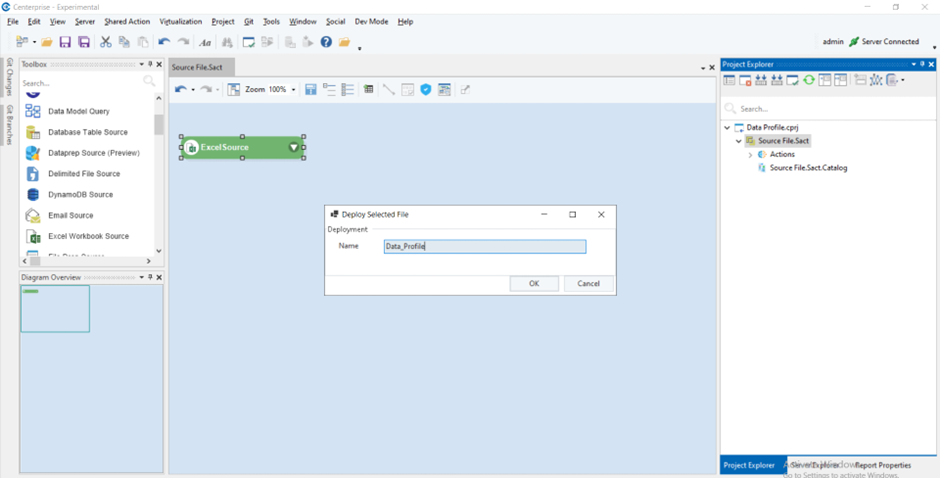
9. Save the file again. Next, right-click on the SharedAction file node in the Project Explorer panel and select Deploy Selected File.
10. A Deploy Selected File window will appear. Here, provide a name for the deployment and click OK to close the window.
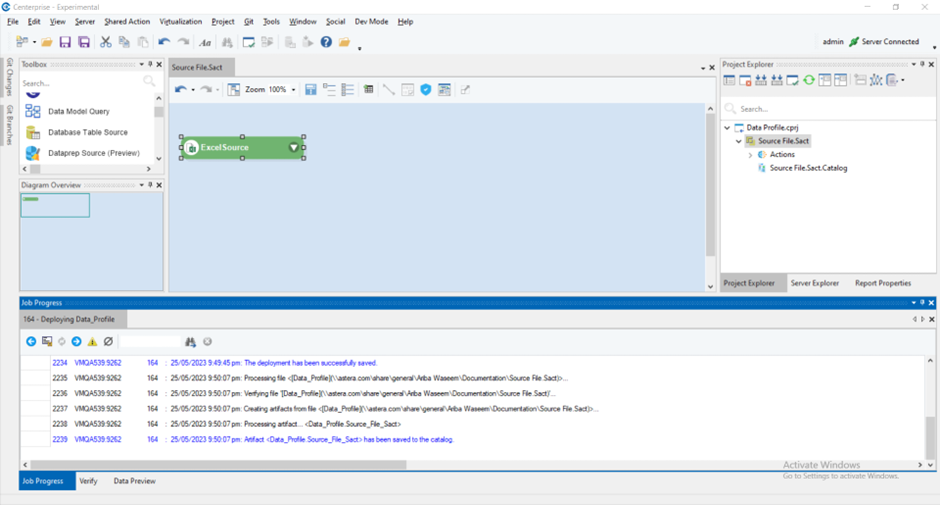
11. A deployment will be created, as evident in the Job Progress window.
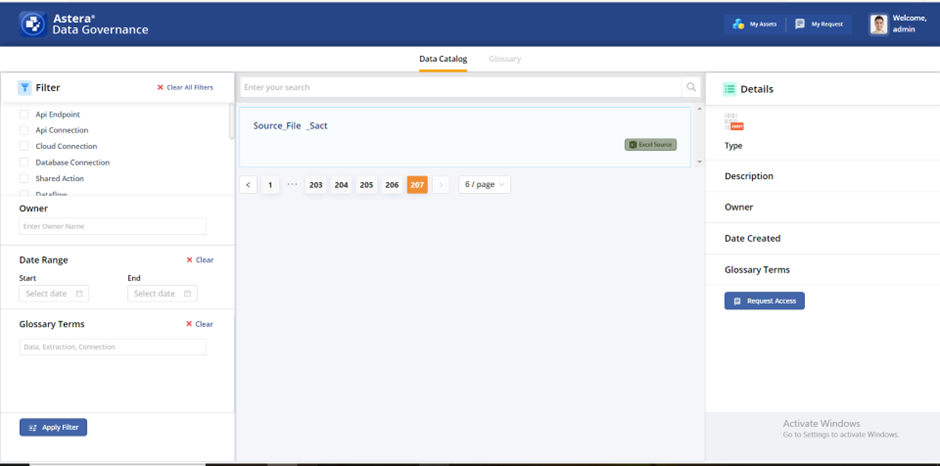
12. Now, navigate to Astera Data Governance’s web application and search for the deployed artifact using the search bar. The searched term is matched against the name and description of the artifact, and if found, the matched artifact is returned in the results. Once found, click the artifact’s name.
13. Once clicked, users will be redirected to an artifact Overview window. Now, click the Data Profile tab next to the Overview tab.
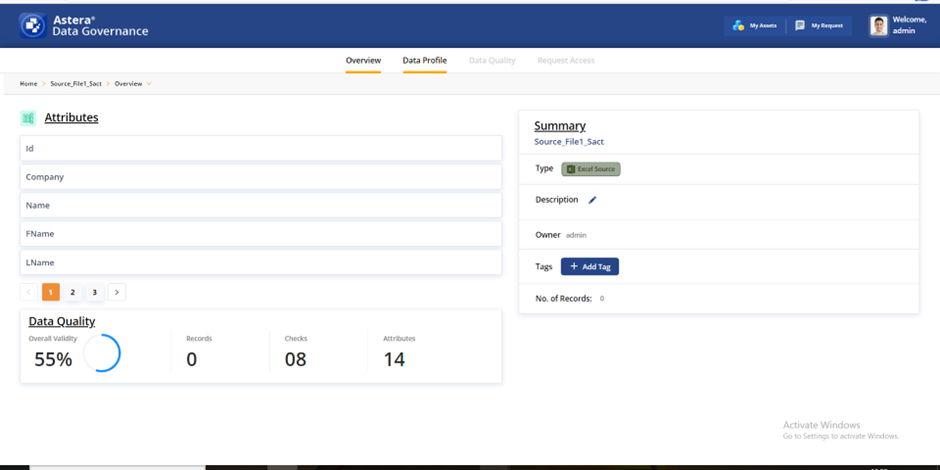
14. You will be redirected to the Data Profile page. Here, you will see an empty grid. Click the Run icon to run the data profile for the deployed asset.
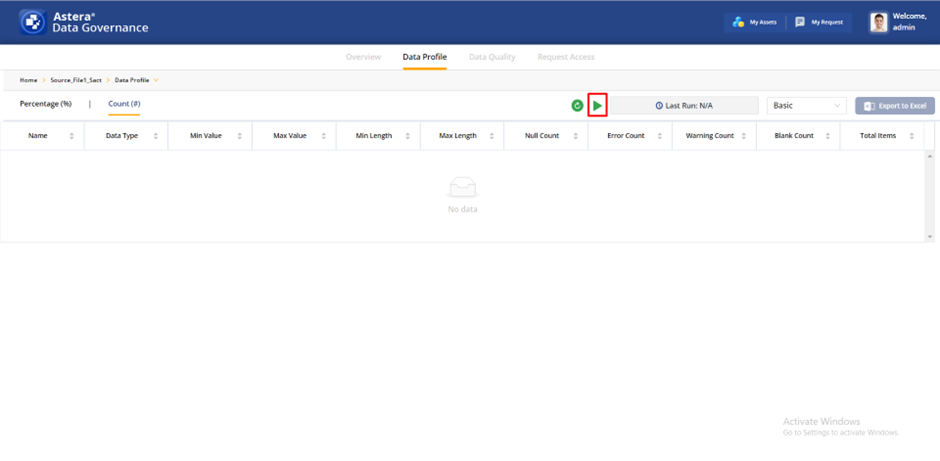
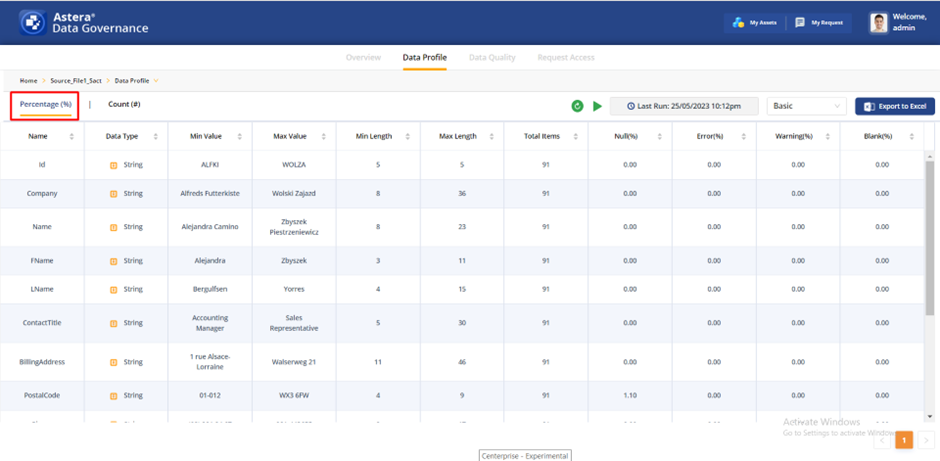
15. The Data Profile will start running. After completion, the empty grid will be populated with information regarding the source data. The Last Run icon will also display the data and timestamp of when a data profile for a deployed asset was last run.

16. Here, we can also select the Percentage (%) option in the top-left corner of the window for a percentage view of the data profile.
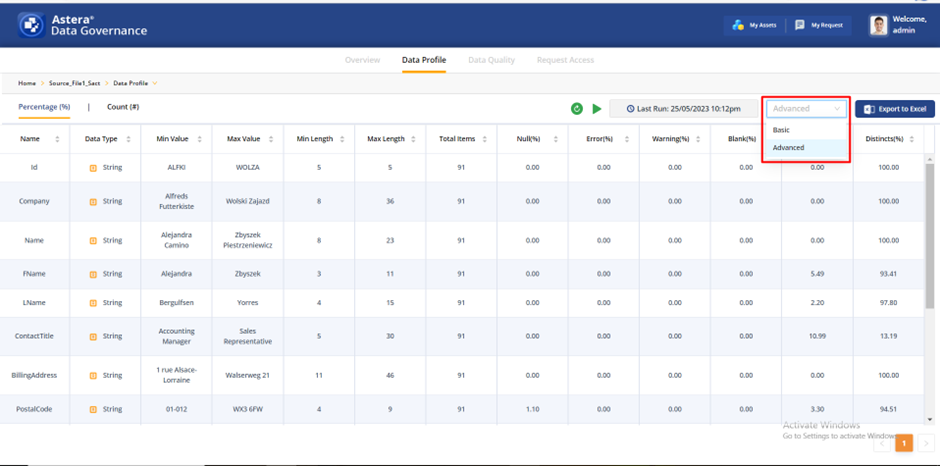
17. You can also view more information regarding the profile by selecting the Advanced option from the drop-down in the top-right corner of the window.
18. You can also click the Export to Excel option in the top-right corner of the window to export the data profile to an Excel file.
