Setting up Astera Data Management Server on AKS
Azure Kubernetes Service (AKS) presents an easy and quick way to deploy applications on Azure datacenters securely. AKS allows for operating and governing on-premise, edge and multicloud Kubernetes clusters all from itself. To learn more about the AKS, visit this site.
In this article, we will cover how to create and set up an AKS cluster for the Astera Data Management Server.
Setting Up your own Azure Kubernetes Service
1. Deploy an Azure Kubernetes Service cluster using Azure GUI.
2. Go to your Azure Organization portal to set up AKS for Astera Data Management Server.
Creating your AKS Cluster
1. Go to the search bar from your dashboard on Azure and type Kubernetes Service.
2. Create a new cluster in AKS by selecting Create a Kubernetes cluster.

3. While creating the AKS cluster, create a new Resource group by clicking on the Create new option below the drop-down for the Resource group.
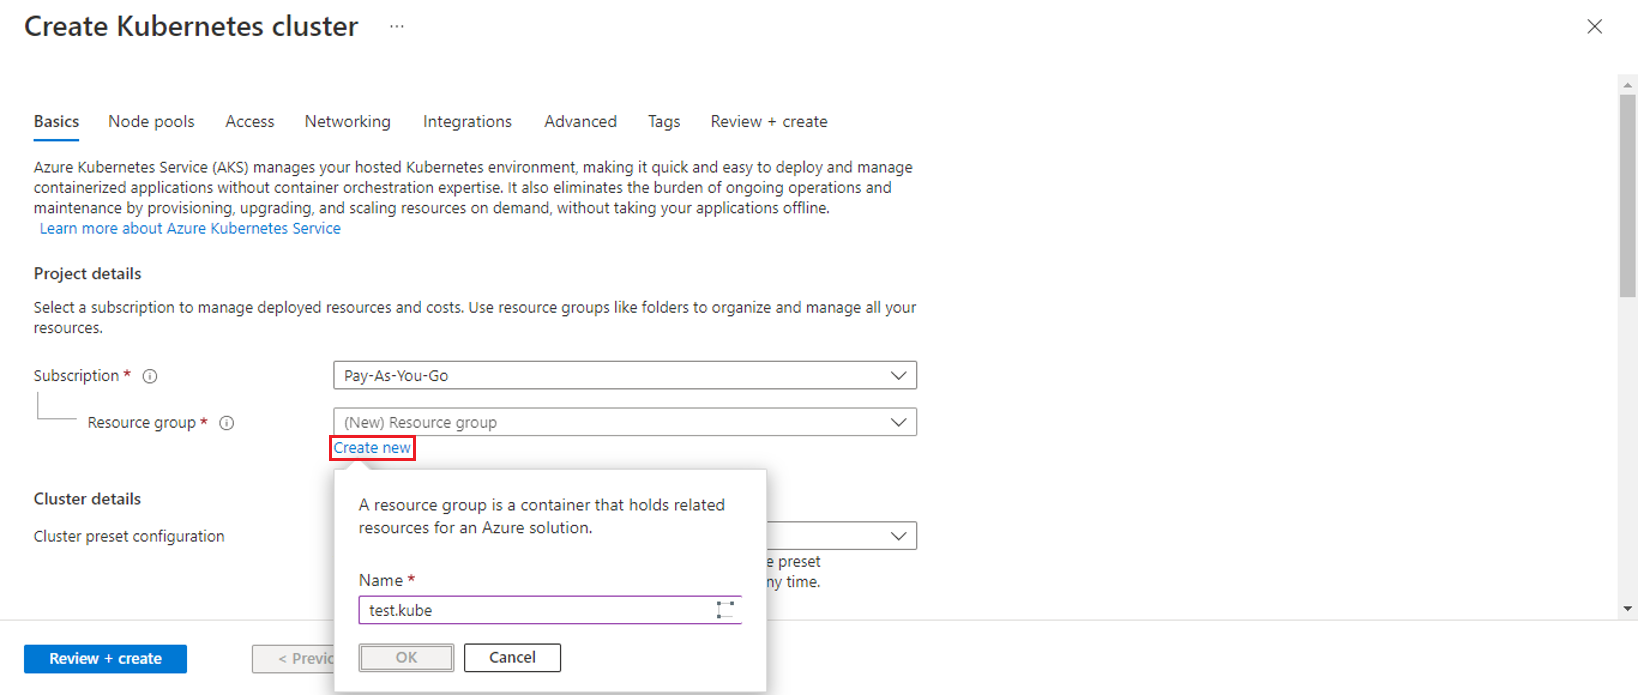
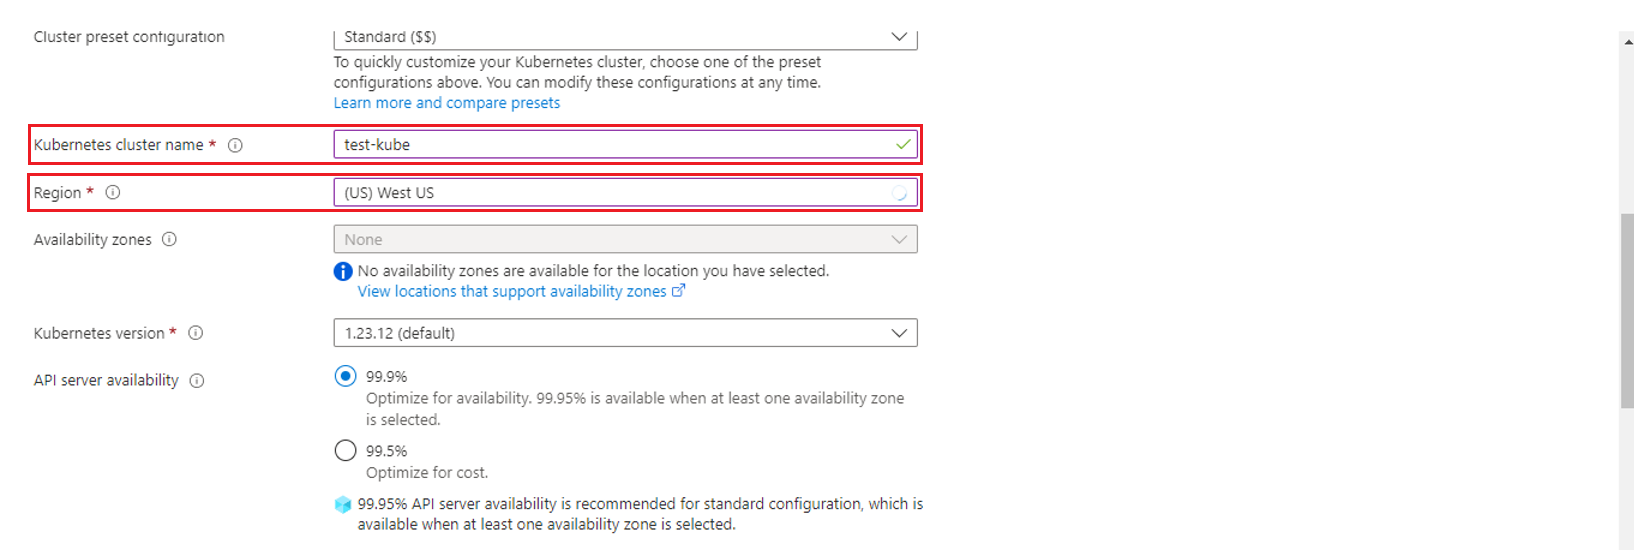
4. Next, provide the Kubernetes Cluster name. Also, specify the Region based on where the resource group is created.
Let the other options, Cluster preset configuration, Availability zones, Kubernetes version and API server availability remain as default.
5. Select the primary node pool’s Node Size, and Scale Method as described below.
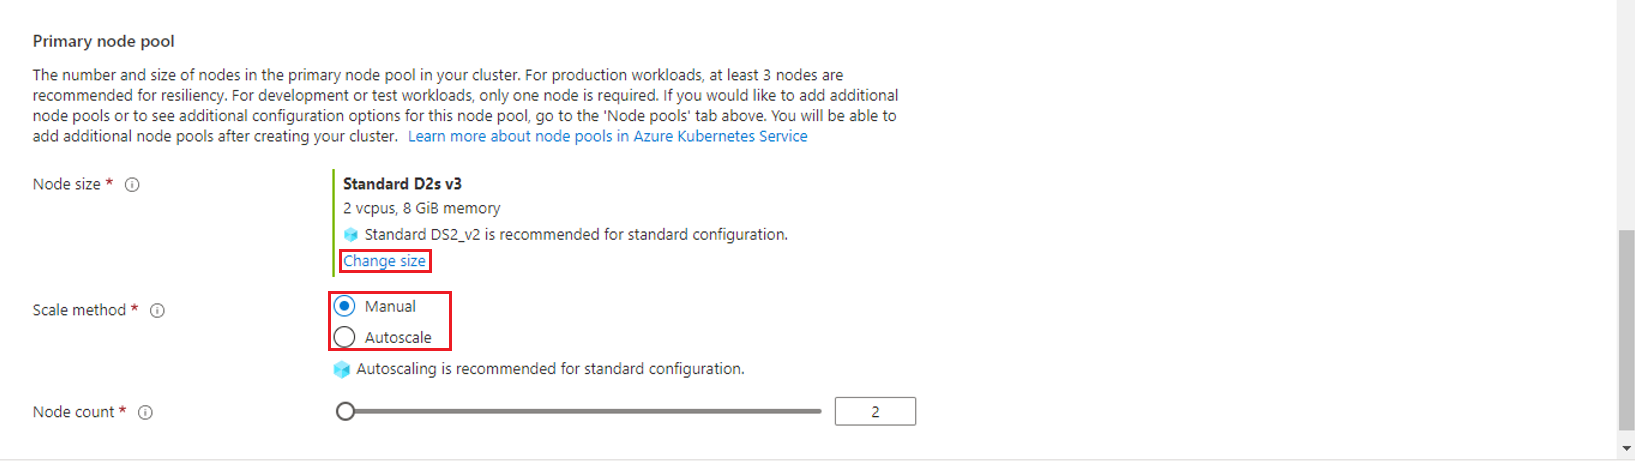
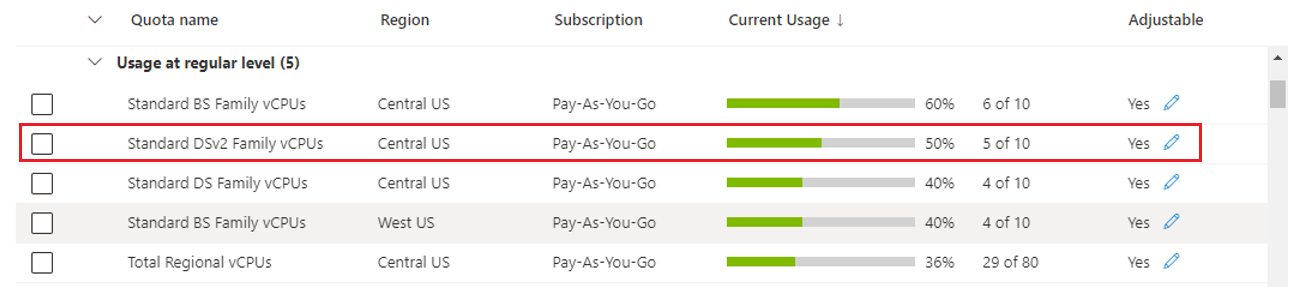
Note: Make sure that you have enough cores available in the region for that particular machine family when selecting the machine size. This can be done by checking in the Quotas section. To go to the Quotas section, open the portal in a new tab, search for ‘quotas’ and after opening quotas, select Compute.
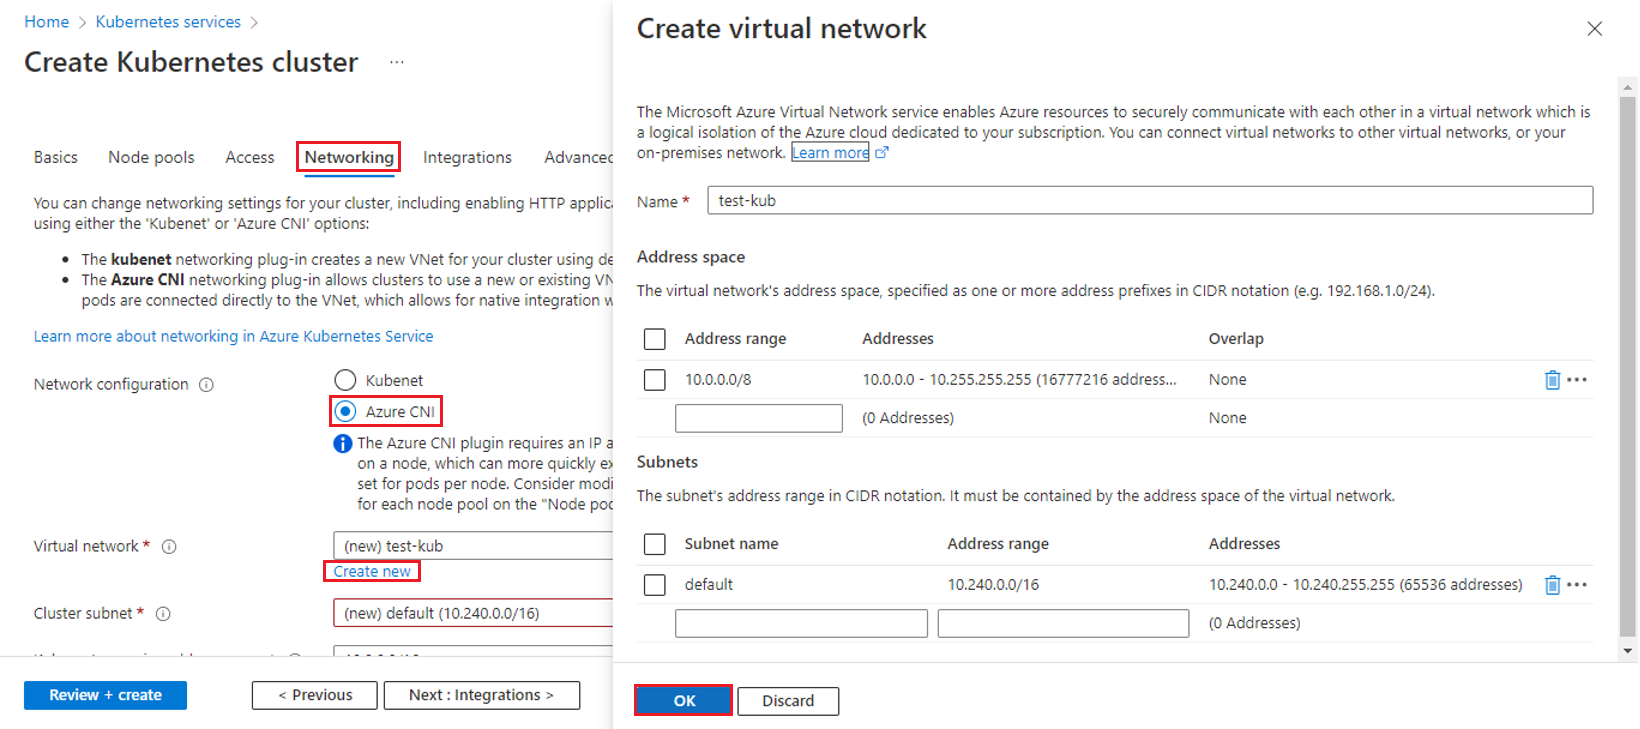
6. Now go to the Networking Tab and select Azure CNI as the Network Configuration.
Create a New virtual Network by selecting the Create New option, and set the properties as illustrated below and click OK.
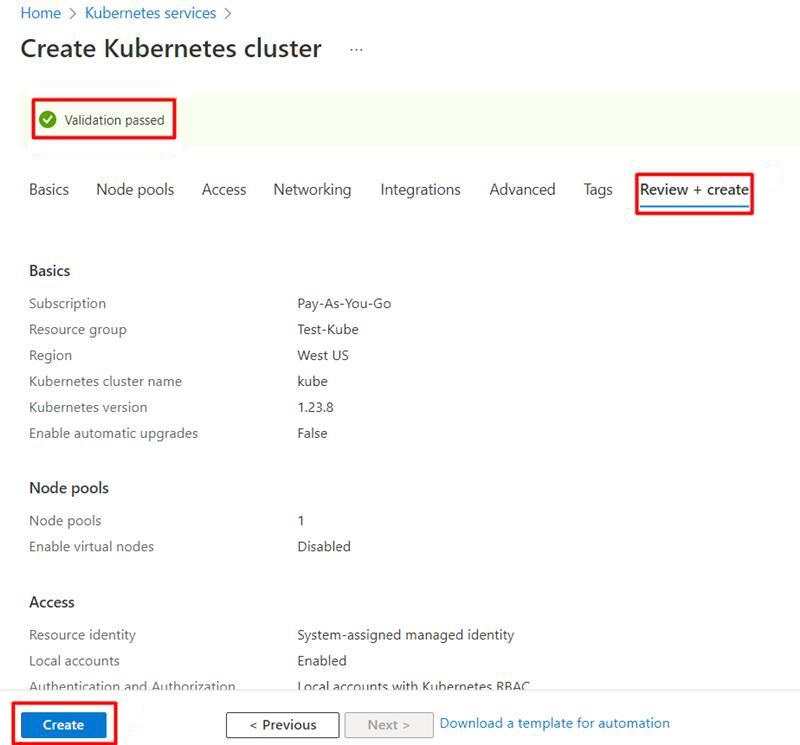
7. Now go to the Review + Create Tab to validate the options chosen. Once validated, click on Create to start deployment for the AKS cluster.
Adding a Secondary Node Pool (Worker Node)
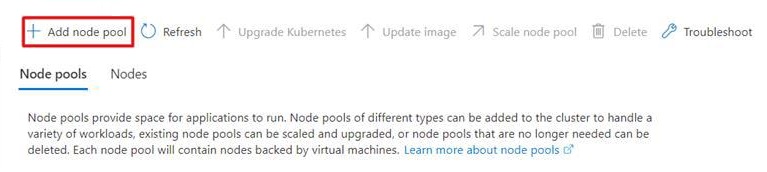
1. To add a worker node, navigate to the Node Pool which appears in the left pane on the opening of the cluster post-creation.
2. Now add a node pool, name it, select User mode and OS. Also select Machine size and scaling method as illustrated below.
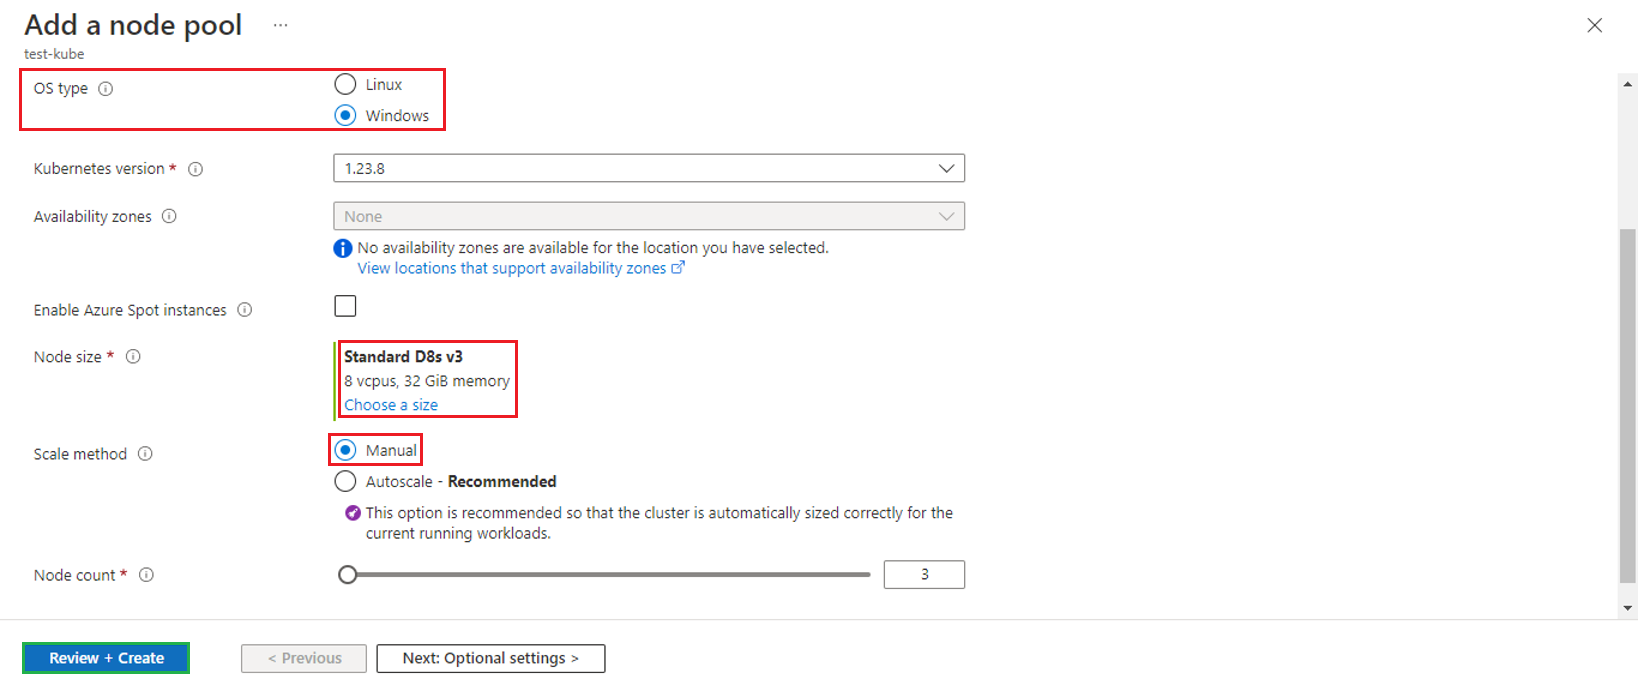
Note: Make sure that you have enough cores available in the region for that particular machine family when selecting the machine size. This can be done by checking in the Quotas section. To go to the Quotas section, open the portal in a new tab, search for ‘quotas’ and after opening quotas, select Compute.

Deploying your Application
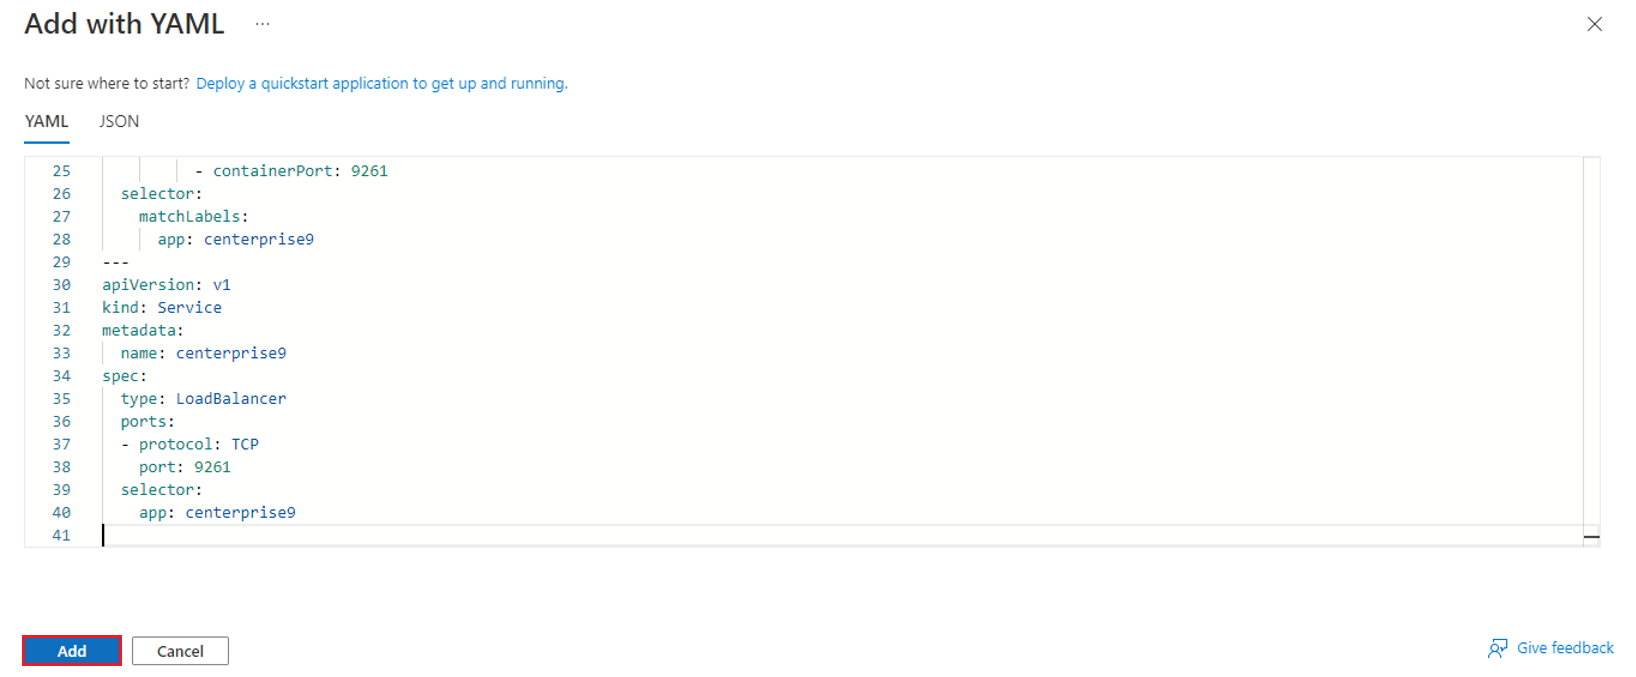
1. Open and copy the Centerprise YAML syntax from centerprise.yaml.
Note: YAML file containing Docker Hub’s public repositories link (asteracloud/asteraintegration:9.1.2-443)
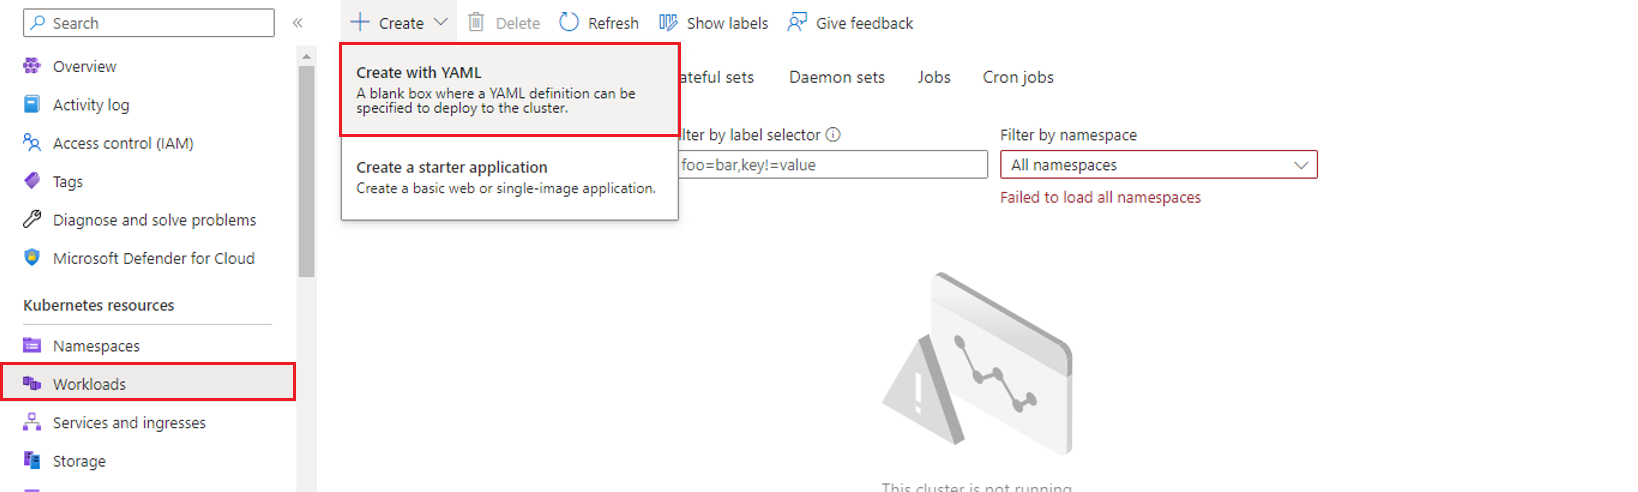
2. Next, go to Workloads in your AKS cluster, click on the Create option and select the option Create with YAML as illustrated in the image below.
3. Paste the earlier copied syntax from the YAML file as described below.
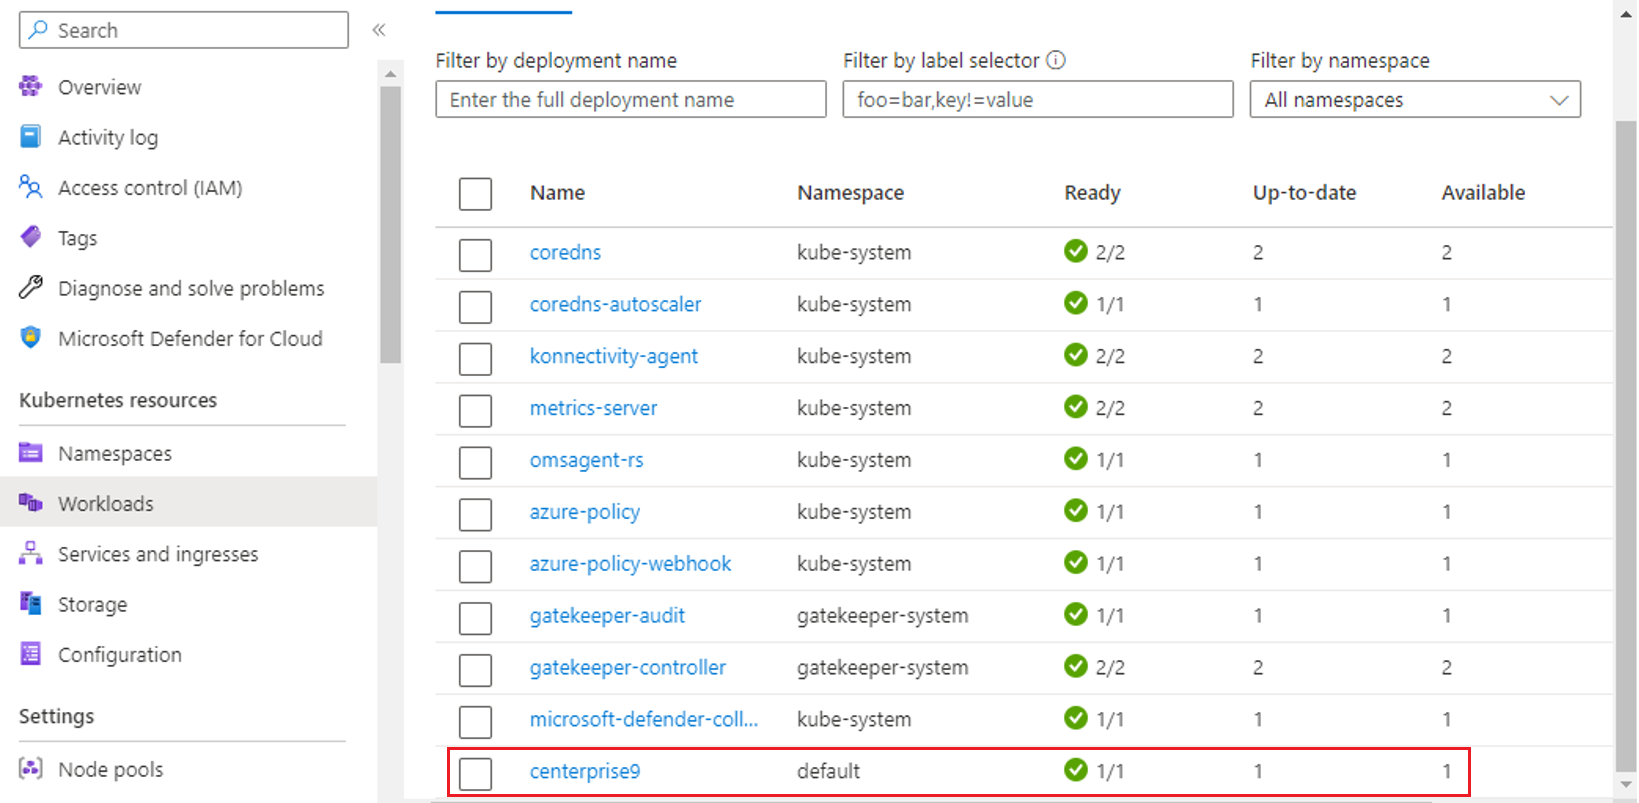
The above process will take approximately 10 minutes to create services and ingress as illustrated below.
Verifying your AKS Deployment
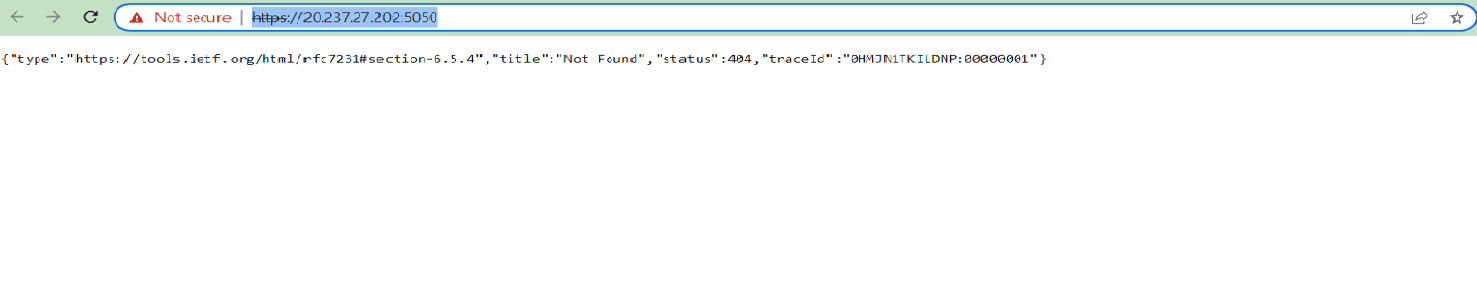
1. When the service is ready, you can verify them in your browser as shown.
Note: For procedures of connecting to the Astera Data Management Server, install Astera DW Builder and follow the setup instructions.
Enable Monitoring for Existing Azure Kubernetes Service (AKS) Cluster:
To enable monitoring directly from one of your AKS clusters in the Azure portal, do the following:
1. In the Azure portal, select All services.
2. In the list of resources, begin typing Containers. The list filters based on your input.
3. Select Kubernetes services.
4. In the list of Kubernetes services, select a service.
5. On the Kubernetes service overview page, select Monitoring - Insights.
6. On the Onboarding to Azure Monitor for Containers insights page, if you have an existing Log Analytics workspace in the same subscription as the cluster, select it in the drop-down list. The list preselects the default workspace and location that the AKS container is deployed to in the subscription.
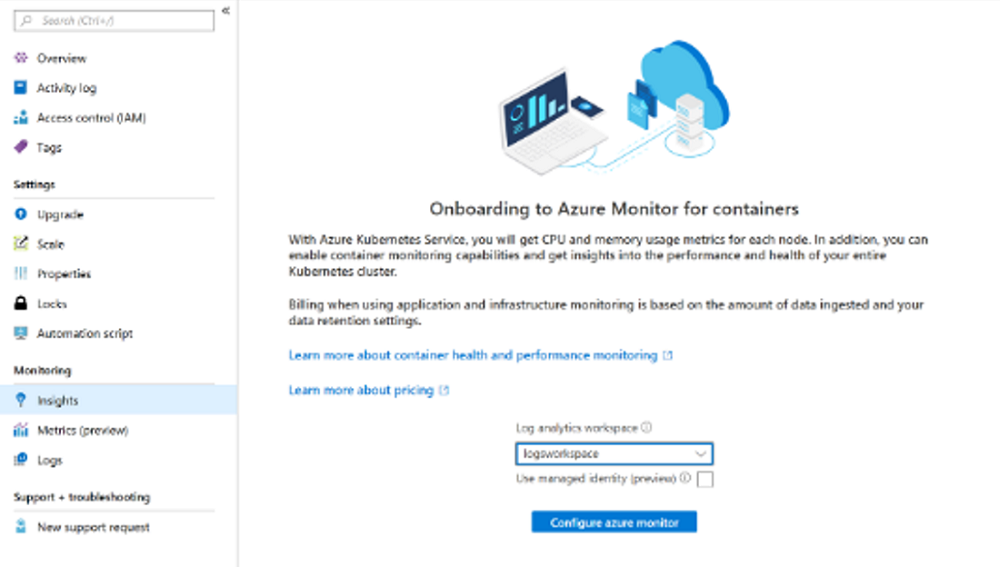
7. Select Use managed identity if you want to use managed identity authentication with the Azure Monitor agent.
After you’ve enabled monitoring, it might take around 15 minutes before you can view operational data for the cluster.
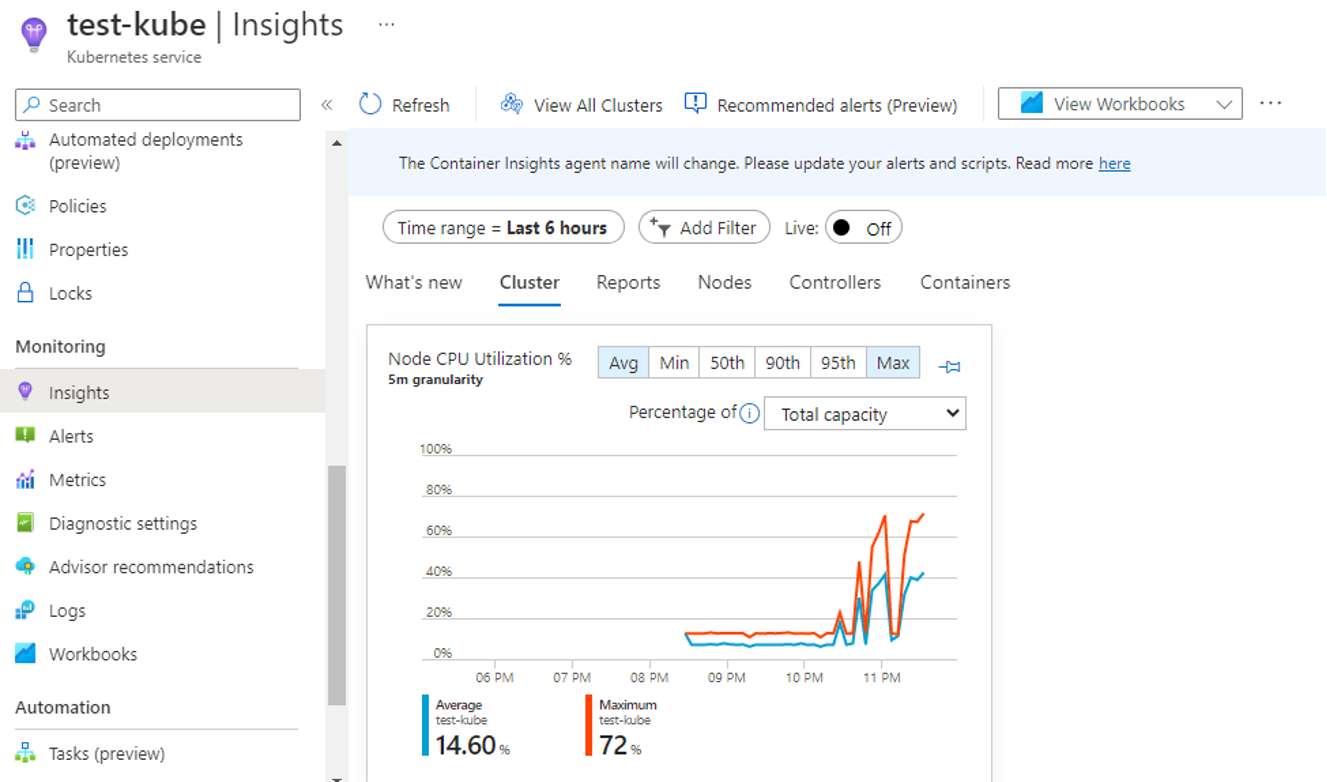
After Setting Up Monitoring, you’ll be able to monitor the Insights for your AKS Cluster by navigating to the Insights Tab under Monitoring to view:
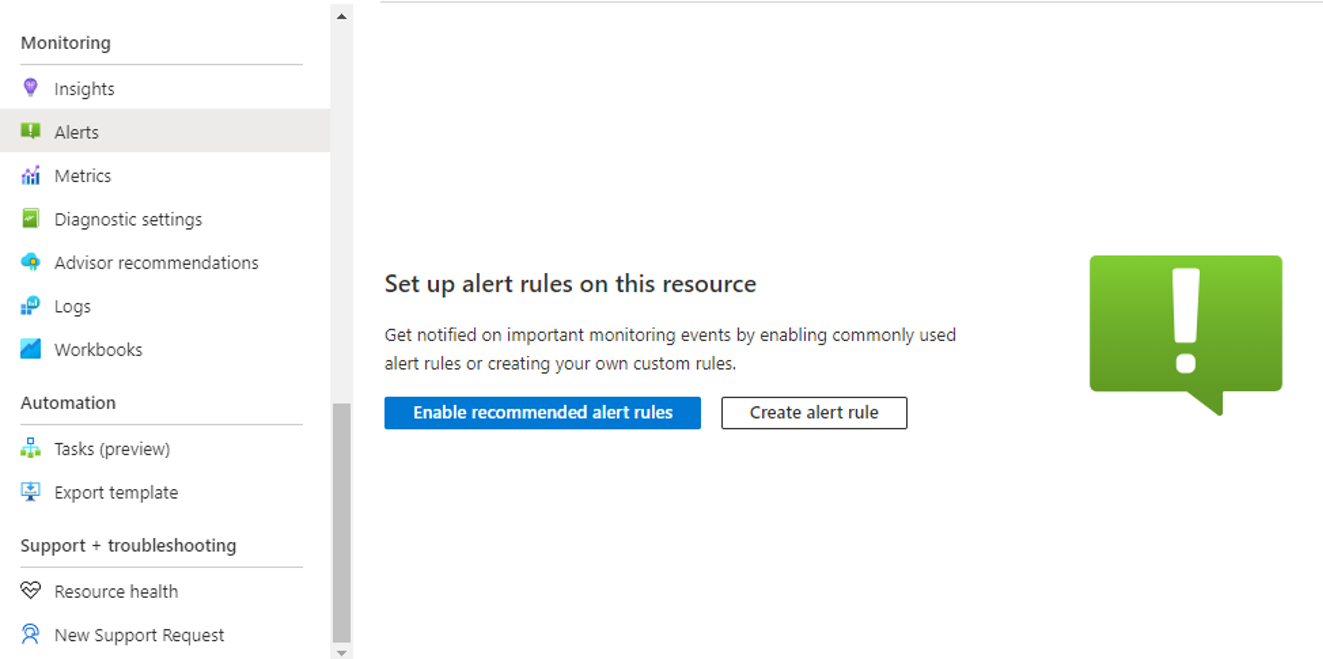
You may also setup customized alerts depending on your requirements from the Alerts Tab under Monitoring.
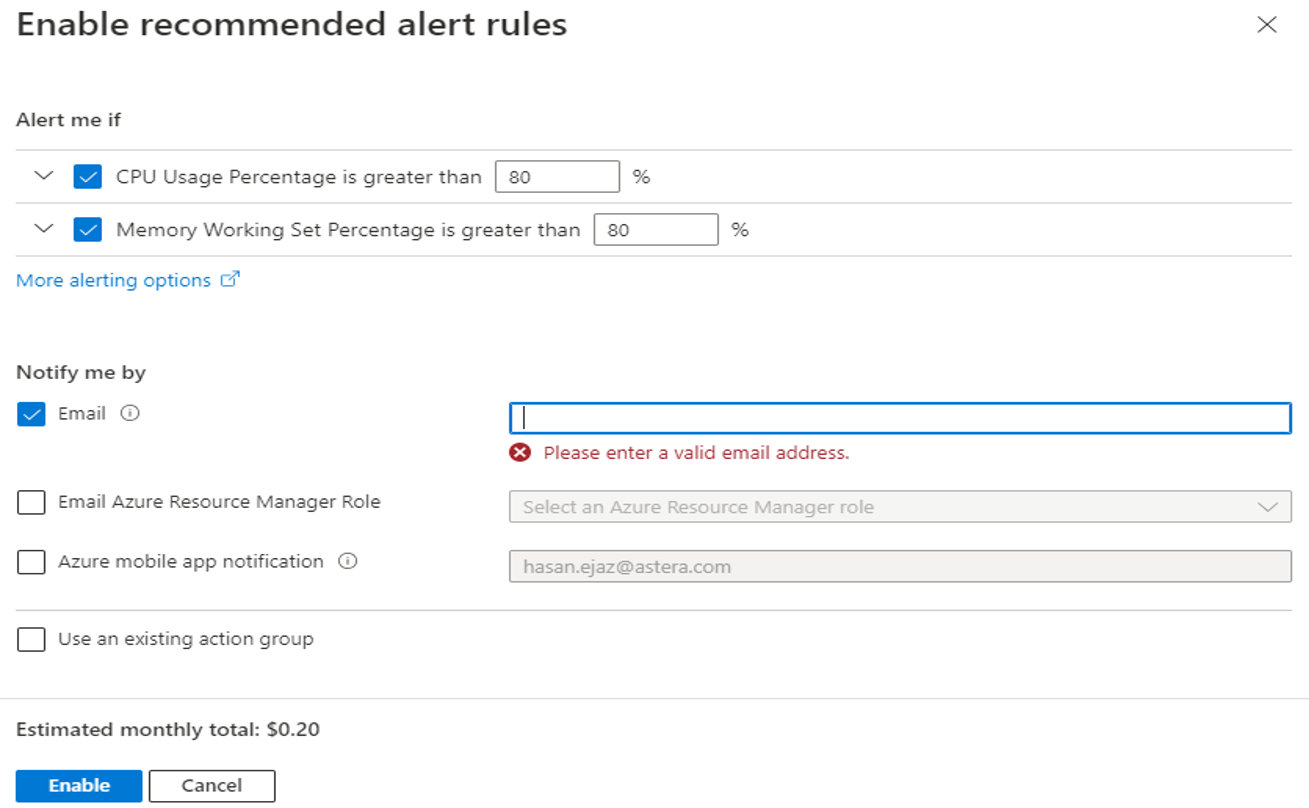
Select Enable recommended alert rules.
You may customize the alert settings depending on your requirements and provide an email to receive the alerts. Once configured select Enable.
This concludes our discussion on setting up, verifying and monitoring a Astera Data Management server deployment on AKS.