Authorizing QuickBooks’ API in Astera Centerprise
The QuickBooks API is a RESTful API which allows you to read or write data to and from QuickBooks. It uses ‘OAuth 2’ authentication type. You can configure a QuickBooks API in Astera Centerprise by using the Import API option present in the REST API Browser.
QuickBooks does not provide Open API definition, so we will add the request manually by using a Custom API in Astera Centerprise.
We only need to follow steps from Development > Create and Configure an App from the following link:
Authentication steps: https://developer.intuit.com/app/developer/qbo/docs/build-your-first-app
Where the Redirect Url used in step 7 in the above link for Centerprise would be:
Redirect Url for Centerprise Server: http://{Server_Name}:8050/)
Note: Save ClientID and secret to use it afterwards in Centerprise authentication
Follow these steps to authorize QuickBooks’ API in Astera Centerprise:
1. Create an integration project in Centerprise by following the instructions provided in this article.
2. Create a Custom API and provide a Name and Base Url.
Base Url (Sandbox): https://sandbox-quickbooks.api.intuit.com
Base Url (Production): URL:https://quickbooks.api.intuit.com

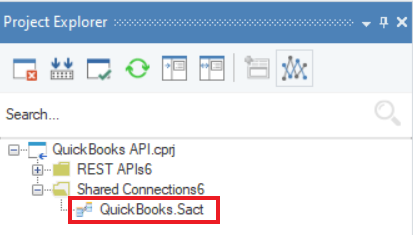
3. Now, you need to authenticate QuickBooks APIs to be able to use them in your dataflow. Without authentication, you will get an error. To authenticate an API, go to the Project Explorer and double click on the API’s .sact file under the Shared Connection node.
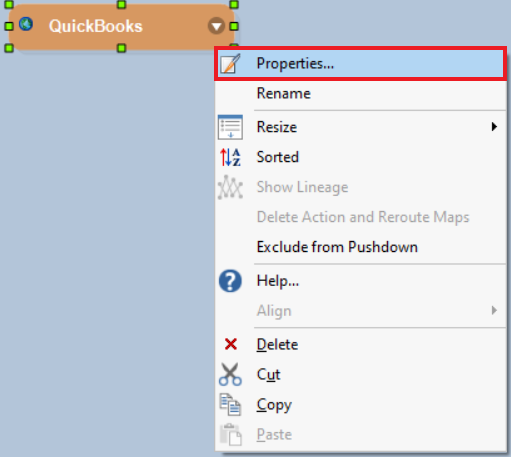
The QuickBooks .sact file will open in the designer. Now, right click on the Shared Action file’s header and select Properties.
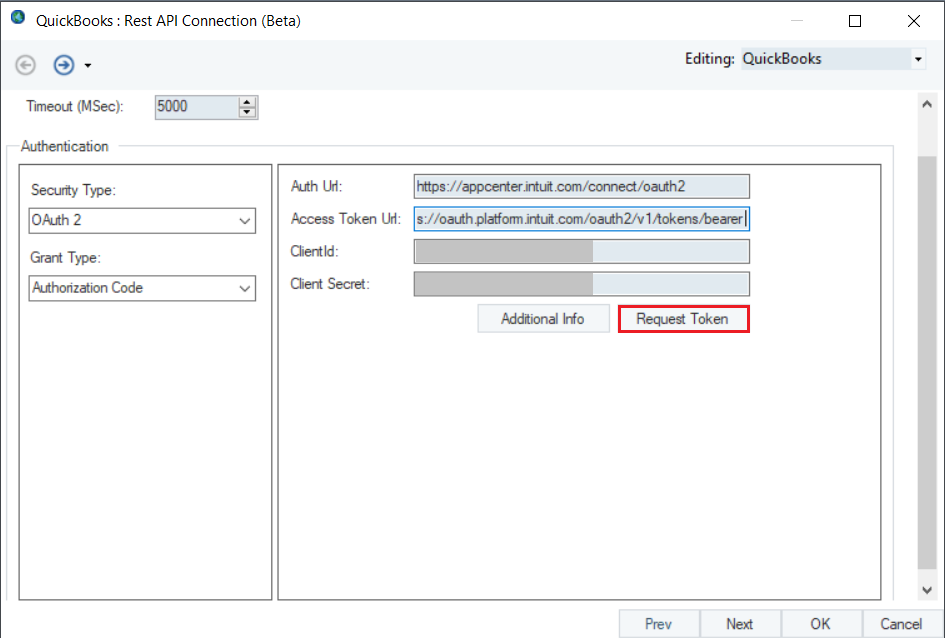
4. QuickBooks uses ‘OAuth 2’ Security Type with Grant Type, ‘Authentication Code’.
Auth Url: https://appcenter.intuit.com/connect/oauth2
Token Url: https://oauth.platform.intuit.com/oauth2/v1/tokens/bearer
ClientID: {ClientID}
Client Secret: {Client_Secret}
Scope: {Scope}
State: {State}
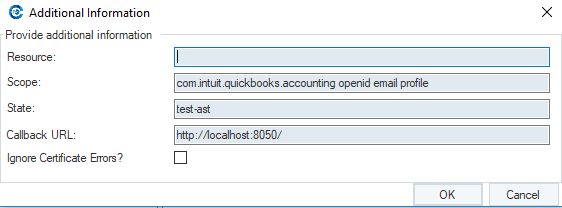
Additional Info - You can modify the authorization by mentioning names of only those permissions that you want to access from QuickBooks in Centerprise.
Note: While working with QuickBooks APIs, it is necessary to specify Scope and State to generate the access token.
5. Click OK, and save the Shared Action file (.sact).
6. Add methods in the REST API Browser which you want to access in Centerprise by adding requests and you are ready to use QuickBooks APIs in Centerprise.
Reference Link: https://developer.intuit.com/app/developer/qbo/docs/api/accounting/most-commonly-used/account
This concludes authorizing a QuickBooks API in Astera Centerprise.