Resource Catalog
The Catalog feature in Astera Centerprise is a centralized repository where one can store artifacts and share them with users as per the application.
The artifacts within the catalog are stored in a Catalog table. The security aspect of the Resource Catalog lets the user give permission to only the people whom they wish to share the catalog with.
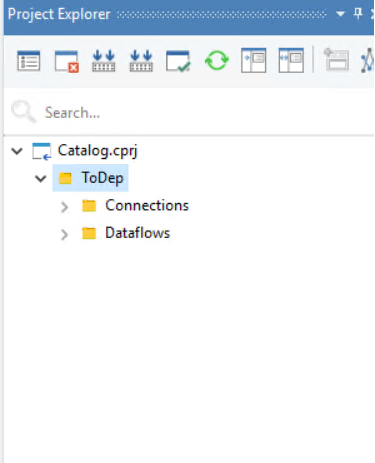
Using Catalog in a Project
1. Open a project, then head to the project explorer.
2. Right-click on any artifact present within the project and select Enable for Catalog in the context menu,
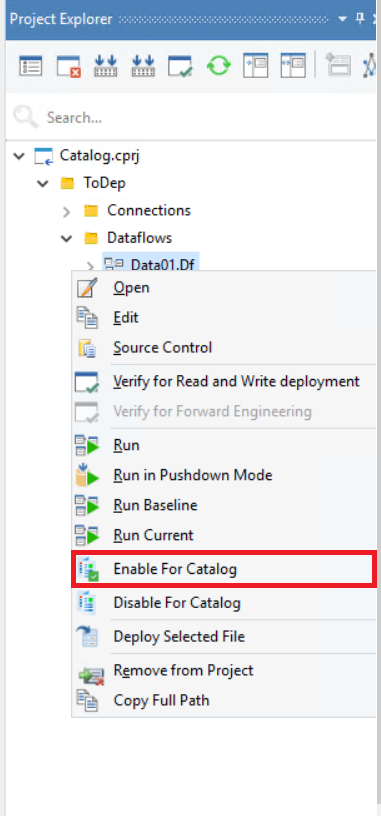
This will add a new node to the artifact,
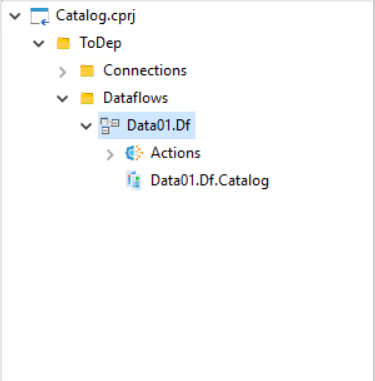
This is where information regarding the catalog for this artifact is going to be stored.
3. Double-click on this new node or right-click and select Open from the context menu,
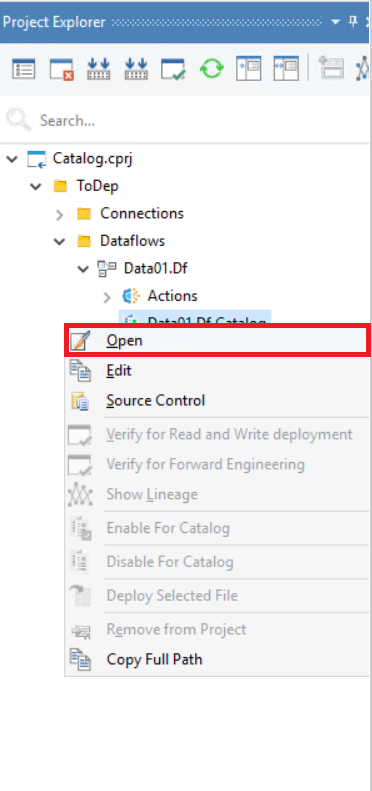
This will open a new window.
Note: This section is optional since the Artifact Name is populated with respect to the filename and the Namespace is populated with respect to the relative path of the project.
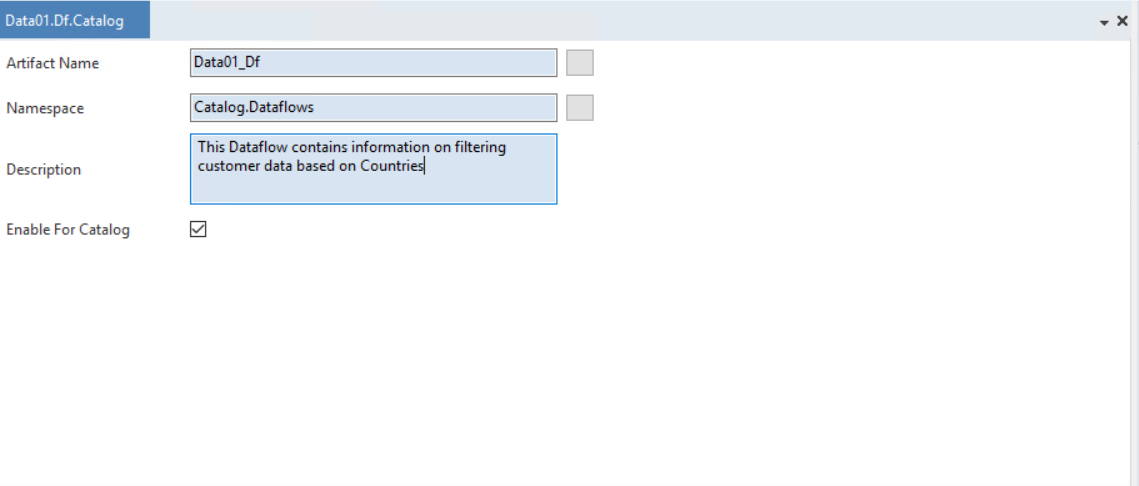
Artifact Name: The name of the artifact whose catalog has been enabled.
Namespace: The path of the artifact in the project to keep track of.
Note: The path and names can be changed and kept static using the icons on the right side of the fields.
Description: A description that explains the artifact and its catalog.
Enable For Catalog: This checkbox is selected if this artifact is going to be included in the catalog deployment.
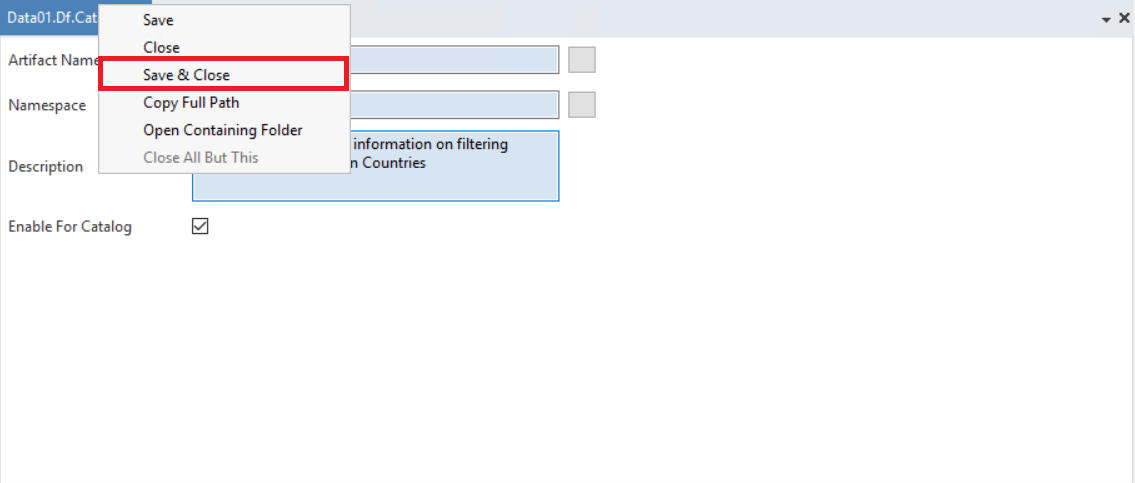
4. Right-click on the window header and select Save and Close from the context menu,
Deploying Artifact for Resource Catalog
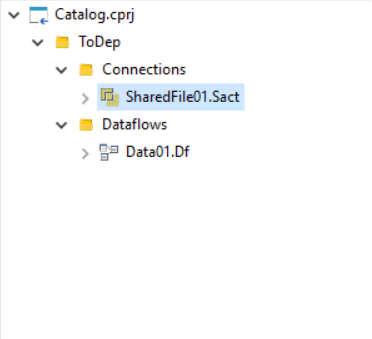
Artifacts present in the project explorer can be deployed individually or they can be grouped and deployed if they are all present under a single folder.
For our use case, we will be deploying a shared action file and a data flow present within a single folder,
1. Right-Click on the folder and select Deploy Selected Folder from the context menu,
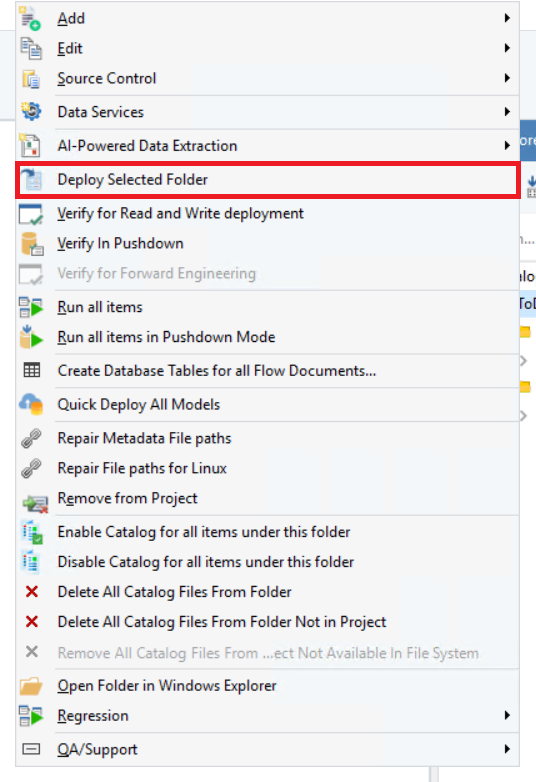
Note: The deployment directory needs to be set before a deployment can be made. You can configure the directory from the cluster settings.
2. Select the option and a new window will pop up,
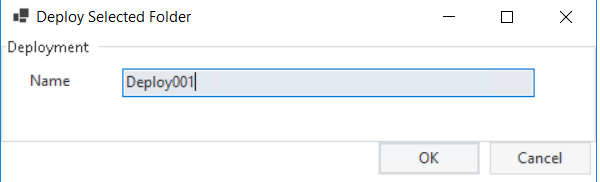
3. Click Ok and the selected folder will be deployed.
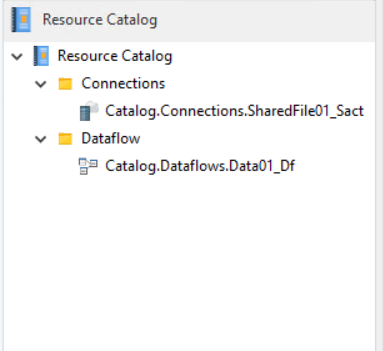
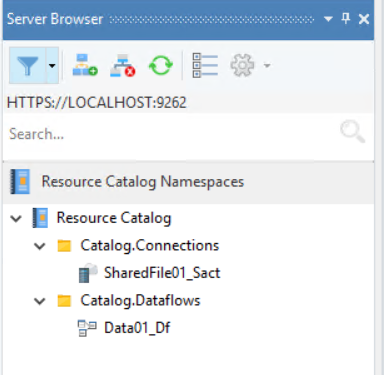
Once deployed, it can be viewed in the Server Browser under the Resource Catalog node,
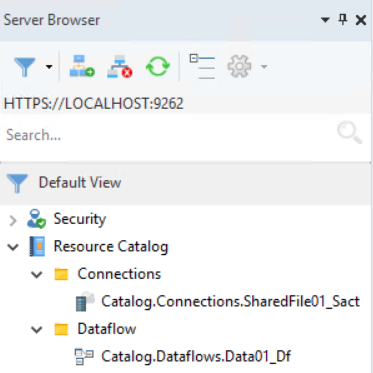
Within the Server Browser, there are two views present that can be filtered based on Catalog,

View by Artifact Type: This option is going to arrange the Resource Catalog artifacts based on artifact type.
View by Namespace: Selecting this option is going to arrange the Resource Catalog Artifacts based on Namespace.
Assigning permissions of Catalog items
We can provide access to this catalog to any of the users.
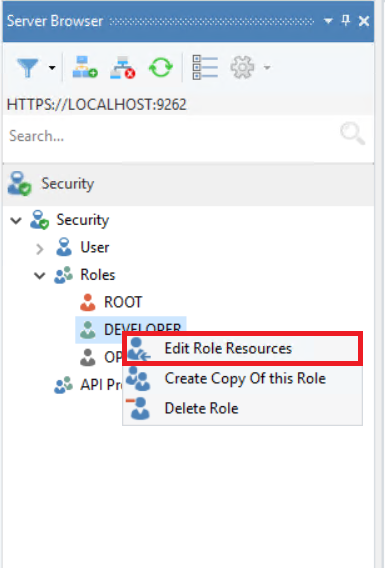
1. Right-click any role under the Security node and select Edit Role Resources,
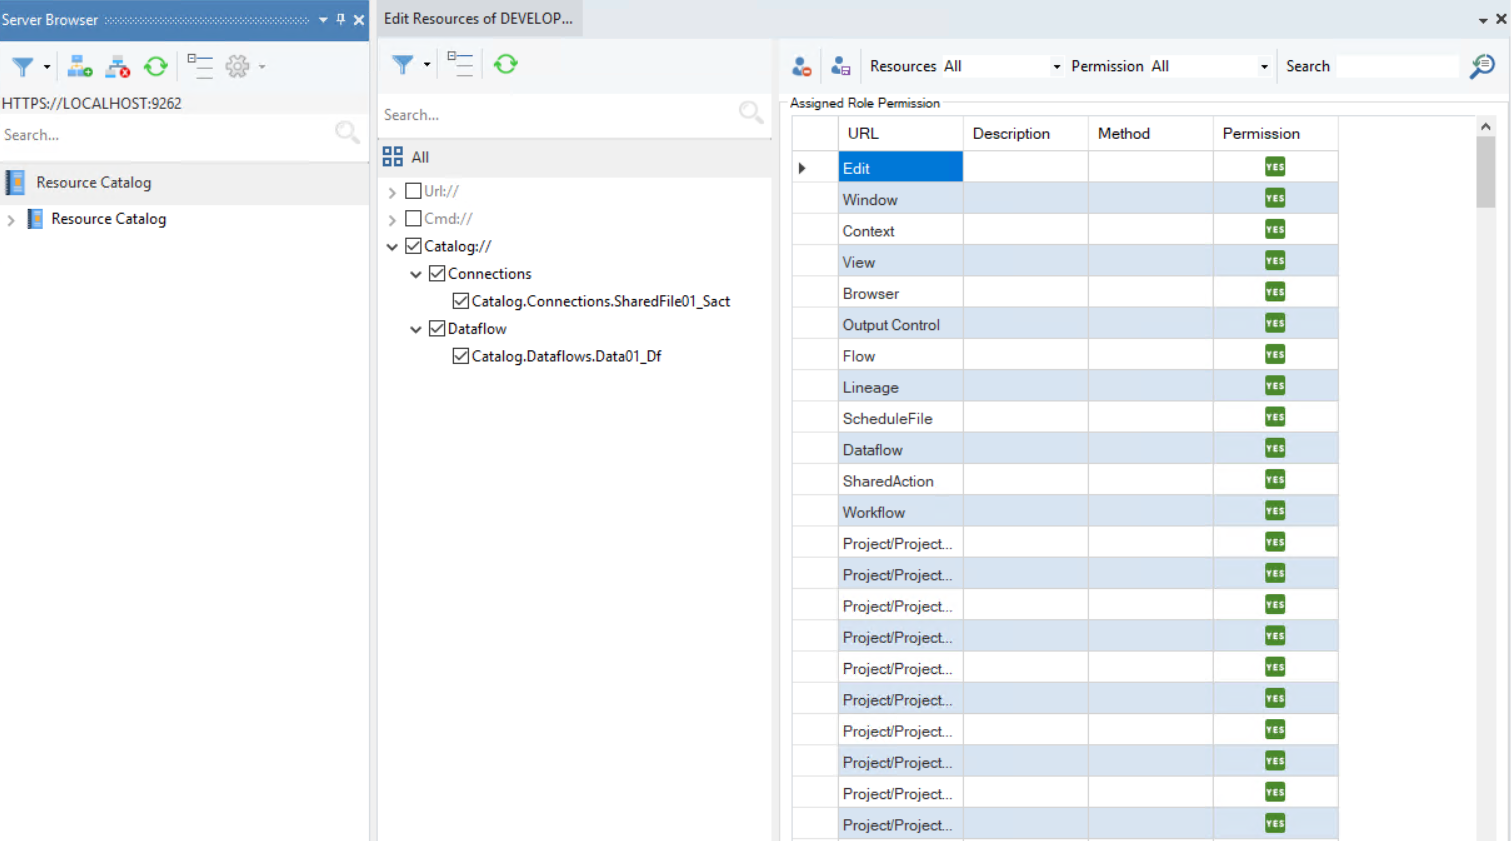
This will open a new window.
Simply select the checkboxes of whichever artifact you wish to give access to,
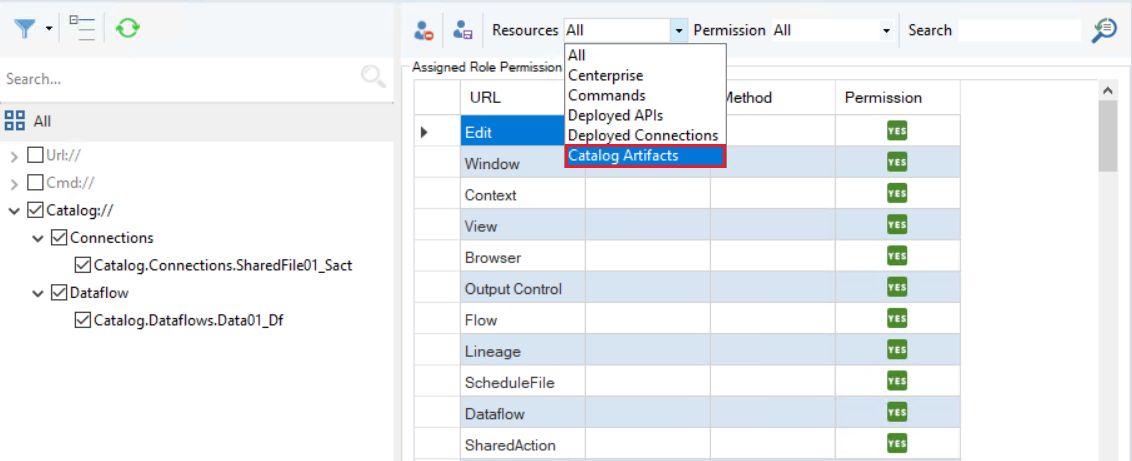
Additionally, the resource window also has a filter based on Catalog Artifacts,
Once the resources have been selected, right-click on the window and select Save & Close.
Catalog Consumption
Once the artifacts within the catalog have been deployed, they can then be consumed in various ETL pipelines.
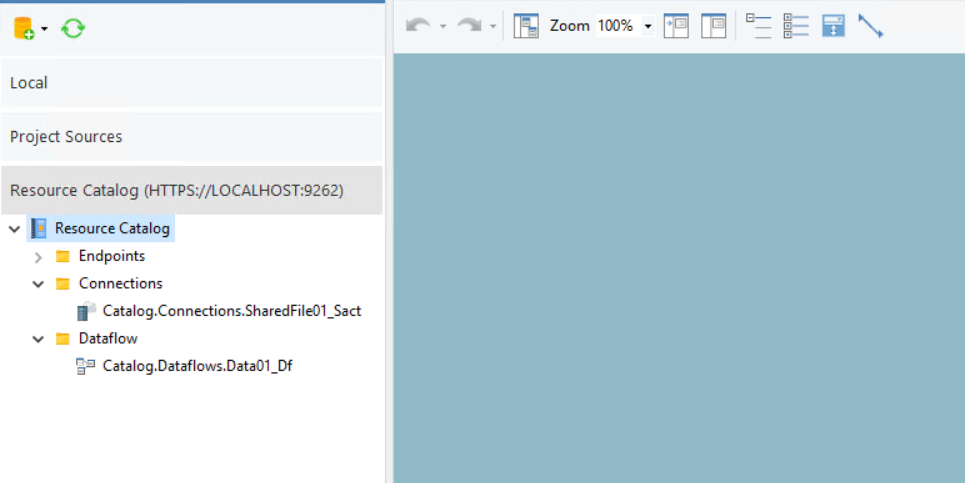
These deployments can also be viewed in the Data Source Browser,
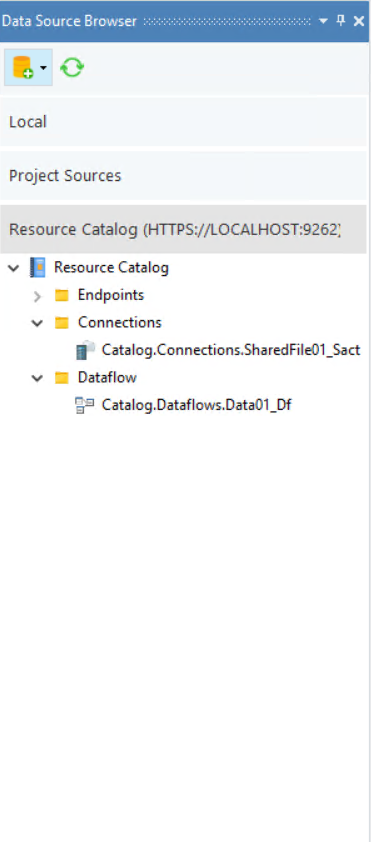
Here, we have the data source browser present from where the artifacts can be easily dragged and dropped.
Note: For connections, the drag-and-drop feature is not applicable, and the user must select those from the object itself.
For our use case, we have the following workflow present,
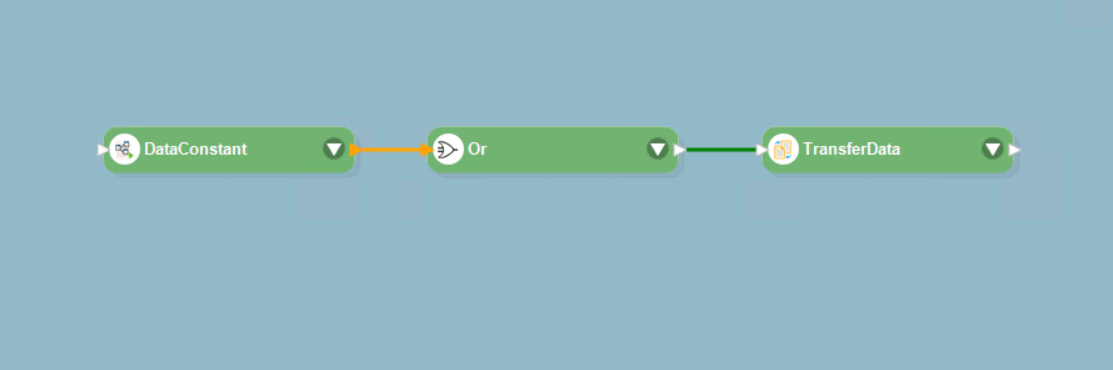
However, we need another Run Dataflow object for our use case to make sure this flow runs accurately. We want the other Run Dataflow object to run on success.
Thus, we will drag and drop our dataflow artifact present in the Resource Catalog section of the Data Source Browser.

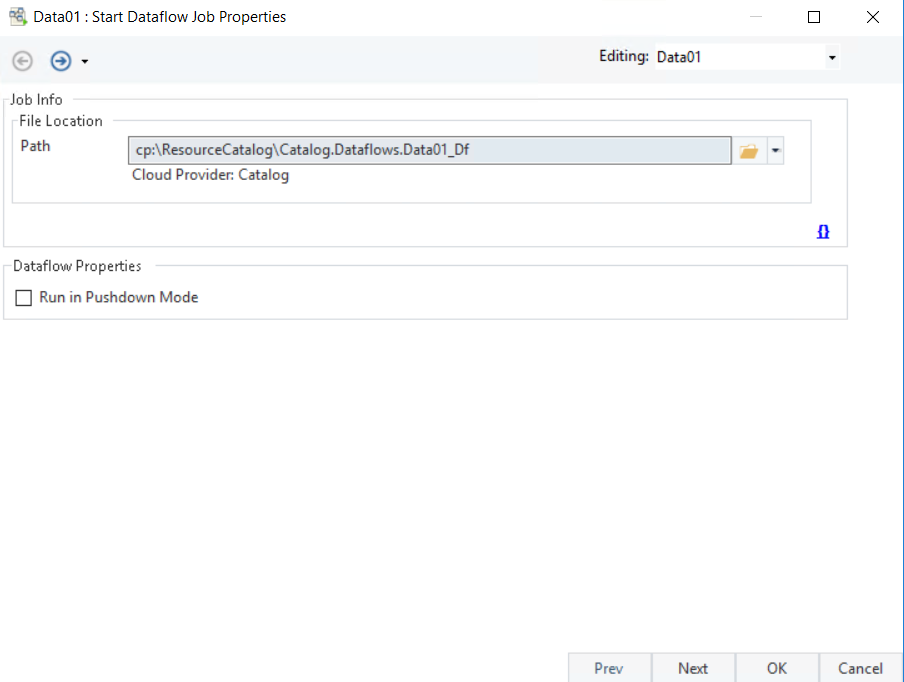
If we open the Run Dataflow object, we can see what the catalog path looks like,
We will then connect it to our OR object.

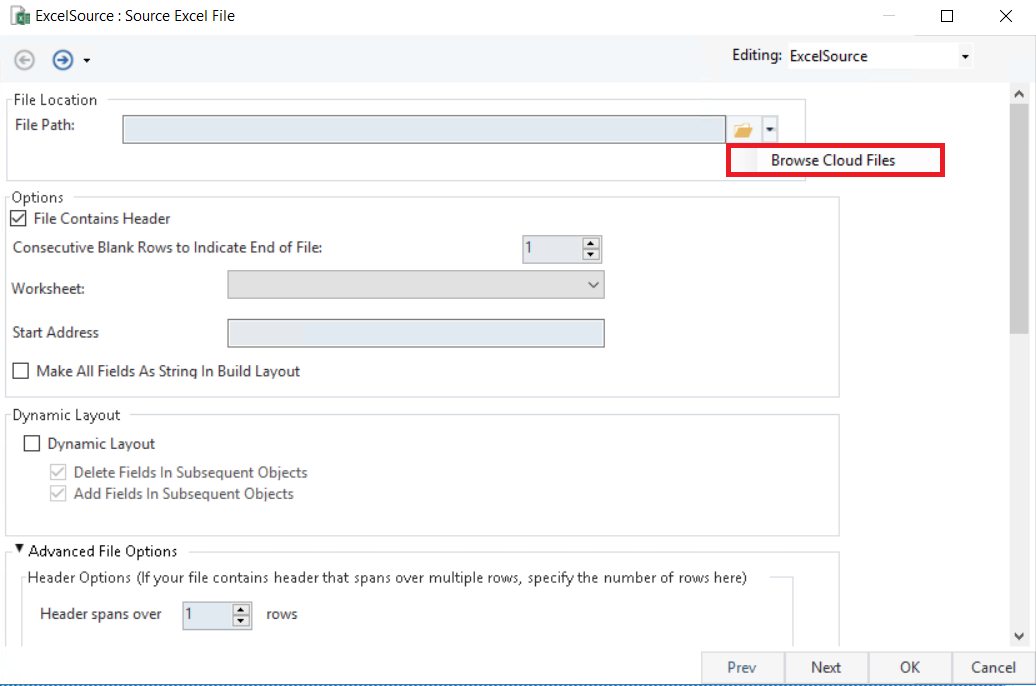
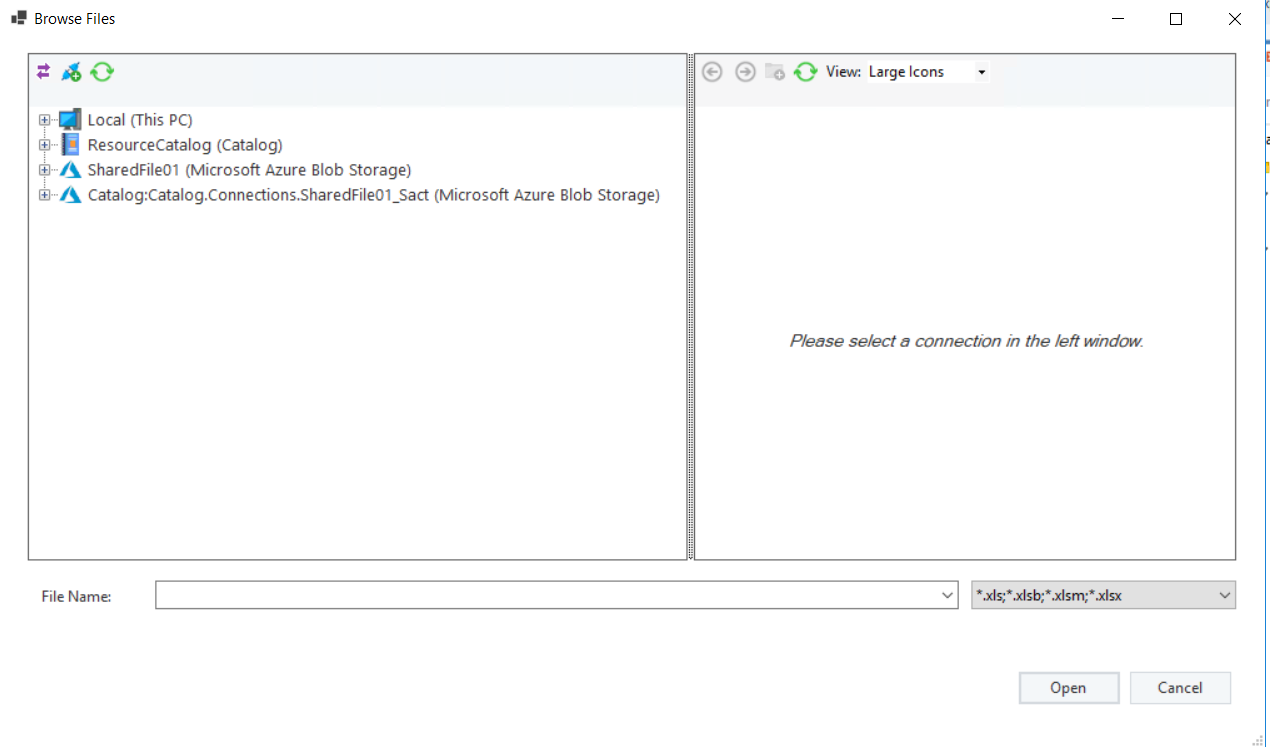
We can also access our catalog artifact through the Browse Cloud Files option present in all the objects,
This concludes the configuration, deployment, and consumption of the Resource Catalog in Astera Centerprise.