File System Items Source
The File System Items Source in Astera Centerprise is used to provide metadata information to a task in a dataflow or workflow. In a dataflow, it can be used in conjunction with a source object, especially in cases where you want to process multiple files through the transformation and loading process. In a workflow, the File System Items Source object can be used to provide input paths to a subsequent object such as a RunDataflow task.
Let’s see how it works in a dataflow.
Using File Systems Items Source in a Dataflow
Scenario
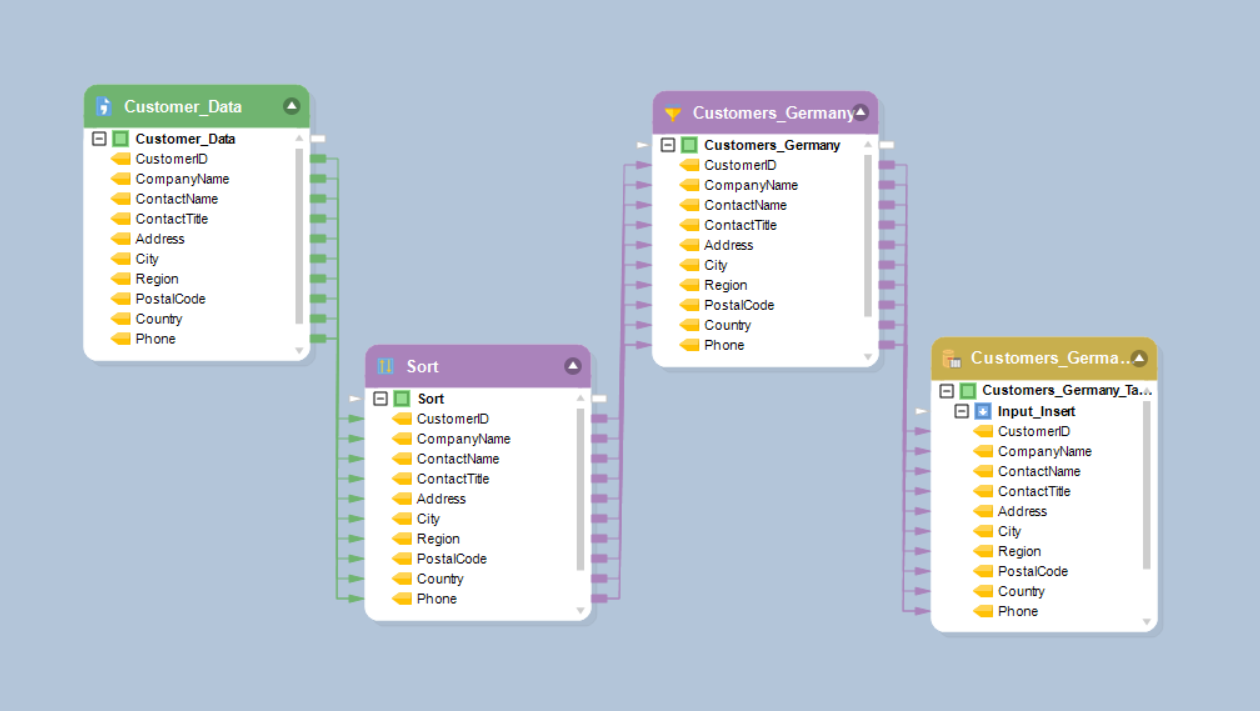
Here we have a dataflow that we want to run on multiple source files that contain Customer_Data from a fictitious organization. We are going to use the source object as a transformation and provide the location of the source files using a File System Items Source object. The File System Items Source will provide the path to the location where our source files reside and the source will object pick the source files from that location, one by one, and pass it on for further processing in the dataflow.
Steps to Use the File System Item Source in a Dataflow
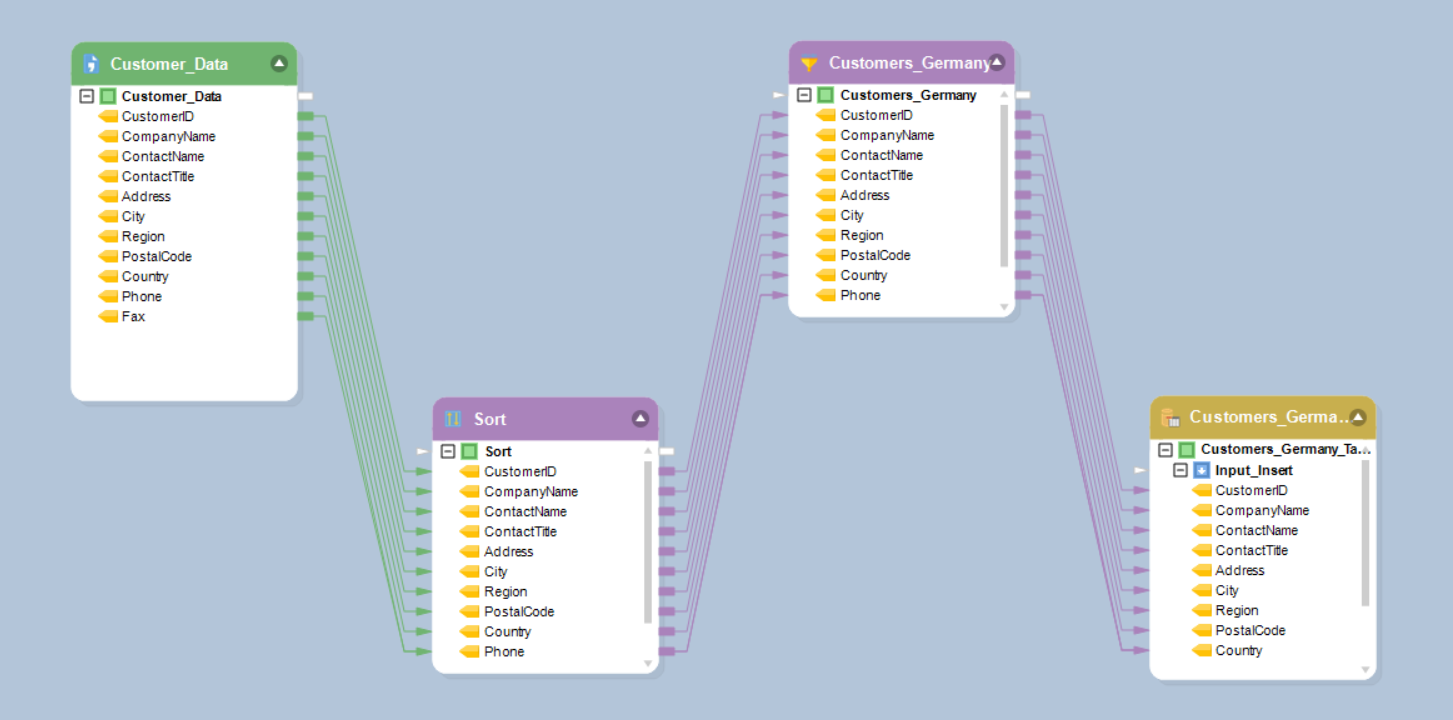
Here, we want to sort the data, filter out records of customers from Germany and write the filtered records into a database table. The source data is stored in delimited (.csv) files.
First, change the source object into a Transformation object. This is because the data is stored in multiple delimited files and we want to process all of them in the dataflow. For this, right-click on the source object’s header and click Transformation in the context menu.
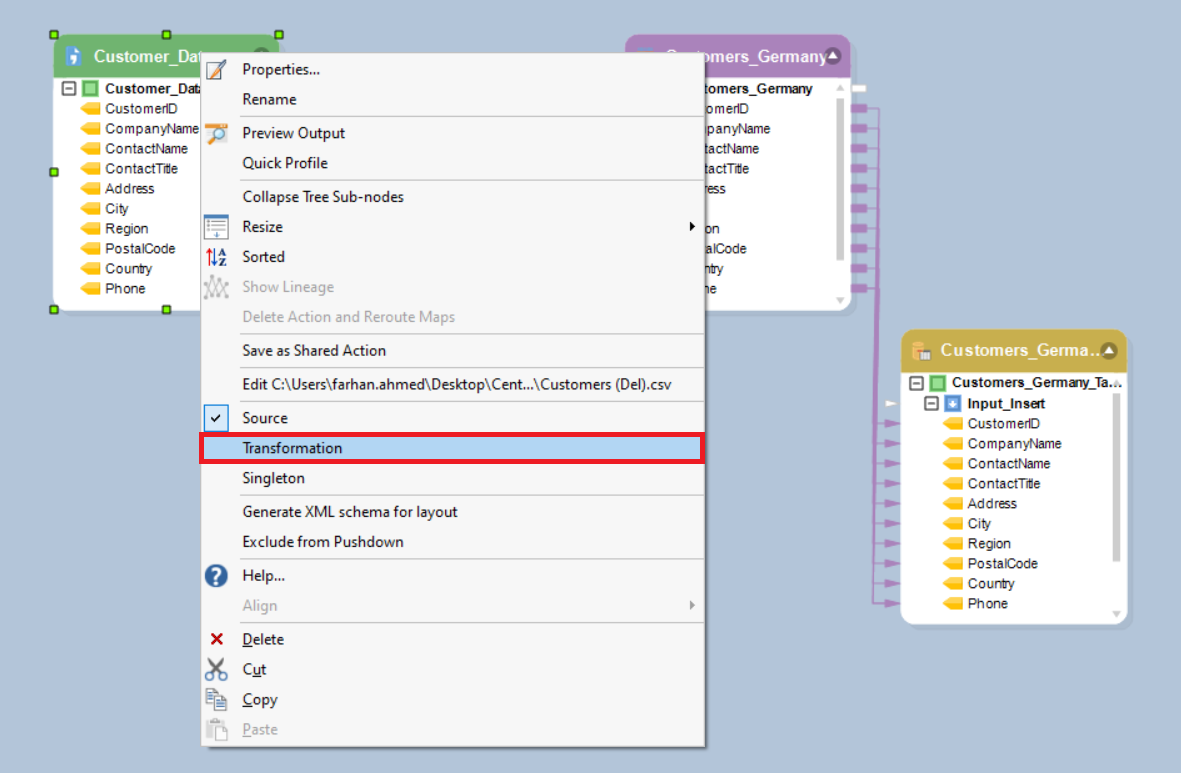
You can see that the color of the source object has changed from green to purple which indicates that the source object has been changed into a transformation object.
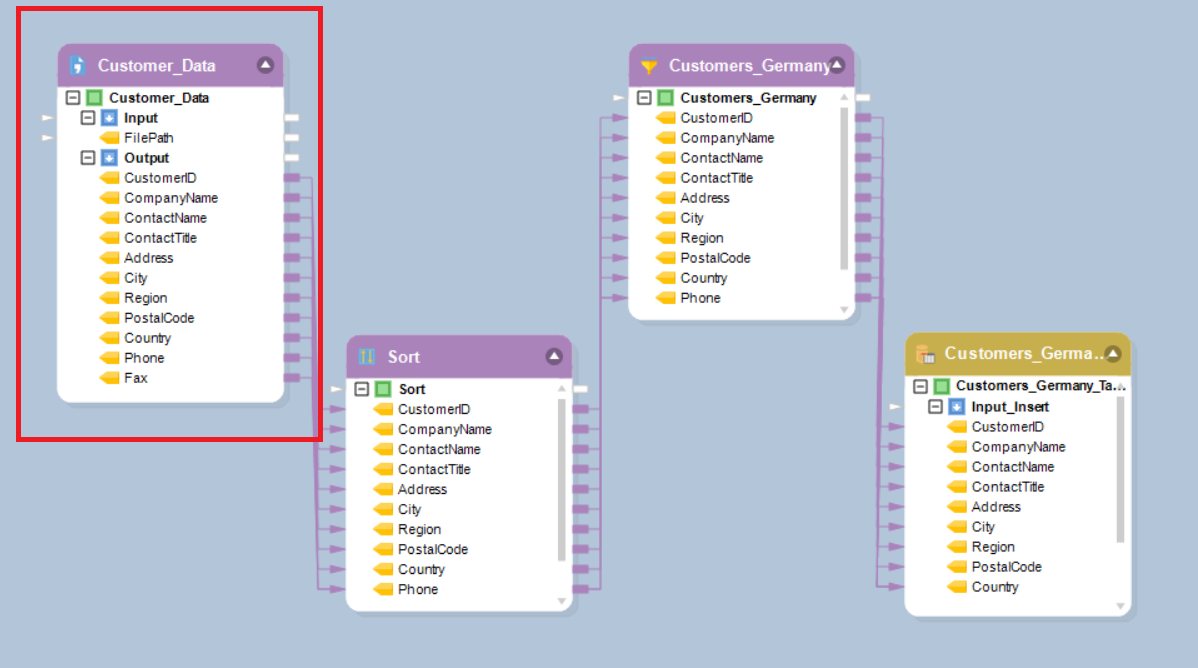
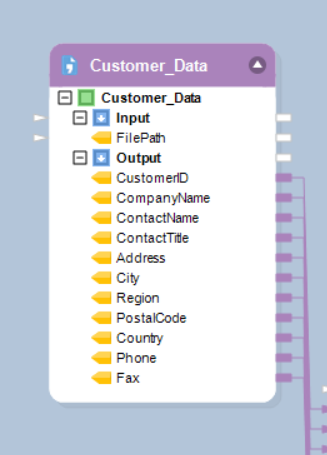
Notice that the source object now has two nodes: Input and Output. The Input node has an input mapping port which means that it can take the path to the source file from another object.
Now we will use a File System Items Source object to provide a path to Customer_Data Transformation object. Go to the Sources section in the Toolbox and drag-and-drop the File System Items Source object onto the designer.
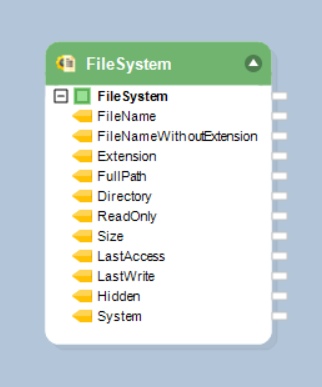
If you look at the File System Items Source object, you can see that the layout is pre-populated with fields such as FileName, FileNameWithoutExtension, Extension, FullPAth, Directory, ReadOnly, Size, and other attributes of the files.
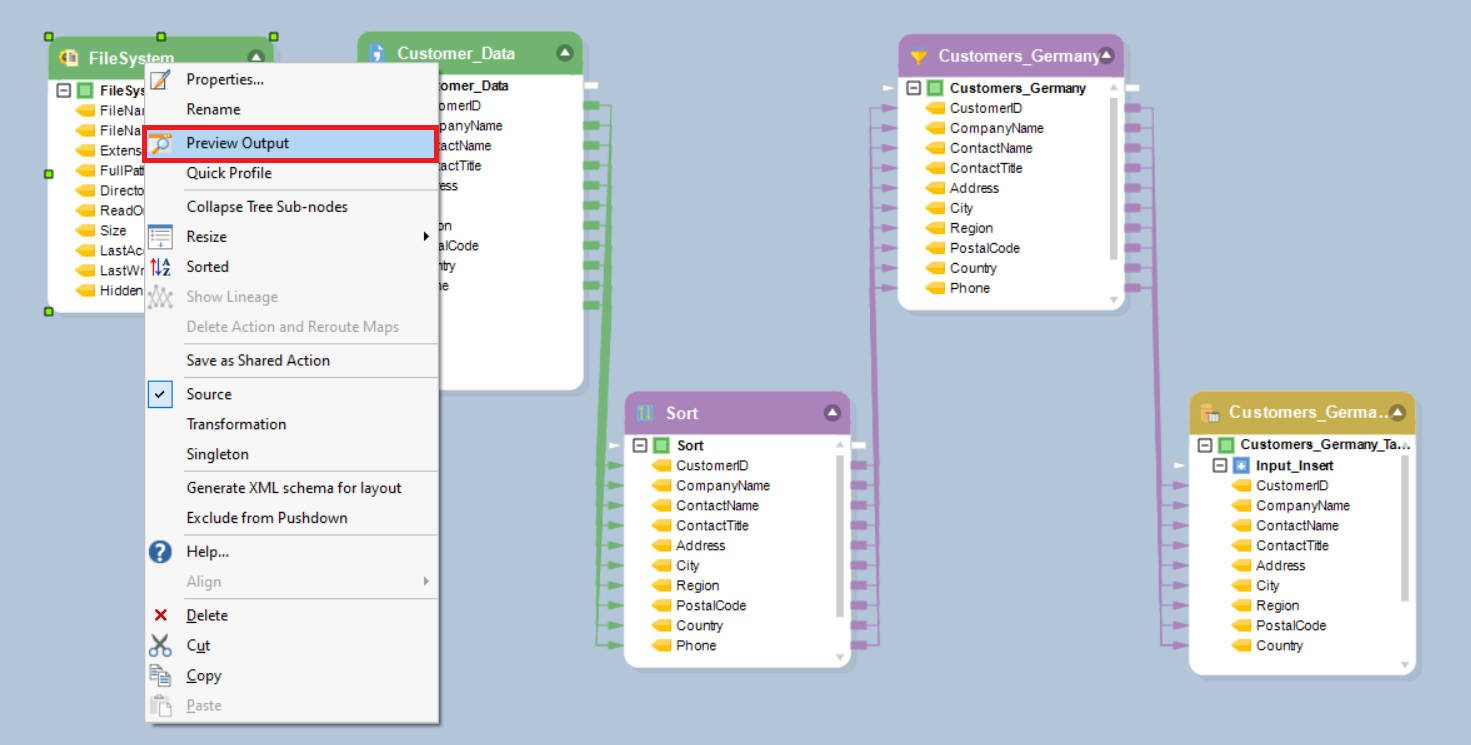
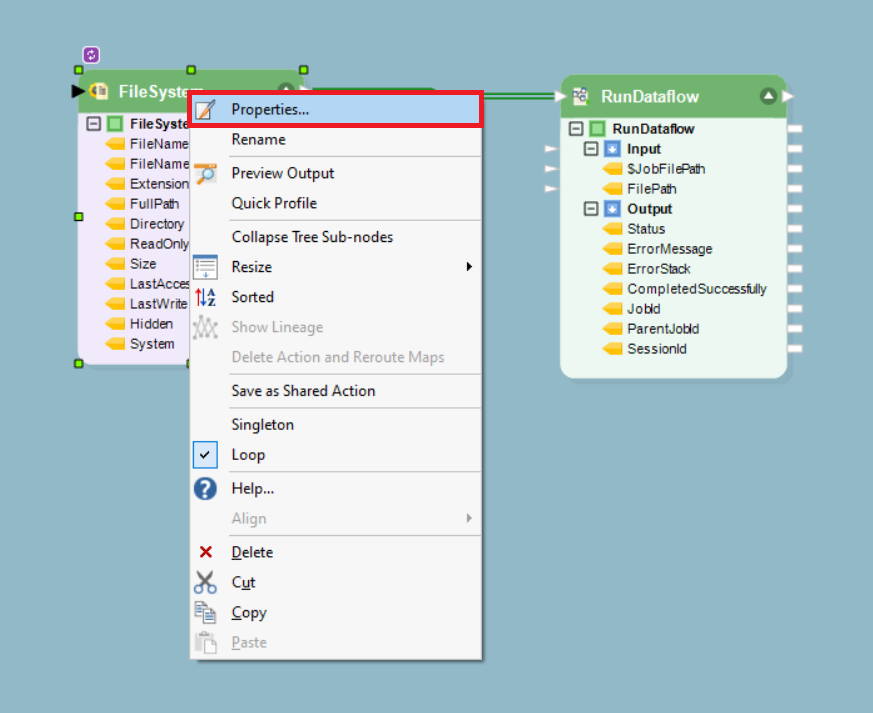
To configure the properties of the File System Items Source object, right-click on the File System Items Source object’s header and go to Properties.
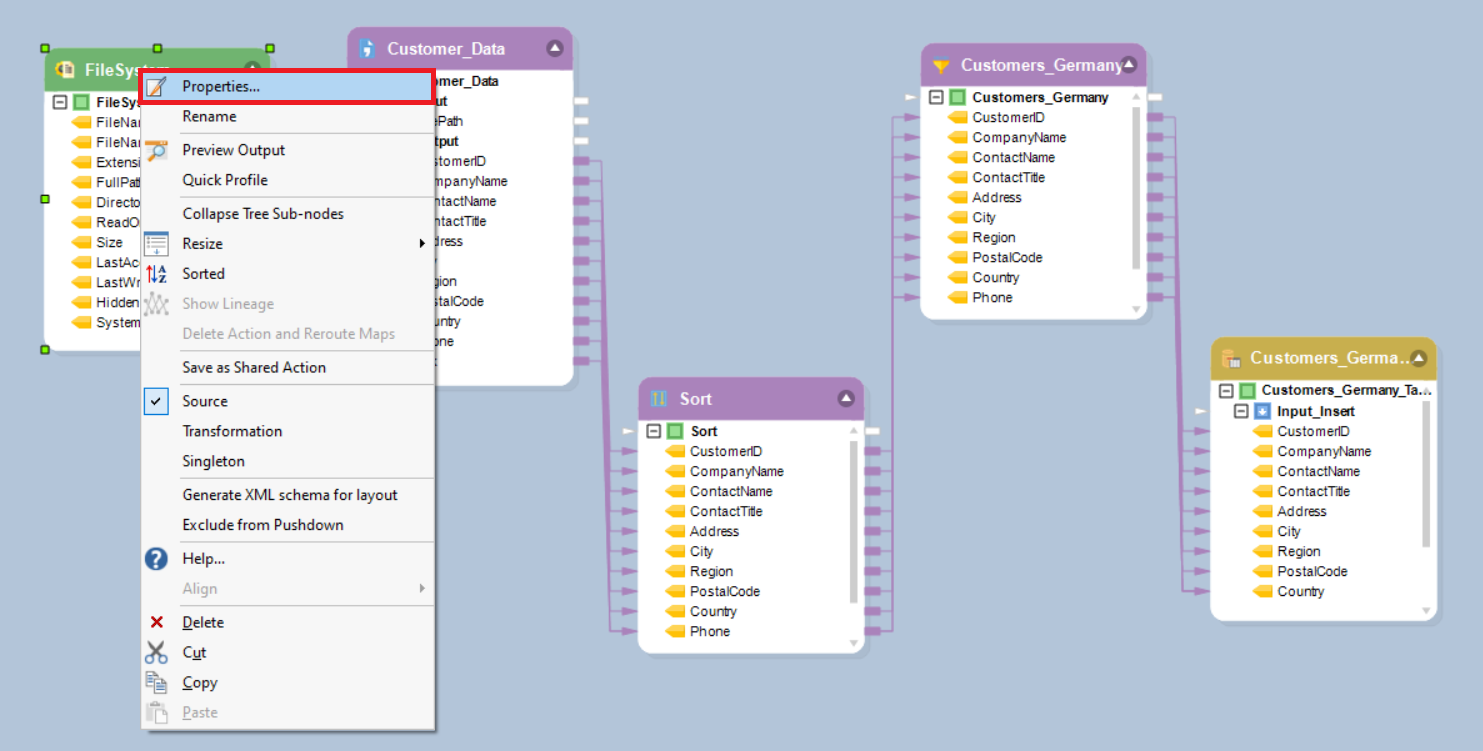
This will open the File System Properties window.
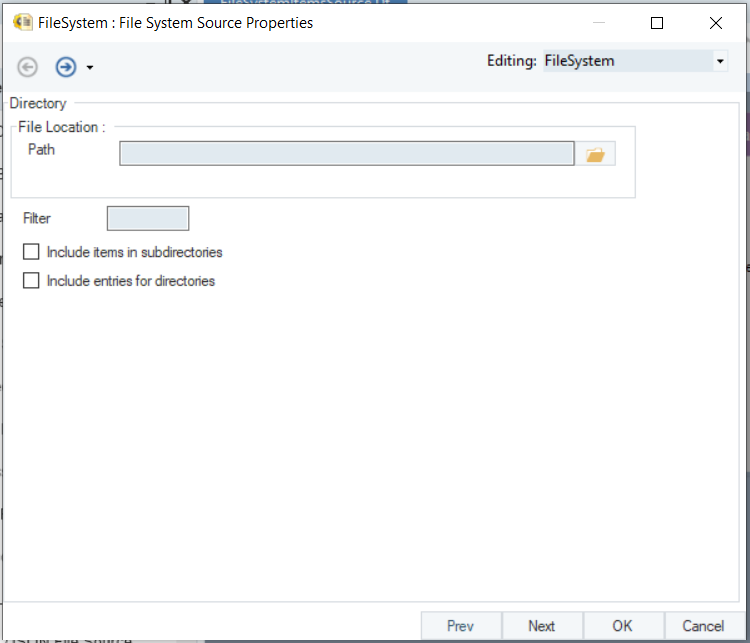
The first thing you need to do is point the Path to the directory or folder where your source files reside.
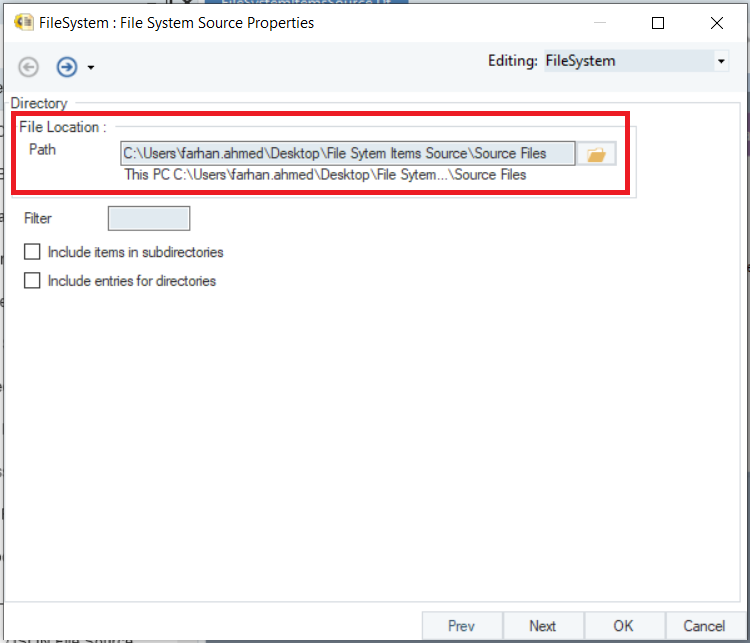
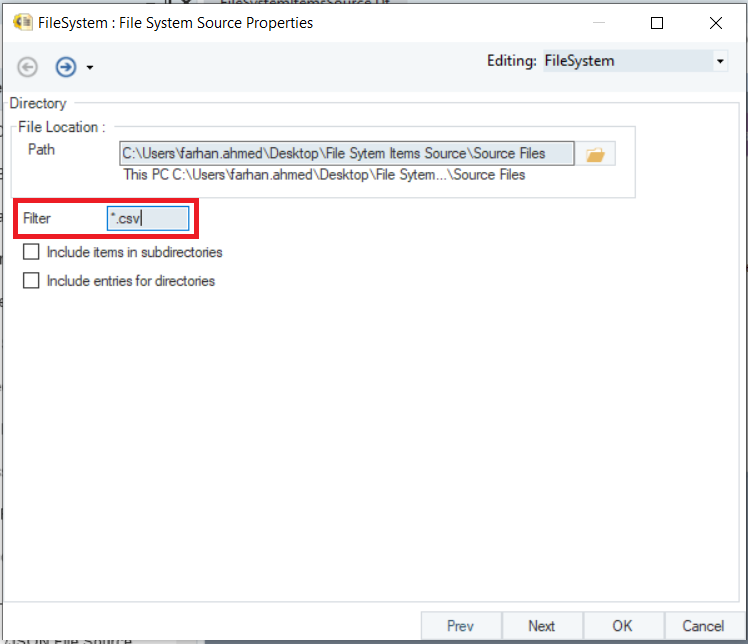
You can see a couple of other options on this screen:
Filter: If your specified source location contains multiple files in different formats, you can use this option to filter and read files in the specified format. For instance, our source folder contains multiple PDF, .txt. doc, .xls, and .csv files, so we will write “*.csv” in the Filter field to filter and read delimited files only.
Include items in subdirectories: Check this option if you want to process files present in the sub-directories
Include Entries for Directories: Check this option if you want to include all items in the specified directory
Once you have specified the Path and other options, click OK.

Now right-click on the File System Items Source object’s header and select Preview Output.
You can see that the File System Items Source object has filtered out delimited files from the specified location and has returned the metadata in the output. You can see the FileName, FileNameWithoutExtension, Extension, FullPath, Directory, and other attributes such as whether the file is ReadOnly, FileSize, LastAccessed, and other details in the output.

Now let’s start mapping. Map the FullPath field from the File System Items Source object to the FullPath field under the Input node in the Customer_Data Transformation object.
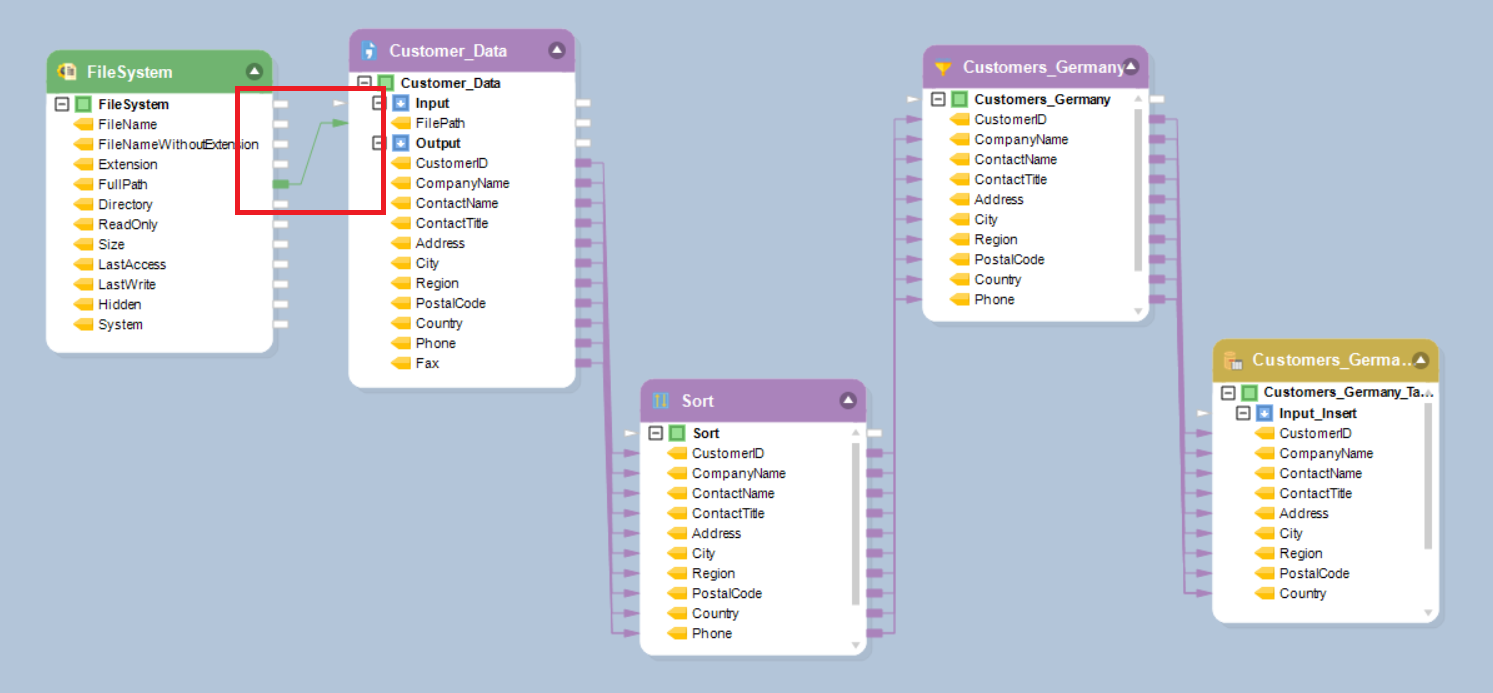
Once mapped, when we run the dataflow, the File System Items Source will pass the path to the source files, one by one, to the Customer_Data Transformation object. The Customer_Data Transformation object will read the data from the source file and pass it to the subsequent transformation object to be processed further in the dataflow.
Using File System Items Source in a Workflow
In a workflow, the File System Items Source object can be used to provide input paths to a subsequent task such as a RunDataflow task. Let’s see how this works.
Steps to Use the File System Items Source in a Workflow
We want to design a workflow to orchestrate the process of extracting customer data stored in delimited files, sorting that data, filtering out records of customers from Germany and loading the filtered records in a database table.
We have already designed a dataflow for the process and have called this dataflow in our workflow using the RunDataflow task object.
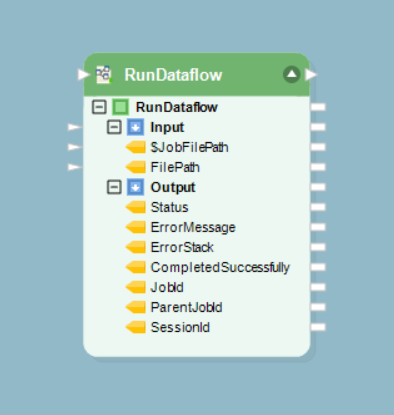
We have multiple source files that we want to process in this dataflow. So, we will use a File System Items Source object to provide the path to our source files to the RunDataFlow task. For this, go to the Sources section in the Toolbox and drag-and-drop the File System Items Source onto the designer.
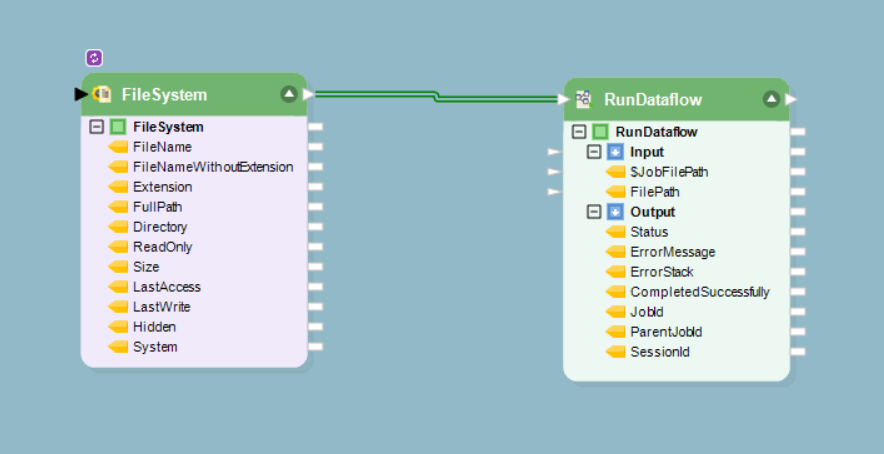
If you look at the File System Items Source, you can see that the layout is pre-populated with fields such as FileName, FileNameWithoutExtension, Extension, FullPAth, Directory, ReadOnly, Size, and other attributes of the files. Also, there is this small blue icon with the letter ‘s’, this indicates that the object is set to run in Singleton mode.
![]()
By default, all objects in a workflow are set to execute in Singleton mode. However, since we have multiple files to process in the dataflow, we will set the File System Items Source object to run in loop. For this, right-click on the File System Items Source and click Loop in the context menu.
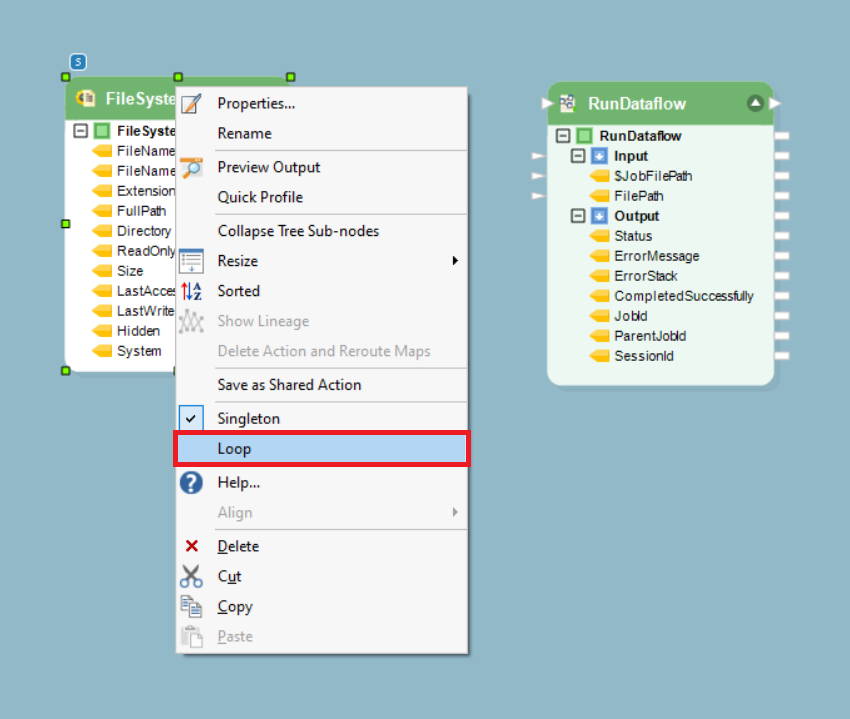
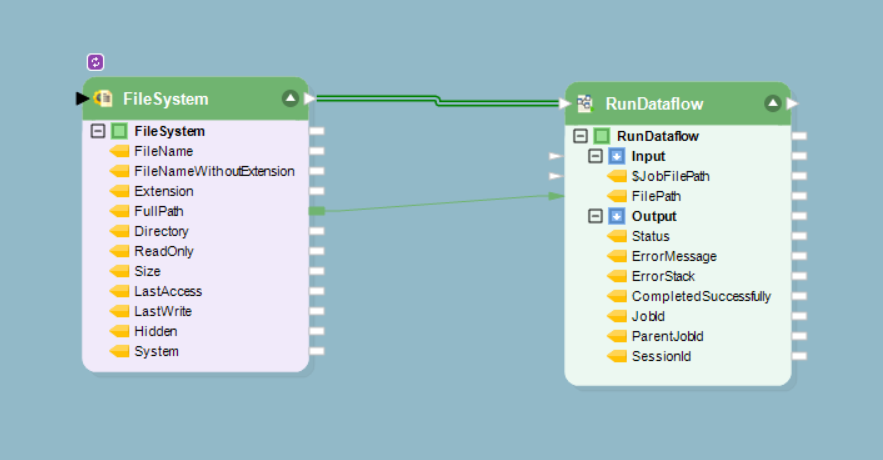
You can see that the color of the object has changed to purple, and it now has this purple icon over the header which denotes the loop function.
![]()
It also has these two mapping ports on the header to map the File System Items Source object to the subsequent action in the workflow. Let’s map it to the RunDataflowTask.
To configure the properties of the File System Items Source, right-click on the File System Item Source object’s header and go to Properties.
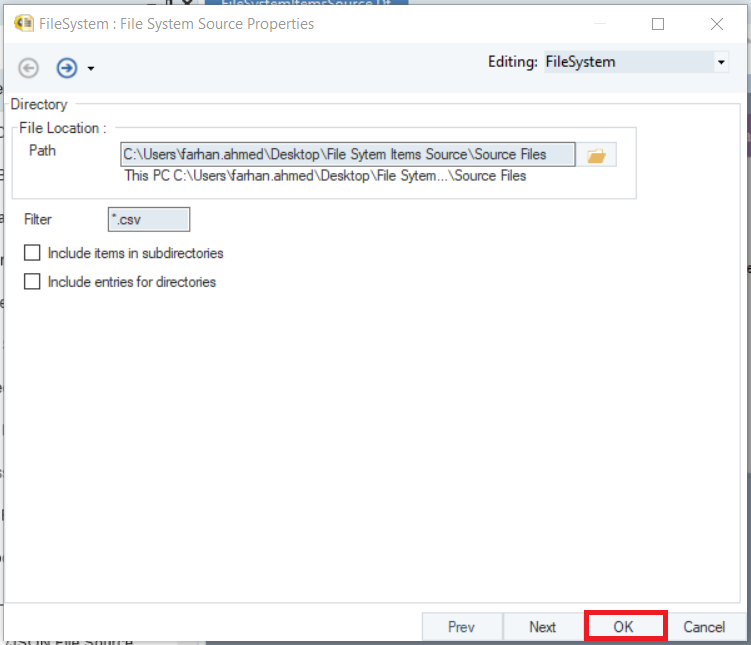
This will open the File System Items Source Properties window.

The first thing you need to do is point the Path to the directory or folder where your source files reside.

You can see a couple of other options on this window:
Filter: If your specified source location contains multiple files in different formats, you can use this option to filter and read files in the specified format. For instance, our source folder contains multiple PDF, .txt. doc, .xls, and .csv files, so we will write “*.csv” in the Filter field to filter and read delimited files only.

Include items in subdirectories: Check this option if you want to process files present in the sub-directories
Include Entries for Directories: Check this option if you want to include all items in the specified directory
Once you have specified the Path and other options, click OK.
Now right-click on the File System Items Source object’s header and click Preview Output.
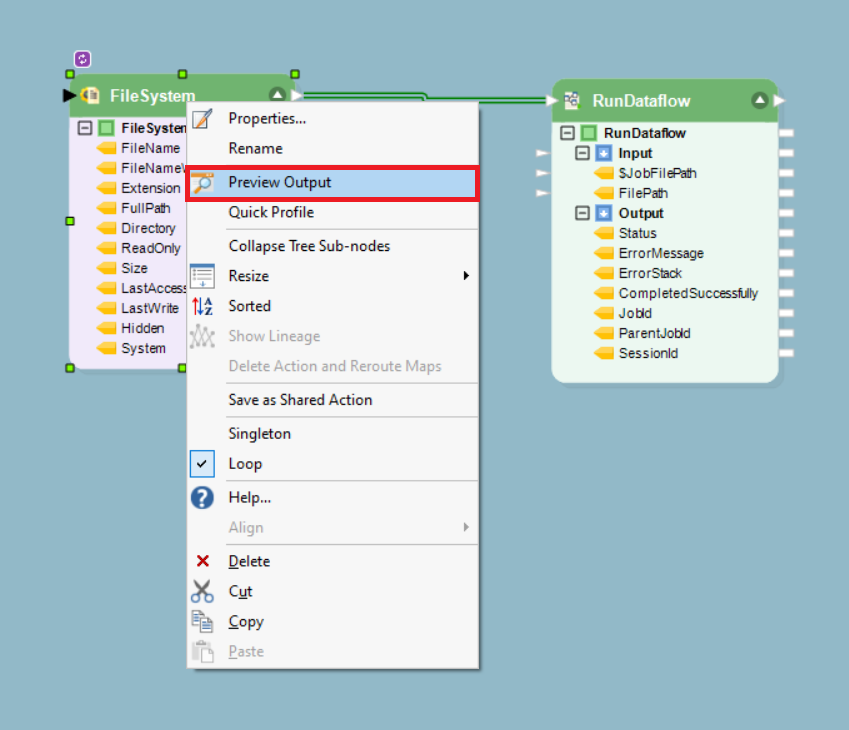
You can see that the File System Items Source object has filtered out delimited files from the specified location and has returned the metadata in the output. You can see the FileName, FileNameWithoutExtension, Extension, FullPath, Directory, and other attributes such as whether the file is ReadOnly, FileSize, LastAccessed, and other details in the output.

Now let’s start mapping. Map the FullPath field from the File System Items Source object to the FilePath variable in the RunDataflow task.
Once mapped, upon running the dataflow, the File System Items Source object will pass the path to the source files, one by one, to the RunDataflow task. In other words, the File System Items Source acts as a driver to provide source files to the RunDataflow tasks, which will then process them in the dataflow.
When the File System Items Source is set to run in a loop, the dataflow will run for ‘n’ number of times; where ‘n’ = the number of files passed by the File System Items Source to the RunDataflow task. For instance, you can see that we have six source files in the specified folder. The RunDataflow task object will pass these six files one by one to the RunDataflow task to be processed in the dataflow.

This concludes using the File System Items Source object in Astera Centerprise.