Data Formats
Centerprise provides a wide range of formatting options for each data type that can be chosen while configuring the destination object. This gives users the ability to change the format of their data as it is transferred to the destination. For instance, in the Dates field users can enter any format of their choice, such as “04-Nov-2022”, “11-04-2022”, etc.
Data Formats can be configured for the following destination objects:
Delimited File, Excel Workbook, and Fixed Length.
In addition to offering a number of pre-configured formats for each supported data type, Centerprise also provides the option to create and save custom data formats.
Let’s have a look at both use cases:
Changing the Data Format by Selecting One of the Available Options
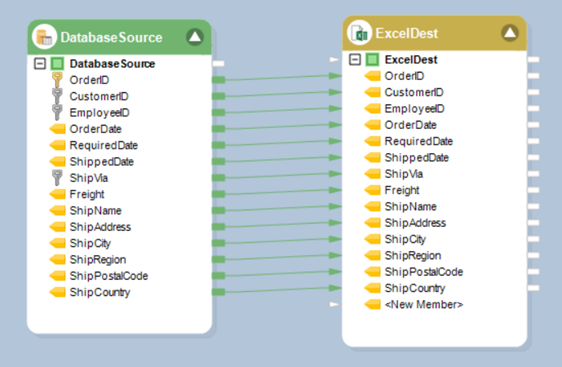
In this example, we will use the Orders dataset from Database Table Source and write it to an Excel Workbook Destination.

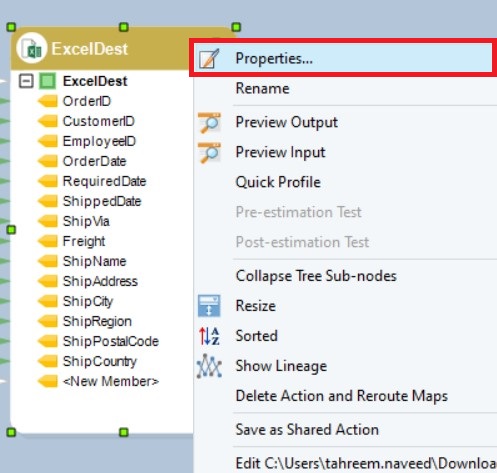
To configure the Excel Workbook Destination object, right-click on the header and select Properties from the context menu:
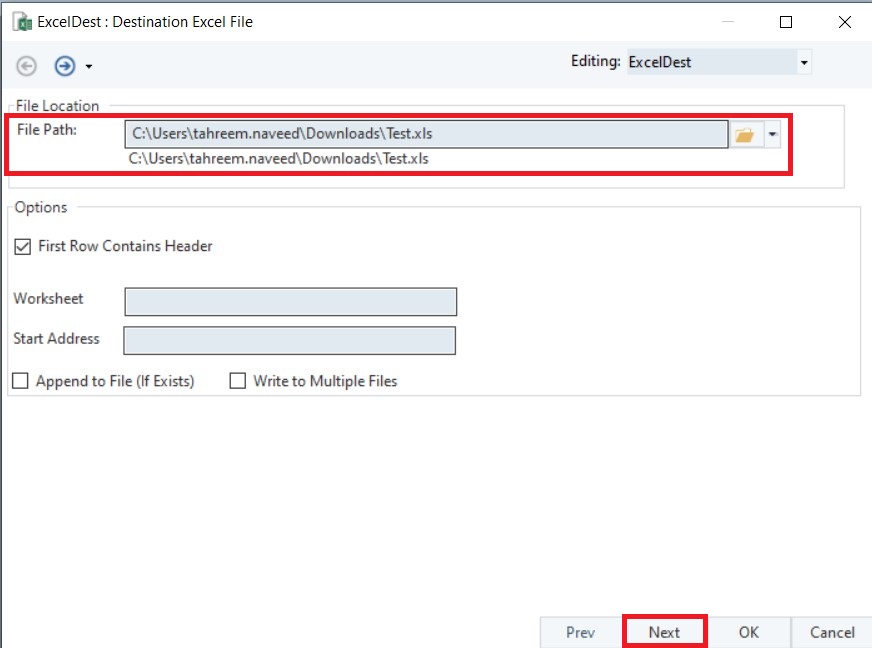
Provide the File Path. This is where the Excel destination file will be saved.
Once the data reading options have been specified on this screen, click Next.
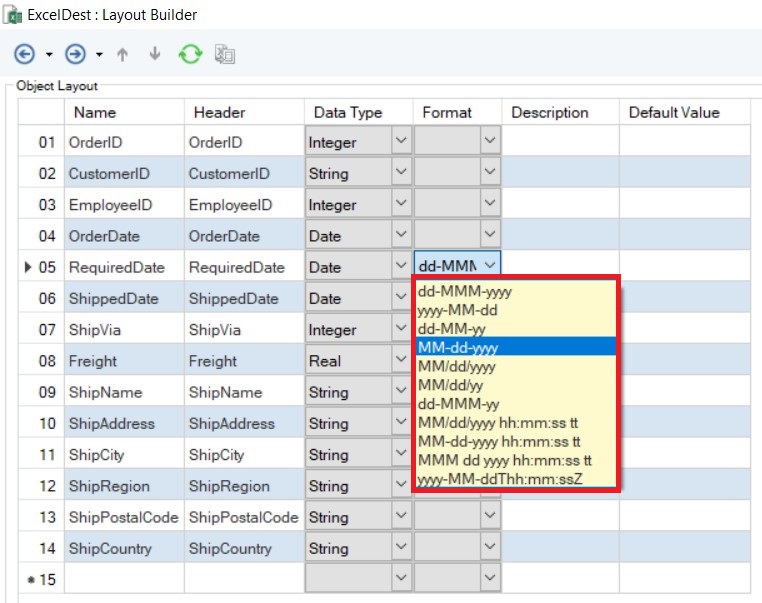
The next window is the Layout Builder where the layout of the Excel destination file can be modified.
To change the data format of your desired field, select one of the formatting options from the drop-down list in the Format column. Here we can see all the pre-configured options provided by Centerprise. In this example, we’ll choose MM-dd-yyyy:
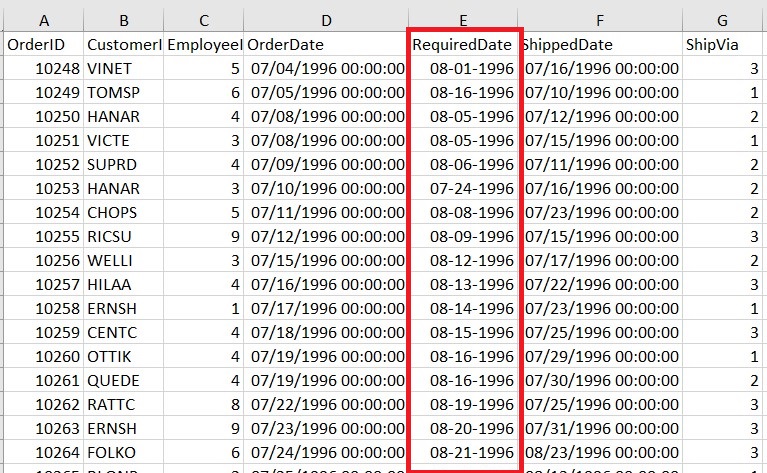
After configuring the destination object, save and run the dataflow. The Excel file created will now have the new date format we specified:
Creating and Using a Custom Data Format
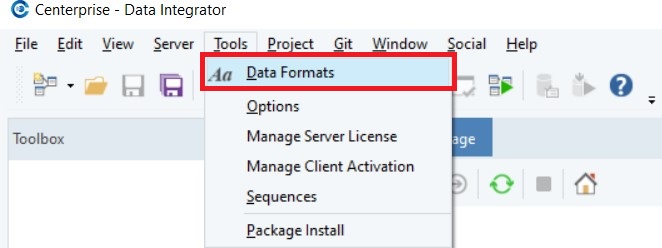
To open the Data Formats window, click on the icon Aa located in the Toolbar at the top of the designer.

An alternate way of opening the Data Formats window is to select Tools > Data Formats:
This will open the Formats tab where we can see all the pre-configured formats for different data types supported by Centerprise.
To add a new data format, we will select the Data Type from the drop-down list:

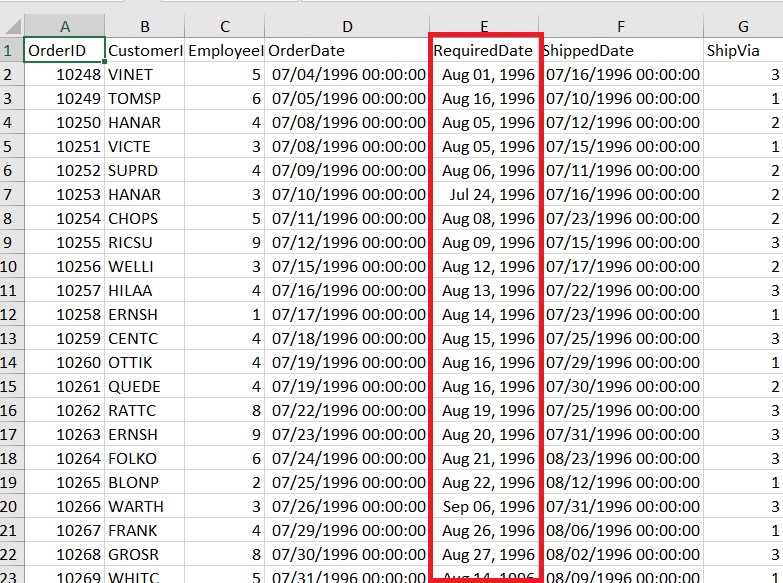
After selecting the data type, double-click on the last blank row in the Format column to enable editing. In this example, we’ll work with the Date data type and add the new format MMM dd, yyyy:
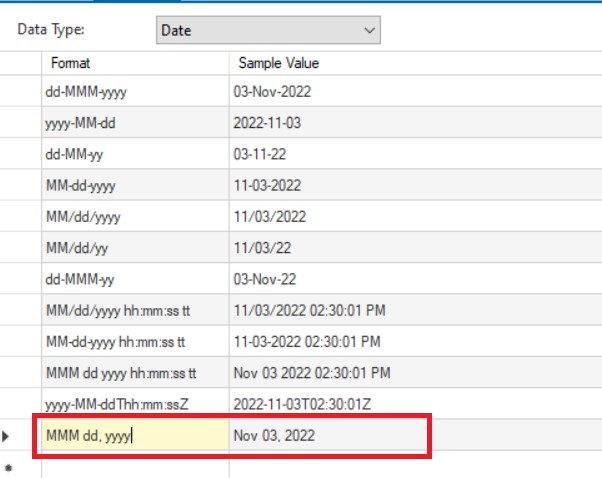
Centerprise automatically provides a sample value for every new format we enter. After adding the new format, we will save our settings and proceed to edit dataflows where we can now use this new format.
Similar to what we did in the previous example, we’ll use the Orders dataset from Database Table Source and write it to an Excel Workbook Destination.
To configure the Excel Workbook Destination object, right-click on the header and select Properties from the context menu:

After providing the File Path and specifying the data reading options, click Next.

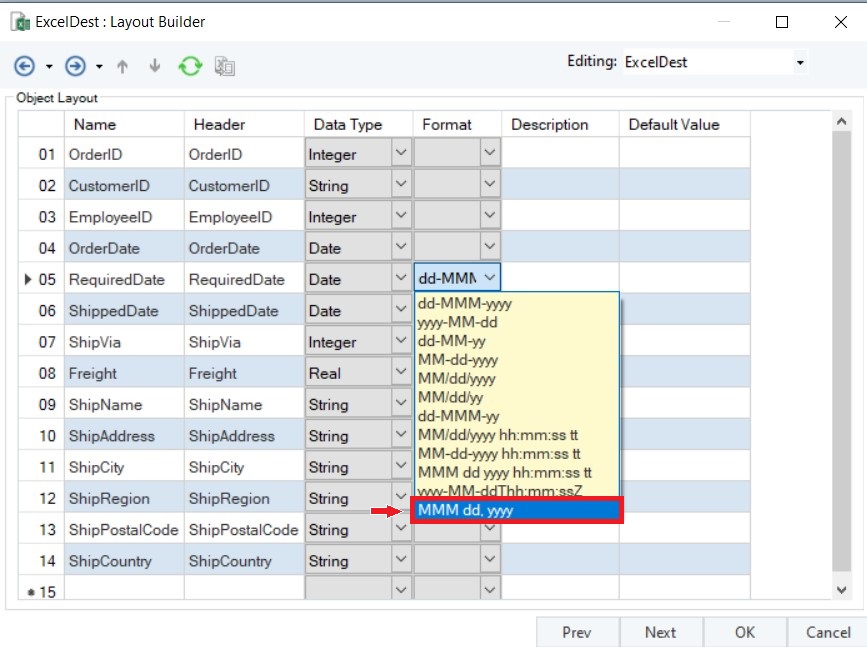
This will take us to the Layout Builder screen. As we click on the drop-down list in the Format column, we can now see the new data format we added along with the other pre-configured options.
After selecting this new format, we’ll save the configuration settings and run the dataflow. The Excel file created will now have the new data format for the RequiredDate field:
This concludes the use of Data Formats in Astera Centerprise.