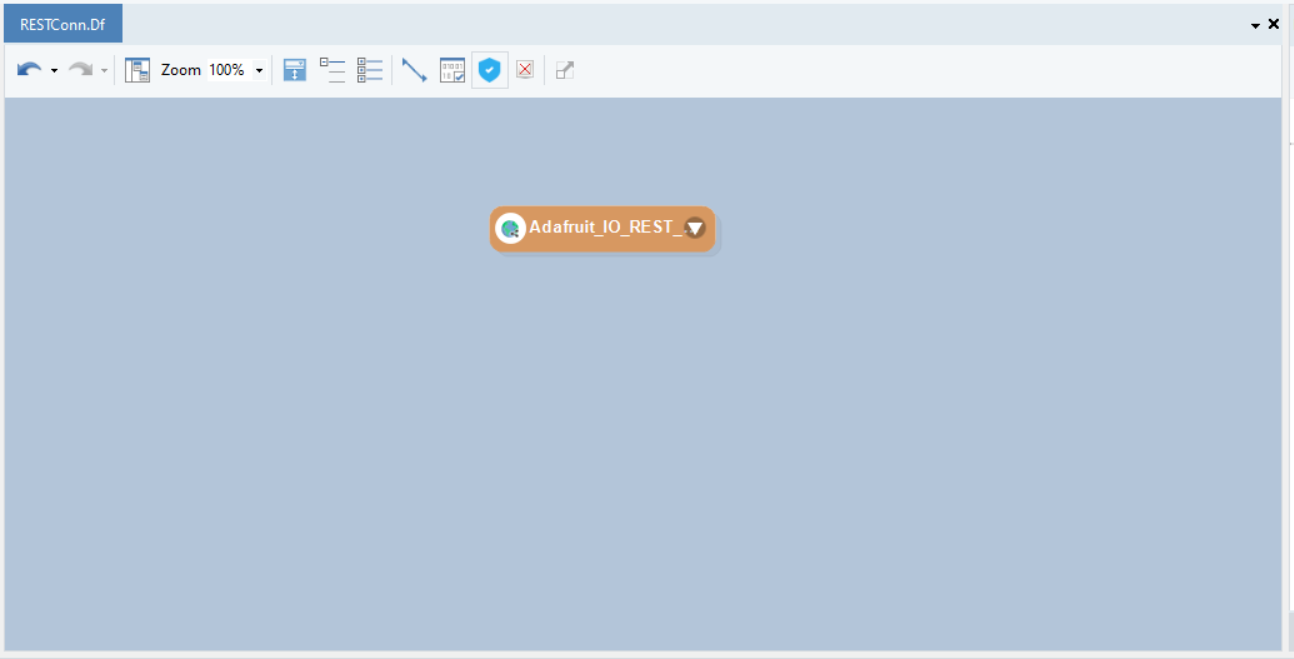
REST Connection
To make an API call in Centerprise, a REST Connection object needs to be configured first.
Configuring The REST Connection Object
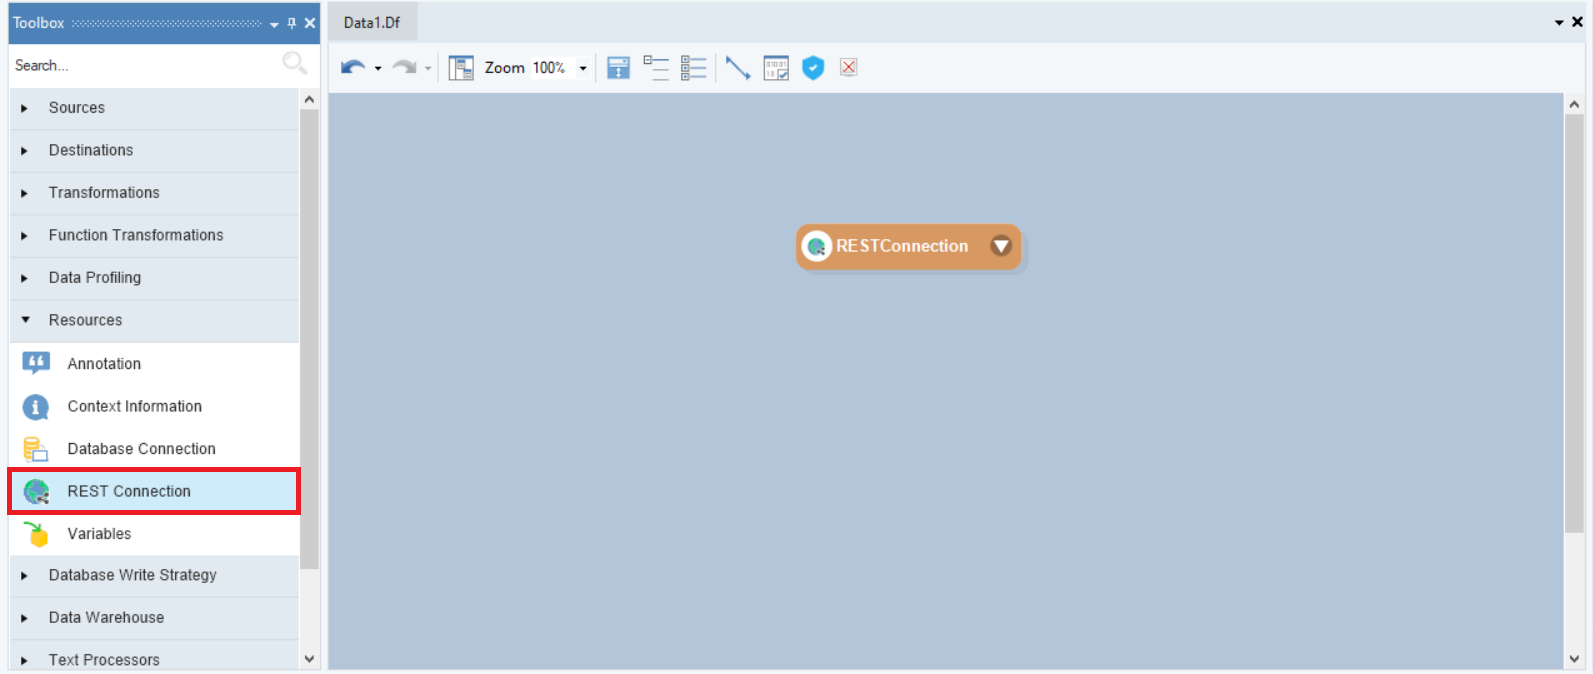
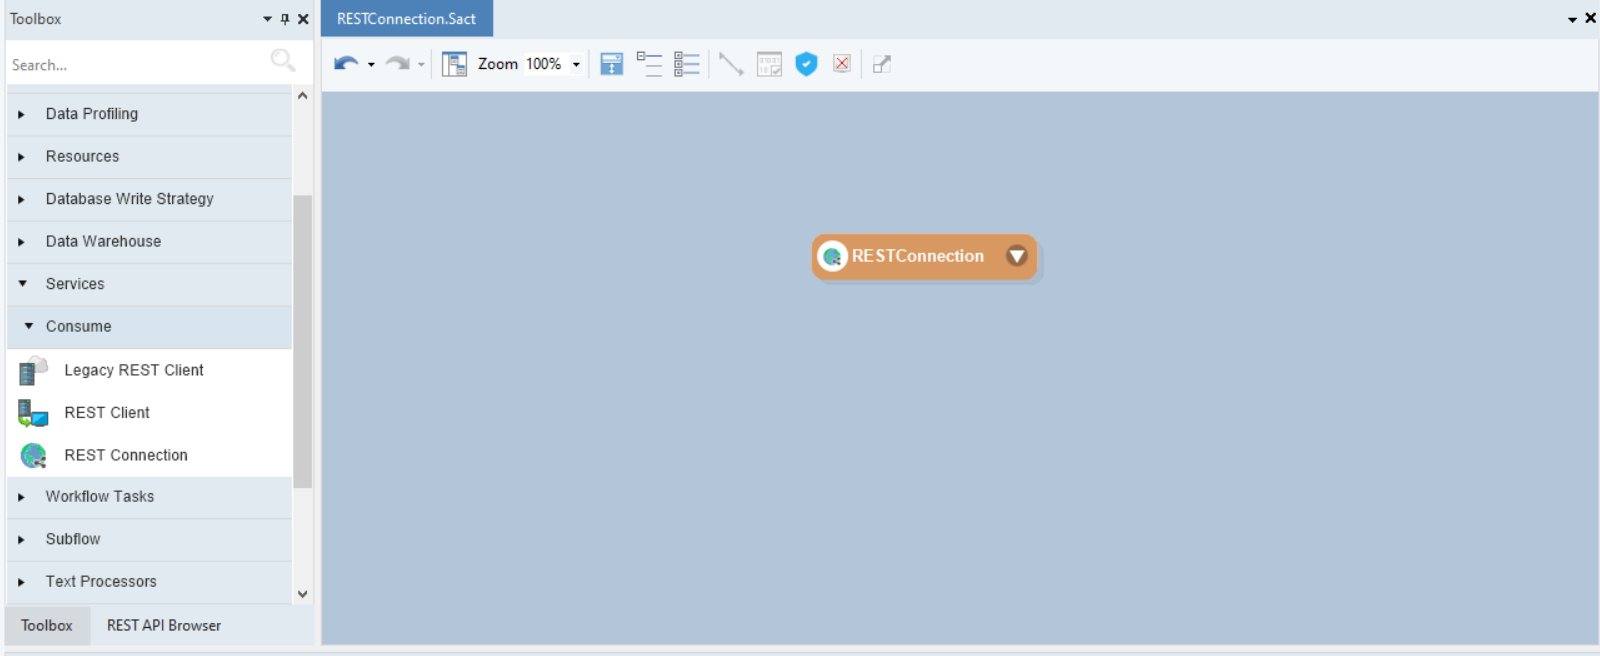
1. Drag-and-drop the REST Connection object from the Toolbox onto a dataflow.
Note: This can also be done in a shared action. This will be covered in more detail at a later stage in the article.
2. Right-click on the REST Connection object and select Properties from the context menu.
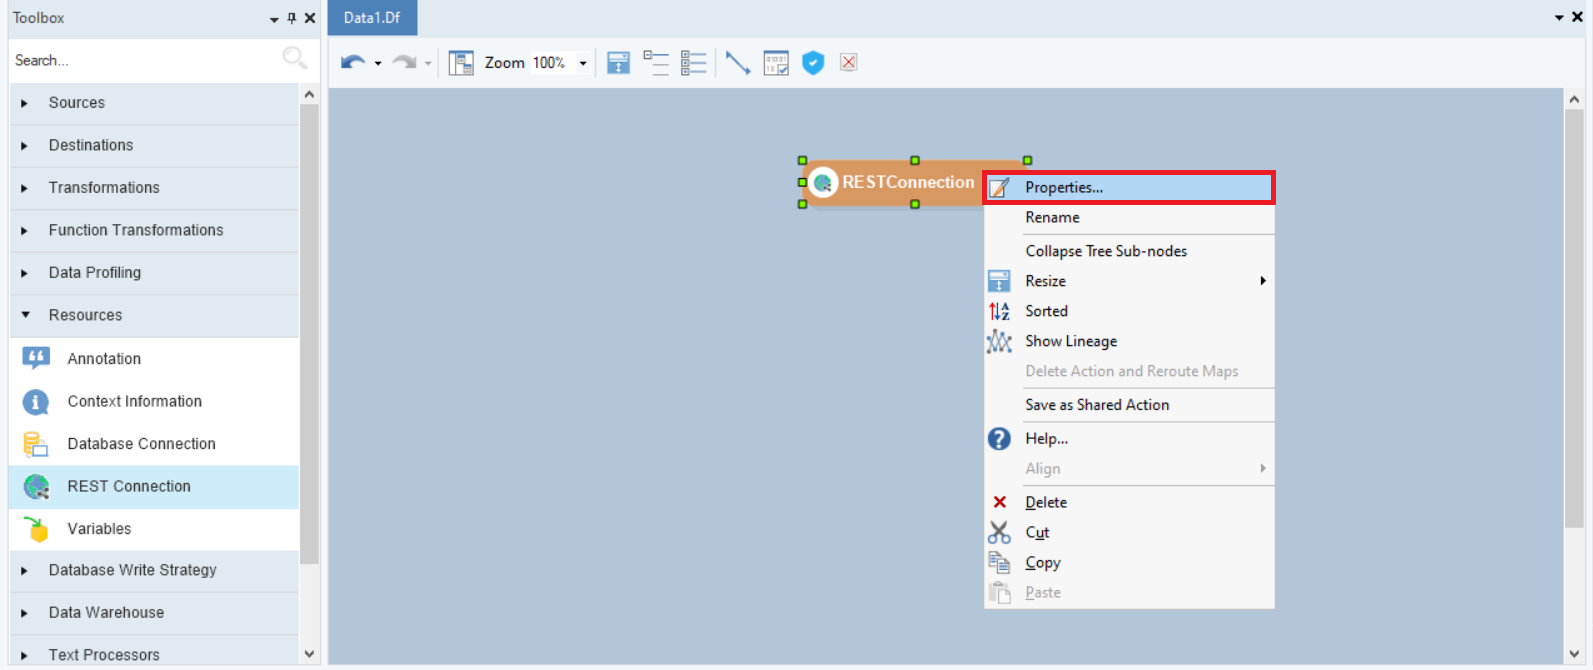
A configuration window will appear on your screen.
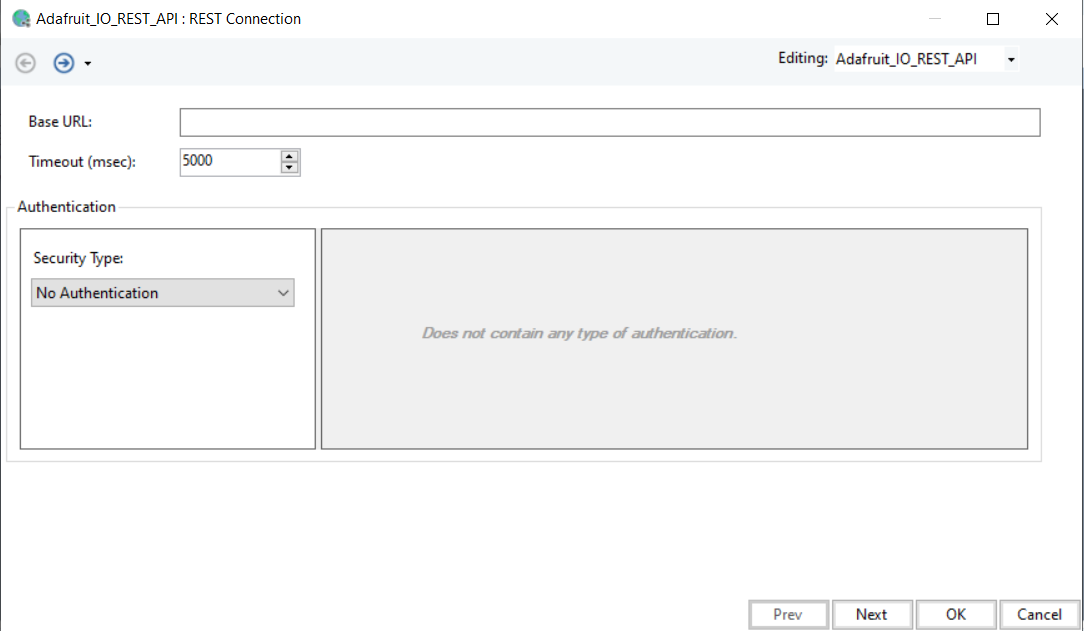
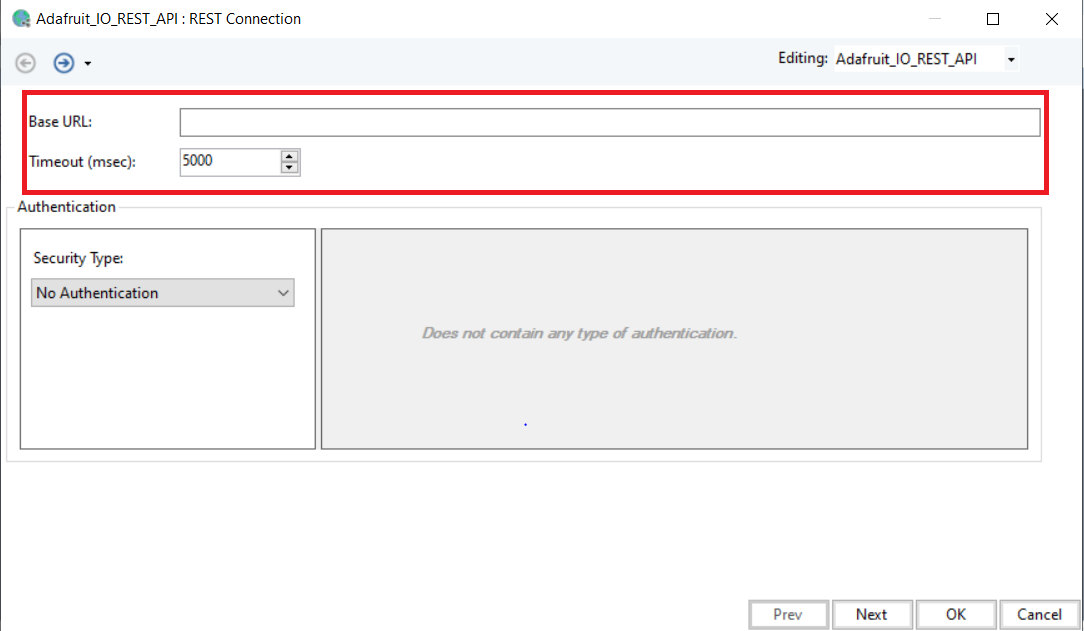
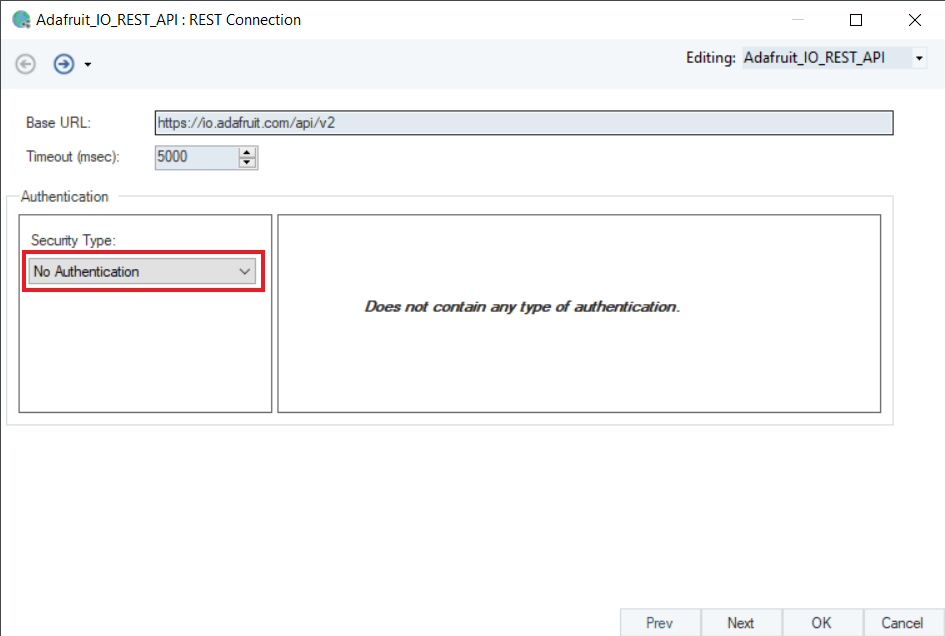
Base URL: Here, you can specify the base URL of the API which will prepend as a common path to all API endpoints sharing this connection. A Base URL usually consists of the scheme hostname and port of the API web address.
Note: When a user imports an API definition, a shared connection file containing the Base URL and authentication type is automatically created within the project. To learn more about importing APIs in Astera Centerprise, click here.
Timeout (msec): Specify the duration, in milliseconds, to wait for the API server to respond before giving a timeout error.
Authentication – Security Type: Specify the authentication type for the API. Astera Centerprise supports the following authentication types:
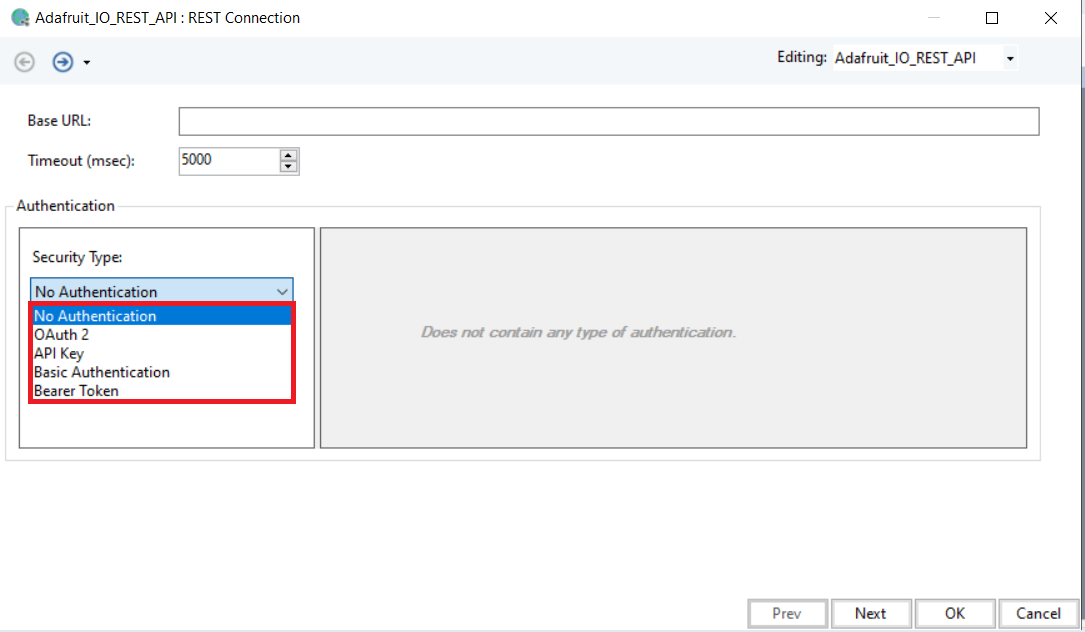
Types Of Authentications:
Following authentication types are supported in Astera Centerprise:
1. No Authentication
2. OAuth 2
3. API Key
4. Basic Authentication
5. Bearer Token
No Authentication
With this security type, the user can send API requests without including any authentication parameters.
OAuth 2
This type is used when an application requires permission to access data on your behalf. Instead of giving away your password to the application, OAuth 2 enables a delegated authorization through a third-party Auth Server.
In response to a valid authorization, the Auth Server issues an Access Token with a restricted scope and validity. When the Access Token expires, its Refresh Token is used to obtain another valid Access Token.
Configure an OAuth 2 request to generate Access and Refresh tokens. The tokens will be implicitly added to the request and auto-refreshed if expired.
In the OAuth 2 authentication, you can select any of the four Grant Types:
1. Implicit
2. Authorization Code
3. Password
4. Client Credentials
Implicit
In this Grant Type, you only need to provide an Authentication URL and Client ID to request token without an intermediate code exchange. It was built for Javascript client applications that receive the token directly exposed in the HTTP URL. Hence, this type is considered less secure for web applications and is replaced with Authorization Code.
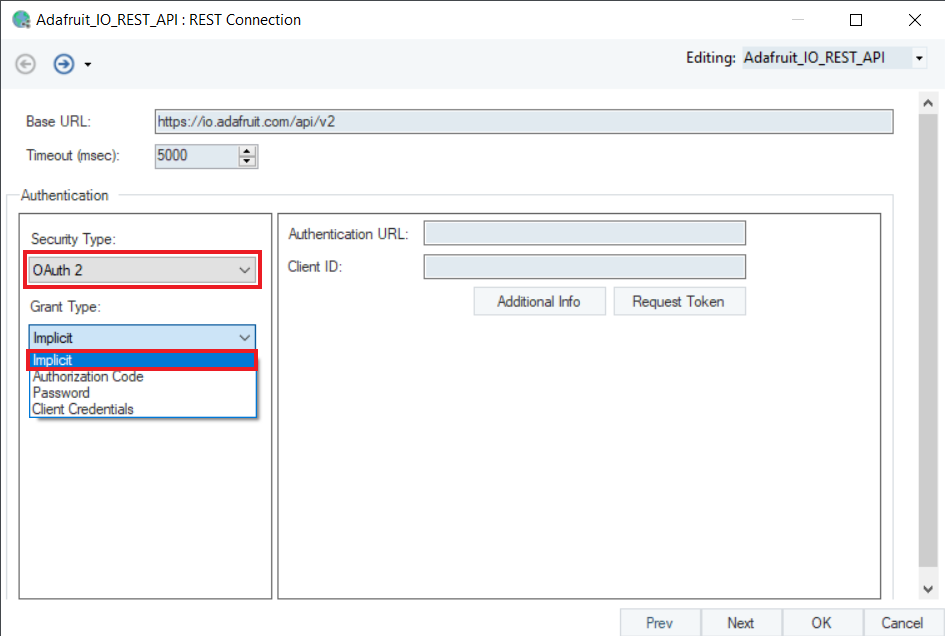
Authentication URL: This is the login page, where the API user authorizes itself to the Authentication Server.
Client ID: This is the public identifier for accessing the registered API Server application.
Authorization Code
This flow type is popular for server-side applications.
In this Grant Type, you need to provide an Authentication URL, Access Token URL, Client ID, and, optionally, a Client Secret to authorize.
On authorizing, the flow first returns a one-time Authorization Code to the client. This code is then exchanged for an Access Token.
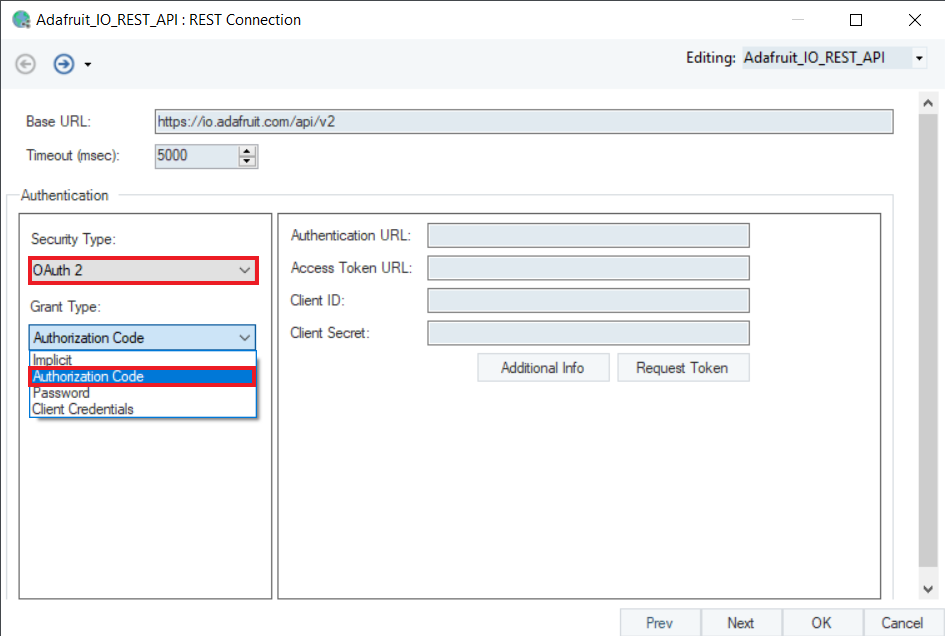
Authentication URL: This is the login page, where the API user authorizes itself to the Auth Server.
Access Token URL: This URL is provided to generate an Access Token for authentication after the user has authorized successfully.
Client ID: The public identifier for accessing the registered API Server application.
Client Secret: It is provided alongside the Client ID, as a secret credential to access the registered application from the Auth Server.
Password
In this Grant Type, you need Access Token URL, Username, Password, Client ID and Client Secret to authorize. It is considered for internal services and not recommended for third party applications as it authenticates the given credentials in a single step.
Since user credentials are exposed to the client application, this flow type outlaws the OAuth principles and is now deprecated.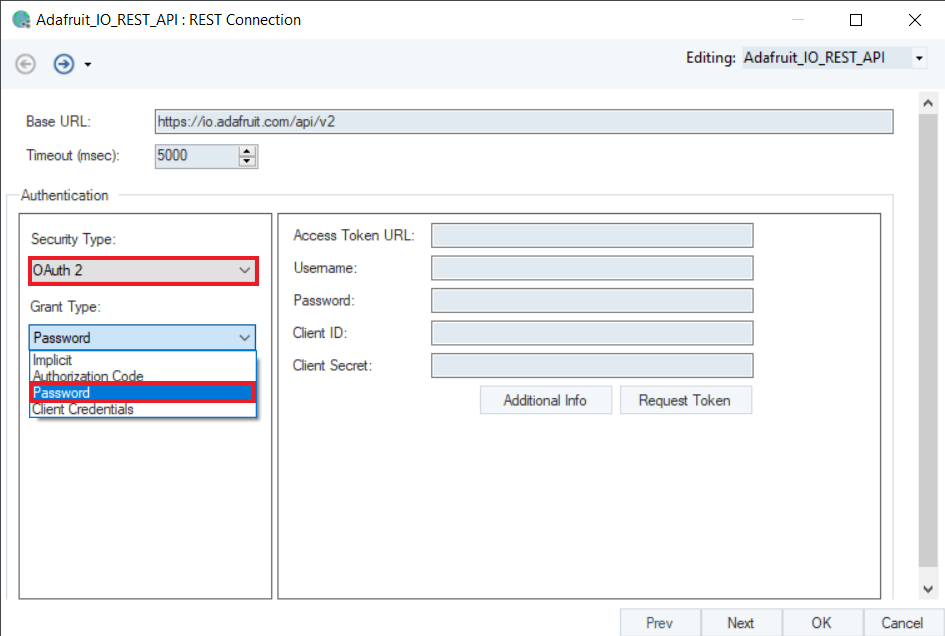
Access Token URL: The URL through which the Access token is going to be generated for authentication.
Username: The application login name of the user for authentication.
Password: The application user password provided for authentication.
Client ID: The public identifier for accessing the registered API Server Application.
Client Secret: It is provided alongside the Client ID, as a secret credential to access the registered application from the Auth Server.
Client Credentials
In this Grant Type, you need Access Token URL, Client ID, and Client Secret to authorize. This is used with the client application. It self-authenticates access to its resources without a user context.
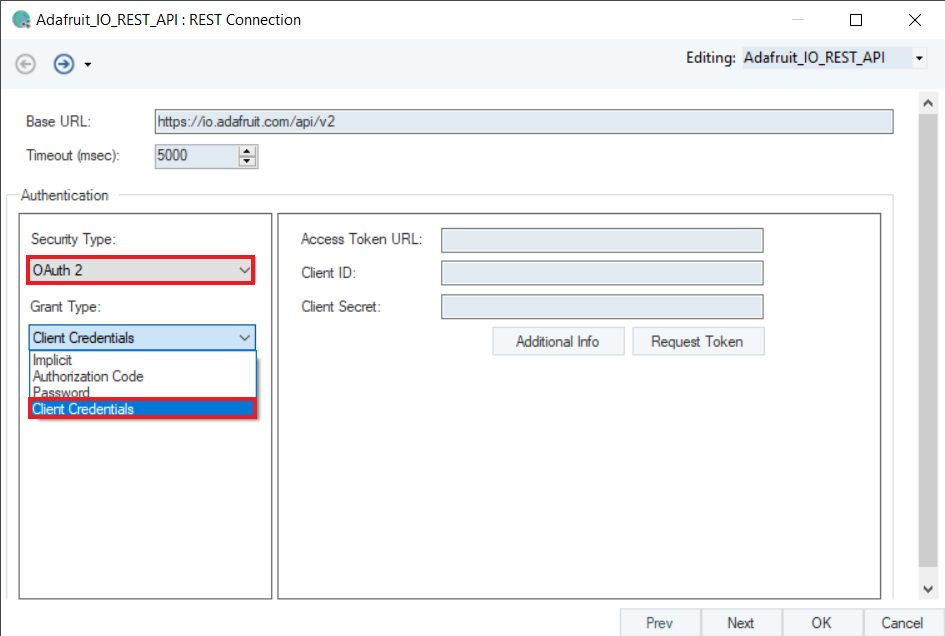
Access Token URL: This URL is provided to generate an access token for authentication.
Client ID: The public identifier for accessing the registered API Server application.
Client Secret: It is provided alongside the Client ID, as a secret credential to access the registered application from the Auth Server.
API Key
An API Key is a key-value pair that a client provides when it makes an API request. They can be sent in the Query string or as a request Header.
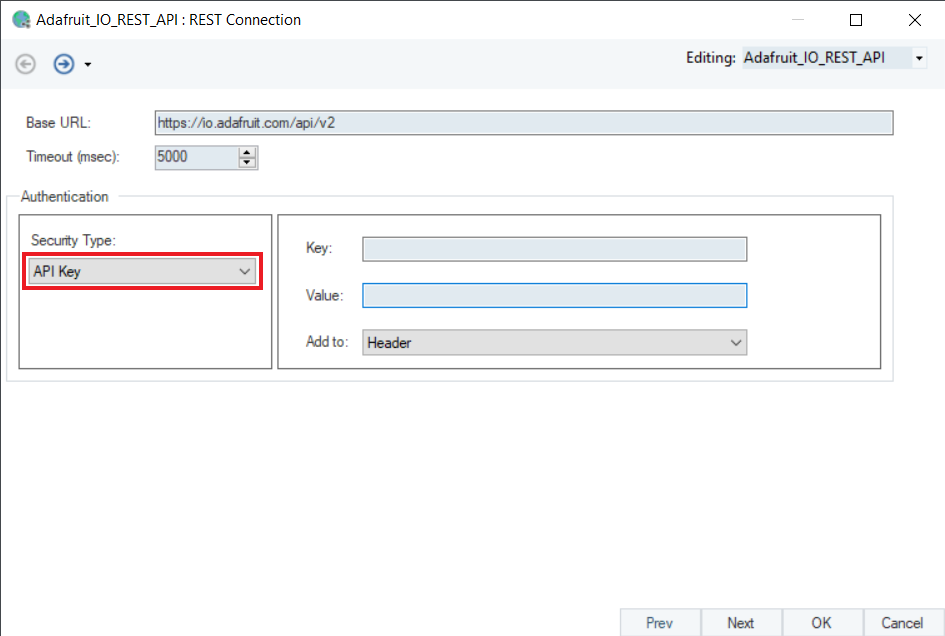
It requires two parameters for authentication:
1. Key
2. Value
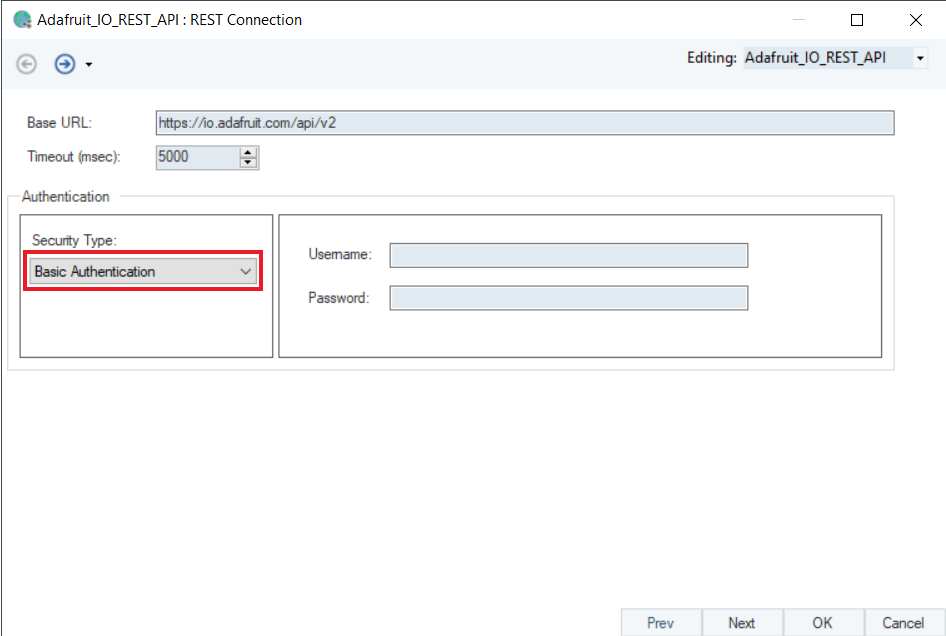
Basic Authentication
Basic Authentication is structured according to the HTTP protocol to provide a Username and Password when making a REST request.
In basic HTTP authentication, a request contains a header field in the form of Authentication: Basic
Bearer Token
Bearer Token or token authentication is an HTTP-based authentication. The access token is a text string included in the request header. It is generated by the server in response to a login request.
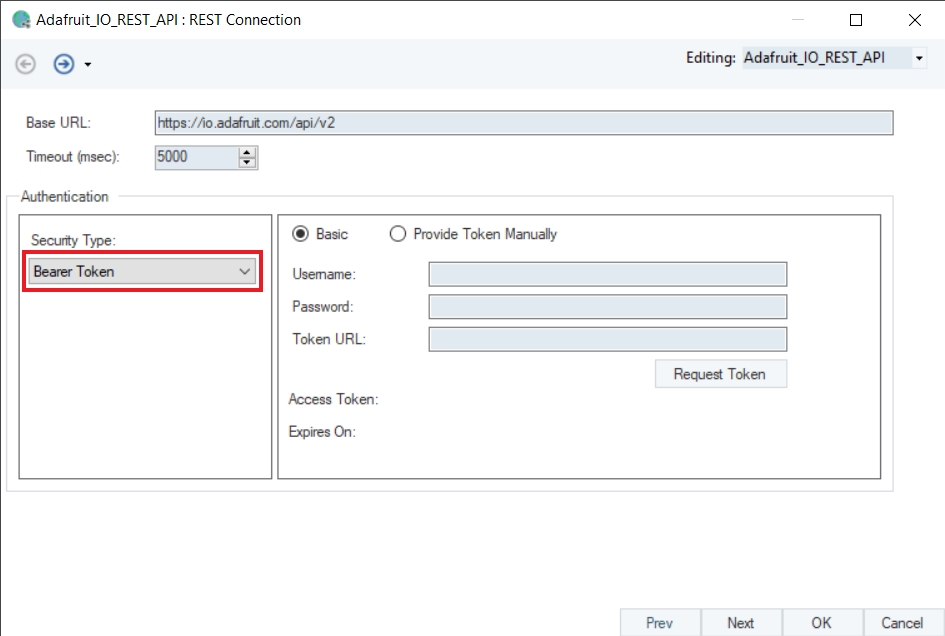
To generate a Bearer Token, you need:
1. User Name
2. Password
3. Token URL
3. Once the Security Type has been selected, click Next and you will be led to the next screen.
Shared Parameters
Once done, the Parameters screen is opened.
This is where you can define parameters based on your requirements, be it a Query or a Header parameter.
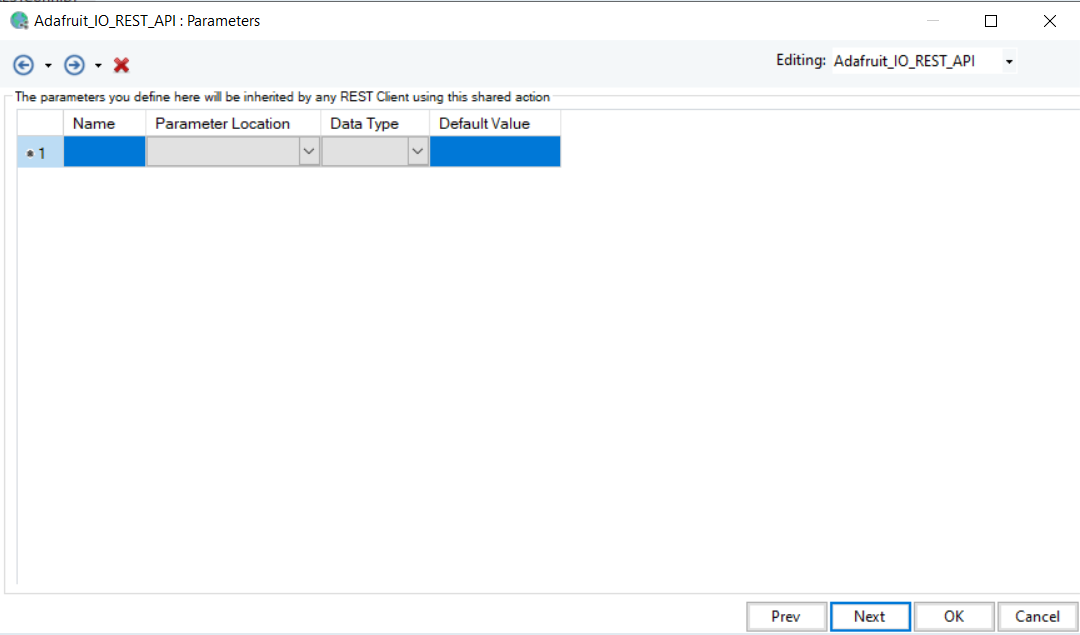
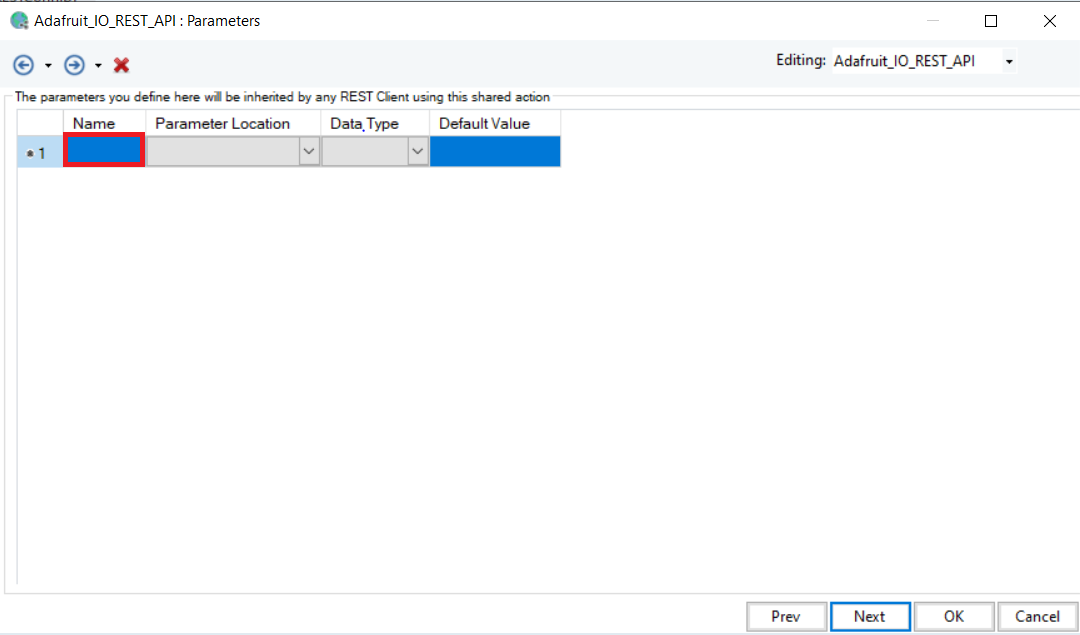
Name: The name of a Query or Header parameter can be defined here.
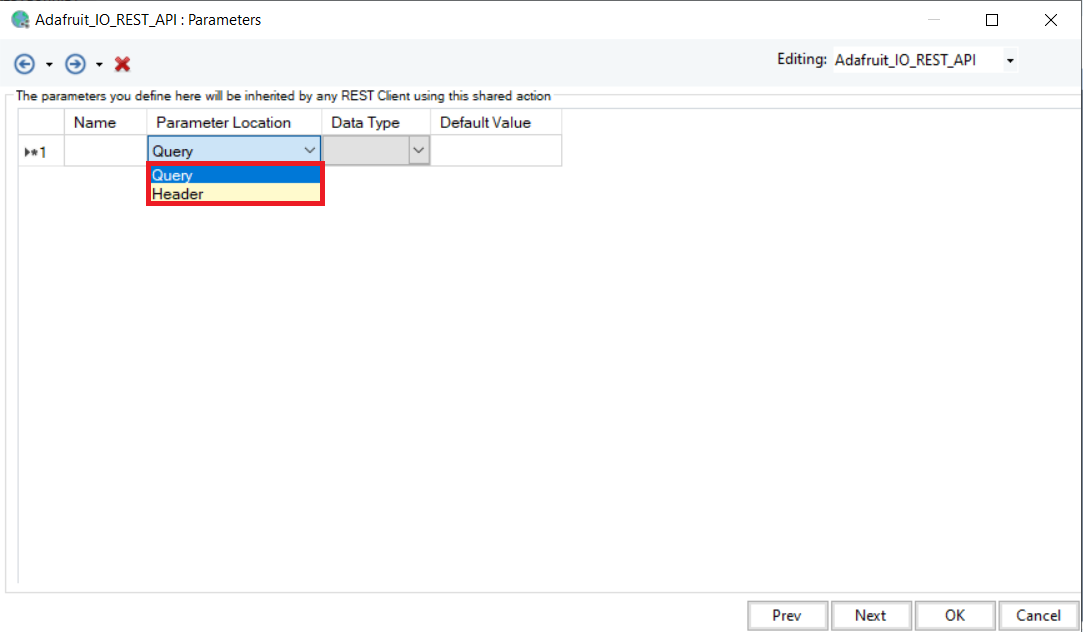
Parameter Location: This option defines whether the parameter has a Query location or a Header location.
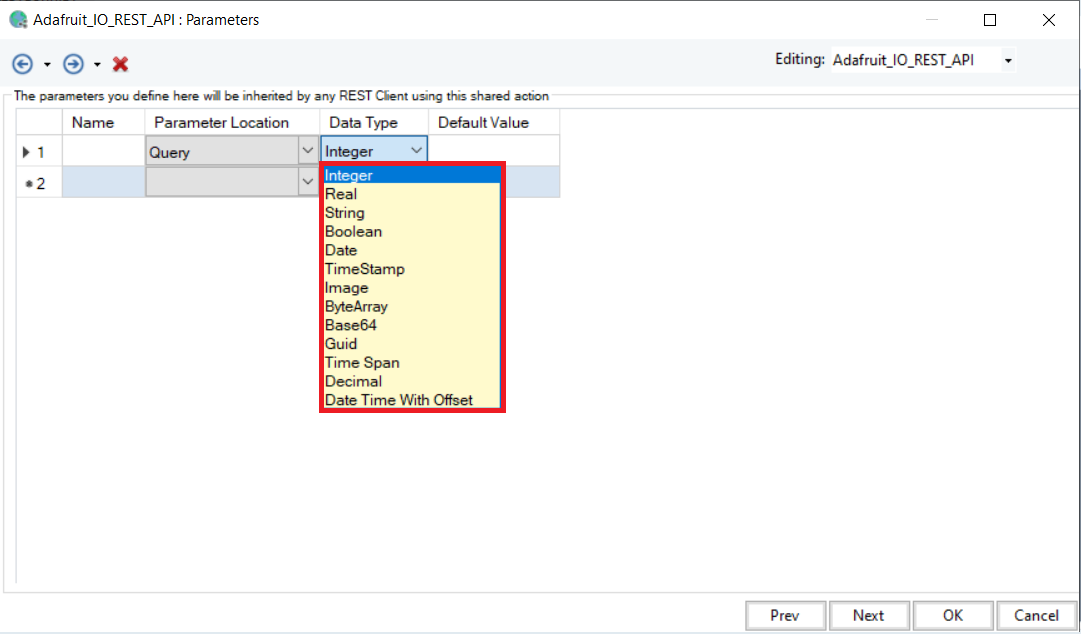
Data Type: This option defines the data type of the parameter from a list of options.
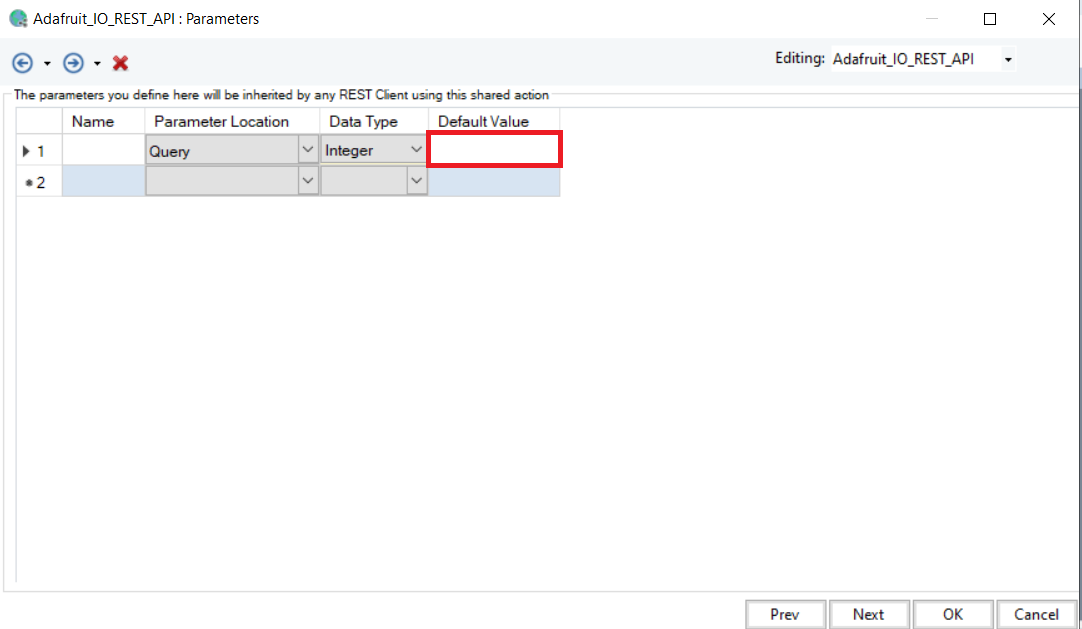
Default Value: Values added here will be used throughout the pipeline unless defined otherwise.
The parameters defined here will be inherited in all REST Clients that use this shared connection.
4. Once done, click Next and you will be led to the Config Parameters screen.
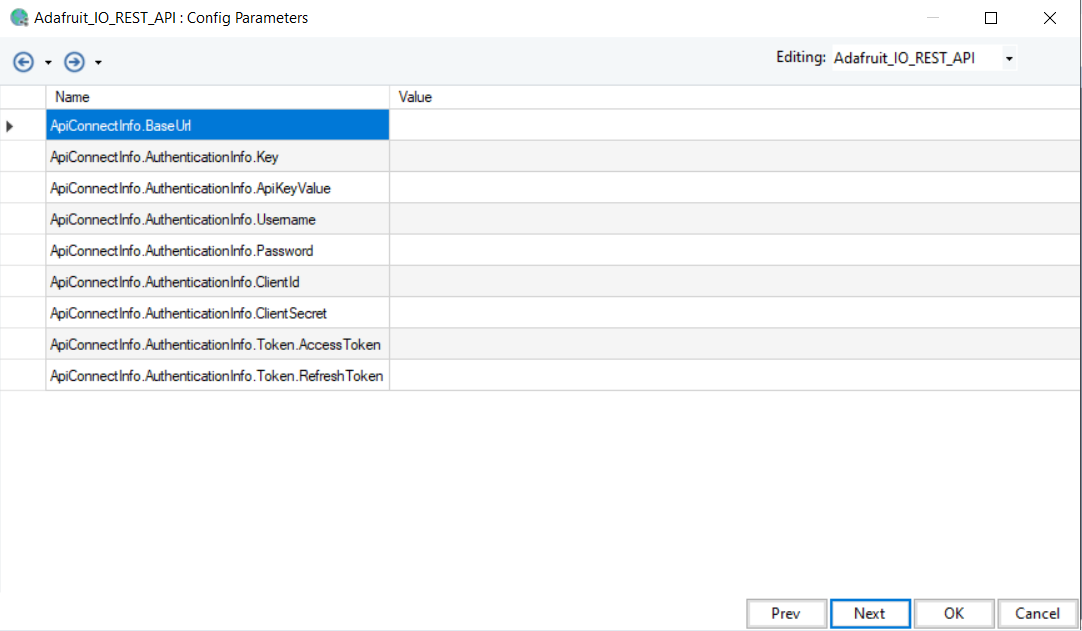
Here, config parameter values can be changed according to your application. Parameters not changed will use their default values.
5. Click Next, and you will be led to the General Options screen.
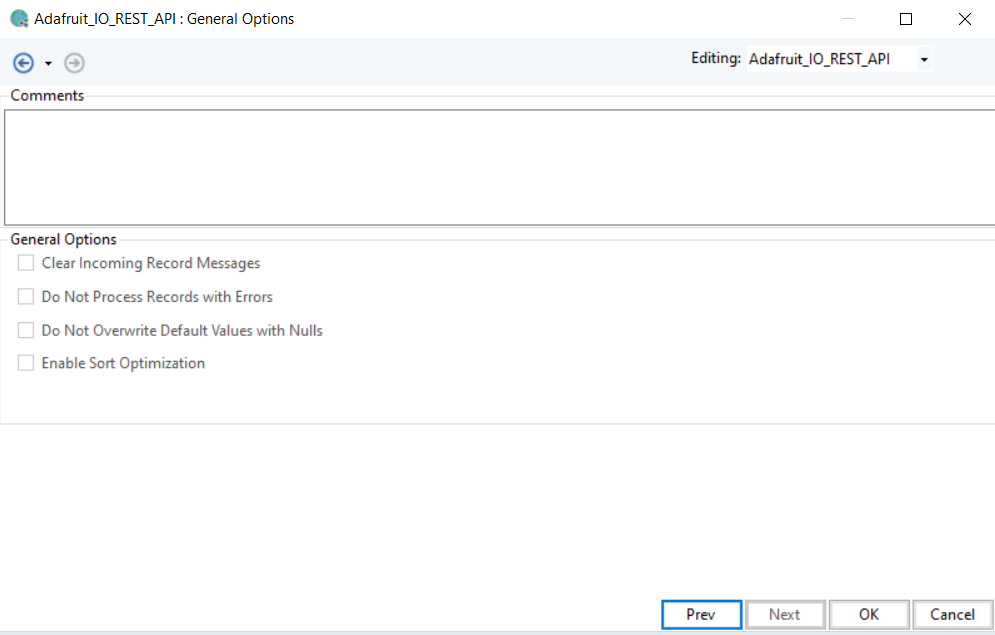
Here, you can add any Comments that you wish to add. The rest of the options for this object have been disabled.
6. Click OK to close the window. You have successfully configured the REST Connection object.
Using the REST Connection Object
In a Dataflow
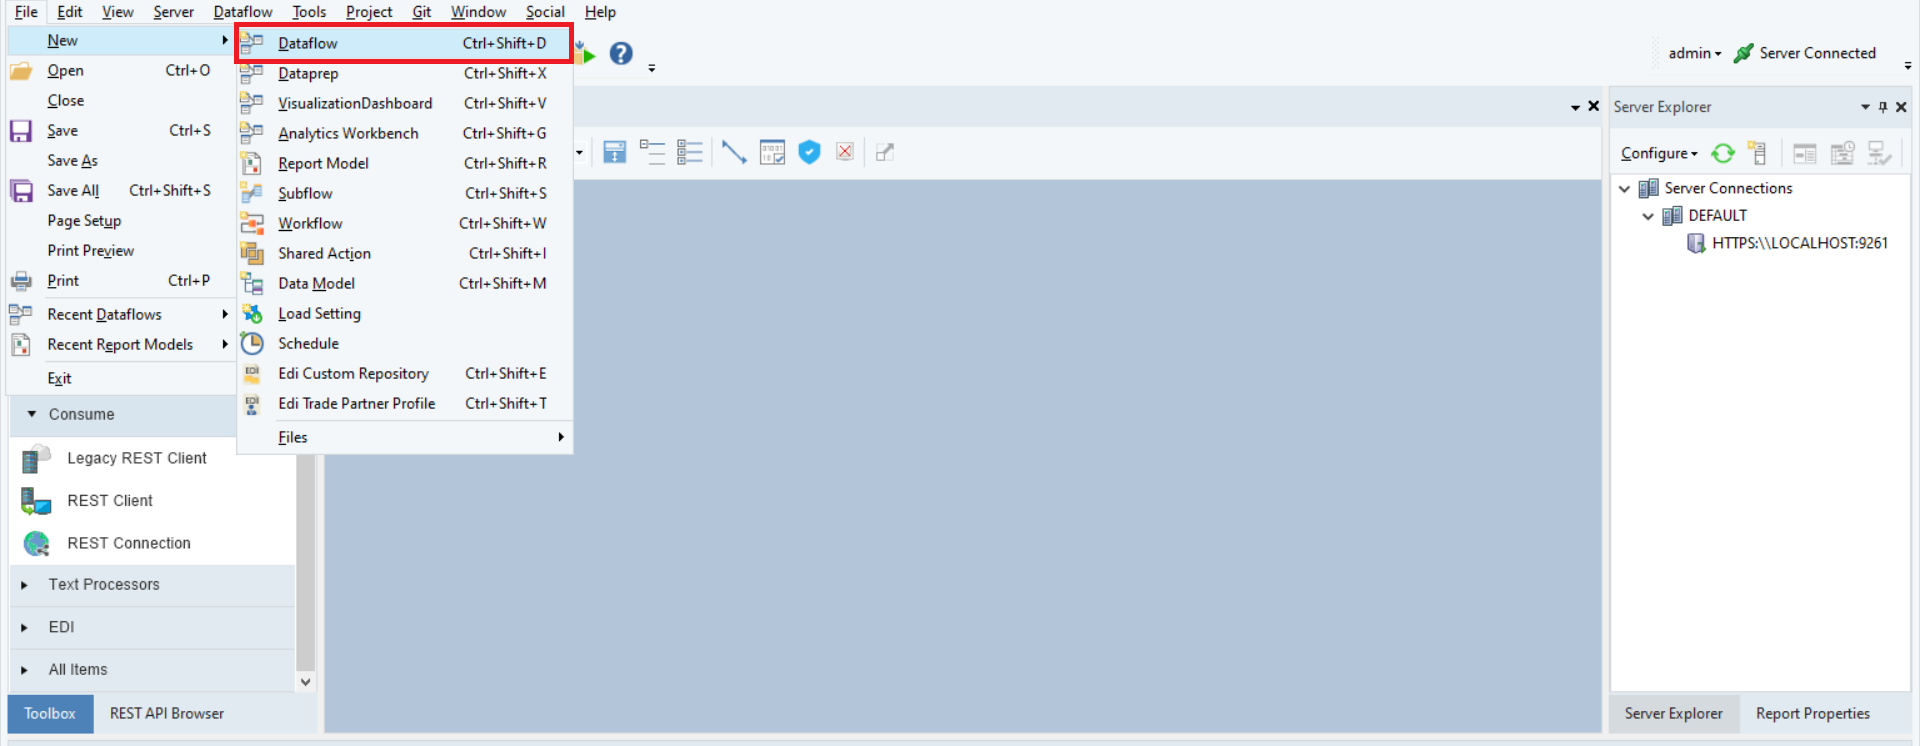
1. Click on File in the main toolbar, hover over New, and select Dataflow from the drop-down menu.
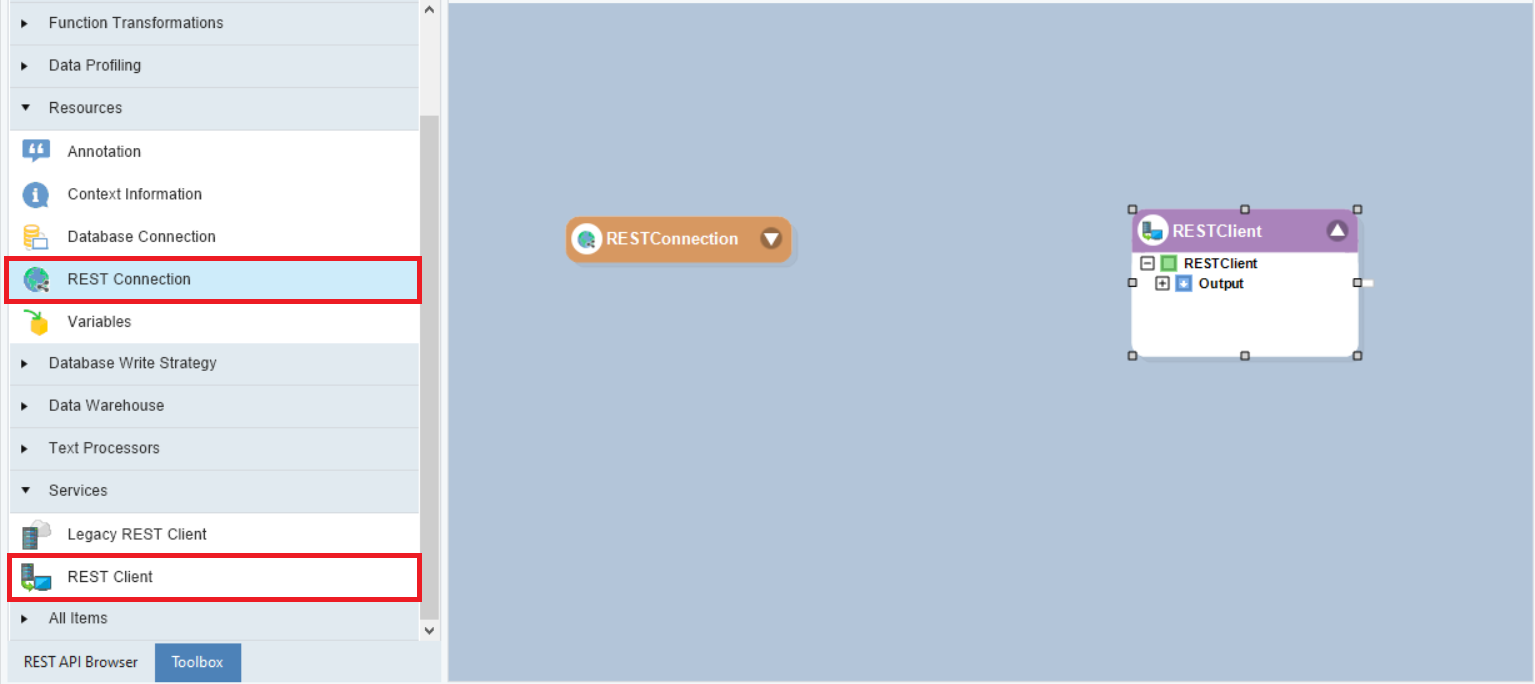
2. Once the dataflow is open, drag-and-drop the REST Connection and REST Client objects from the Toolbox onto the dataflow.
Note: The REST Connection here can only be accessed within the scope of this dataflow.
3. Configure the REST Connection object for the Base URL, Authentication.
Right-click on the REST Client object and select Properties from the context menu.
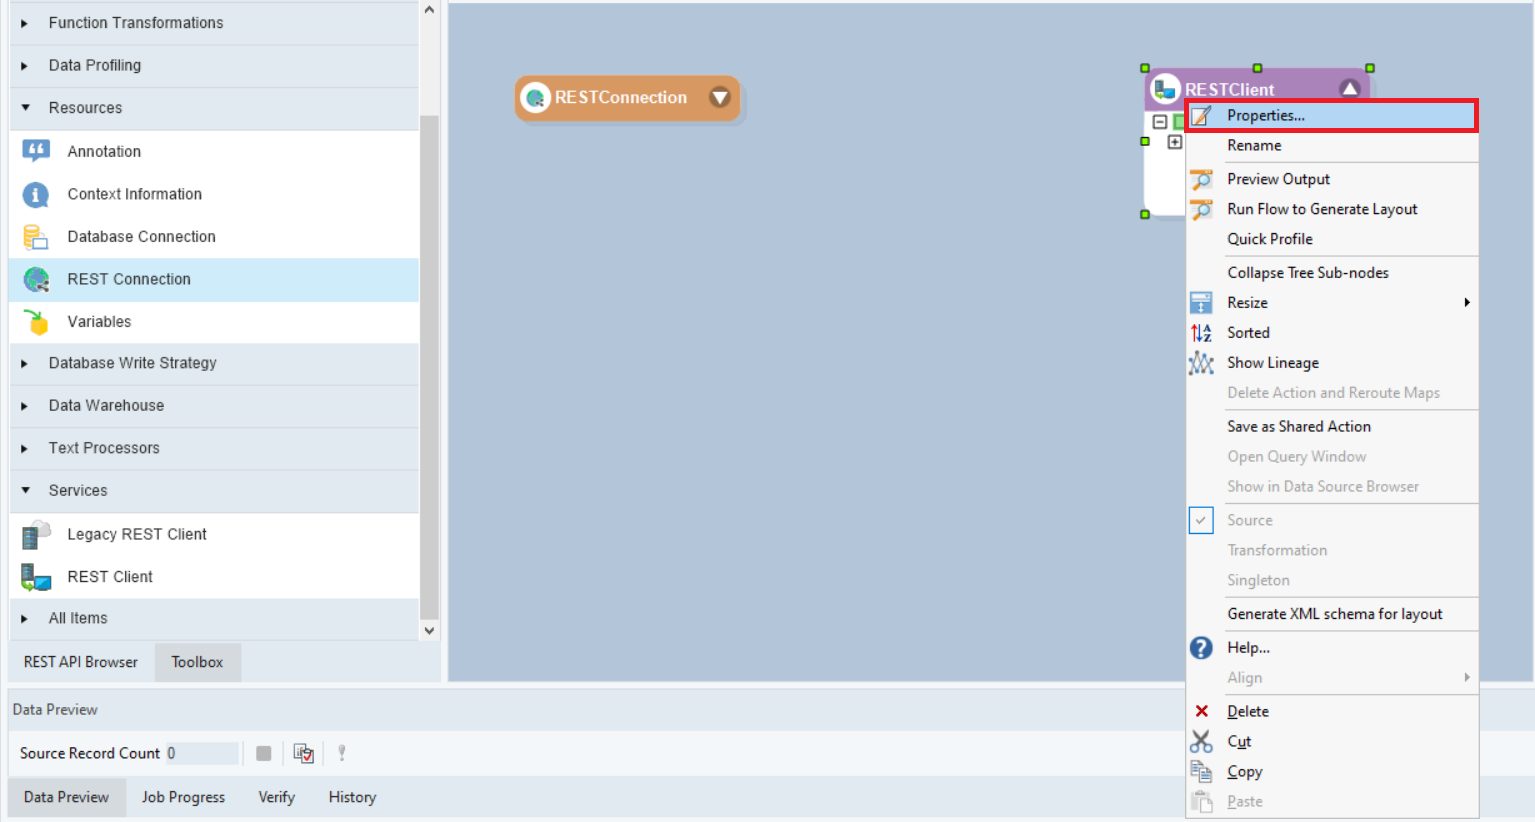
A new REST Client Properties window will open.
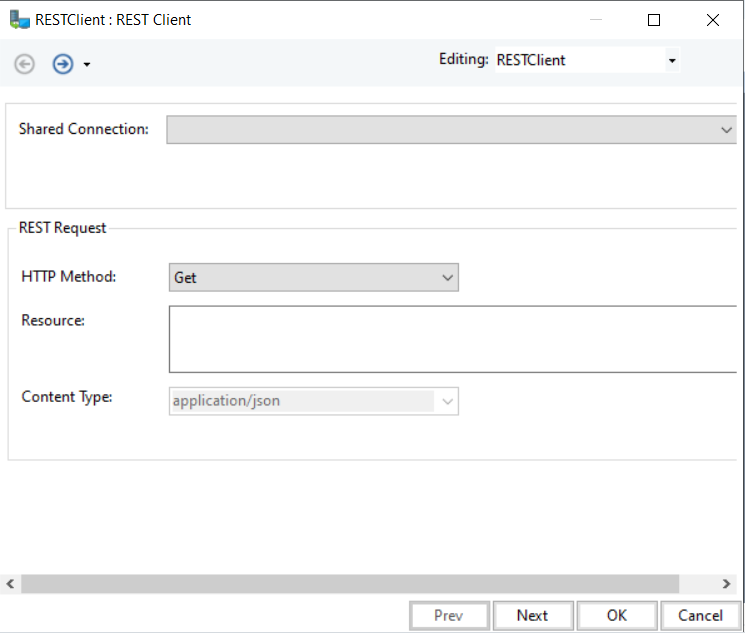
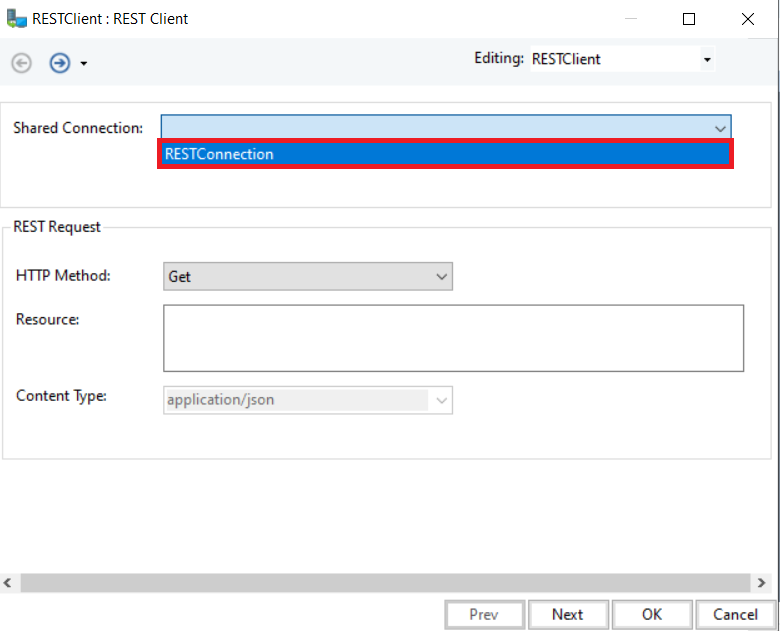
The Shared Connection dropdown list shows us the RESTConnection objects present in the same dataflow.
You can now use this REST Client object to make API calls within Astera Centerprise.
In a Project
1. Navigate to the main toolbar, click Project, hover over New, and select a project type. Please click here for more information on creating projects.
Note: You can also open a previously existing project.

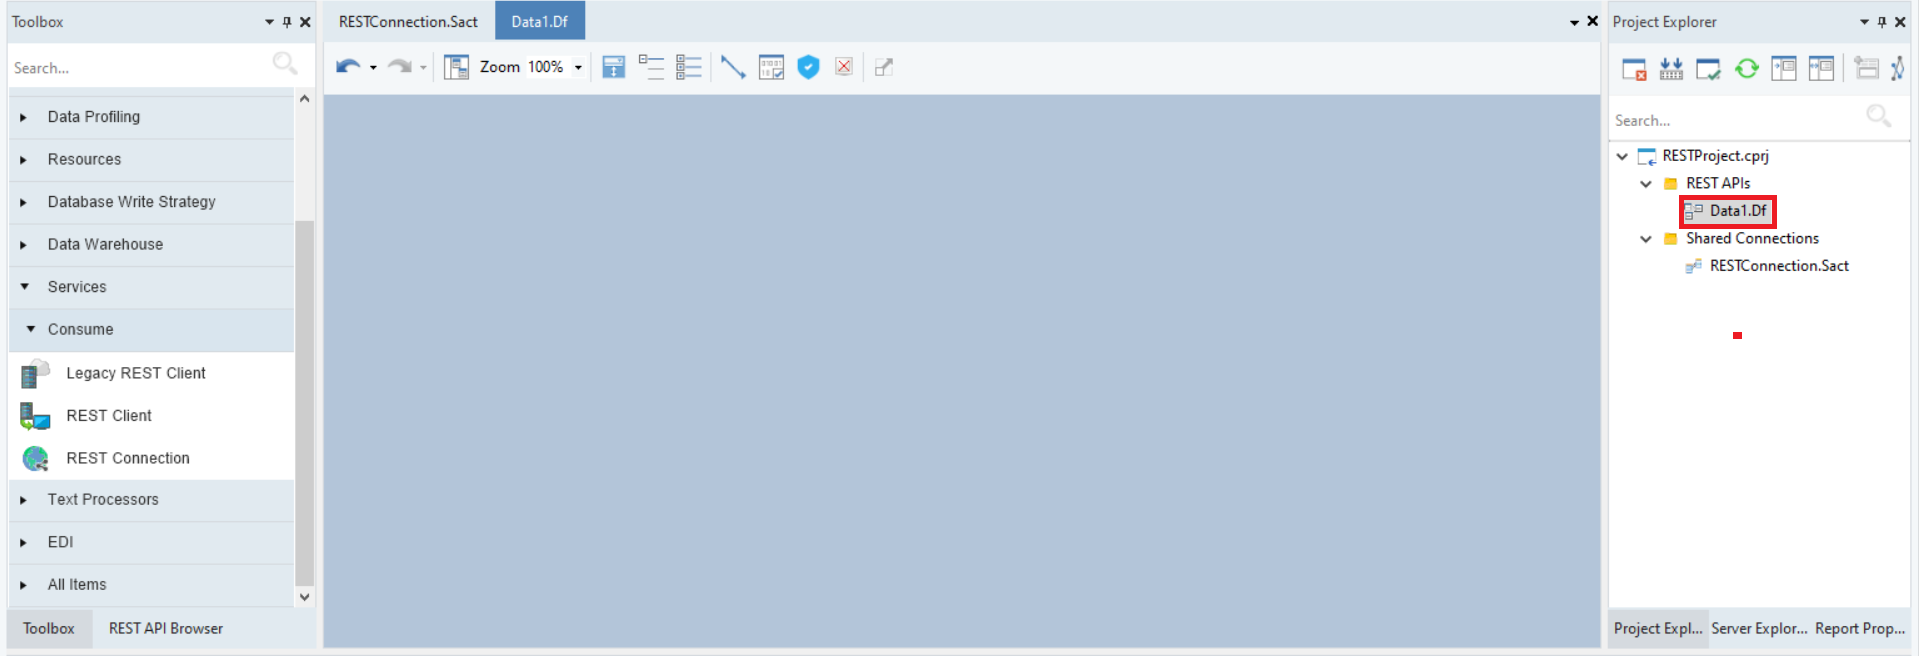
2. Locate the Project Explorer on the right, right-click on the project or one of its folders and select Add New Item from the context menu.
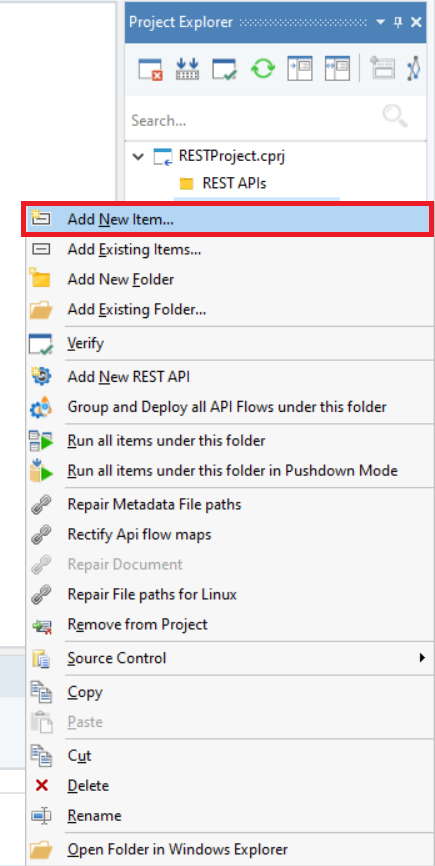
This will open a new window where a new SharedAction can be added to the project.
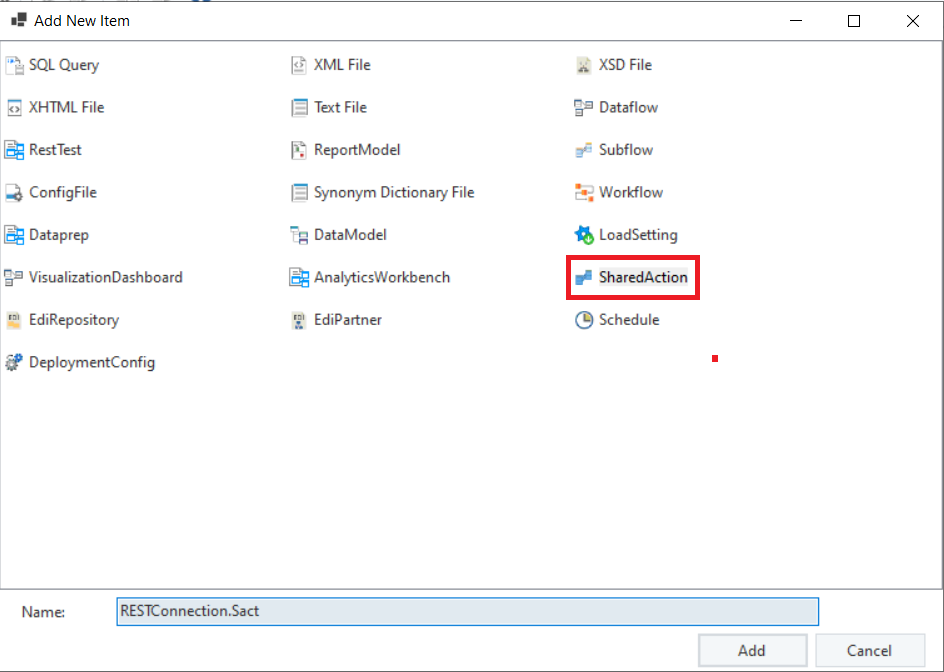
3. Within the SharedAction file, drag-and-drop the REST Connection object from the Toolbox.
Note: The SharedAction file should only contain a single REST Connection object.
4. Configure the REST Connection object with Base URL, Authentication, Shared Parameters and save the SharedAction file
This REST Connection can be used in any flow document contained in the same project.
5. Next, open a new dataflow within the project.
6. Drag-and-drop the REST Client object onto the dataflow, right-click on it and select Properties from the context menu.
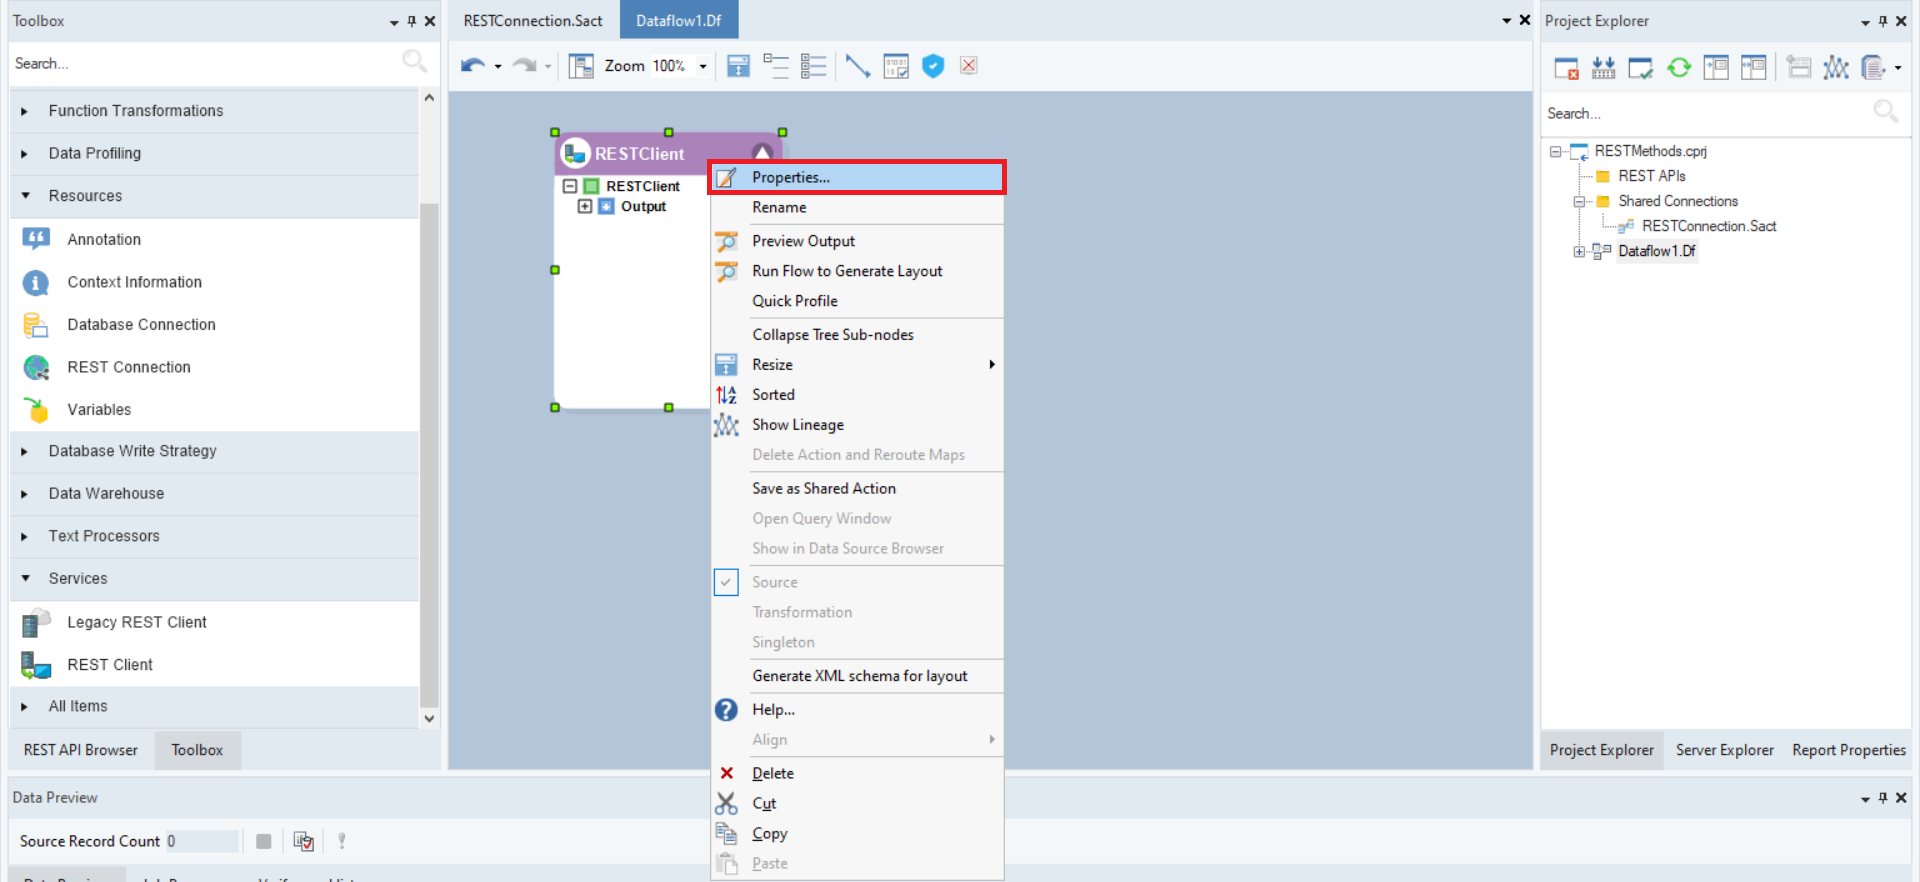
A new window will open.
Here, you can see the name of the Shared Connection within the drop-down menu of the Properties option.
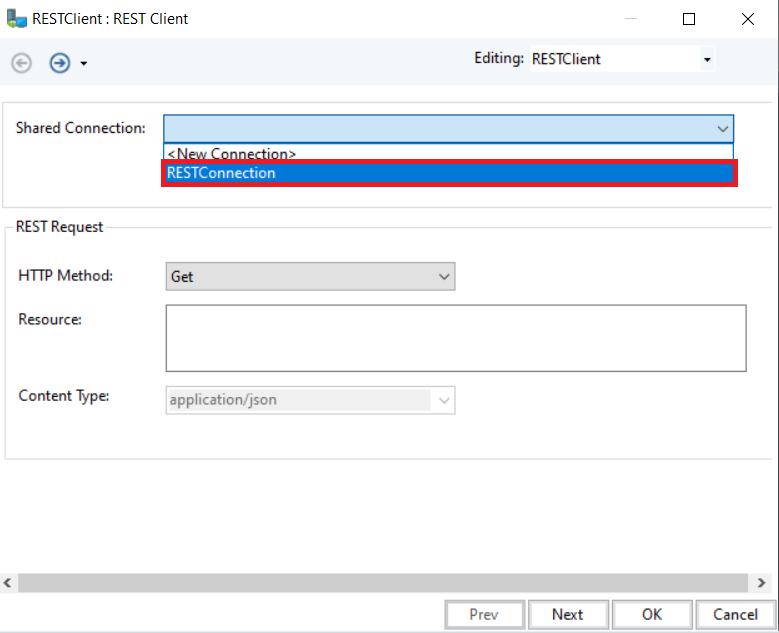
Note: Within the project, the shared REST Connection can be accessed within any flow.
This concludes our discussion on the configuration and use of the REST Connection object in Astera Centerprise.