Deploying Astera Centerprise on Amazon Web Services
Microsoft Azure is an on-premise, hybrid, and future-ready cloud solution. The azure cloud platform has cloud services designed to build, run, and manage applications across multiple clouds. It provides scalable and high-performance cloud computing experience with virtual machines and SQL databases for testing and deployments.
You can now deploy and configure Astera Centerprise on Amazon Web Services (AWS) using virtual machines on AWS.
To continue, please login to the AWS Management Console here.
Deploying Astera Centerprise
Follow the steps below to deploy Astera Centerprise using virtual machines on the AWS Management Console once you login.
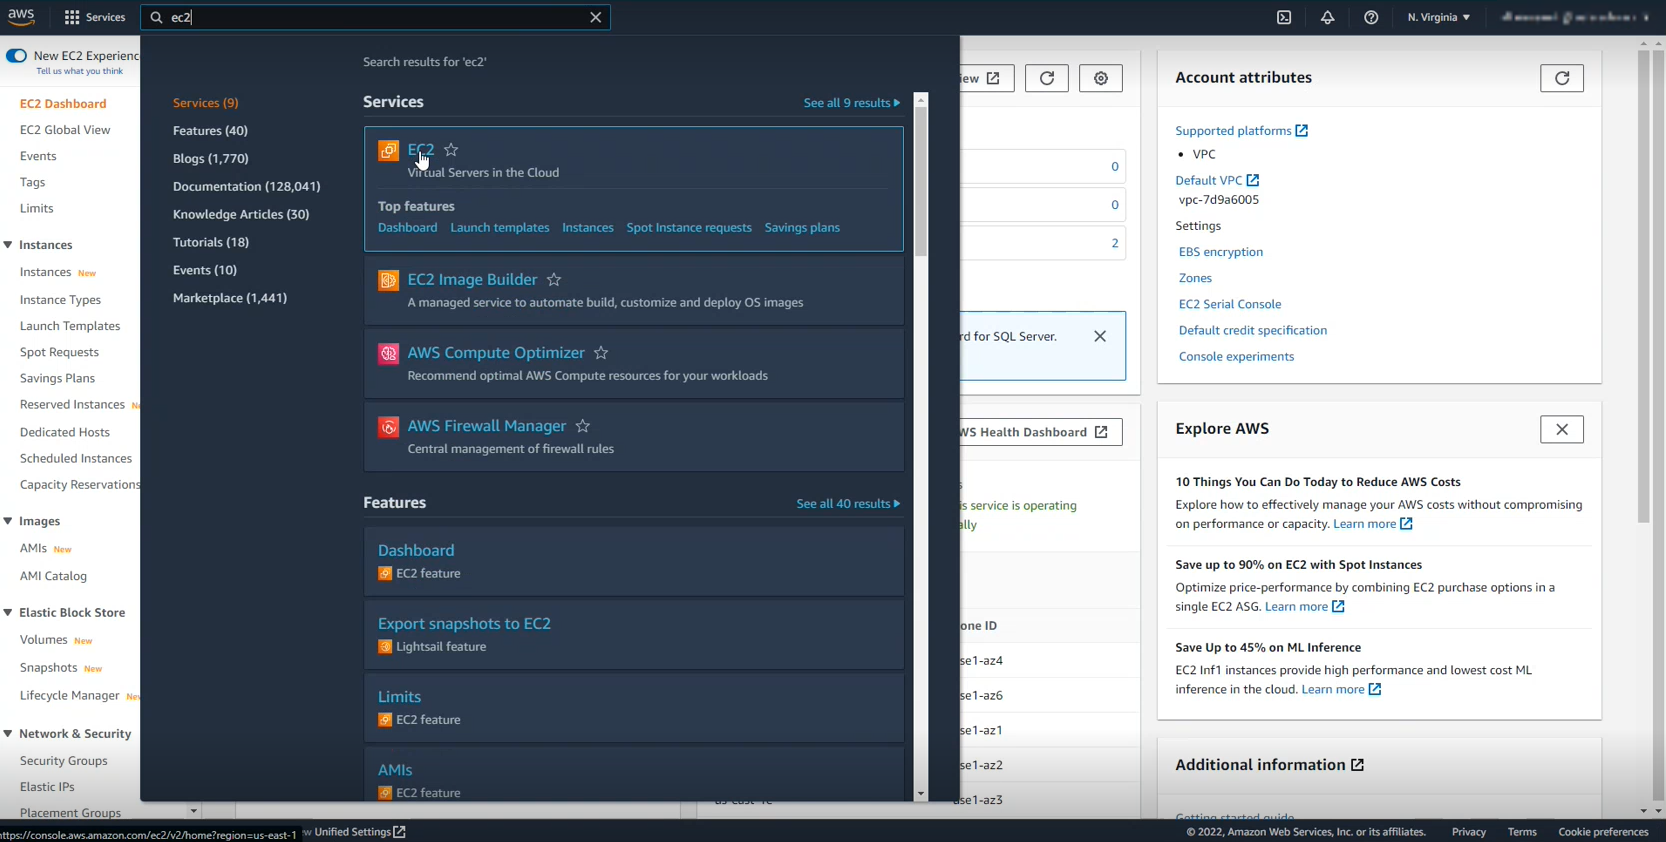
1. Type EC2 in the search bar to find the virtual servers in the Cloud.
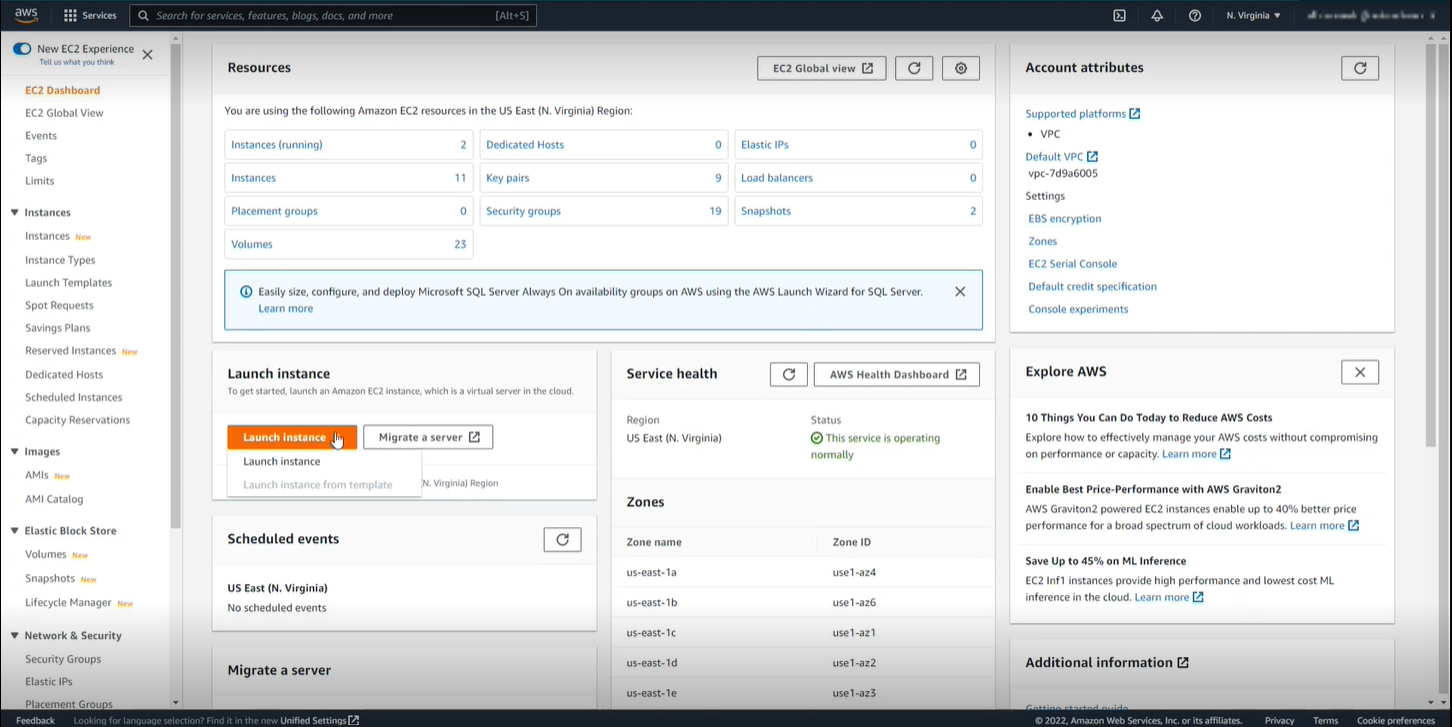
2. Next, click on Launch Instance button on the EC2 page.
3. You are now redirected to a configurations page for the virtual machine instance you want to create. Rename the launched instance and browse for AMIs.
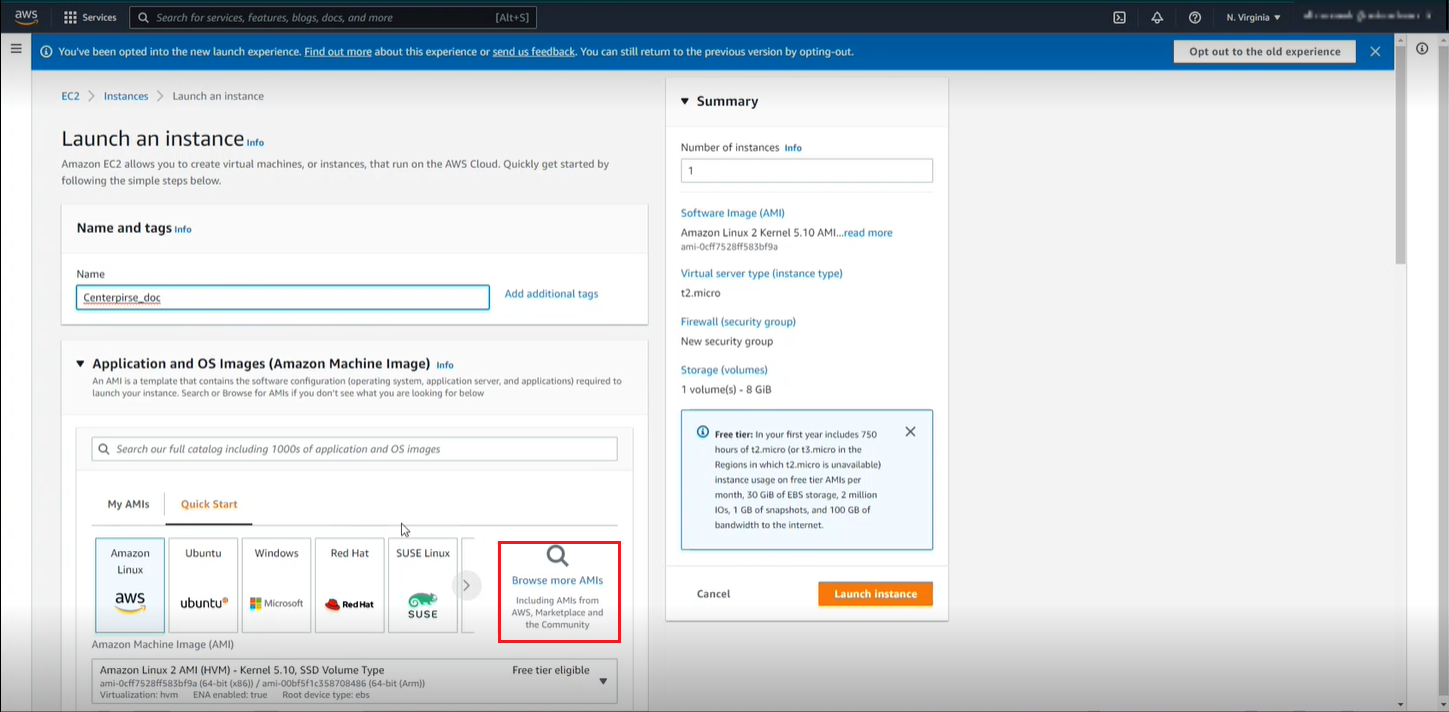
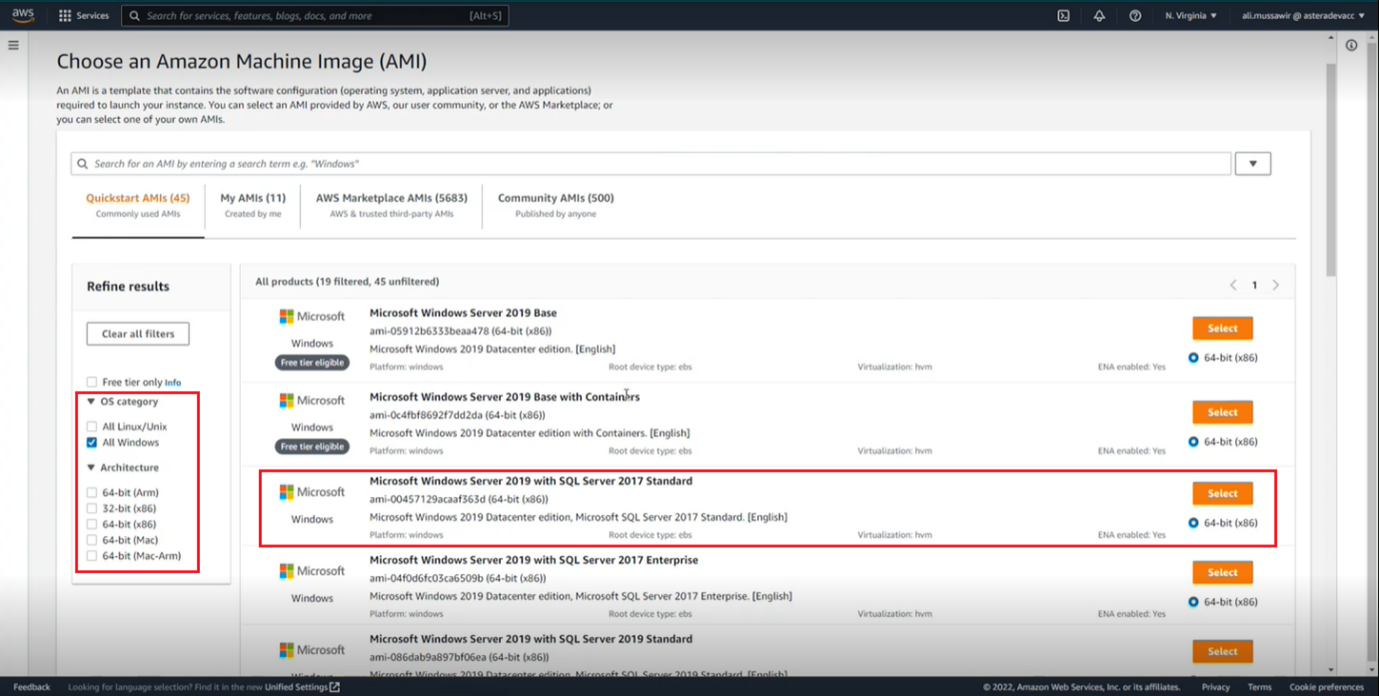
4. You can browse for your desired AMIs using the filters provided. In our case, we will be selecting a windows server with SQL installed for Centerprise.
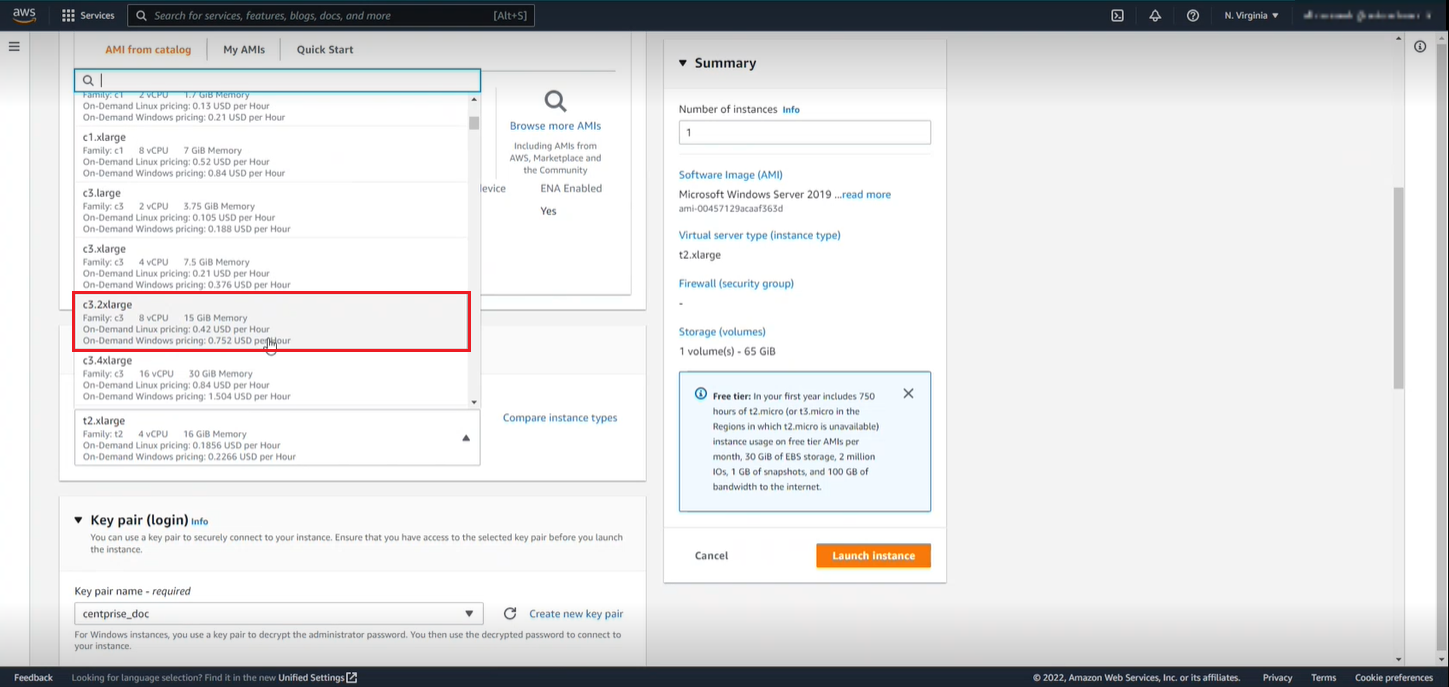
5. Next, select the instance type from the drop down. It is recommended to have at least 16 GiB RAM and 4 vCPUs and the ability to support SQL. So, select c3.2xlarge instance type. The option also has windows/linux pricing mentioned on it.
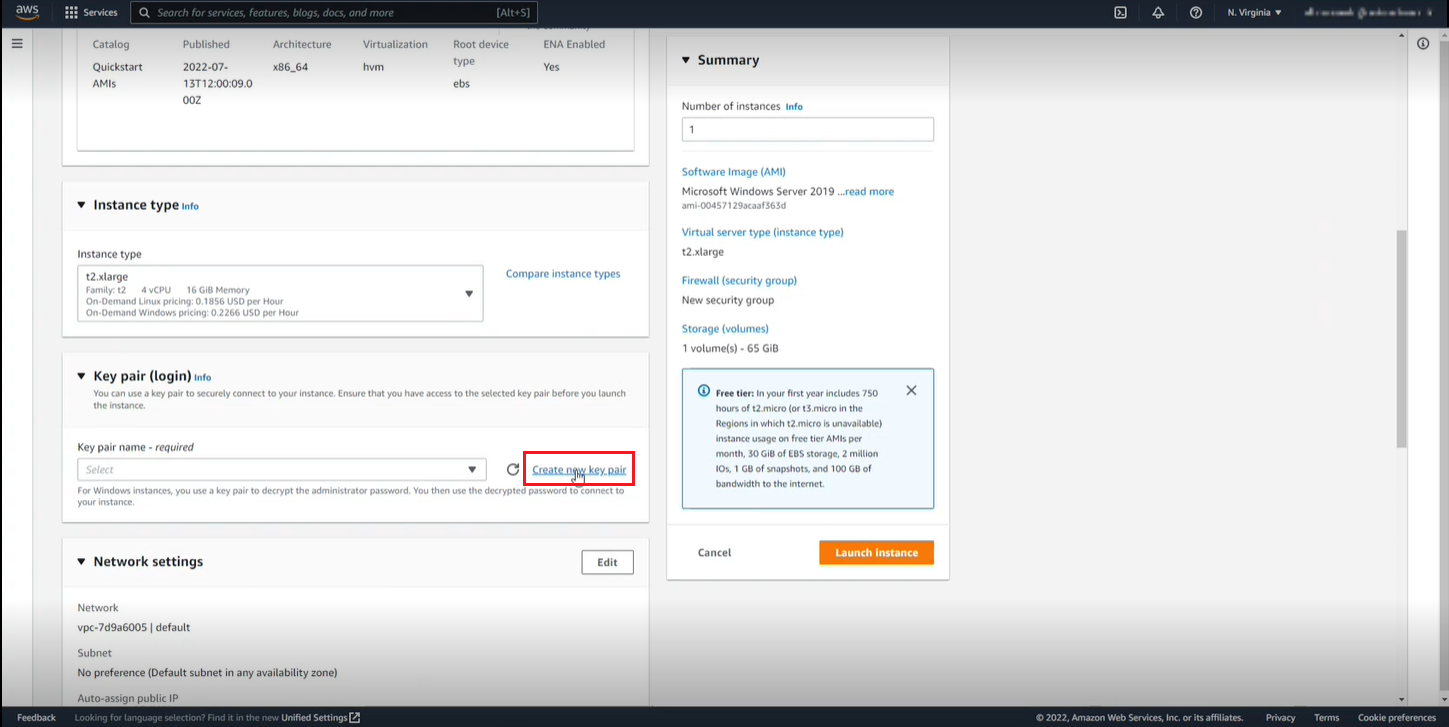
6. Next, click on Create New Key. This will generate a downloading key file which allows for setting administrator password.
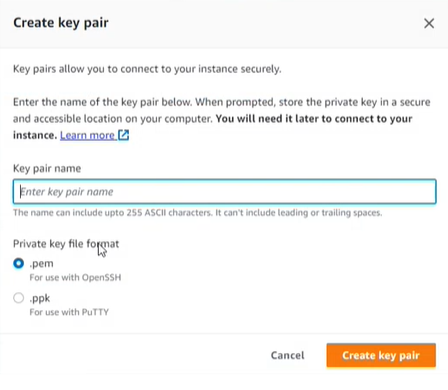
7. This opens a key pair dialogue. Specify a name and create the key pair. The key pair file is downloaded.
8. For the network settings, you can leave these at default unless you want to use an existing security group or provide IPs for connection accordingly.
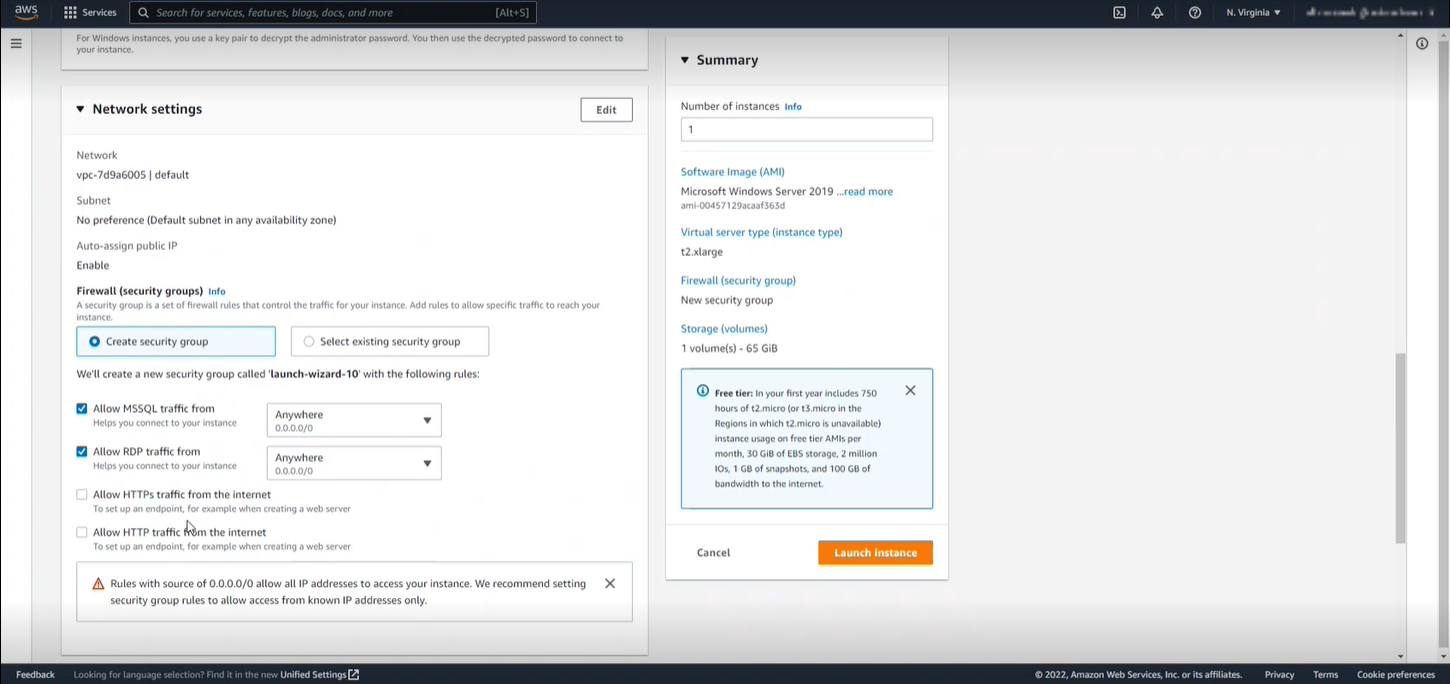
9. Next, you can configure the storage settings as per your requirement and launch the instance.
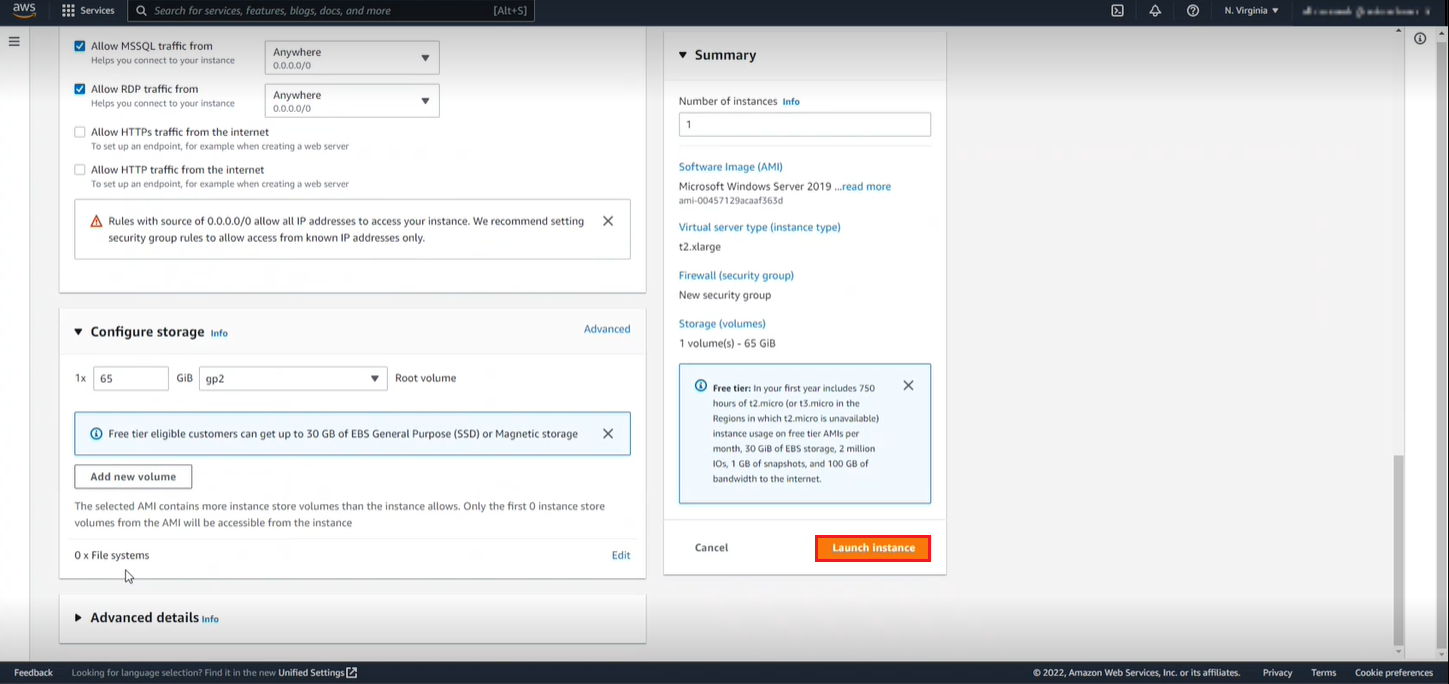
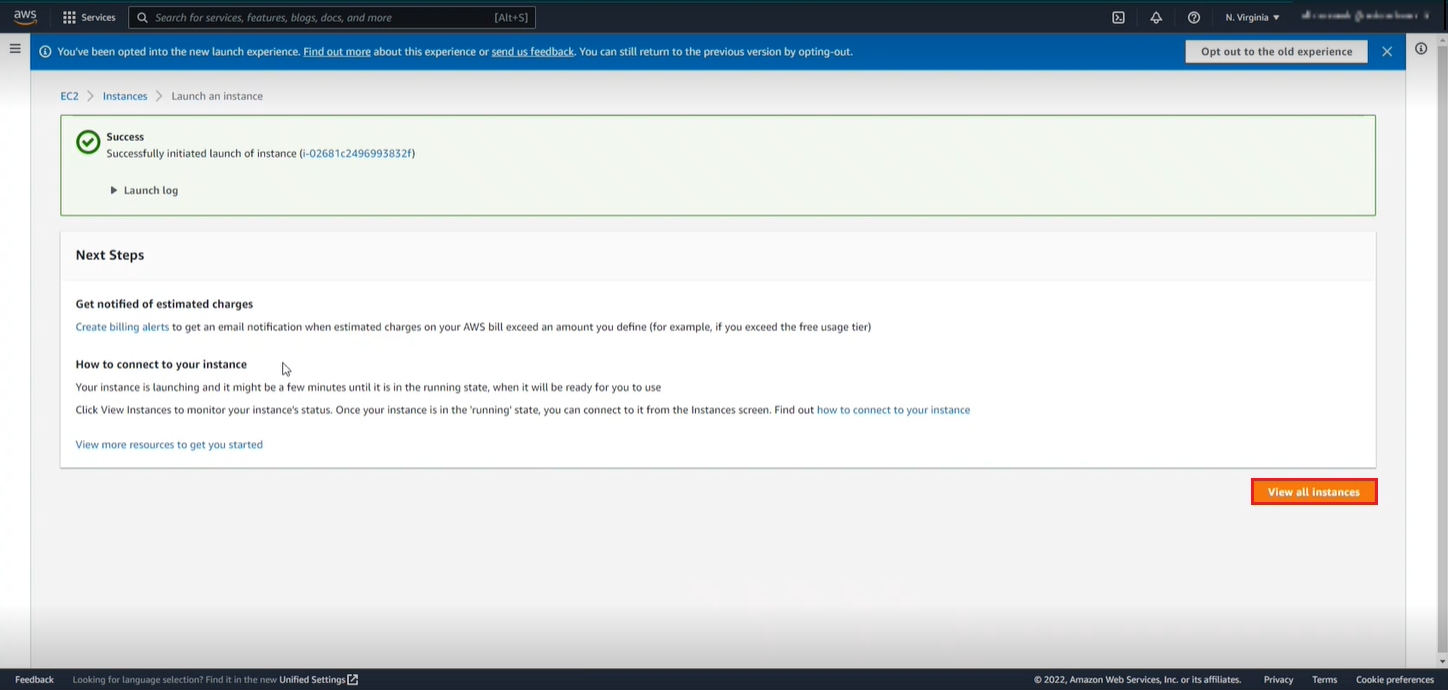
The instance is launched after a few seconds. Click on View all Instances,
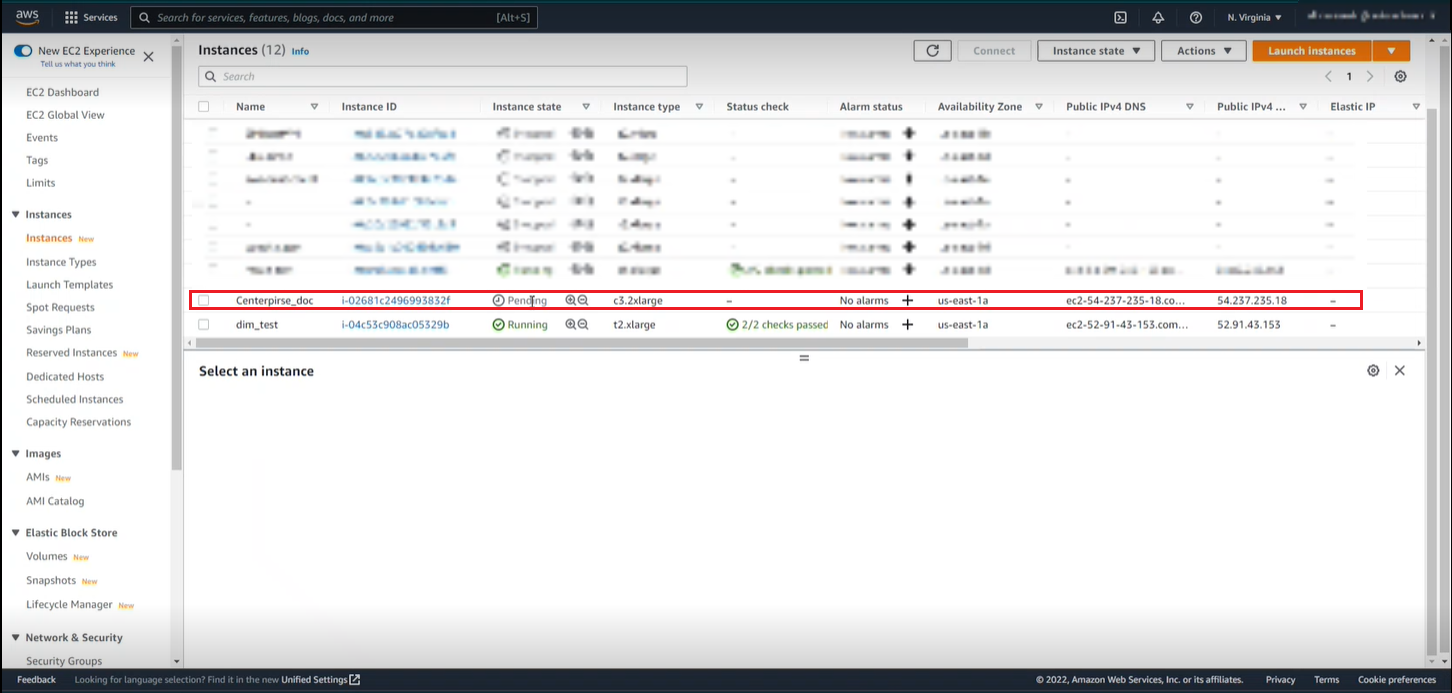
10. AWS proceeds with applying some checks on the instance and this can take a while. You can monitor the progress in the list.
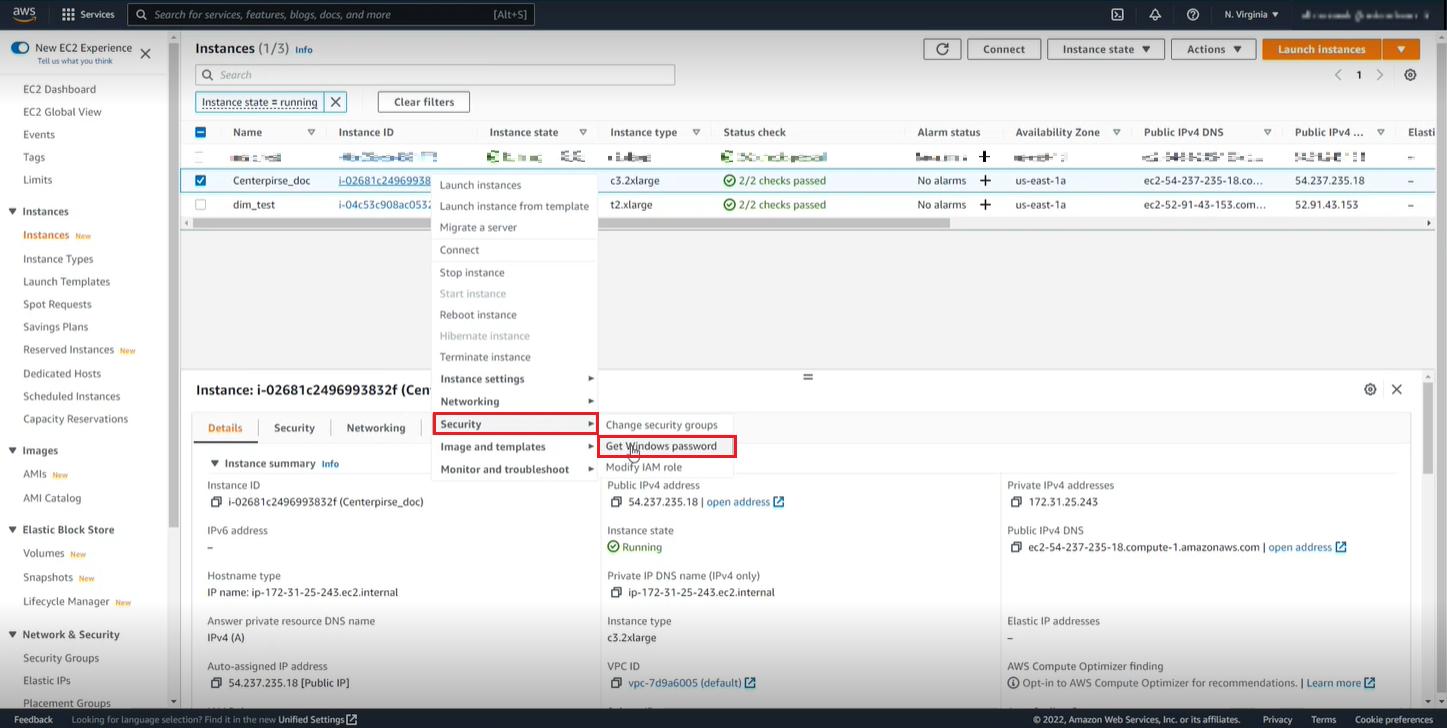
11. Once the checks are passed, right click on the instance and go to Security->Get Windows Password.
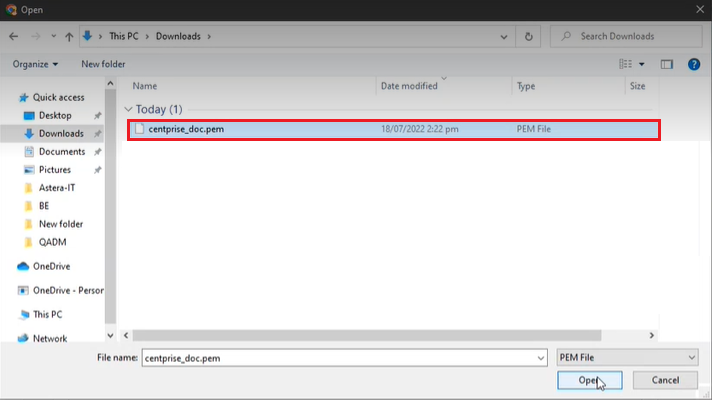
12. Browse for the Key Pair file downloaded earlier.
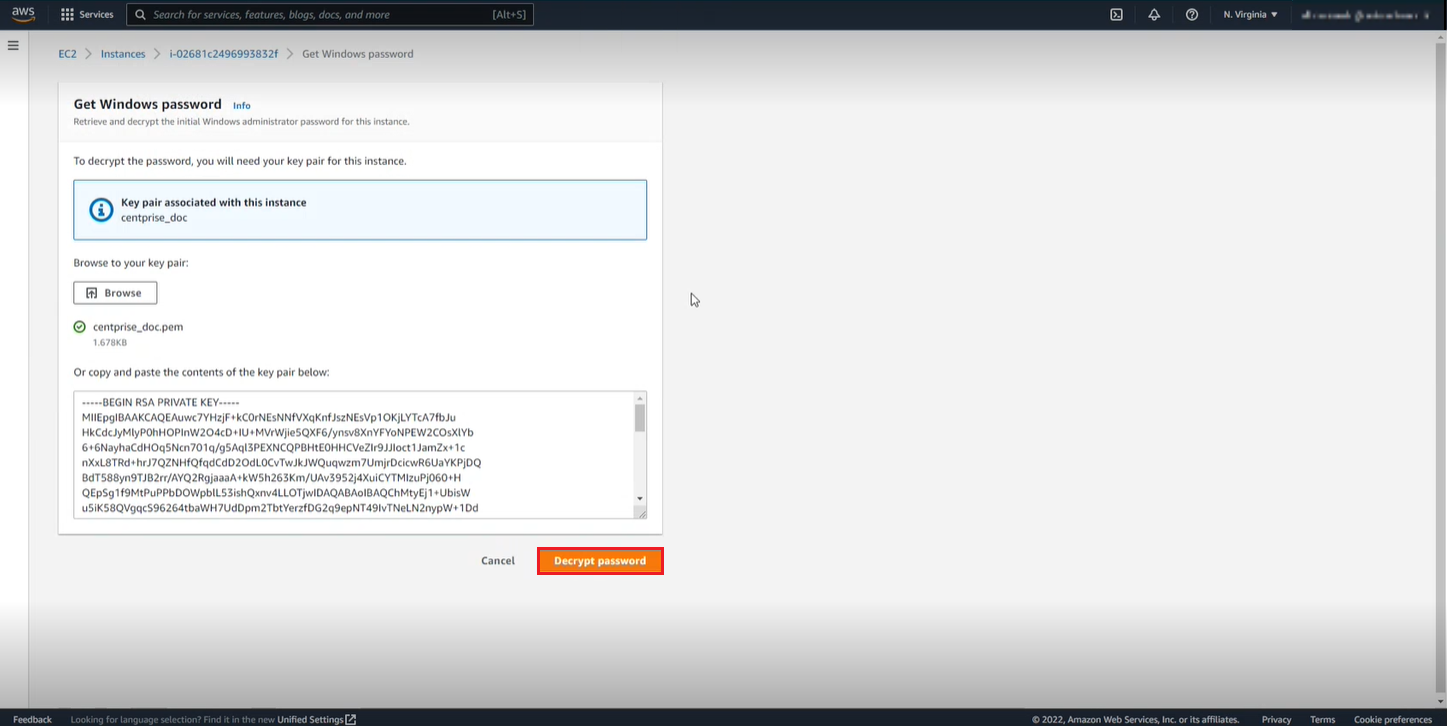
13. Click on Decrypt password.
14. You can now copy the username and password to use with the instance.
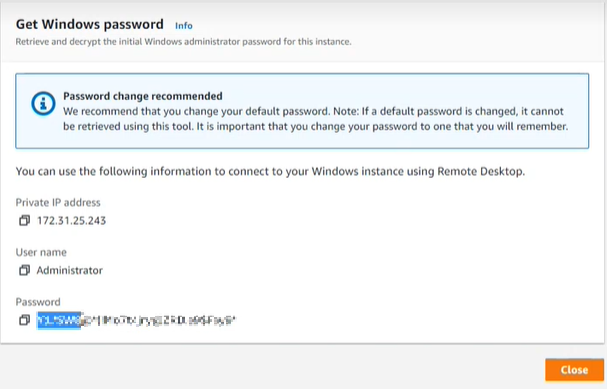
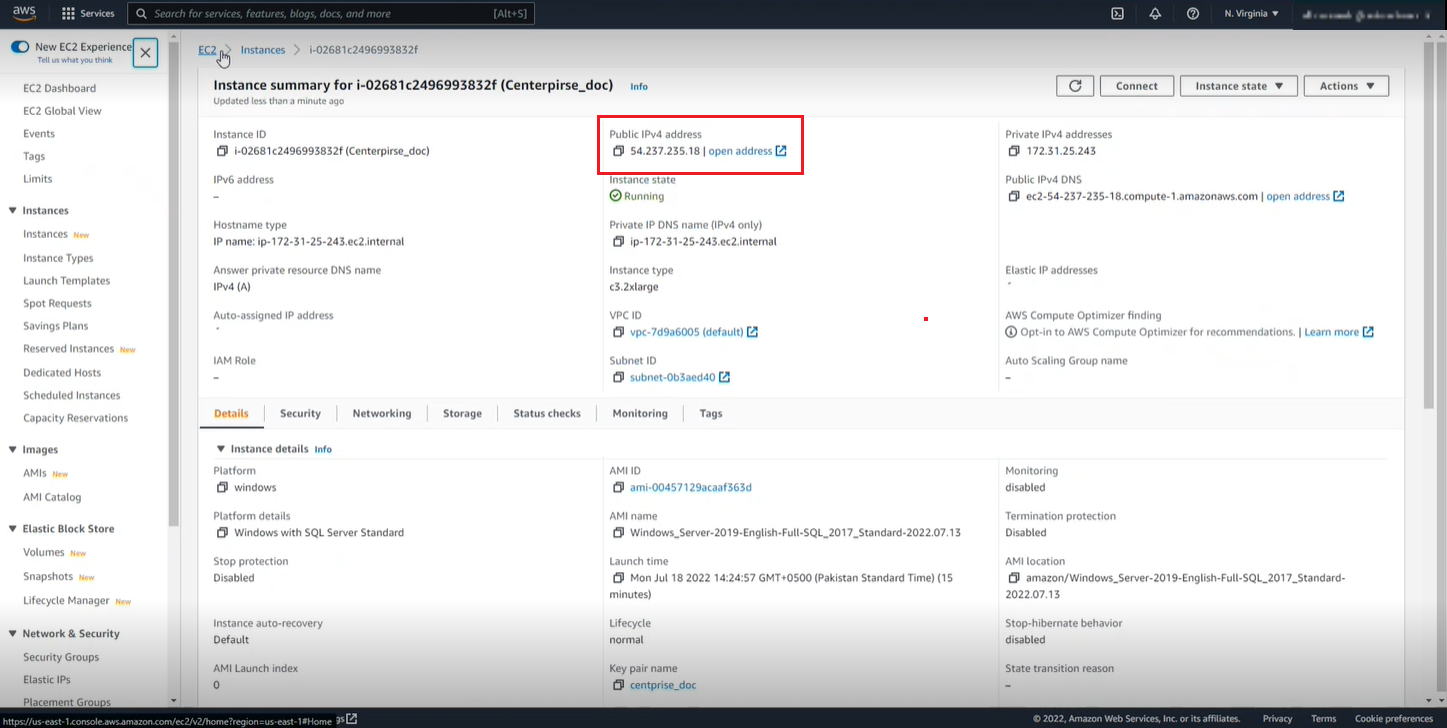
15. Go back to the instance and copy the Public IPv4 Address to connect your RDP.
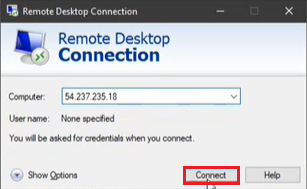
16. You can now connect to the created virtual machine by using the Public IP we created in the Networking section on your remote desktop.
17. Once connected to the virtual machine, you can now install Astera Centerprise on it.
To download the trial of Astera Centerprise, click here.
To learn more about the installation of Astera Centerprise, click here.
Note: Once you’ve created the virtual machine, you can connect to the SQL database through the Administrator Account credentials that you provided earlier in the Basics section while configuring the virtual machine.
This concludes deploying Astera Centerprise on Amazon Web Services.