Deployment
Deployment is a way for setting up Centerprise projects to run on the Scheduler.
When you are deploying a project, you can also specify parameters by creating a config file for project archive (.car) files to run project flows independent of any local parameters.
In this document, we will learn how to deploy projects in Astera Centerprise.
How to deploy a project on Astera Centerprise Server
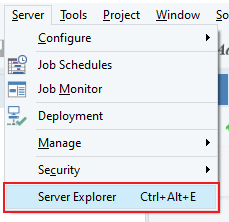
1. Go to Server > Server Explorer. This will open a Server Explorer panel.
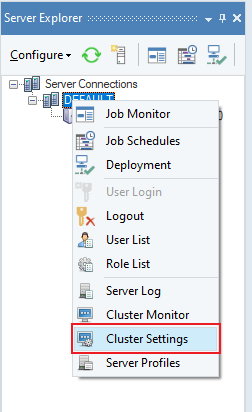
2. On the Server Explorer panel, right-click on the DEFAULT server node, and select Cluster Settings.
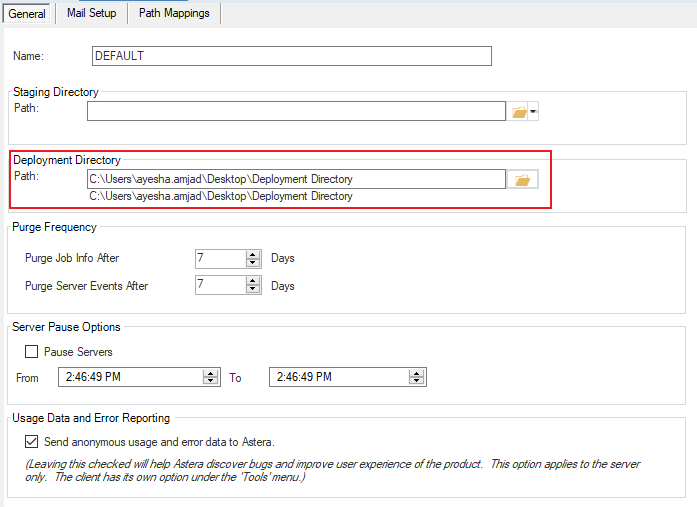
This will direct you to the general settings tab.
3. In the general settings tab, specify the Deployment Directory path. Deployment Directory is the location where the deployment files will be stored for the server to access when a deployment schedule is run.
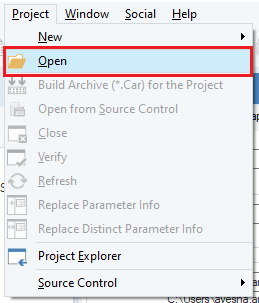
4. Now, open the project that you want to deploy on Astera Centerprise’s Server by going to Project > Open and direct it to the .cprj file. This will open the selected project in the Project Explorer panel.
Note: .cprj file refers to a Centerprise project file.
5. In the Project Explorer panel, right-click on the Project node, and select Build Archive (.Car) for the Project from the context menu.
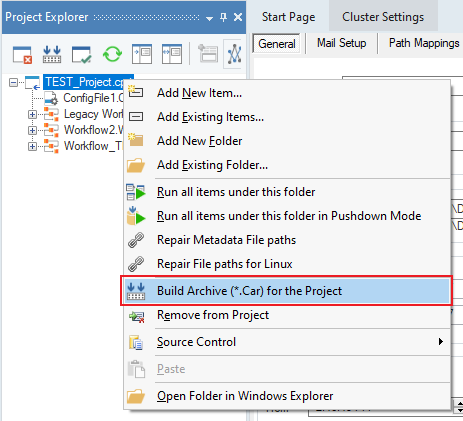
6. Save this archive file on your system.
7. Now, open the Deployment window. Go to Server > Deployment.
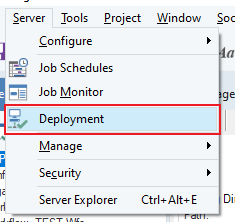
This will direct you to the main Deployment screen.
8. Click the Add Deployment icon to add a new deployment.
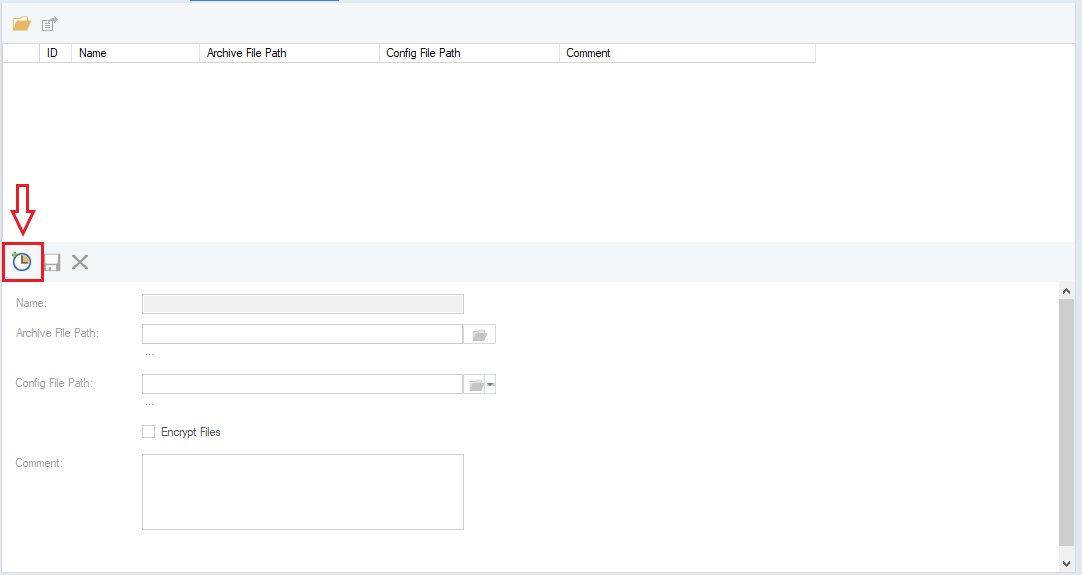
9. Configure deployment settings by providing the following details:
- Name
- Archive File Path (*.car)
- Config File Path (an optional file to specify project parameters)
- Comment (optional)
10. Save this deployment by clicking the Save Deployment icon and it will be added to the list of deployed projects.
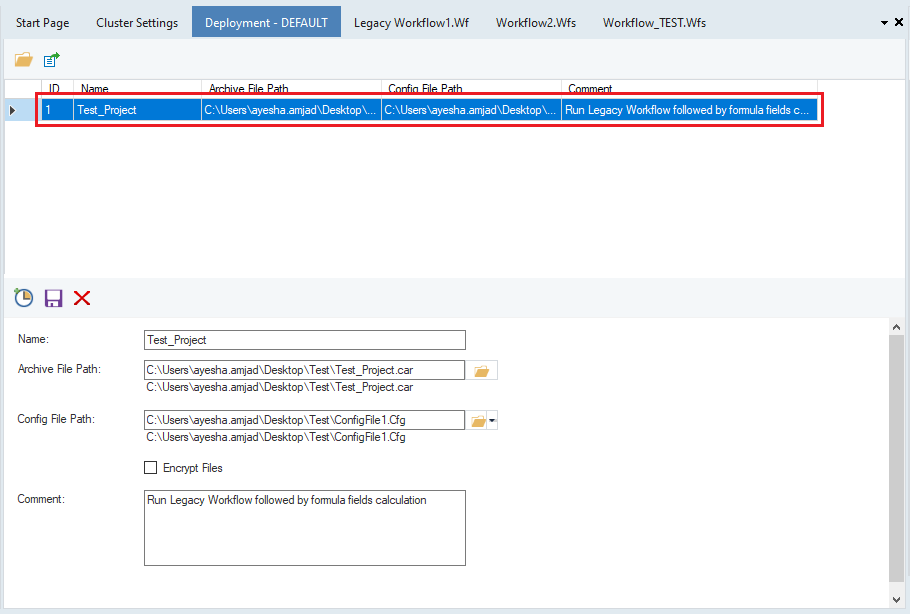
Multiple deployments can be configured on the cluster from the deployment window. The top part of the deployment screen shows the configured deployment files.