Data Quality Mode
In addition to the standard logging functionality, Centerprise provides a special Data Quality Mode option, useful for advanced profiling and debugging. When a dataflow is created/opened in Data Quality Mode, most objects on the dataflow show the Messages node with output ports.
In this document, we will learn how to use the Data Quality Mode in Astera Centerprise.
Sample Use-Case
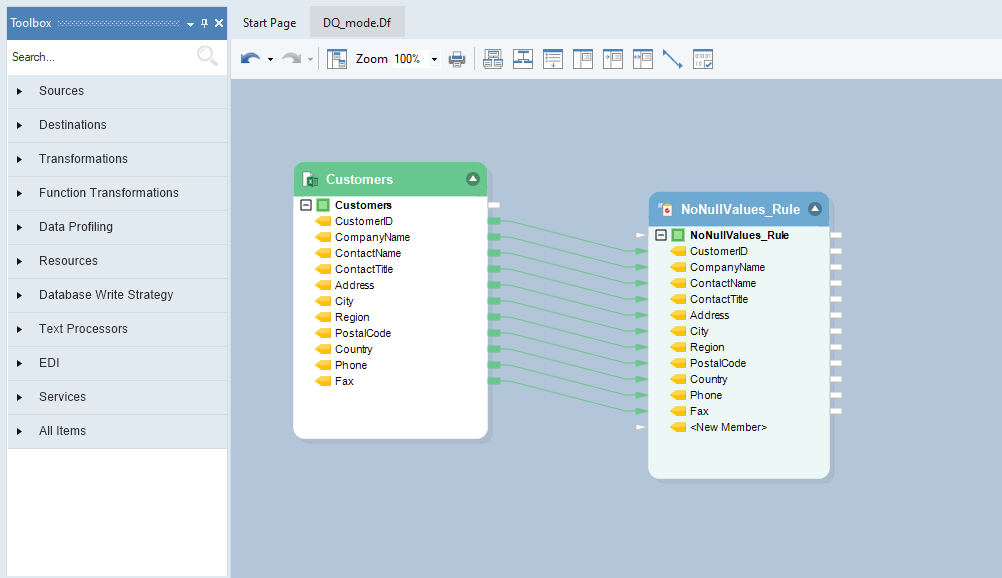
In this case, we have a simple dataflow designed to perform a data quality check. It contains customers’ data coming in from an Excel Workbook Source. A Data Quality Rule object is added to validate data for null values and perform warning checks.
If you preview the Customers dataset output at this stage, you will see that some of the records have missing values in the Region and Fax fields.
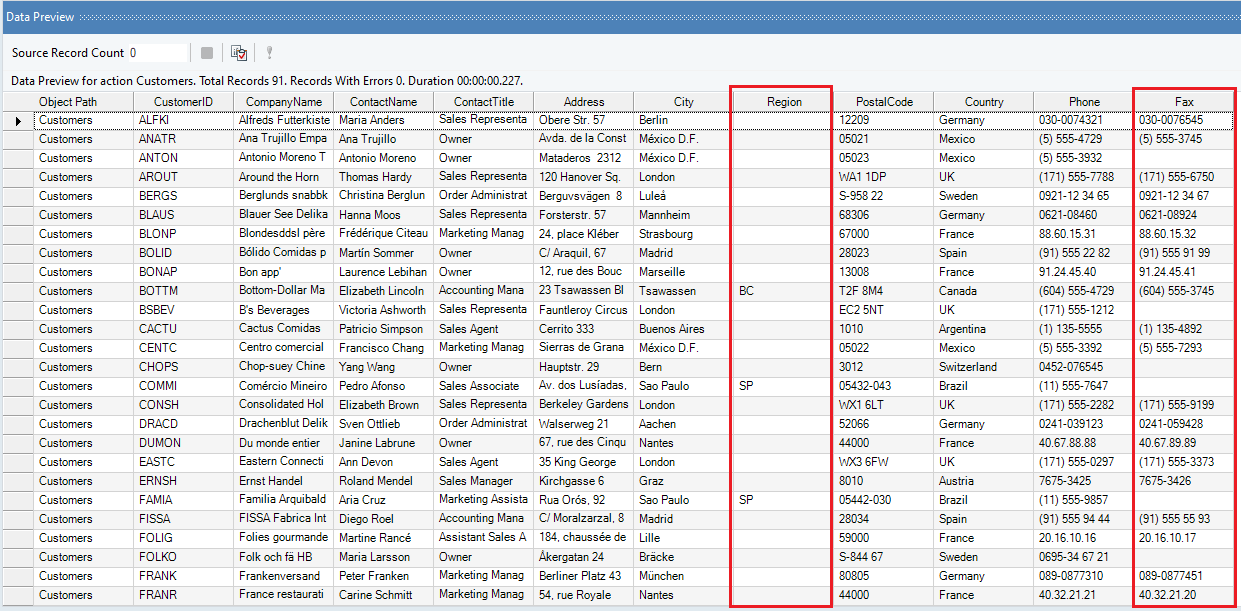
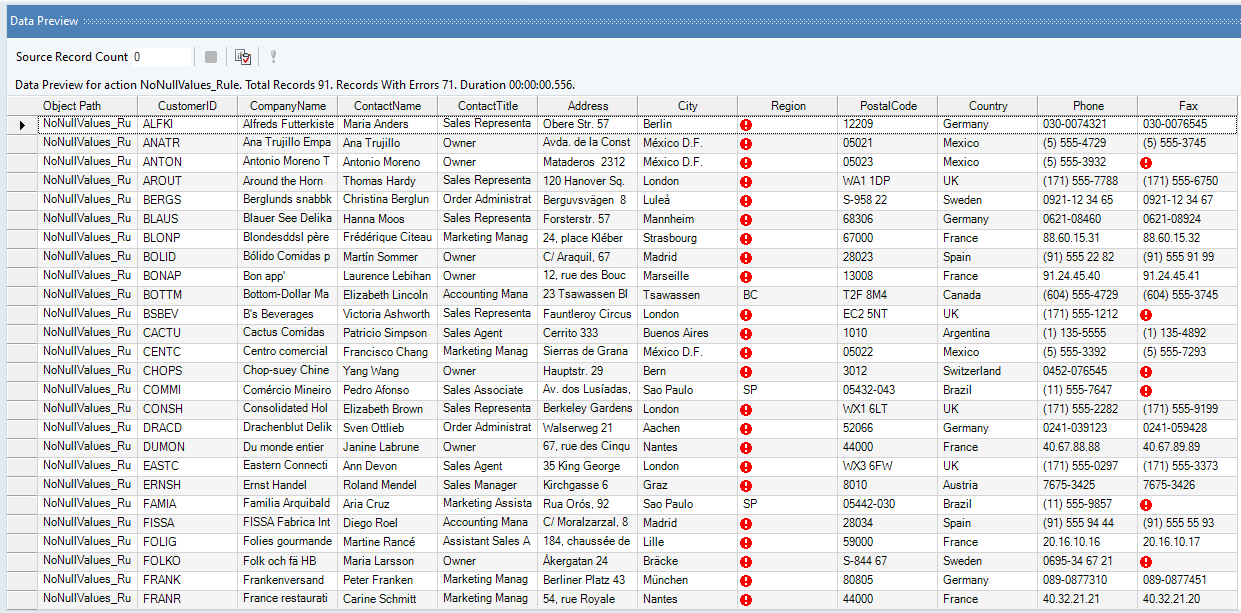
Data quality rules are set so that records with empty Region values are marked as errors and records with empty Fax values are marked as warnings. A red exclamation sign in the Data Preview window identifies the records that have failed to match the rule and returned an error or a warning as a result.
Now, for instance, we want to collect information regarding the number of errors/warnings in a single record, the error/warning messages attached to these records, and write this information to a destination. For this purpose, we will use Data Quality Mode.
Note: The Record Level Log feature also collects and records this information but we can not further process it in the dataflow.
Activating Data Quality Mode
1. To activate this feature, click on the Data Quality Mode  icon located at the top of the dataflow designer.
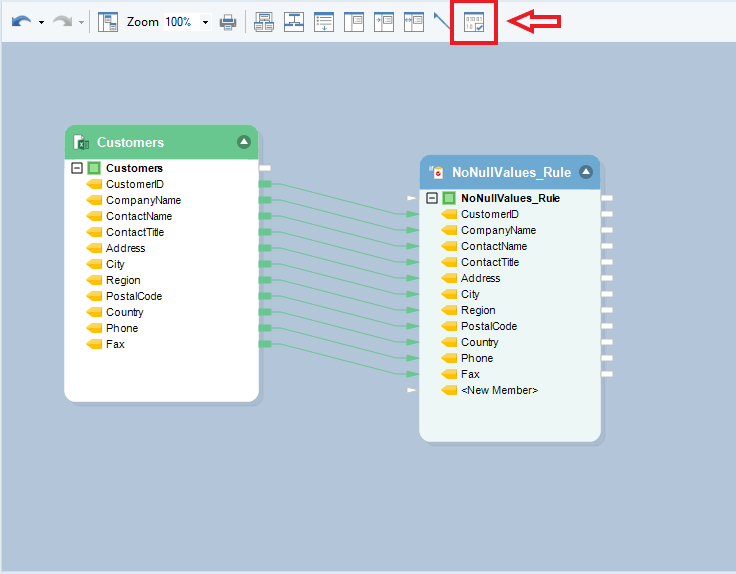
Once Data Quality Mode is activated, a Messages node will be added to all the objects in the dataflow.
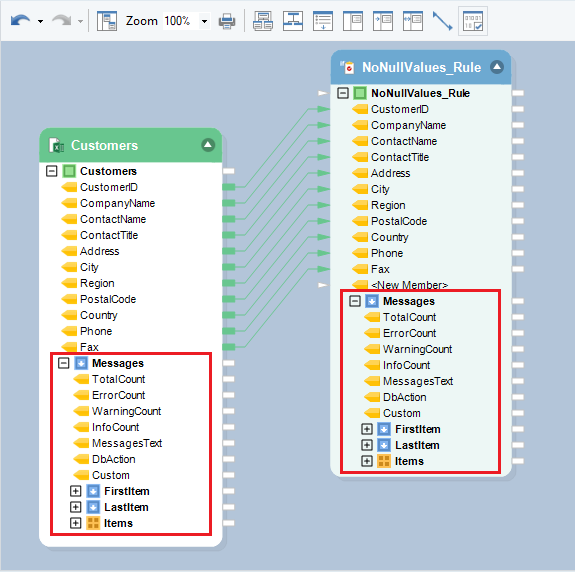
The Messages node captures the following statistical information:
- TotalCount
- ErrorCount
- WarningCount
- InfoCount
- MessagesText
- DbAction
- Custom
In addition, FirstItem, LastItem, and Items sub-nodes provide a way to collect quality control data for each of the records. The quality control data includes ElementName, MessageType, or Action etc. and can be written to a destination object for record-keeping purposes.
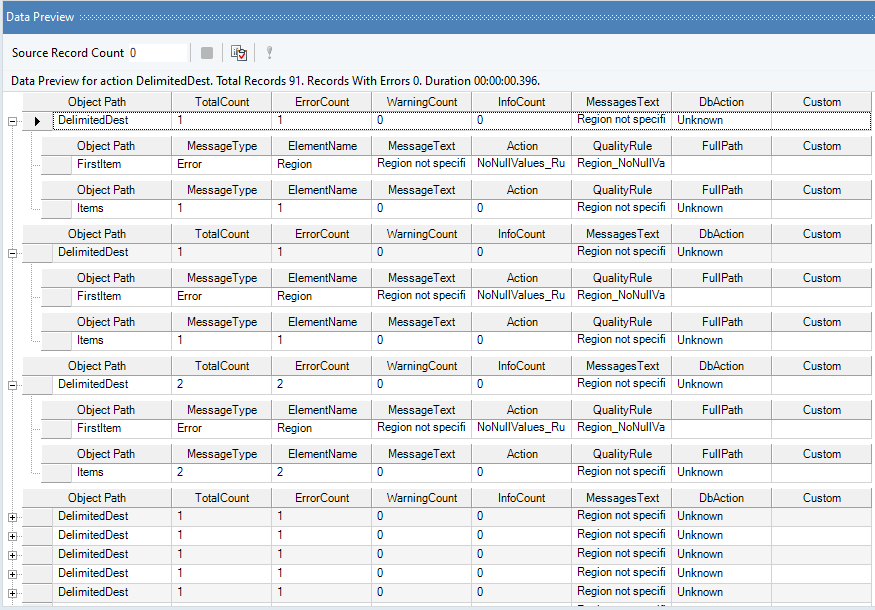
Writing to a Destination
Connecting the Messages node’s output ports to another object’s input ports on the dataflow makes it possible to get both - summary statistics and record-level statistics for the dataset, which are useful for analysis and debugging. To do this:
1. Right-click on the Messages node inside the NoNullValues_Rule object and go to Write to > Delimited File Destination.
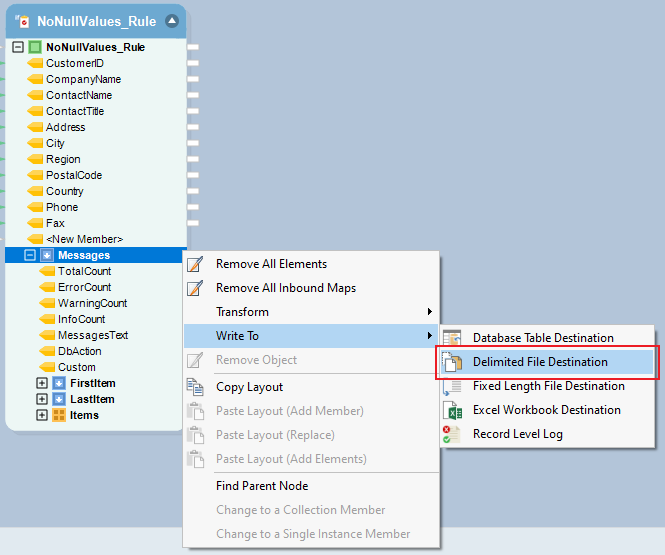
A Delimited Destination object is added to the designer with mapped fields.
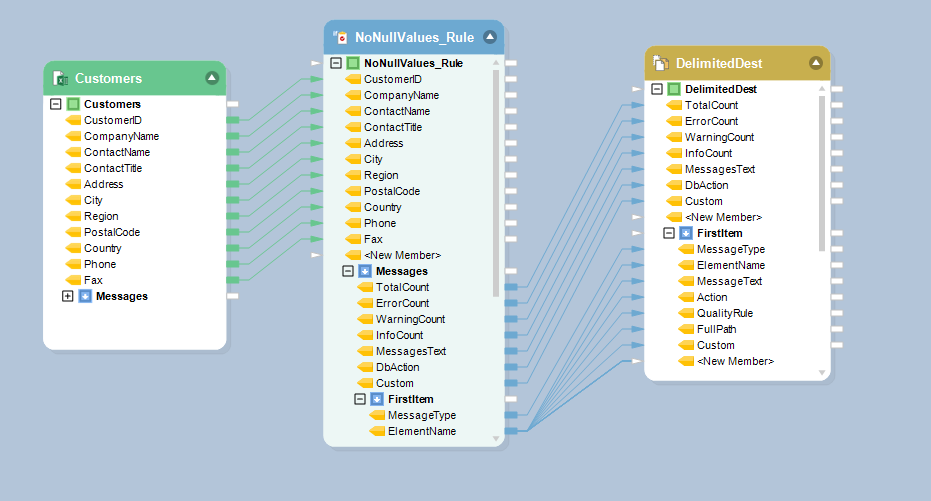
2. Configure settings for the Delimited File Destination to save this data.
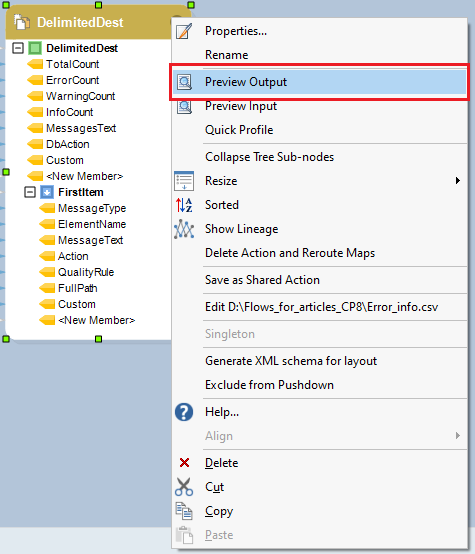
3. Right-click on the header of the destination object and select Preview Output from the context menu.
A Data Preview window will open, showing error and warning information.