Route Transformation
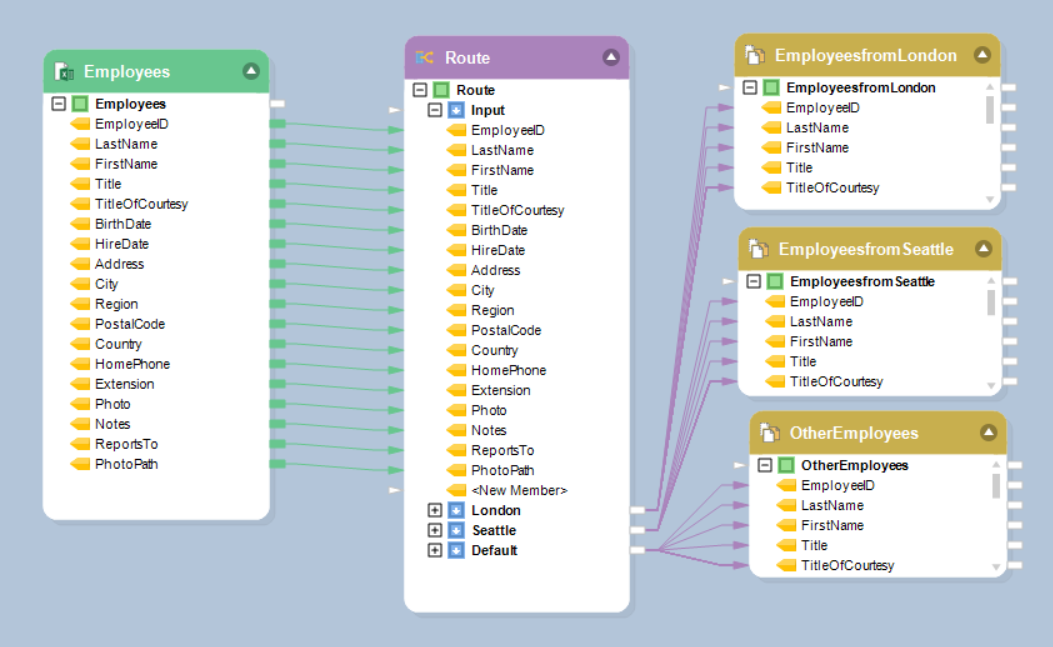
A Route transformation object invokes one or more paths in the dataflow, in accordance with some decision logic expressed as a set of Rules. Using the Route transformation object, you can create some custom logic involving multiple paths and adapt it to suit your data processing scenario.
For example, a record passing some rule will be written to Destination1, a record passing another rule will be written to Destination2, and a record which fails to pass any rules can still be written to a Destination3, and be fed to a downstream transformation object.
Steps to Use the Route Transformation in Centerprise
To add a Route transformation object, drag the Route object from the Transformations section in the Toolbox, and drop it on the dataflow designer.
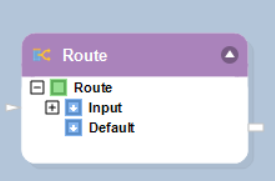
An example of what a Route object might look like is shown below:
To configure the properties of a Route object after it was added to the dataflow, right-click on the object’s header, and select Properties from the context menu. The following properties are available:
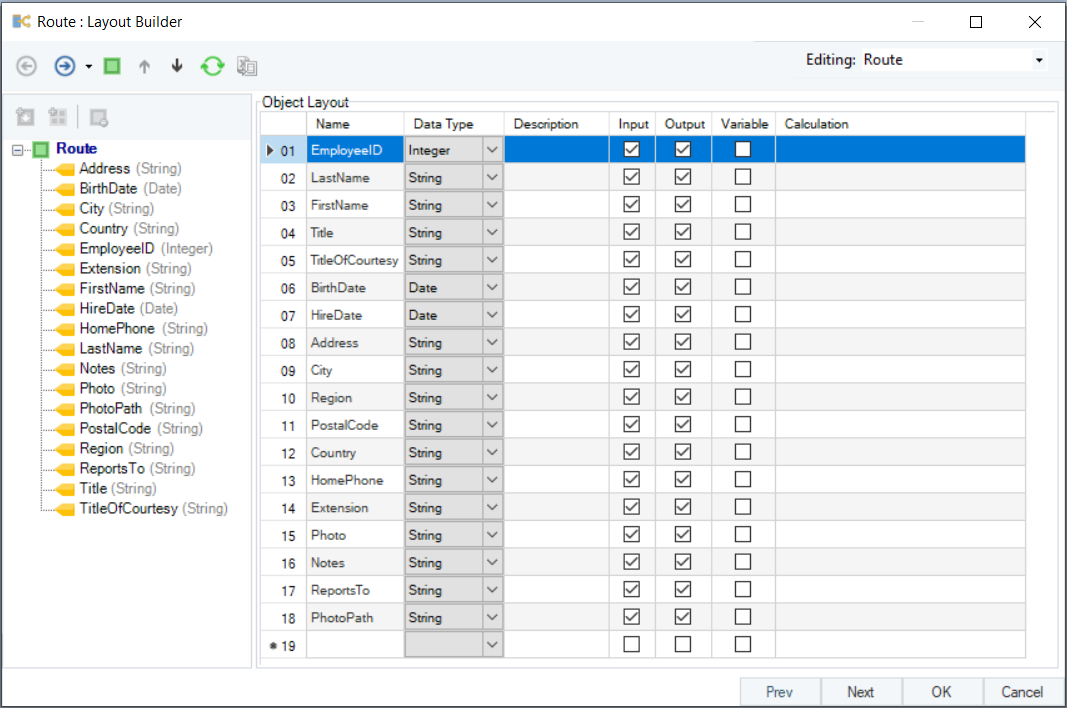
Layout Builder window:
The Layout Builder window allows you to add or remove fields in the field layout, as well as select their data type. The fields added in the Layout Builder will be added to the Input node inside the object box, as well as in all Rule nodes corresponding to the number of rules created (see below).
Route Transformation Properties window:
The Route Transformation Properties window allows the interface to manage Route rules.
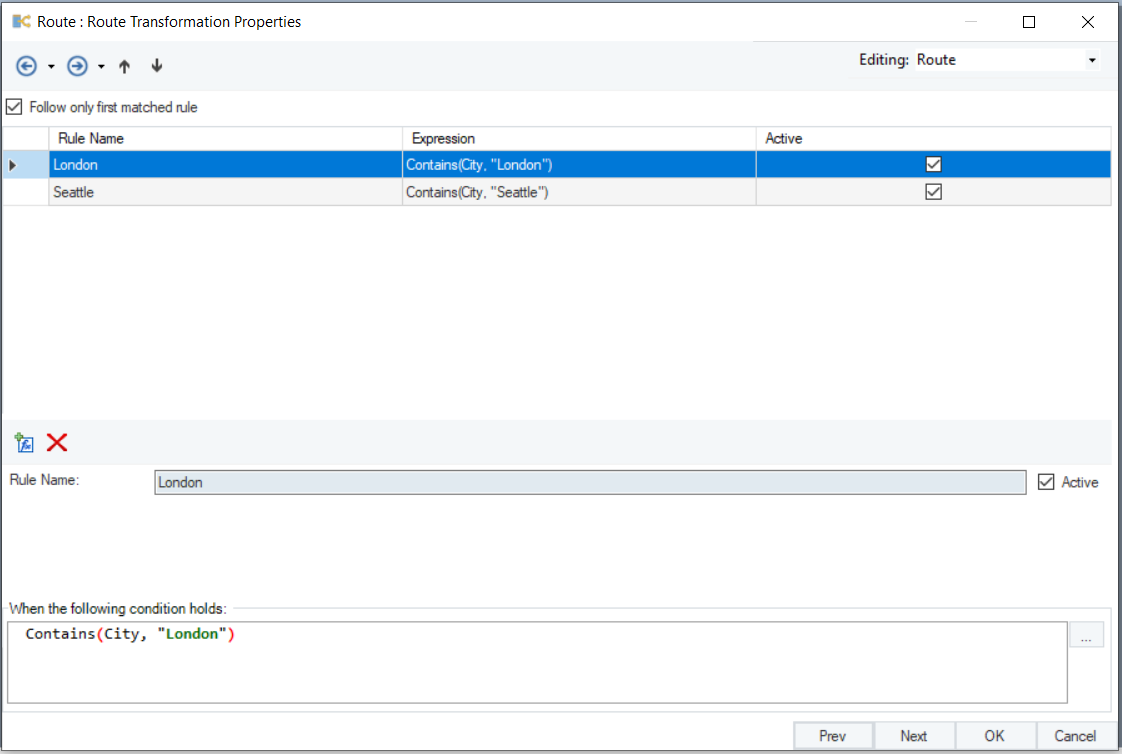
Click the icon to create a new rule.
Type a descriptive name for the rule in the Description field.
In the Expression input, enter an expression for the rule. For example, LTV > 60 and LTV <= 80, or any rule or condition you want to apply to your data. Alternatively, you can click on the  button to open the Expression Builder window - a tool that allows you to visually build your rule using Record tree and IntelliSense.
Click Compile to check for any syntax errors in your rule. The Compile Status should read “Successful” for a successful compilation.
To activate the rule, check the Active checkbox.
Add other Route rules if necessary. To delete an existing Route rule, select it and click the  icon.
icon.
Note: Each Route rule you add here will have its own Rule node in the Route object box once you close the Properties window. You can then map it to downstream objects in the dataflow as needed.
Note: All Route transformation objects have a Default node. This node handles records not passing any rules defined in your Route transformation object.
General Options window:
This window shares options common to most objects in the dataflow.
Clear Incoming Record Messages
When this option is checked, any messages coming in from objects preceding the current object will be cleared. This is useful when you need to capture record messages in the log generated by the current object and filter out any record messages generated earlier in the dataflow.
Do Not Process Records with Errors
When this option checked, records with errors will not be outputted by the object. When this option is unchecked, records with errors will be outputted by the object, and a record message will be attached to the record. This record message can then be fed into downstream objects in the dataflow, for example a destination file that will capture record messages, or a log that will capture messages, as well as collect their statistics.
The Comments input allows you to enter comments associated with this object.