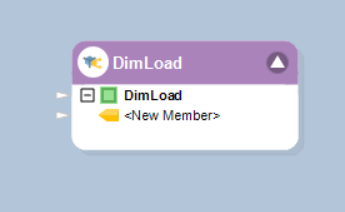
Dimension Loader
The Dimension Loader object in Centerprise allows for efficient and effective data history maintenance within databases. It allows users to write data to a dimension table by mapping fields from source objects.
Note: The Dimension Loader object was previously called the Slowly Changing Dimensions (SCD) object in versions preceding Centerprise v9.
In Centerprise v9, the following SCD types are supported:
- SCD 1 – Used to update records by overwriting previous values
- SCD 2 – Retains full history of values by creating new records
- SCD 3 – Retains full history using new “Previous” and “Current” columns
- SCD 6 – A hybrid of SCD types 1, 2, and 3
Use Case
In this article, we will look at how to configure and use the Dimension Loader object in Centerprise.
We will be using the Database Table Source object, alongside the Dimension Loader object for our example.
The following is a preview of the data we will be working with.
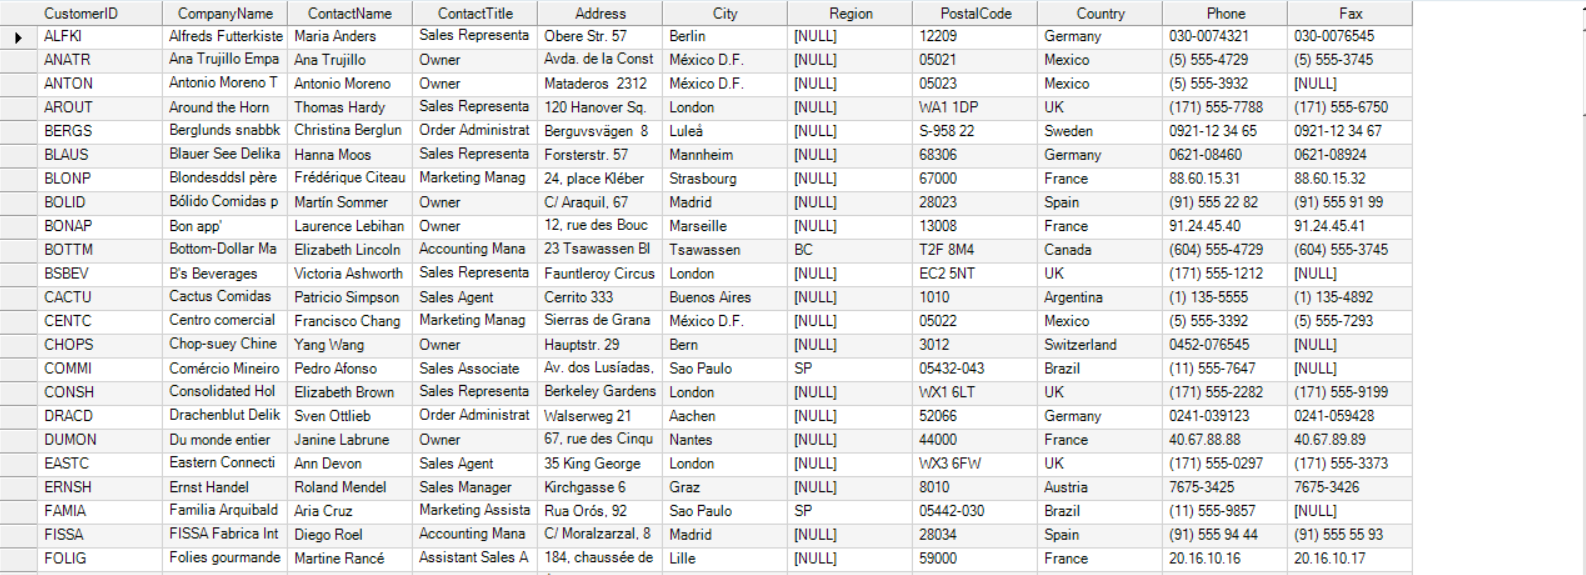
We will be using a Customers table wherein we will use fields within this table as dimensions to implement our use case. Hence, we will apply Dimension Loader’s SCD Type 1 and SCD Type 2 functionalities to the CompanyName and Phone fields in the Customers dataset. Doing this will help us maintain history for the aforementioned fields.
Note: For information regarding the configuration of a Database Table Source object, click here.
Configuring the Dimension Loader object
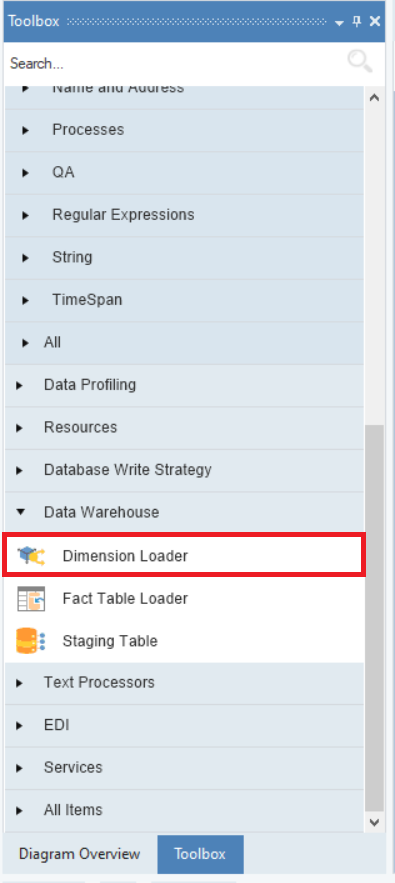
- To get the Dimension Loader object from the Toolbox, go to Toolbox > Data Warehouse > Dimension Loader.
- Drag-and-drop the Dimension Loader object onto the designer.
Now, we will configure the DimLoad object.
- Right-click on the header of the DimLoad object and select Properties from the context menu. Double-clicking the object will also open the object’s configuration window.
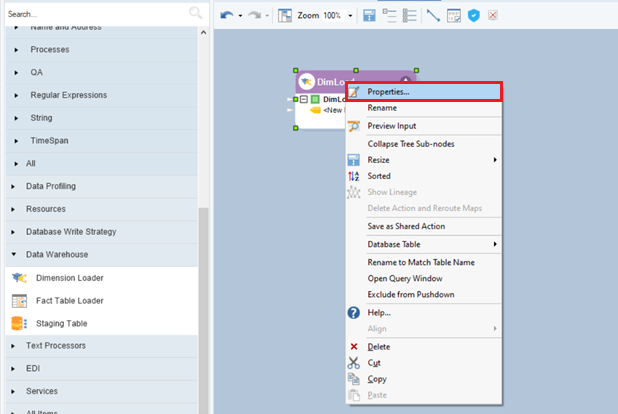
- The first window you will see is the Database Connection window.
Here, we will provide the required credentials. Our chosen database consists of the table where history for changing records in the Customers source table will be maintained and stored.
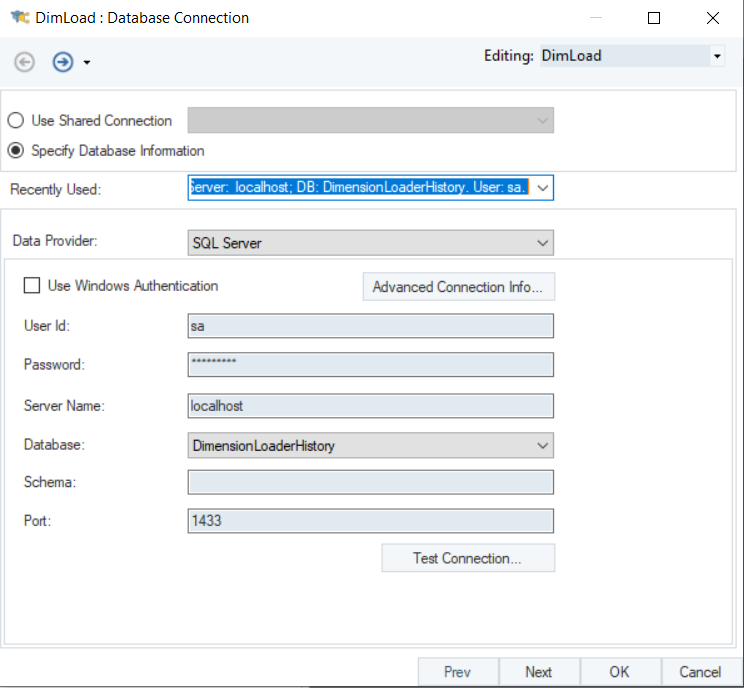
- After testing the connection, click Next. The next window is the Pick Table window. We will use the Pick Table drop-down menu and choose the table where alterations of records will be maintained.
The Show Options for SCD3 and SCD6 checkbox determines whether options for SCD Type 3 and SCD Type 6 need to be provided. Since we are only focusing on Types 1 and 2, we can leave this option unchecked.
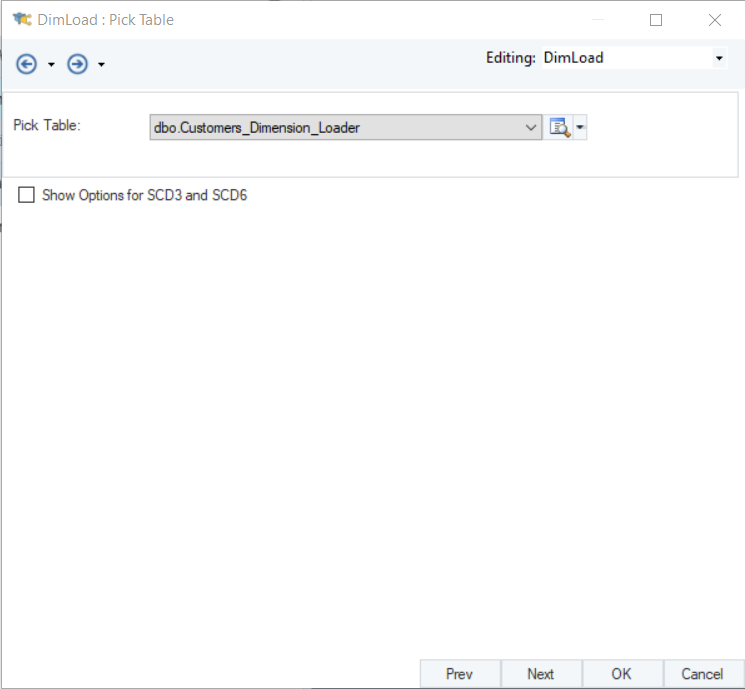
Note: Essentially, the table we choose in the DimLoad: Pick Table window is a table with a preset layout and fields which will be used to store data which has been updated or changed.
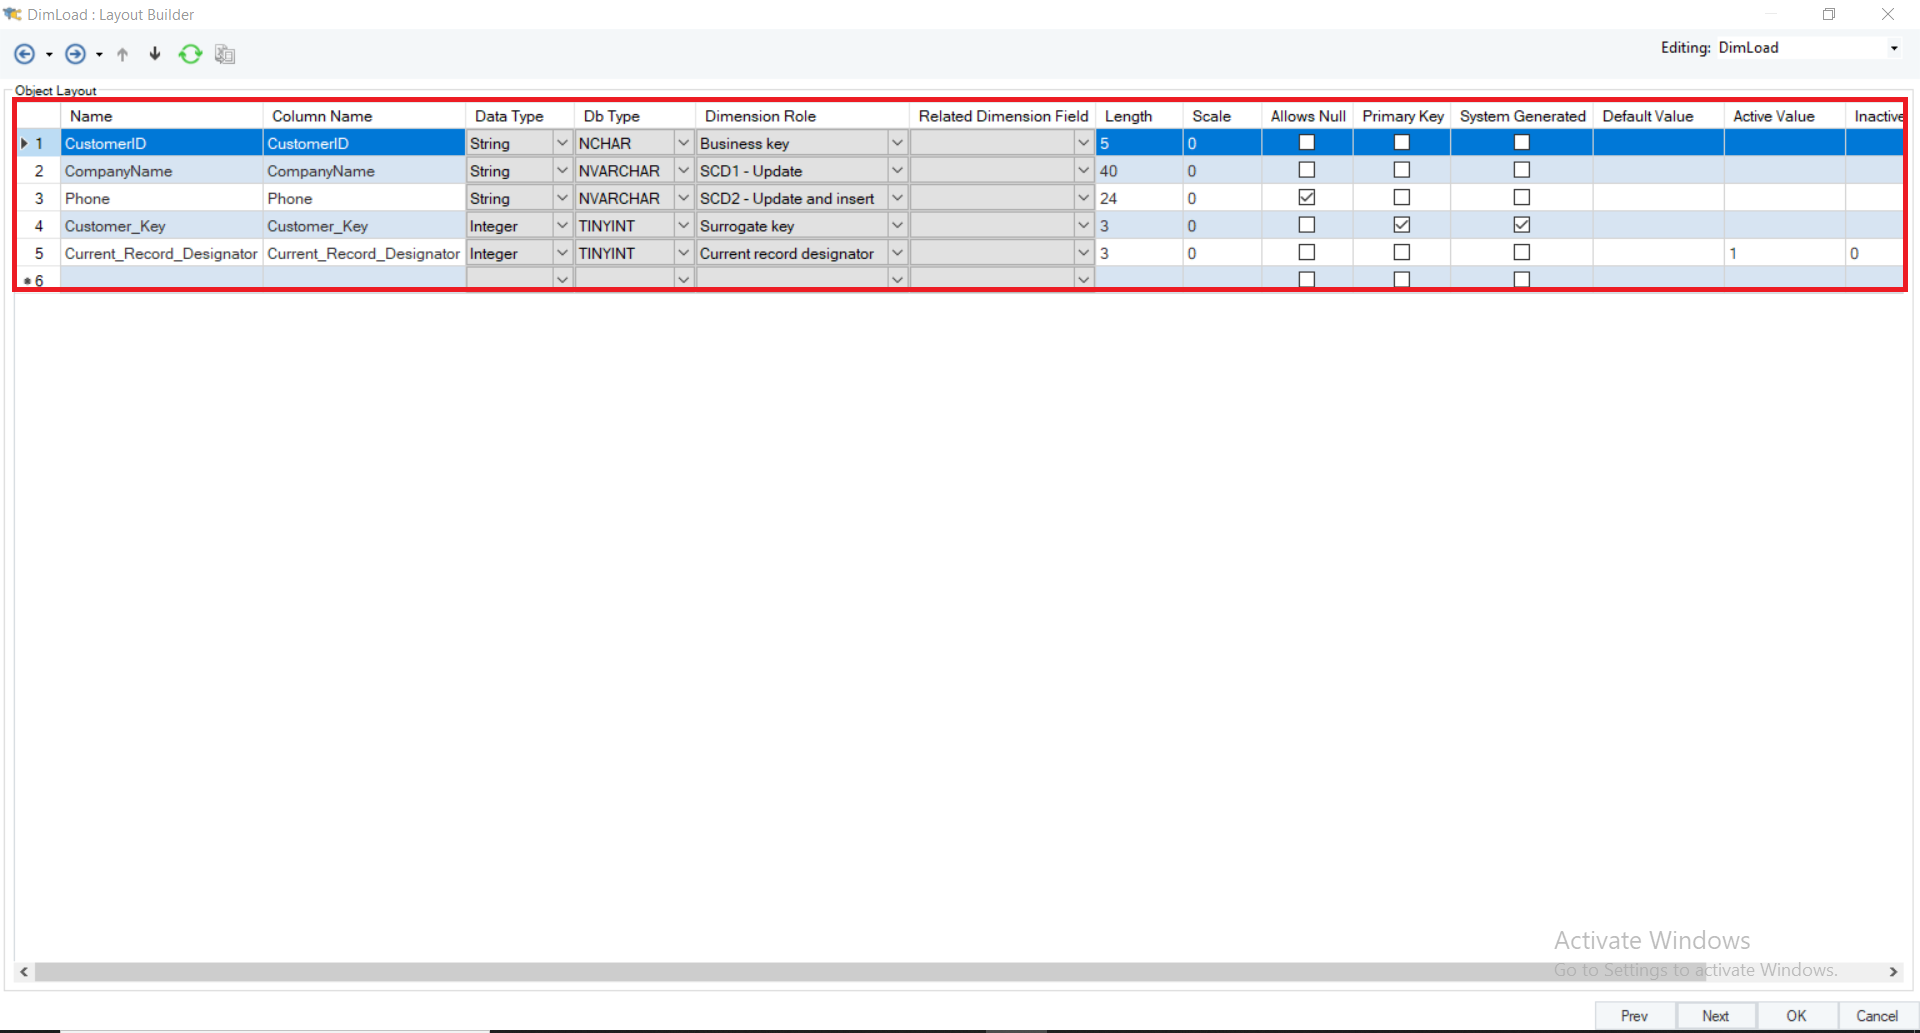
- Now, click Next. This is the Layout Builder.
As you can see, there are two additional columns in this window. The Dimension Role column and the Related Dimension Field column. The Dimension Role column is used to assign different SCD types, along with related attributes (row identifiers, surrogate key, business key). The latter column is typically used alongside the SCD Type 3 and Type 6 functionality, where it is assigned separate columns to store “previous” values.
We will now assign fields SCD types and configure them accordingly.
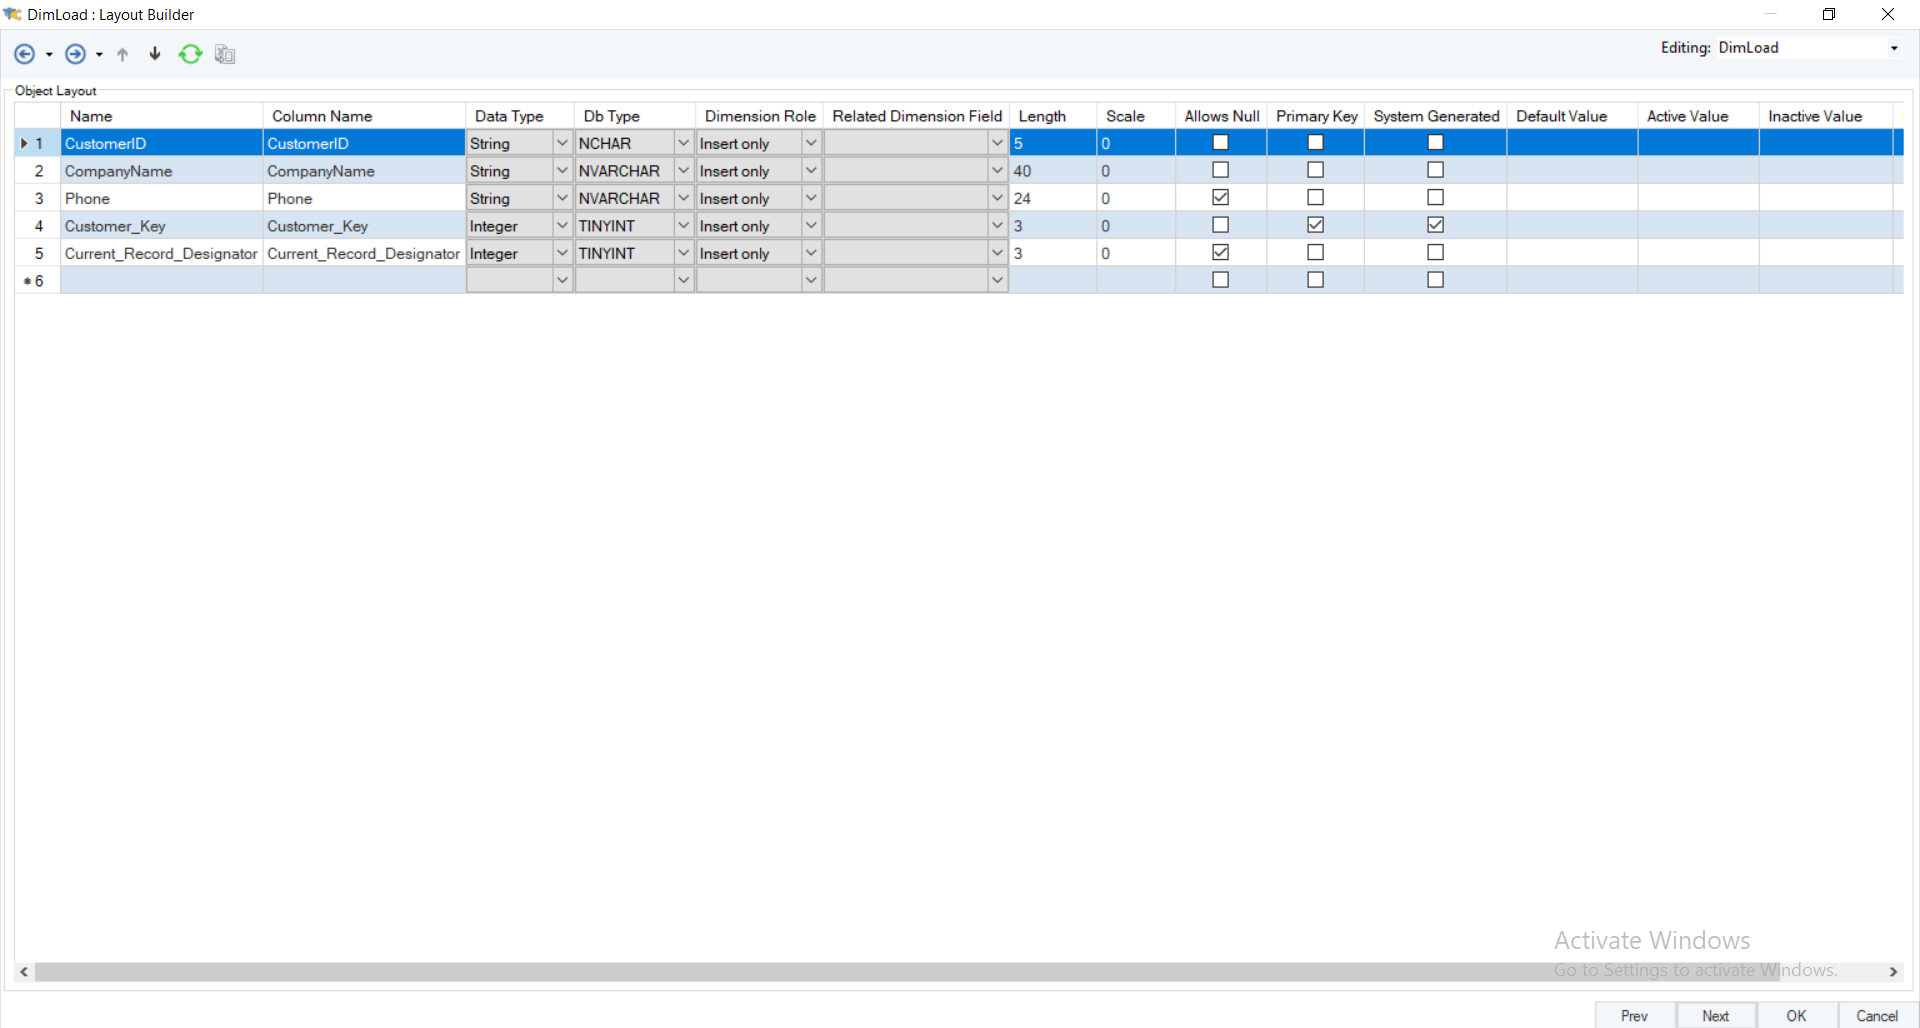
The following are brief explanations of all the configurations which we will perform on this layout.
- The CustomerID field’s Dimension Role will be set to Business Key from the drop-down.
- The CompanyName field will be assigned the SCD1 – Update Dimension Role from the drop-down as, for our use case, we do not want to store the previous value if a company’s name is changed.
- The Phone field will be assigned the SCD2 – Update and Insert Dimension Role from the drop-down, as we would like to retain full history of this field.
- As SCD Type 2 is being employed, we must have a surrogate key as the primary key, to differentiate between updated records with the same Business Key. Thus, we will set the Customer_Key field’s Dimension Role as Surrogate key from the drop-down. We must also make sure that the Primary Key and System Generated checkboxes are checked for this field as this will serve as our primary key.
- We will also be using a Current_Record_Designator field for the Phone field, as we would like to know which record with various updates is the most current one, hence active. We will assign this field the Current record designator option from the Dimension Role drop-down. We must also make sure that the Allows Null checkbox is unchecked for this field, as the Current Record Designator cannot be null. We will also specify Active and Inactive values as “1” and “0” for this field.
Other Active Row Identifiers which this object provides are:
- Effective Date – Uses a DateTime value to indicate when a “Current” record was first added. Thus, indicates active and inactive records.
- Expiration Date – Uses a DateTime value to indicate when a “Previous” record expired. Thus, indicates active and inactive records.
- Version Number – Gives different updating records different numbers so that they can be differentiated.
Note: The Related Dimension Field column is used when SCD Type 3 is assigned to a field. It is used to select a column that would store the “Previous” value for a field that is being monitored through SCD Type 3.
- The DimLoad object has now been configured successfully. Click OK.
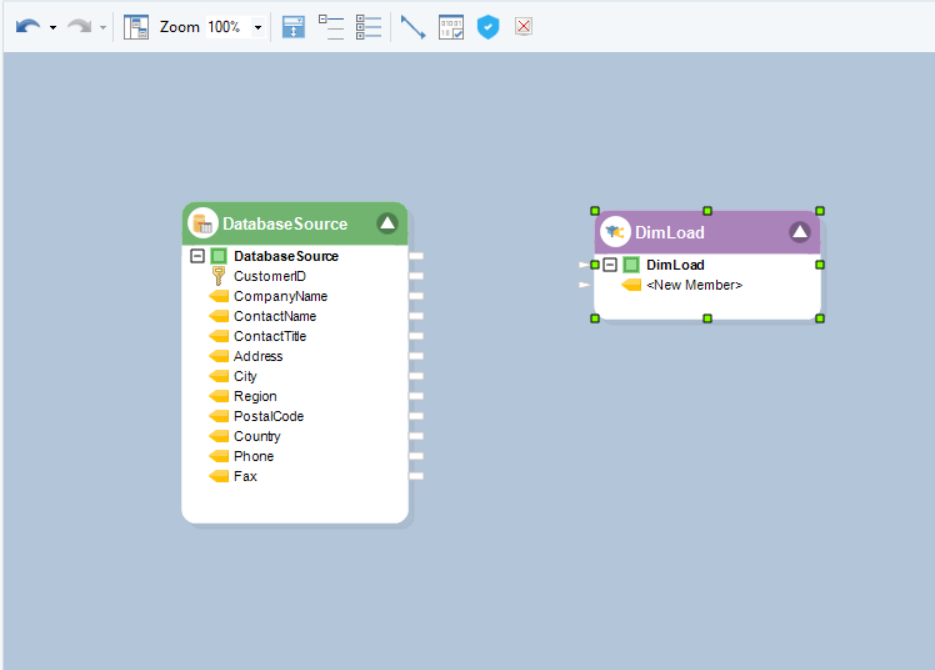
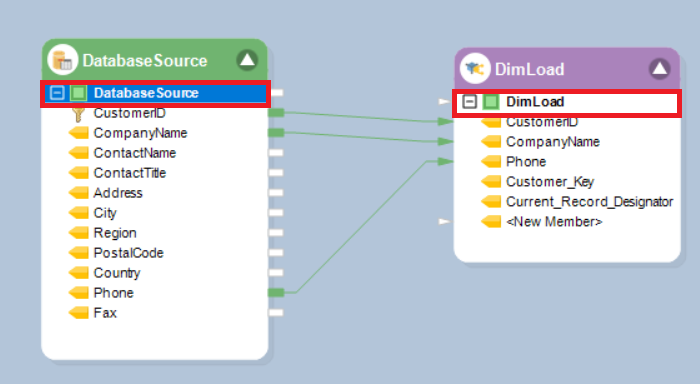
- Now, we will auto-map the required fields from the source object to the DimLoad object by dragging-and-dropping the DatabaseSource node from the source to the DimLoad node in the Dimension Loader, both with a green box next to them.
As you can see below, the required fields have been auto-mapped successfully.
- Click on the Start Dataflow icon located in the toolbar at the top of the designer, to establish the mappings and connection between the two objects.

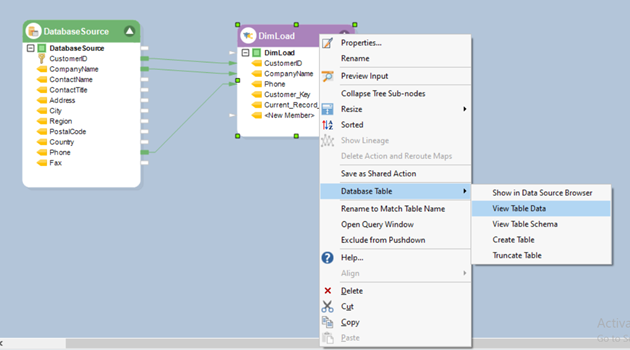
- Now, to view the configured table within the DimLoad object, right-click on the object’s header and select Database Table > View Table Data.
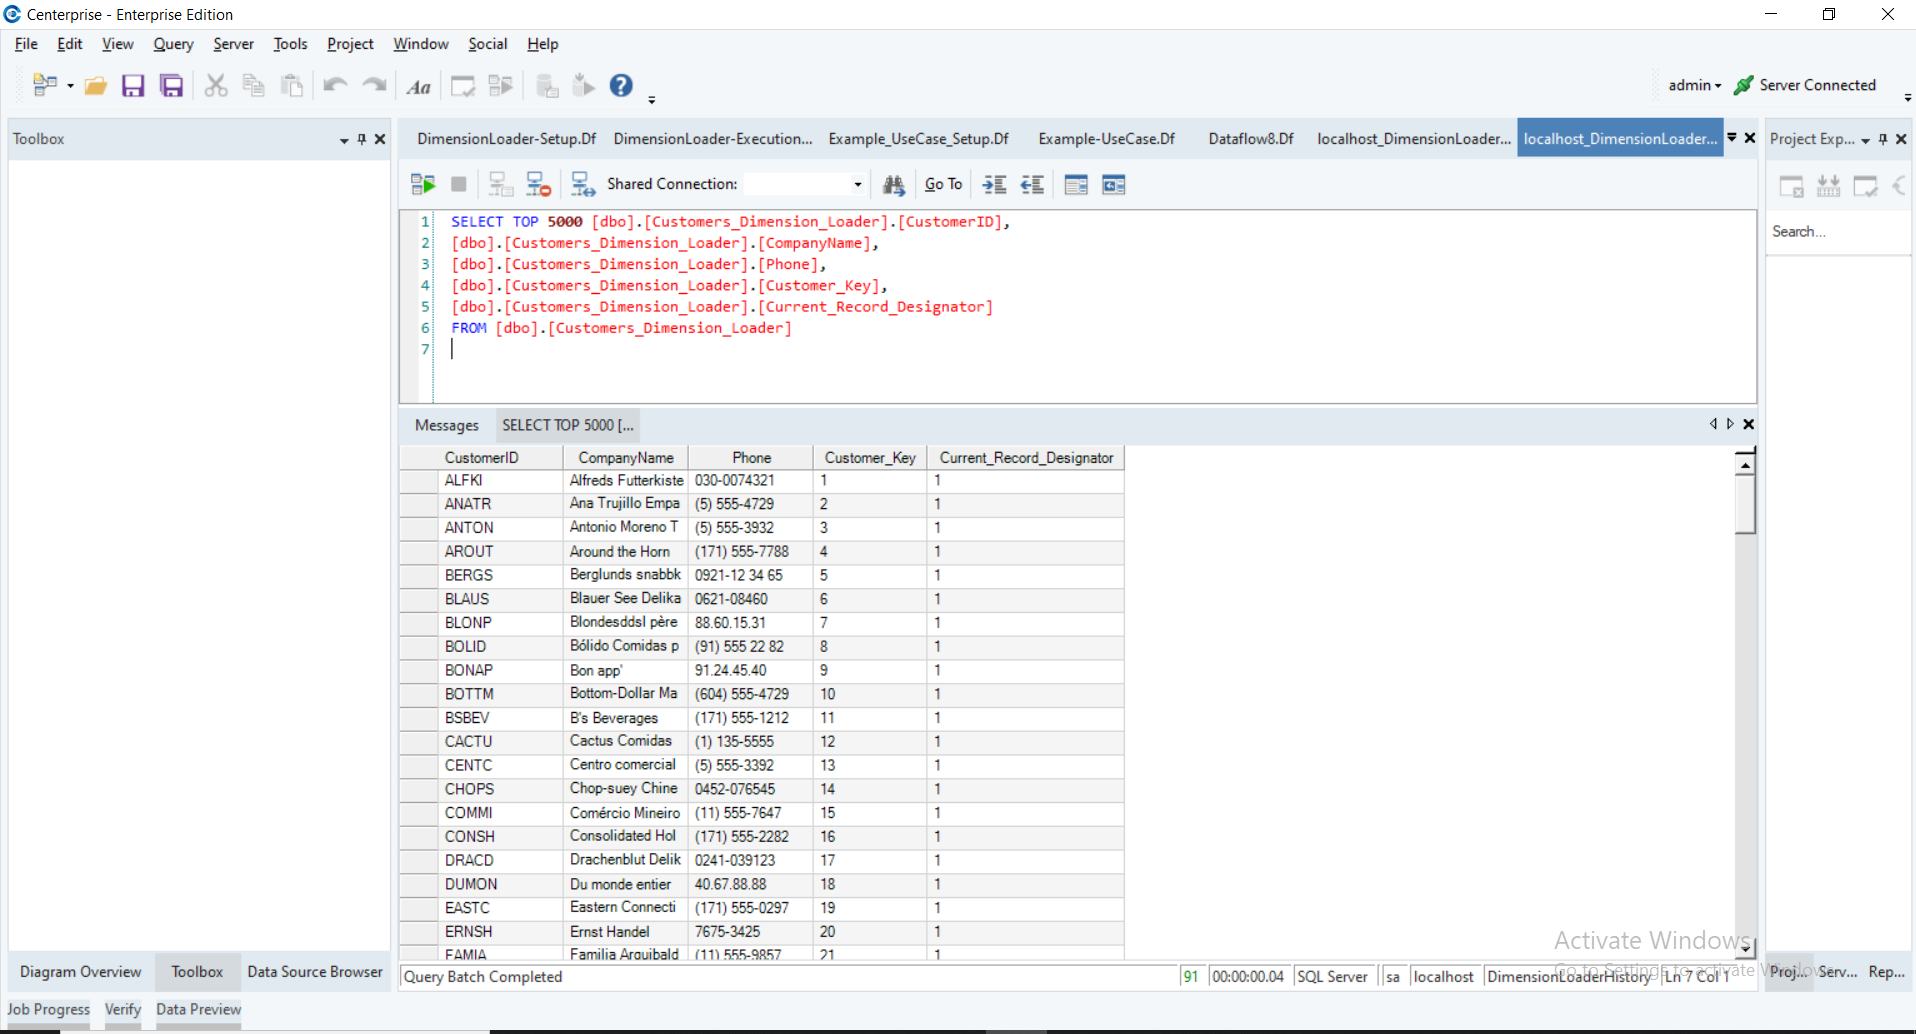
You will see the following table in a new tab:
Now, let’s consider a scenario where the CompanyName for the first record has been updated to “NewCompany”, and the Phone value for the second record has been changed to “123456789” in the source table.
Let’s see how history will be maintained in the destination table for these altered records.
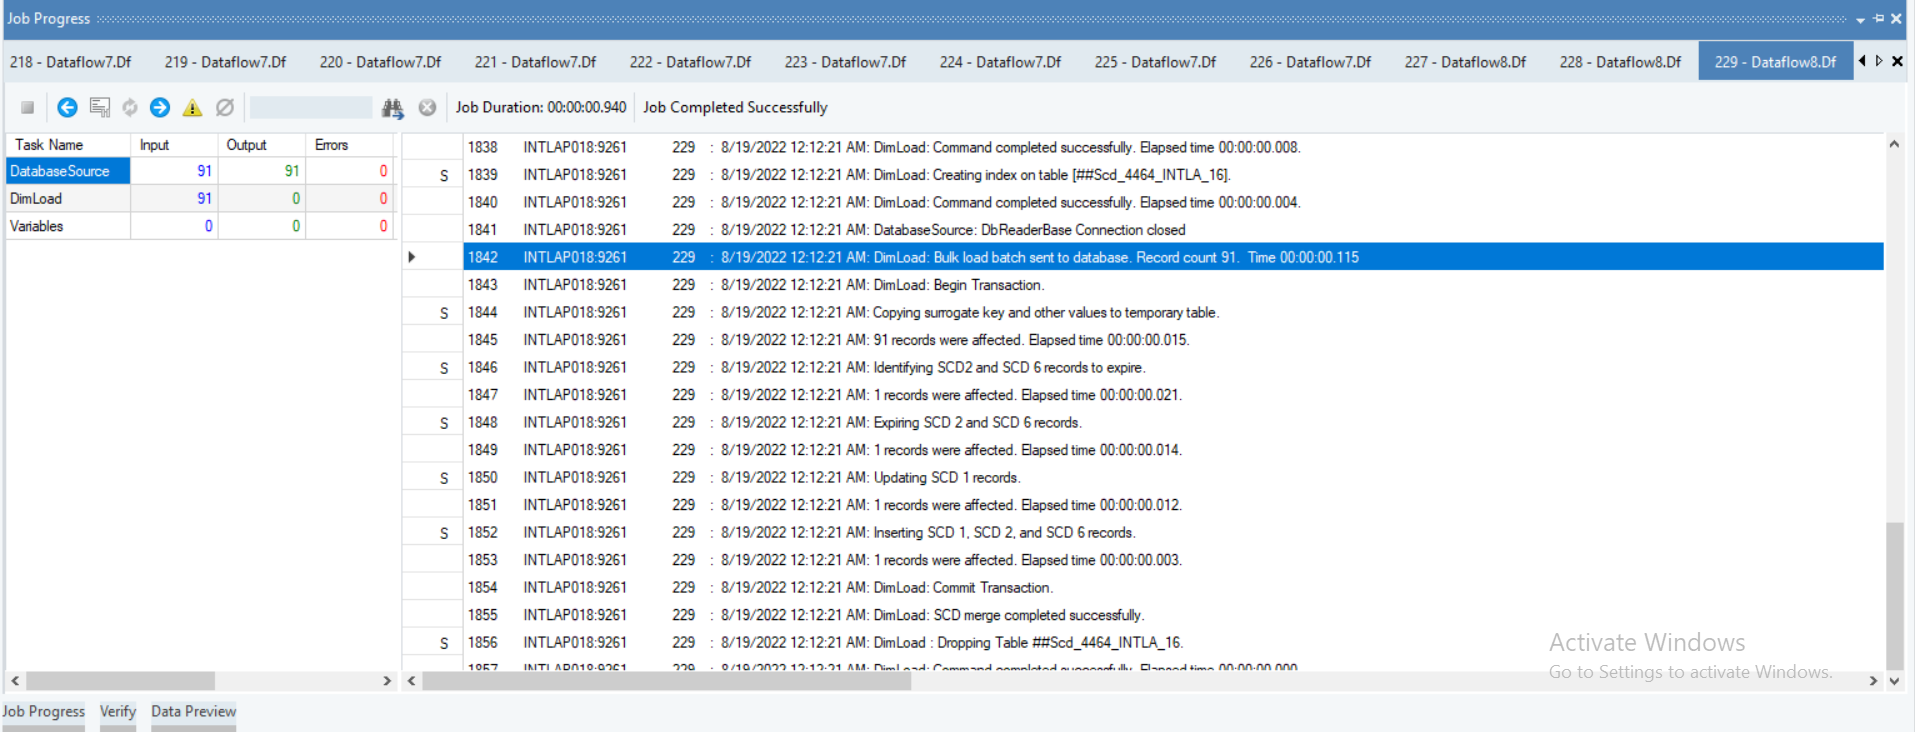
Let’s run the dataflow after records have been updated. Upon clicking, the Job Progress window will pop-up and show a summary and information of all the altered records.
Finally, to view these changes, we will again navigate to the View Table Data option by right-clicking on the DimLoad object’s header.
You will see the following table: 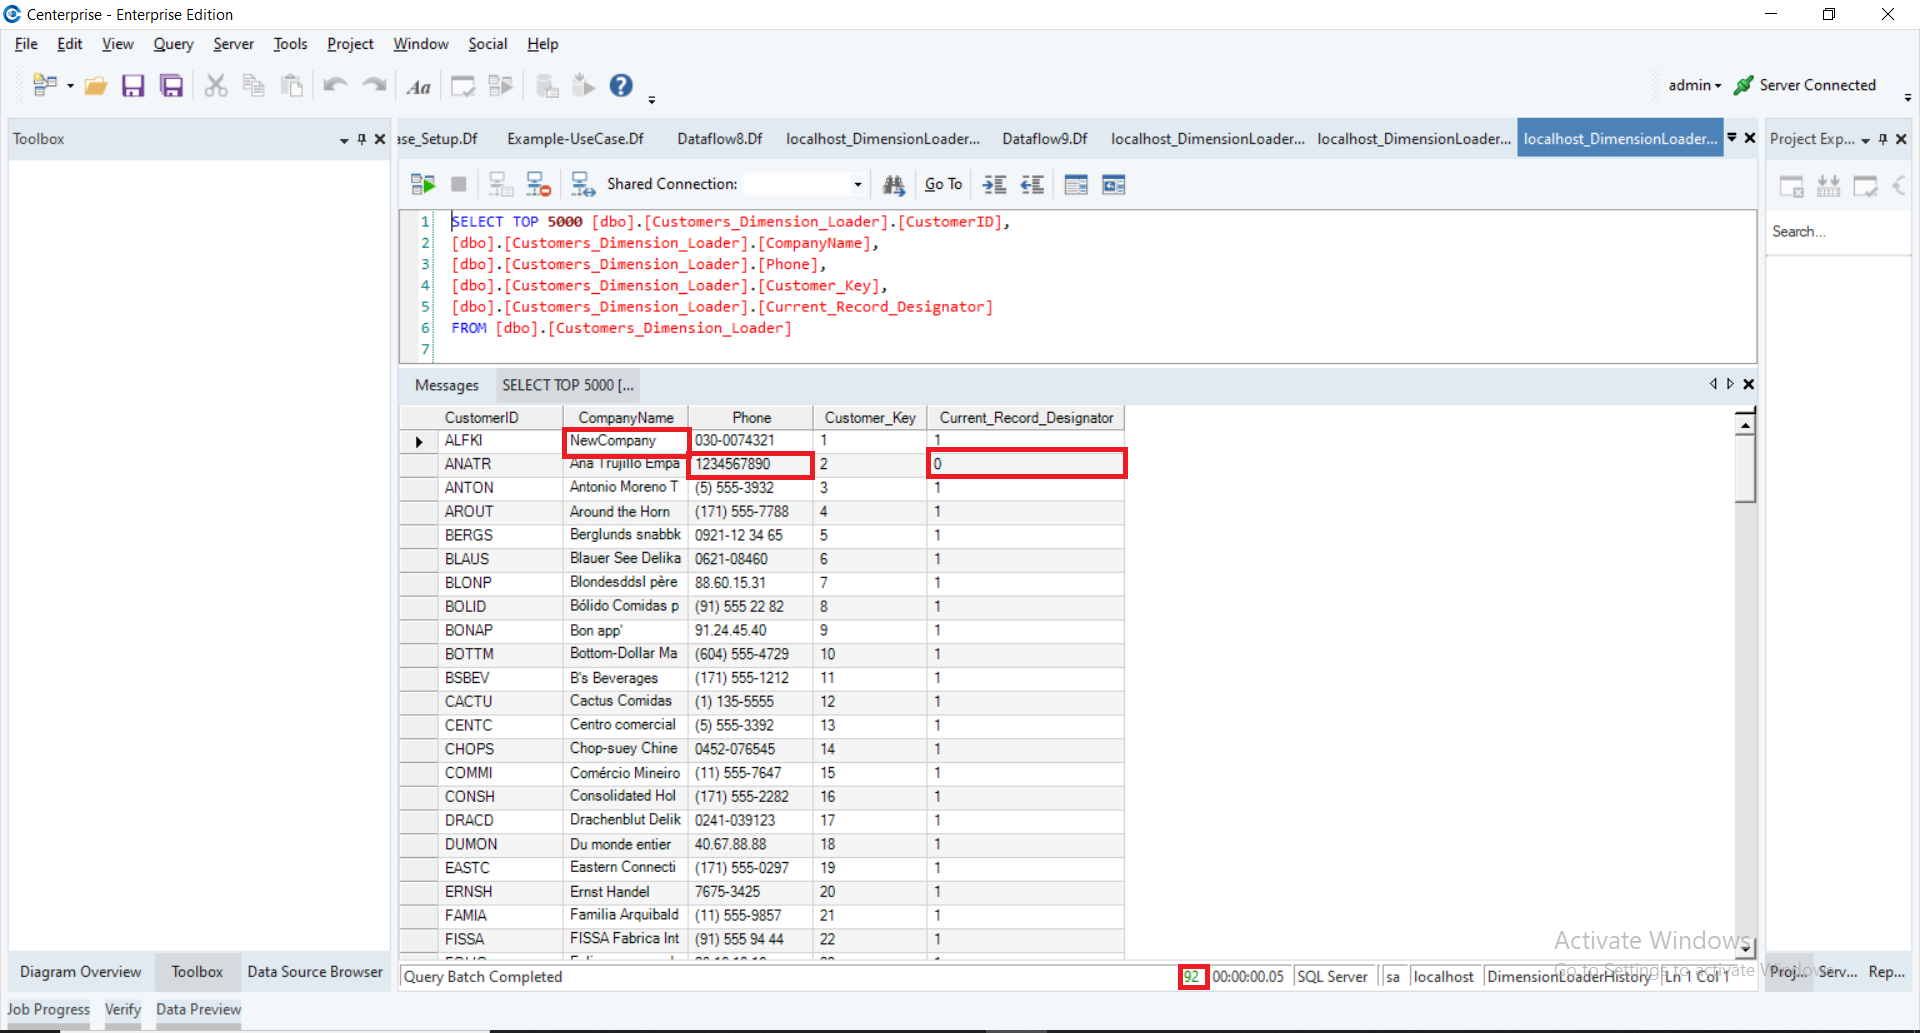
As you can see, the alterations to the record values have been implemented and stored successfully. As SCD Type 2 was also utilized, the total number of rows has also increased from 91 to 92 due to the updated record, as highlighted above as well.
This concludes using the Dimension Loader object in Centerprise.