Creating Field Profile
The Field Profile feature captures statistics for selected fields from one or several objects. Field Profile is essentially a transformation object as it provides Input and Output ports similar to other transformations. These output ports make it possible to feed the statistics collected to another object on the dataflow.
In this document, we will learn how to create a Field Profile in Astera Centerprise.
Using Field Profile
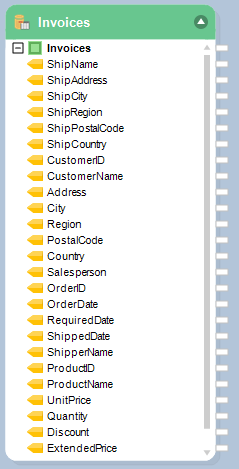
In this case, we have extracted data from a sample Invoices Database Table Source.
We want to collect detailed statistics from some of these fields of data, and write it to a Delimited File Destination. For this purpose, we will use Centerprise’s Field Profile feature.
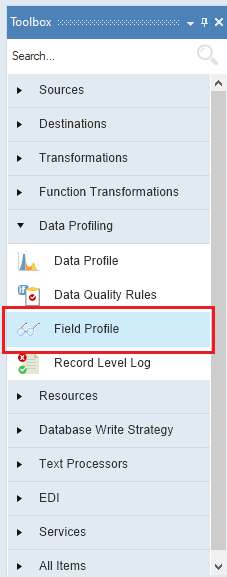
1. To get a Field Profile object from the Toolbox, go to Toolbox > Data Profiling > Field Profile. If you are unable to see the toolbox, go to View > Toolbox or press Ctrl + Alt + X.
2. Drag-and-drop the Field Profile object onto the dataflow designer.
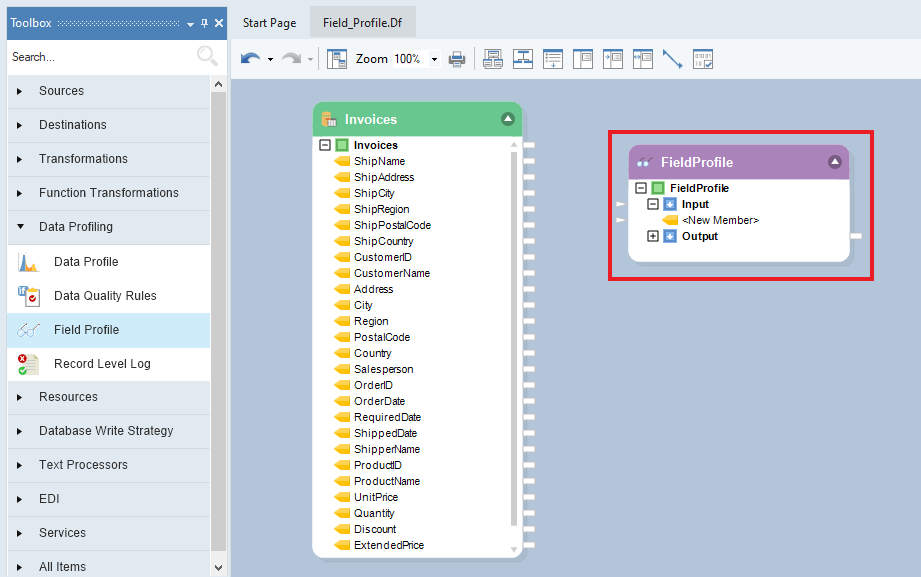
You can see that the dragged Field Profile object contains an Input node and an Output node. The Input node is empty as we have not mapped any fields to it yet.
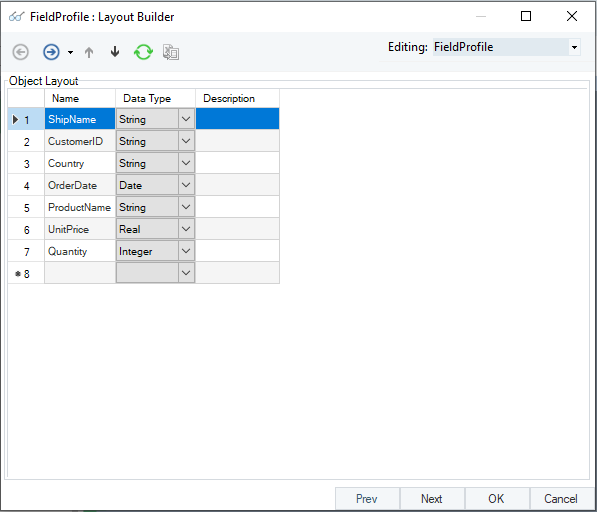
3. One-by-one map ShipName, CustomerID, Country, OrderDate, ProductName, UnitPrice, and Quantity from the source object to the Field Profile object’s Input node.
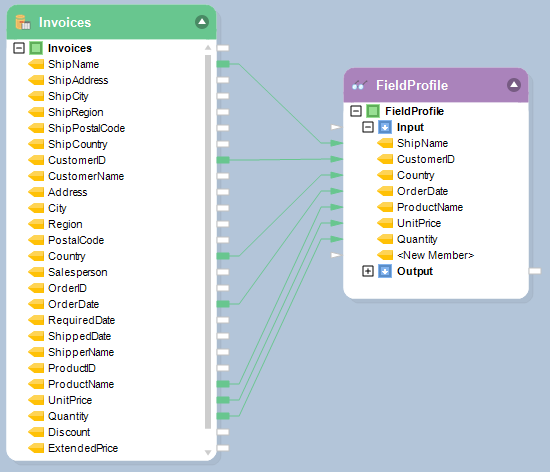
Note: Statistics will be collected only for the fields linked to the Input node of the Field Profile object. This way, you can selectively collect statistics for a subset of fields from the selected field layout.
Configuring the Field Profile Object
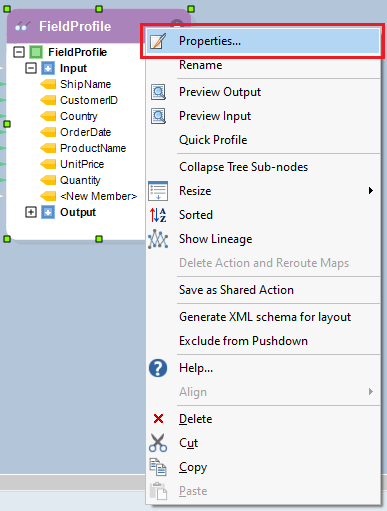
1. To configure the Field Profile object, right-click on its header and select Properties from the context menu.
A configuration window will open. The first screen you will see the Layout Builder. This is where we can create or delete fields, change their name, and data type.
2. Click Next. On the Properties window, specify the Statistics Type from the dropdown list.
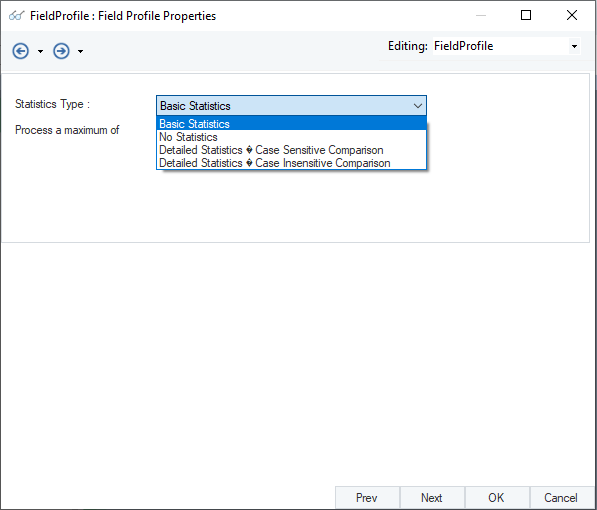
Field Statistics dropdown allows you to select detail levels of statistics to collect. Select among the following detail levels:
- Basic Statistics: This is the default mode. It captures the most common statistical measures for the field’s data type.
- No Statistics: No statistics are captured by the Data Profile.
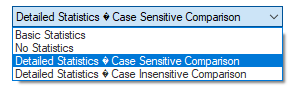
- Detailed Statistics – Case Sensitive Comparison: Additional statistical measures are captured by the Data Profile, for example Mean, Mode, Median etc. using case-sensitive comparison for strings.
- Detailed Statistics – Case Insensitive Comparison: Additional statistics are captured by the Data Profile, using case insensitive comparison for strings.
In this case, we will select Detailed Statistics – Case Sensitive Comparison.
Click OK.
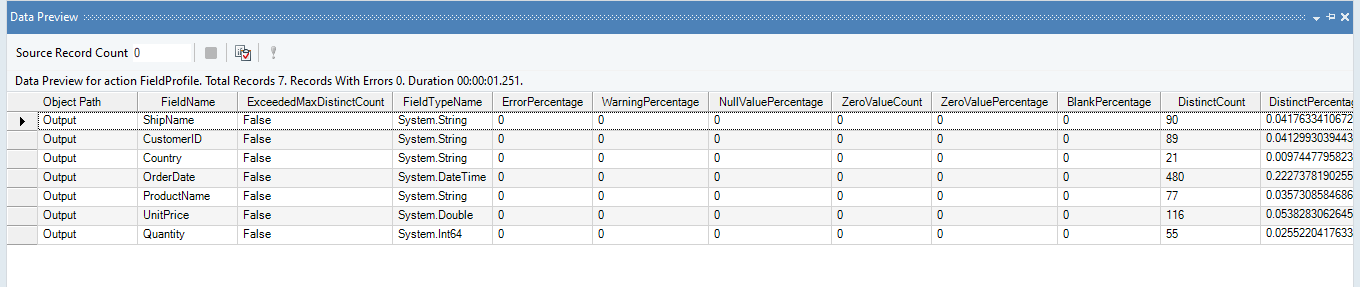
3. Right-click on Field Profile object’s header and select Preview Output from the context menu.
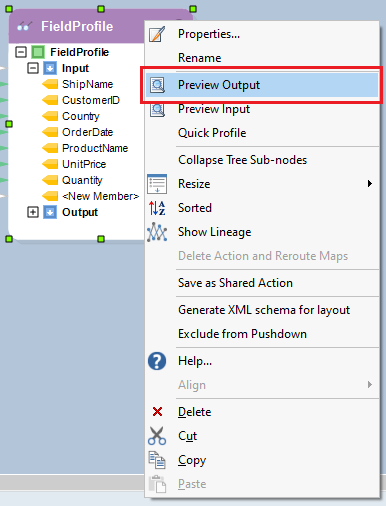
A Data Preview window will open and show you the statistics of each mapped field as a record.
Writing to a Destination
Observe that the Field Profile object contains an Output node. Once expanded, you will see various statistical measures as fields with output ports.
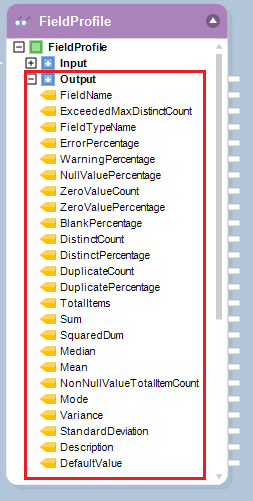
We can write these statistical measures to a destination file.
1. Right-click on the Output node and go to Write To > Delimited File Destination.
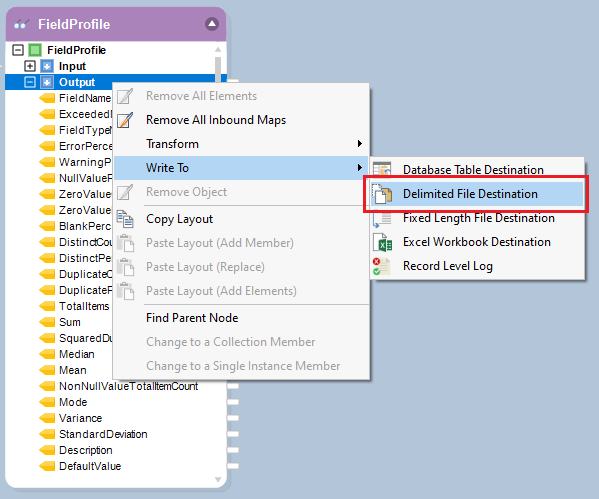
A Delimited File Destination object will be added to the dataflow designer with auto-mapped fields from the Output node.

3. Configure settings for your Delimited File Destination from here.
Executing the Task
1. After configuring the settings for the Delimited File Destination object, click on the Start Dataflow icon from the toolbar located at the top of the window.
A Job Progress window will open at this instant and will show you the trace of the job.
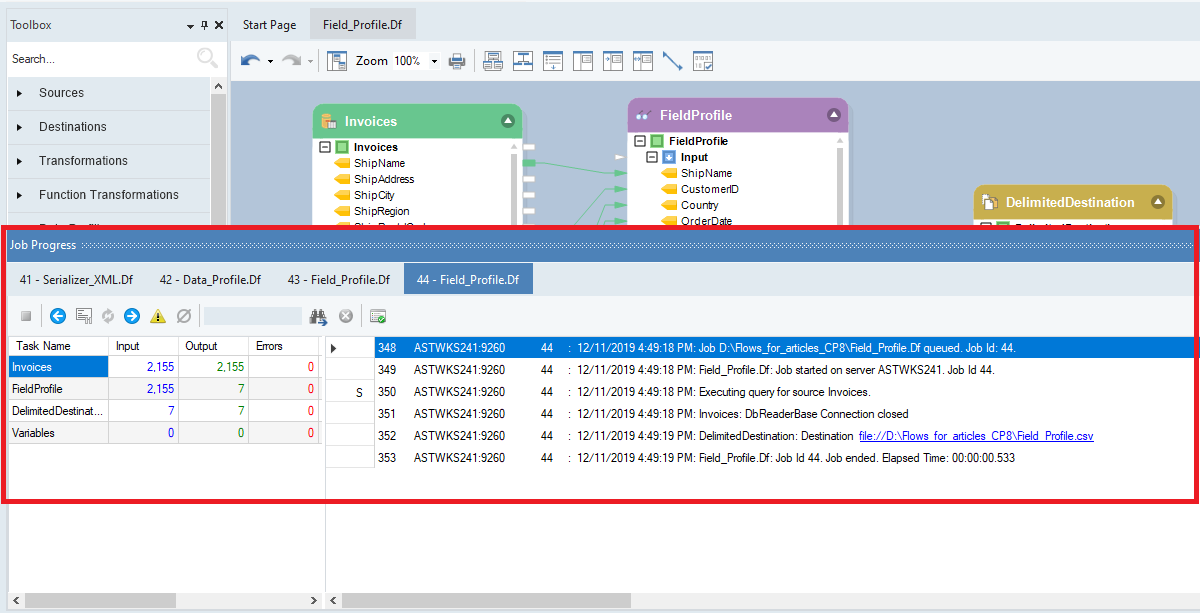
You can open the delimited file that contains field statistics from the link provided in the Job Progress window.