Connection Vault
What is the Connection Vault Feature?
The connection vault feature allows you to deploy database, cloud storage, and Rest connections/credentials to the server. You can give rights of specific connections to authorized personnel (User Roles) without sharing the credentials.
Instead of giving the credentials, only access is given to the users.
Using the Connection Vault Feature
Deploying a Shared Connection:
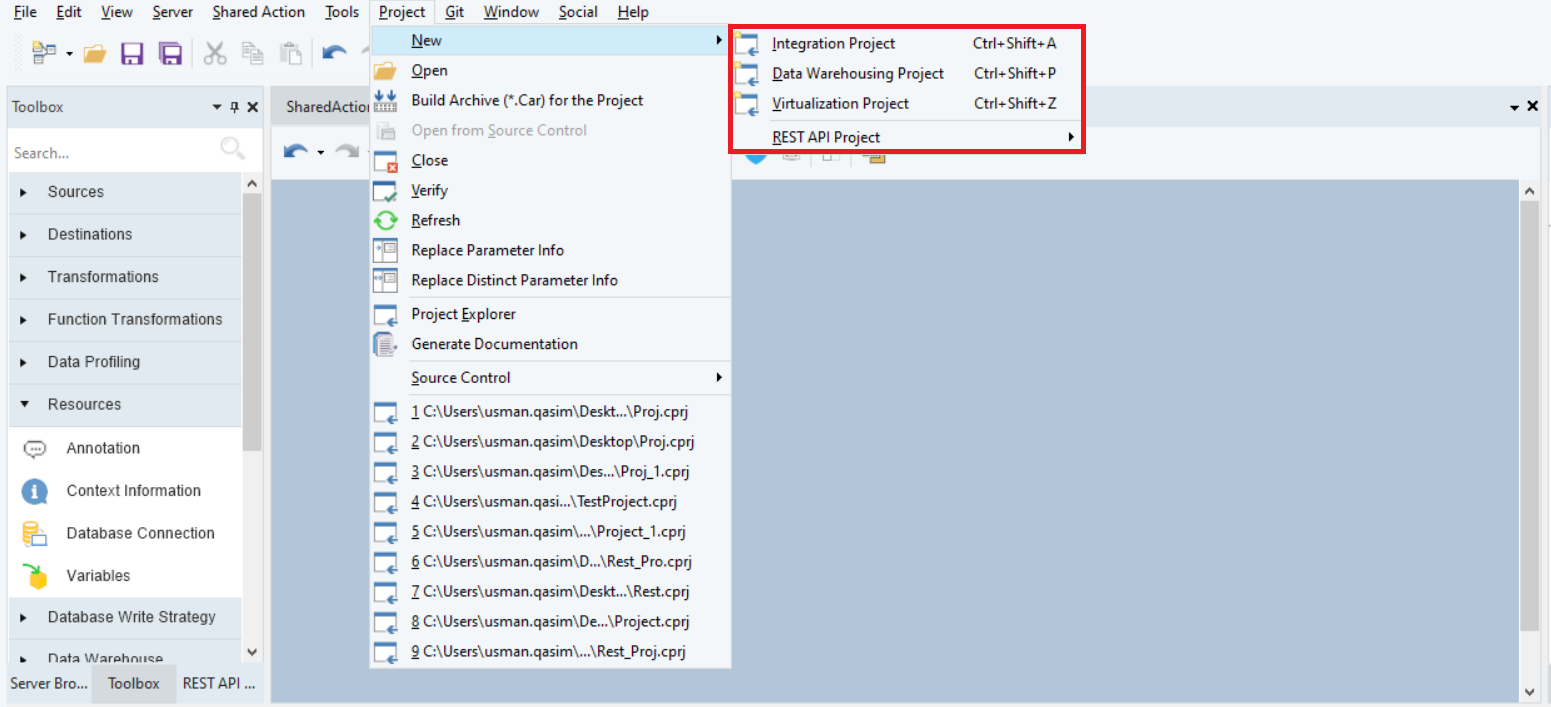
1. Create a new project in Astera Centerprise.
Select Project from the main toolbar, move the cursor over New and select a new type of project.
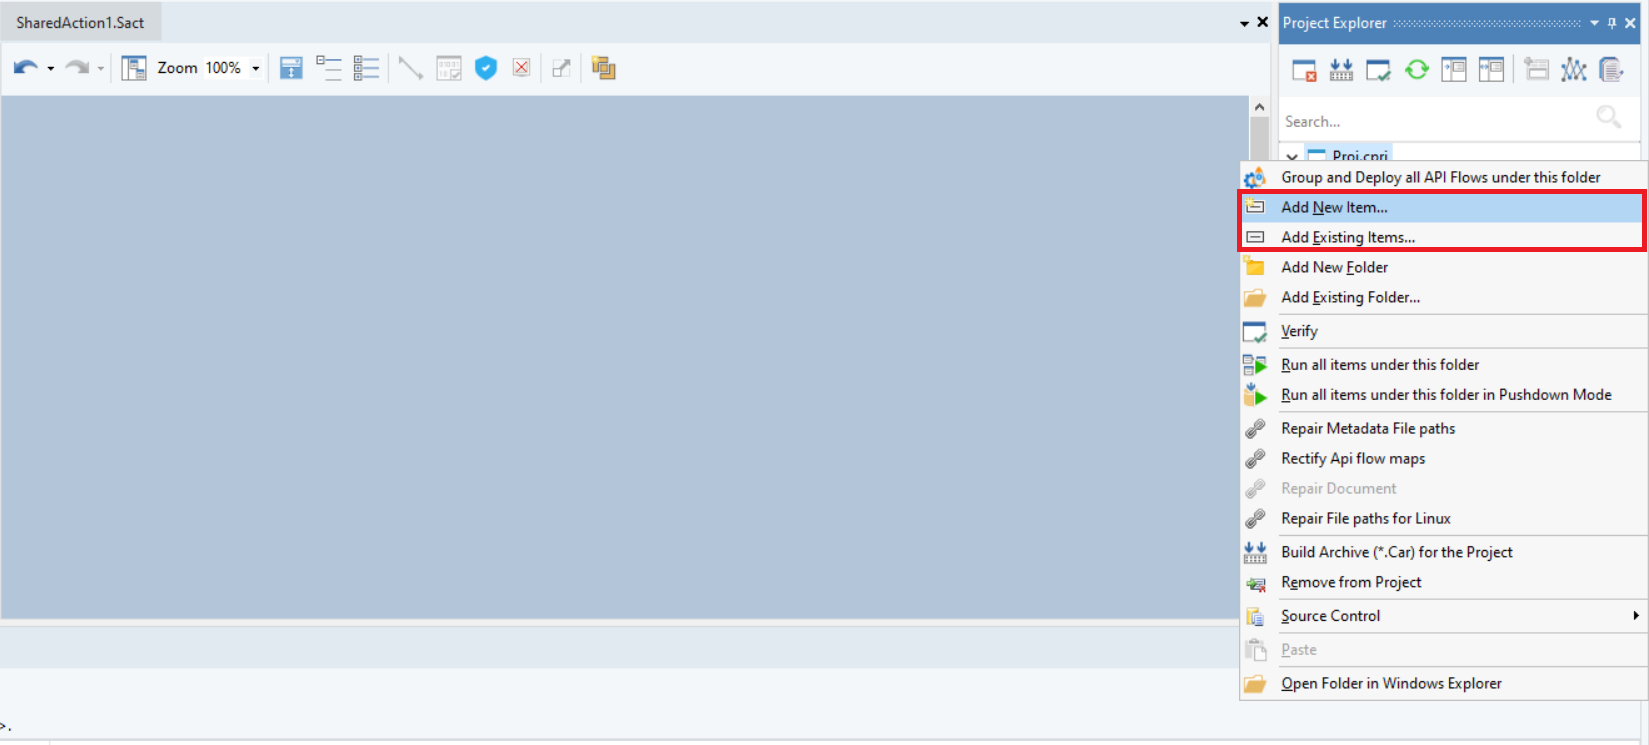
2. Create/Add a shared action from the project options.
Right-click on the project name in the Project Explorer and select Add New Item… from the context menu.
Alternatively, you can add a shared action from an existing file.
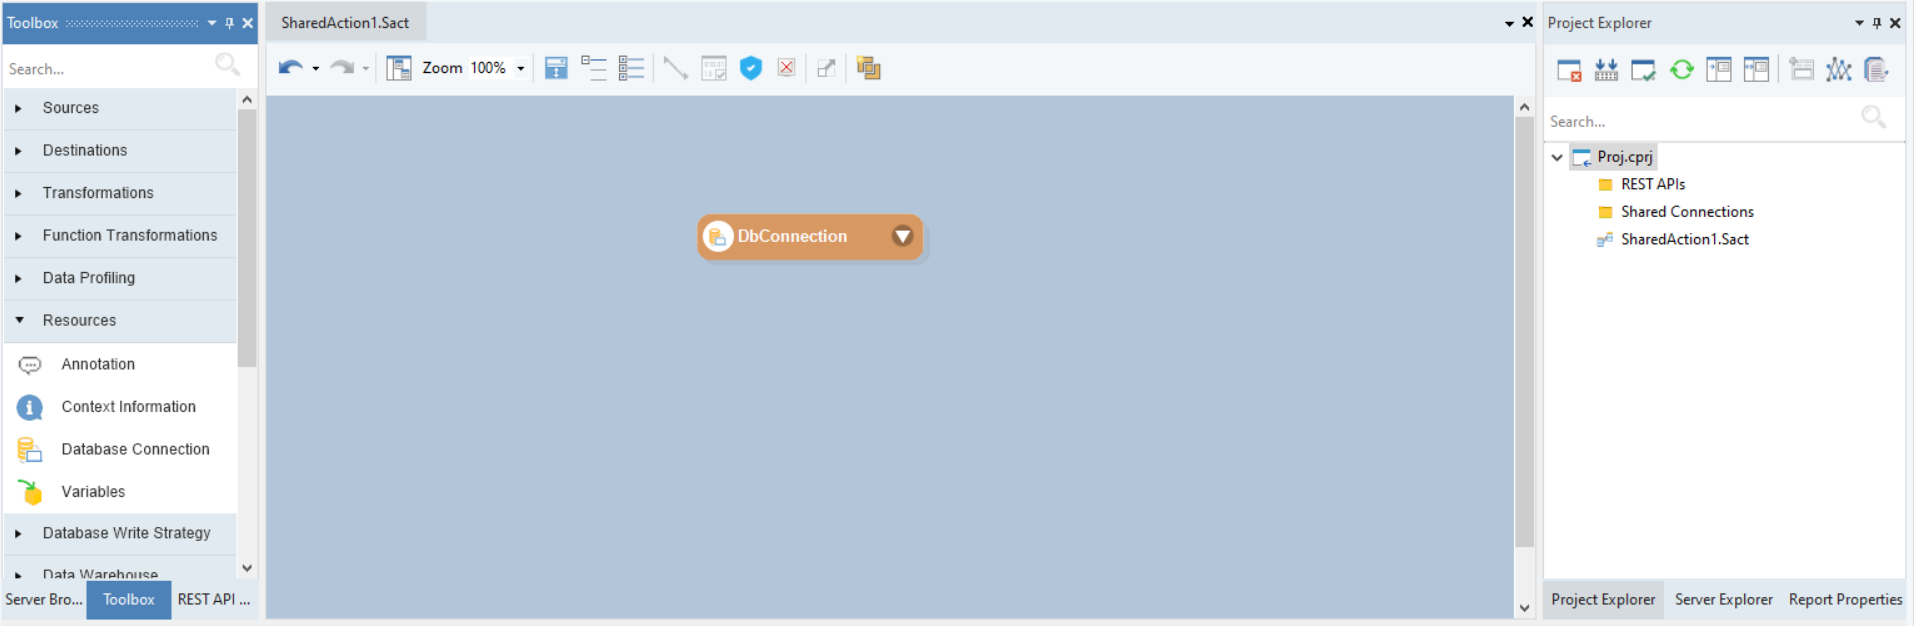
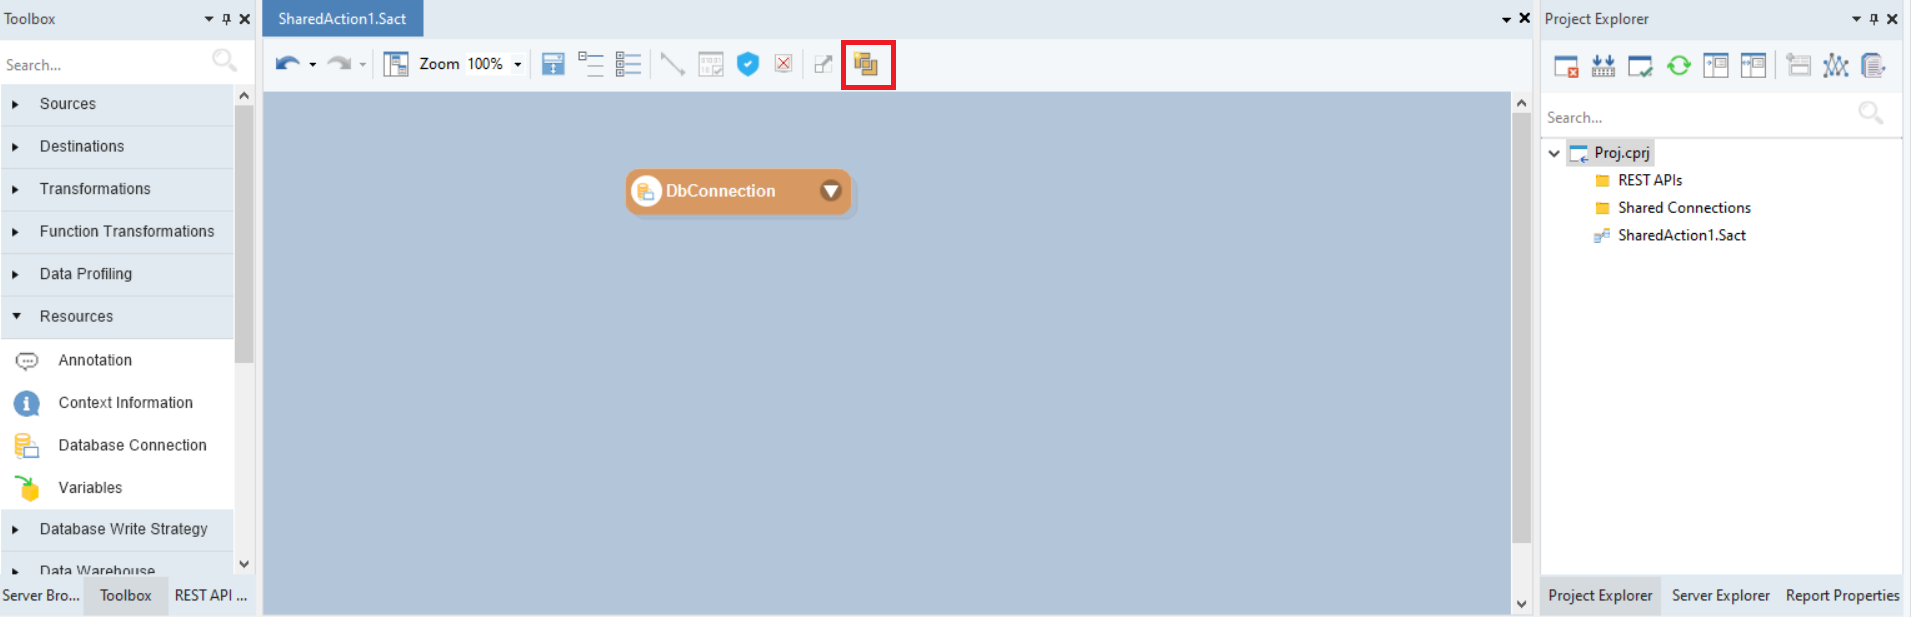
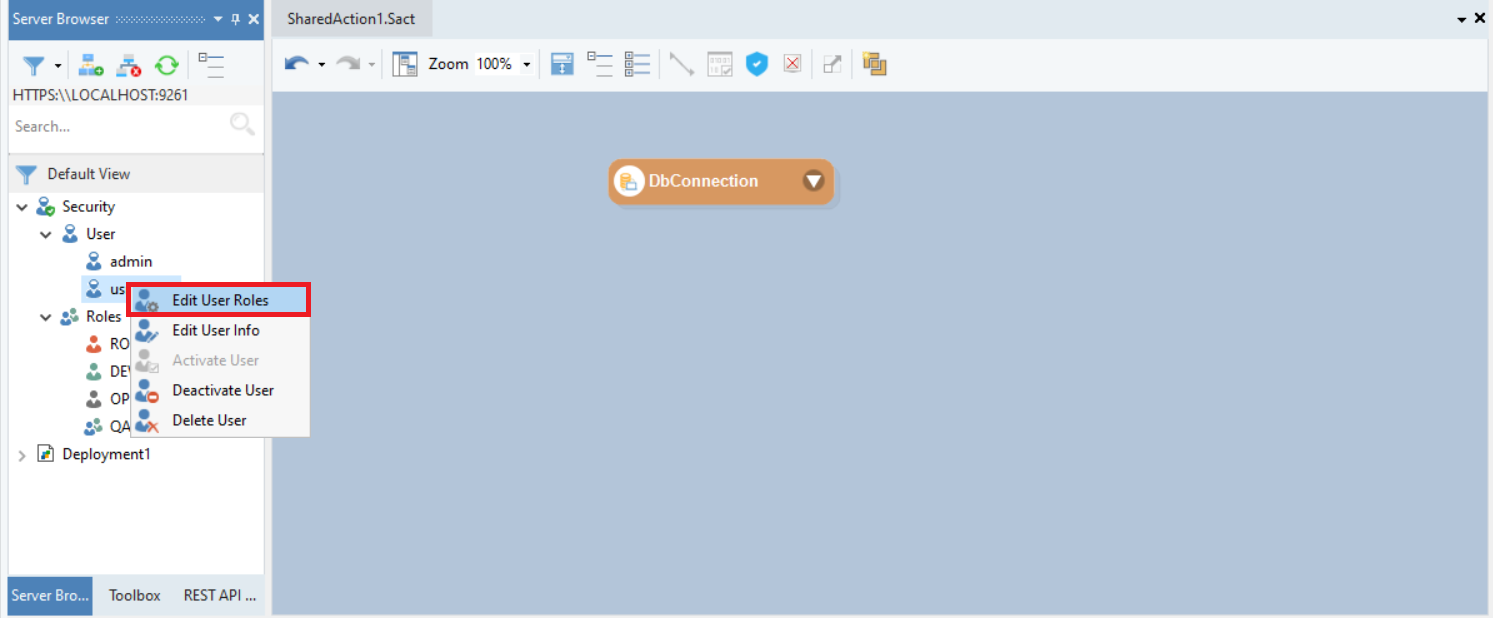
3. Add a connection object to the dataflow designer.
Here, we have used a Database Connection object to establish a connection in the shared action file.
Note: You can use REST Connection or Cloud Storage Connection objects in a similar way.
4. Configure the object with the database, the access for which is to be given to the user.
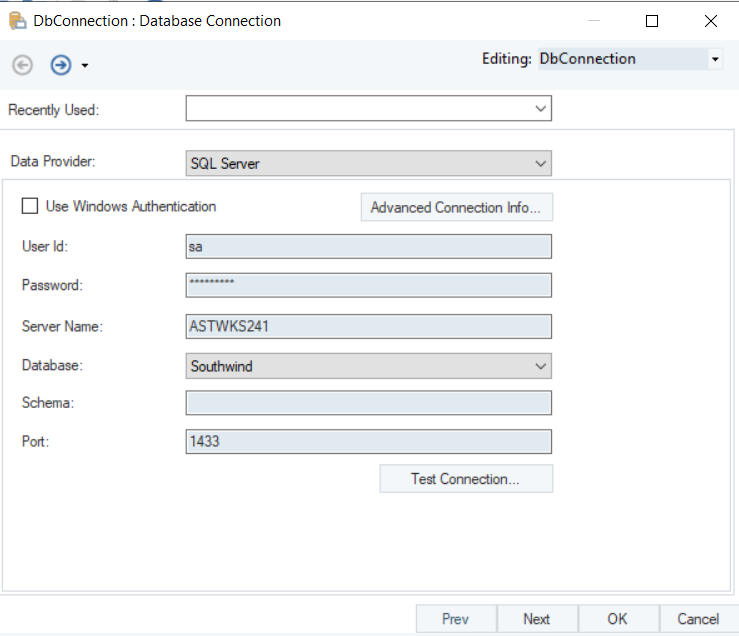
Once your object is configured, click OK.
5. Deploy the shared connection using the right-most option present in the shared action toolbar.
Clicking it will open a new window. Here, you can add the Deployment Name and provide a Config File Path if one is present.
Enable User Authorization: When checked, the presence of the folder in the cloud with respect to the Centerprise username will be checked. If yes, the user will be able to access it; otherwise, not.
Note: This option is only applicable for cloud connections.
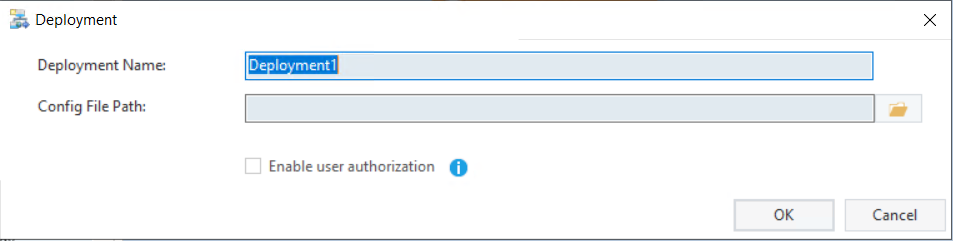
Once done, click OK, and the deployment will be created in the Server Browser panel.
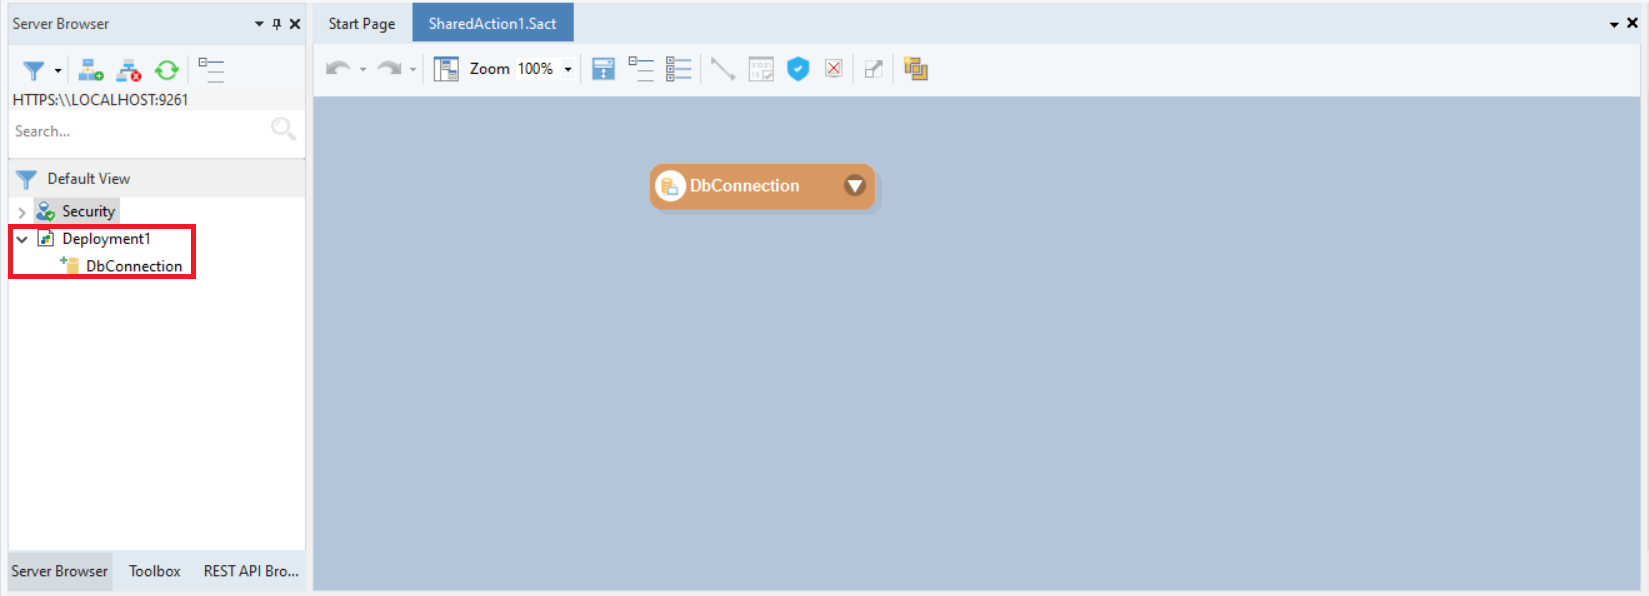
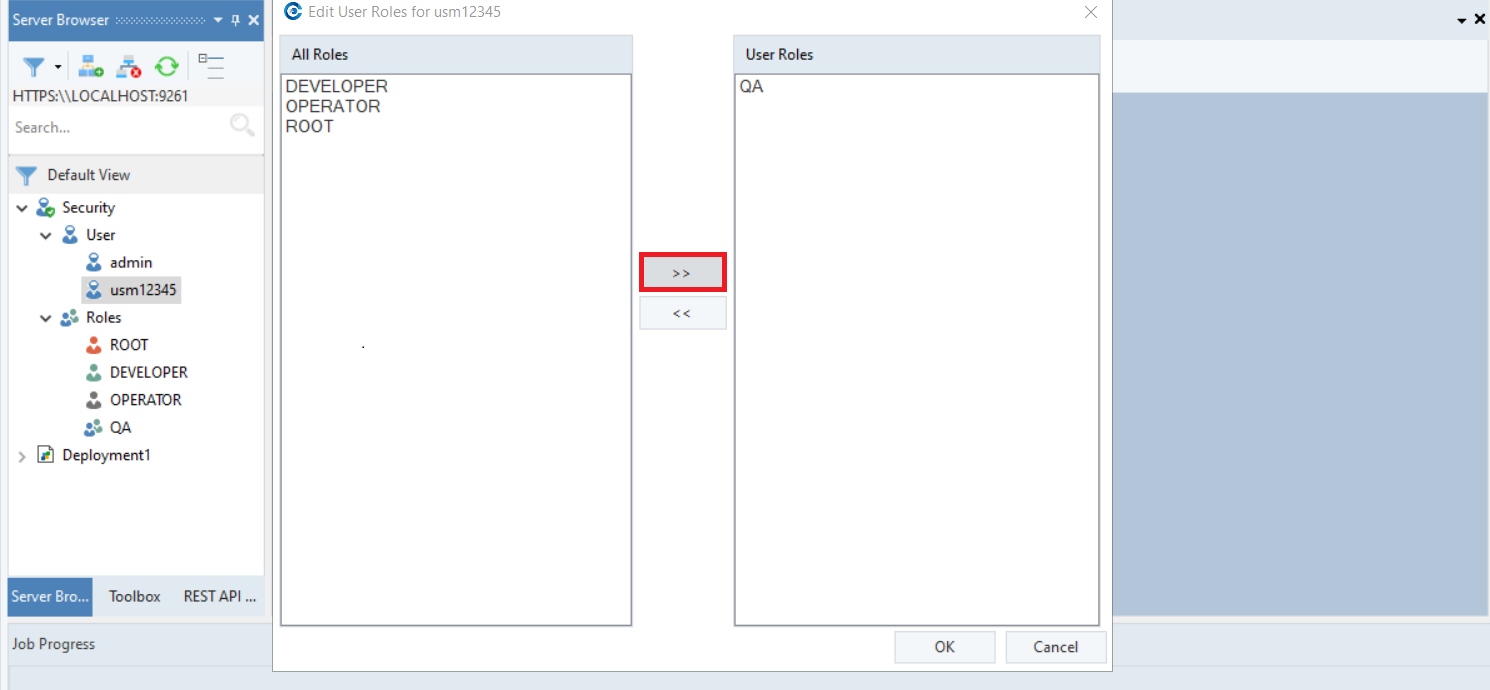
6. Open the role resources in the Server Browser that you want to give permissions to.

7. Expand the Connection node in the Role resources window and select the connection that you want to give permission to for this role.
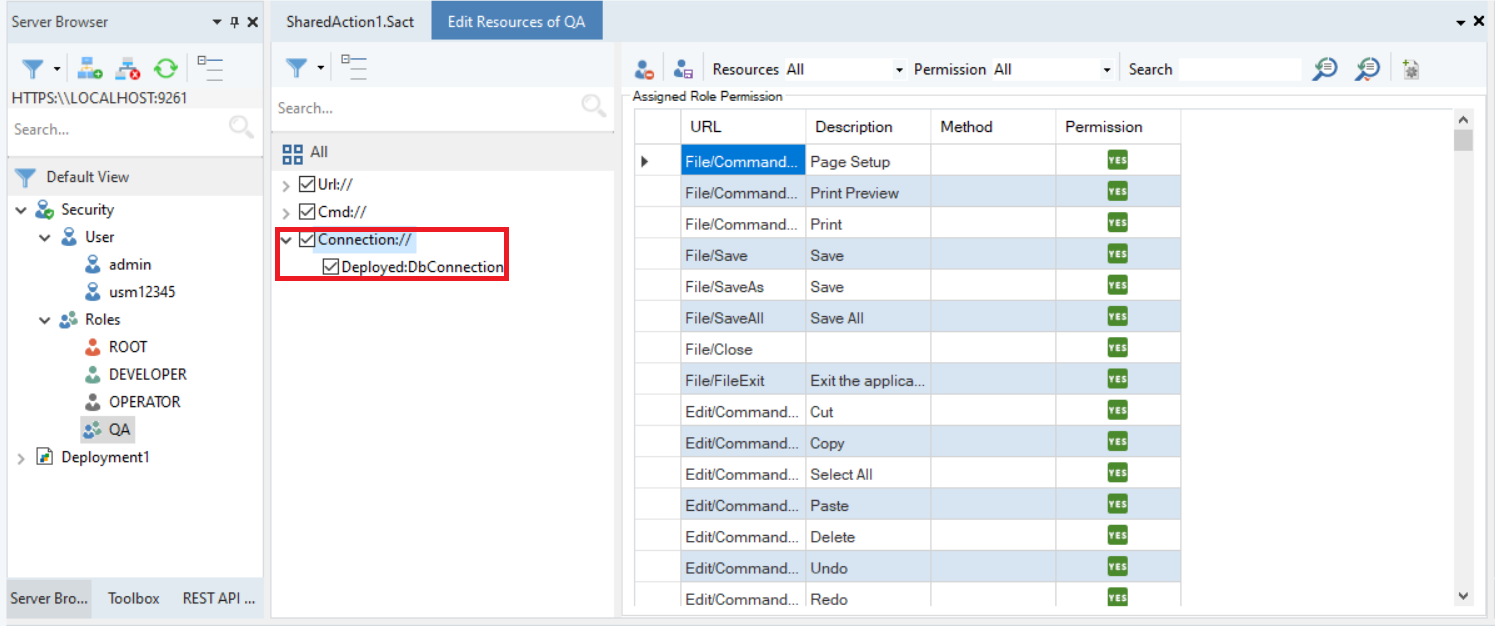
8. Save and close the role resources window. Once done, make sure to assign this role to the user you want to provide permissions to.
9. Select the role you wish to assign the user and click the right-facing arrow.
Note: You can also take a role away from the user by clicking on it in the window on the right and selecting the left-facing arrow.
Accessing the Shared Connection
10. Now, check if the user has access to the shared connection.

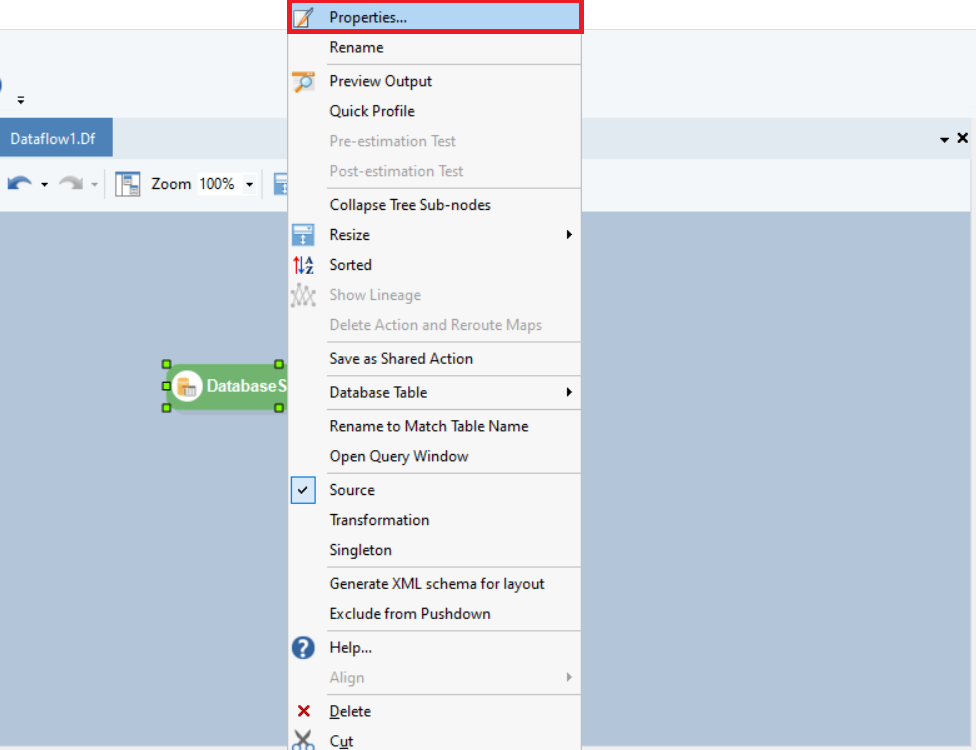
Upon opening the properties of the Database Table Source, check the shared connections bar.
Open the properties window by right-clicking on the source object and selecting Properties from the context menu.
Once opened, you will see the following window:
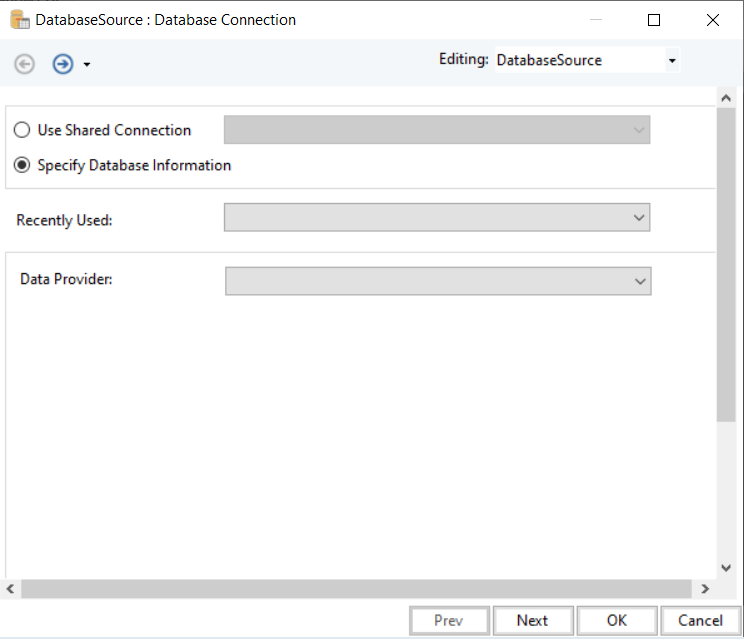
Selecting the Use Shared Connection checkbox will allow you to select from a list of shared connections from the drop-down menu.
In our case, we have allowed one deployed connection to be assigned to this user.
Deployed:DbConnection: This is the name of the connection that has been shared.
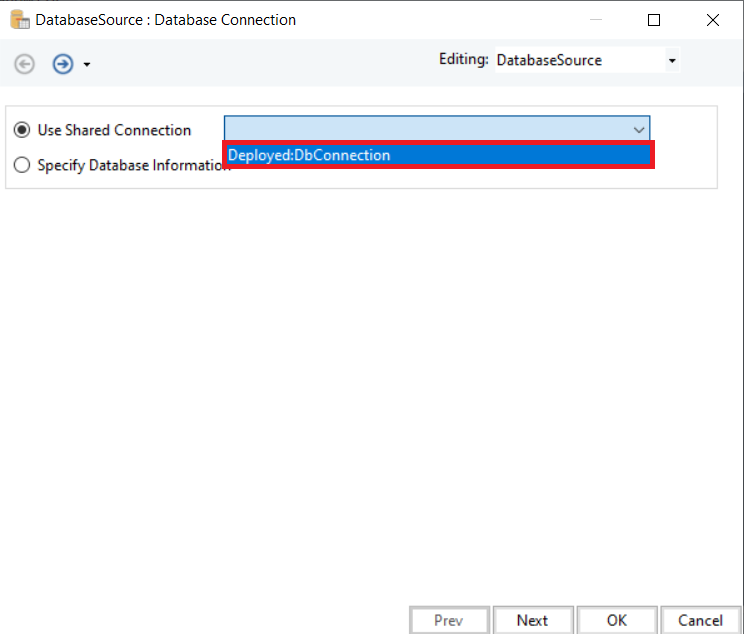
This user now has access to this deployed connection.
The connection rights have been provided without the need to provide any credentials.
This concludes our discussion on the connection vault feature in Astera Centerprise.