Building a Data Warehouse – A Step-By-Step Approach
Establishing a data warehousing system infrastructure that enables you to meet all of your business intelligence targets is by no means an easy task. With Astera Data Warehouse Builder, you can cut down the numerous standard and repetitive tasks involved in the data warehousing lifecycle to just a few simple steps.
In this article, we will examine a use case that describes the process of building a data warehouse with a step-by-step approach using Astera Data Warehouse Builder.
Use Case
Shop-Stop is a fictitious online retail store that currently maintains its sales data in an SQL database. The company has recently decided to implement a data warehouse across its enterprise to improve business intelligence and gain a more solid reporting architecture. However, their IT team and technical experts have warned them about the substantial amount of capital and resources needed to execute and maintain the entire process.
As an alternative to the traditional data warehousing approach, Shop-Stop has decided to use Astera Data Warehouse Builder to design, develop, deploy, and maintain their data warehouse. Let’s take a look at the process we’d follow to build a data warehouse for them.
Step 1: Create a Source Data Model
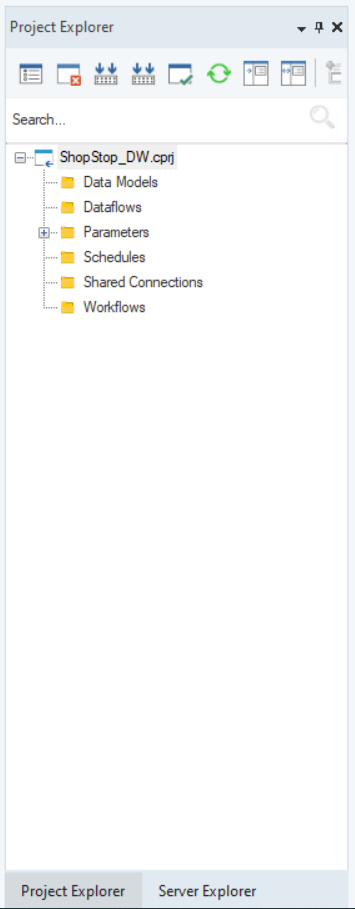
The first step in building a data warehouse with Astera Data Warehouse Builder is to identify and model the source data. But before we can do that, we need to create a data warehousing project that will contain all of the work items needed as part of the process. To learn how you can create a data warehousing project and add new items to it, click here.
Once we’ve added a new data model to the project, we’ll reverse engineer Shop-Stop’s sales database using the Reverse Engineer icon on the data model toolbar.
To learn more about reverse engineering from an existing database, click here.
Here’s what Shop-Stop’s source data model looks like once we’ve reverse engineered it:
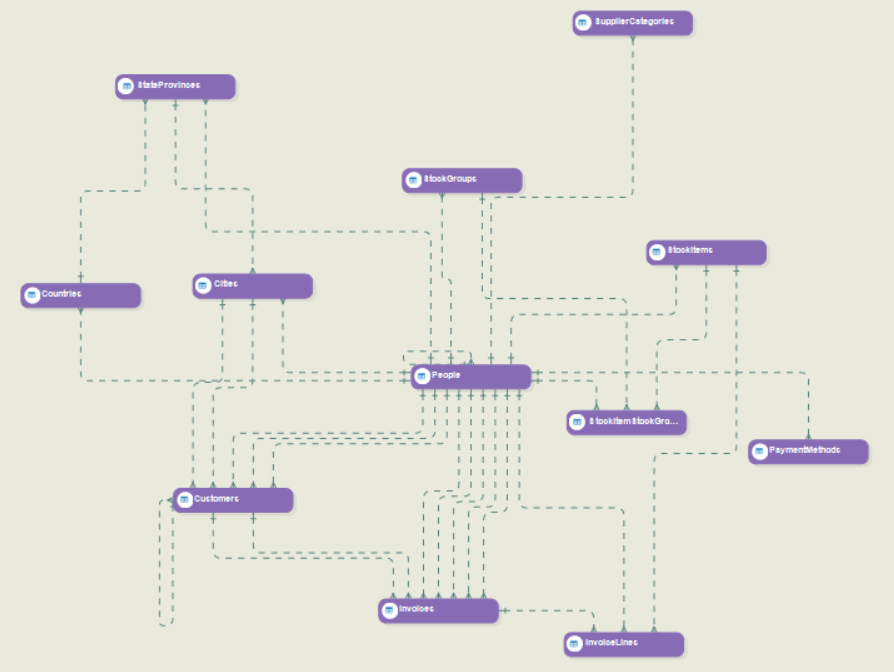
Note: Each entity in this model represents a table that contains Shop-Stop’s source data.
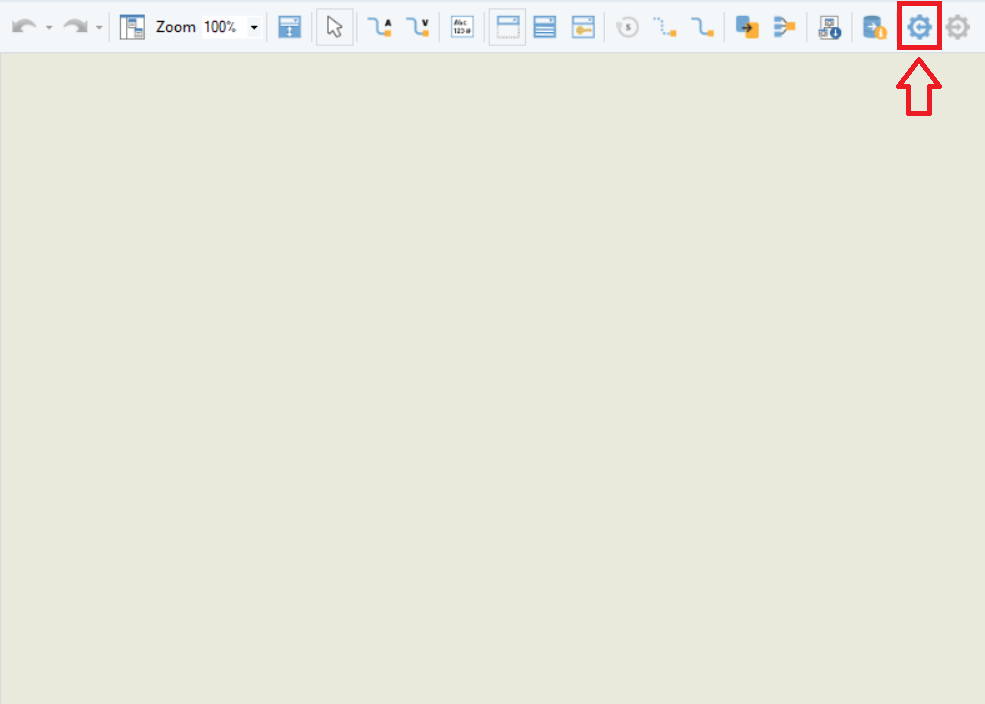
Next, we’ll verify the data model to perform a check for errors and warnings. You can verify a model through the Verify for Read and Write Deployment option in the main toolbar.
![]()
For more information on verifying a data model, click here.
After the model has been verified successfully, all that’s left to do is deploy it to the server and make it available for use in ETL/ELT pipelines or for data analytics. In Astera Data Warehouse Builder, you can do that through the Deploy Data Model option in the data model toolbar.
![]()
For more information on deploying a data model, click here.
We’ve successfully created, verified, and deployed a source data model for Shop-Stop.
Step 2: Build and Deploy a Dimensional Model
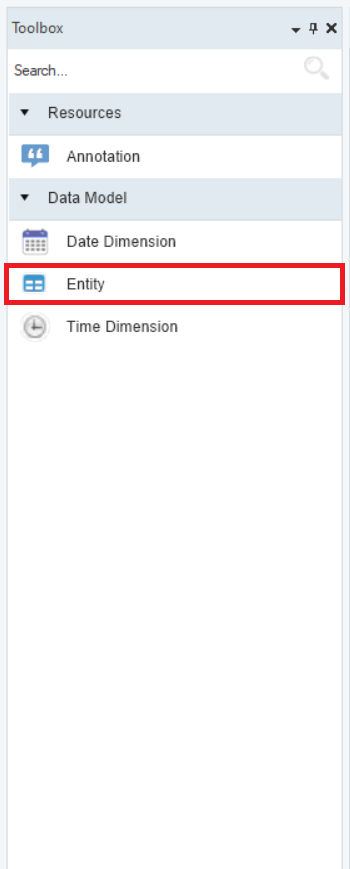
The next step in the process is to design a dimensional model that will serve as a destination schema for Stop-Stop’s data warehouse. You can use the Entity object available in the data model toolbox, and the data modeler’s drag-and-drop interface to design a model from scratch.
However, in Shop-Stop’s case, they’ve already designed a data warehouse schema in an SQL database. First, we’ll reverse engineer that database. Here’s what the data model looks like:
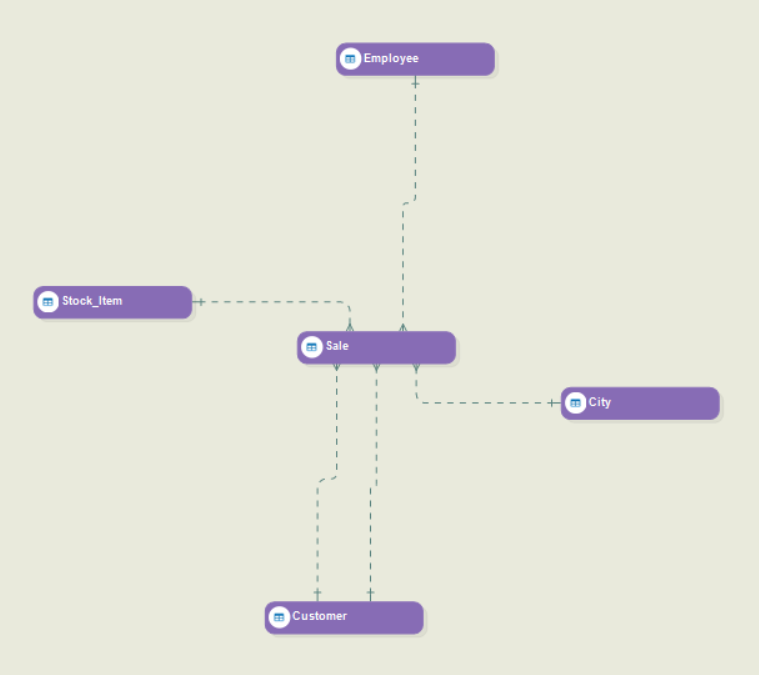
Note: Each entity in this model represents a table in Shop-Stop’s final data warehouse.
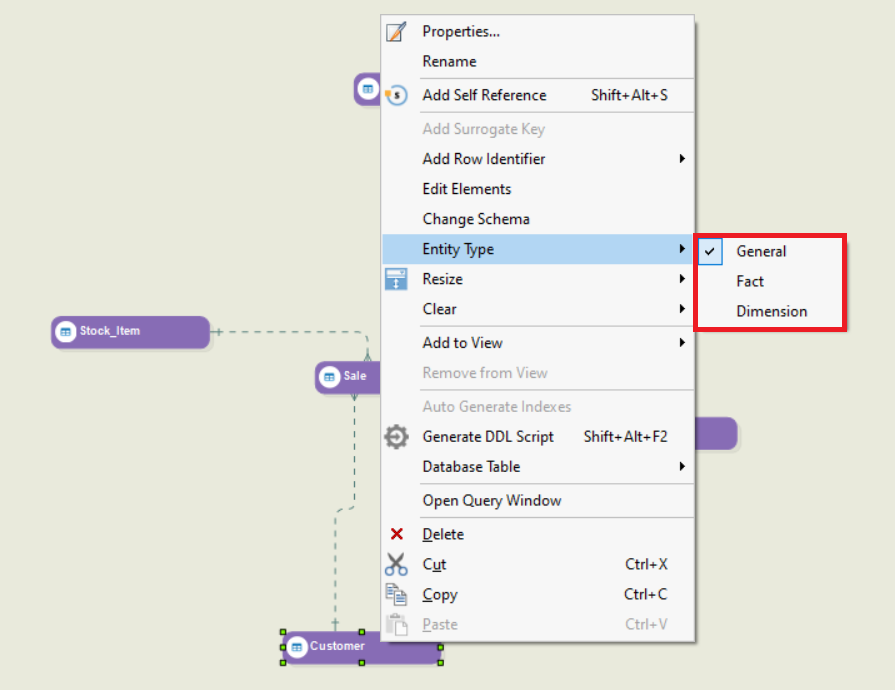
Next, we’ll convert this model into a dimensional model by assigning facts and dimensions. The type for each entity, when a database is reverse engineered, is set as General by default. You can conveniently change the type to Fact or Dimension by right-clicking on the entity, hovering over Entity Type in the context menu, and selecting an appropriate type from the given options.
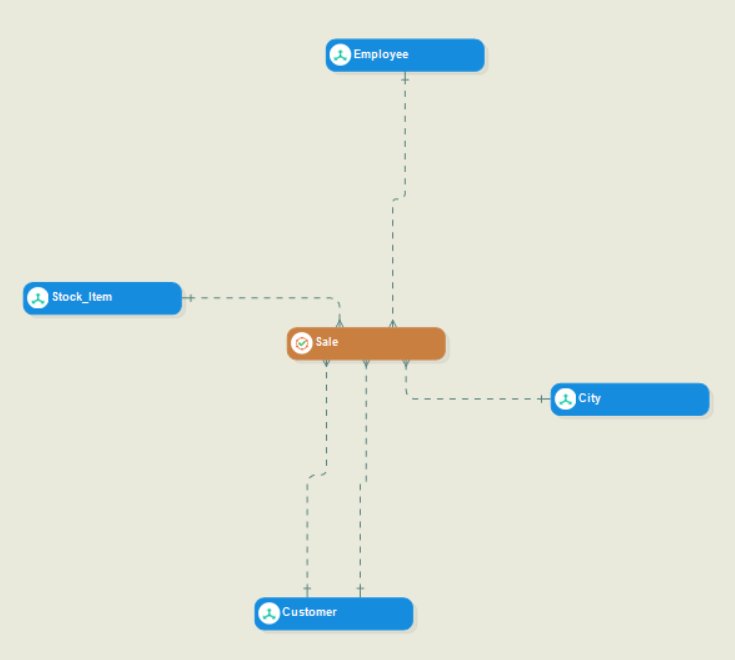
In this model, the Sale entity in the center is the fact entity and the rest of them are dimension entities. Here is a look at the model once we’ve defined all of the entity types and converted it into a dimensional model:
To learn more about converting a data model into a dimensional model, click here.
Once the dimensions and facts are in place, we’ll configure each entity for enhanced data storage and retrieval by assigning specified roles to the fields present in the layout of each entity.
For dimension entities, the Dimension Role column in the Layout Builder provides a comprehensive list of options. These include the following:
- Surrogate Key and Business Key.
- Slowly Changing Dimension types (SCD1, SCD2, SCD3, and SCD6).
- Record identifiers (Effective and Expiration dates, Current Record Designator, and Version Number) to keep track of historical data.
- Placeholder Dimension to keep track of late and early arriving facts and dimensions.
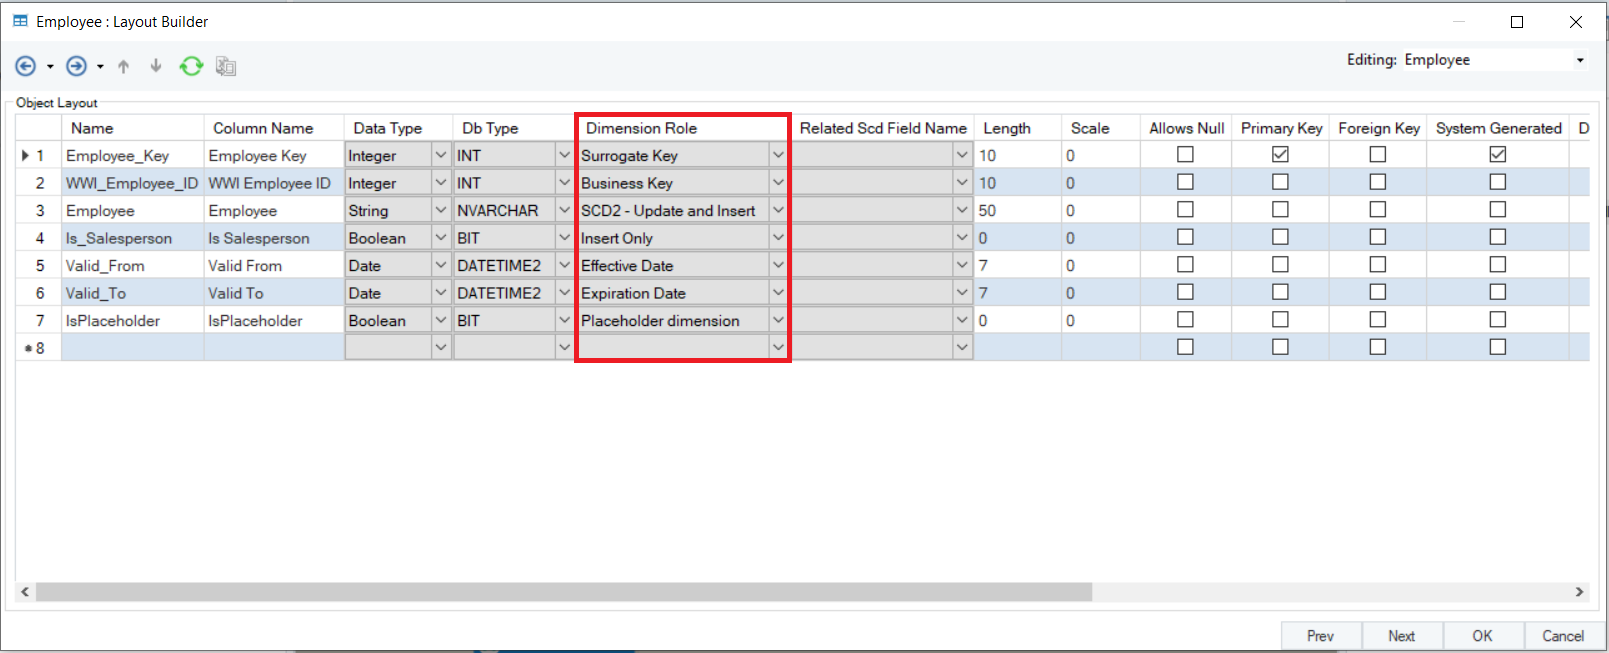
As an example, here is the layout of the Employee entity in the dimensional model after we’ve assigned dimension roles to its fields.
To learn more about dimension entities, click here.
The fact entity’s Layout Builder contains a Fact Role column, through which you can assign the Transaction Date Key role to one of the fields.
Here is a look at the layout of the Sale entity once we’ve assigned the Transaction Date Key role to a field:
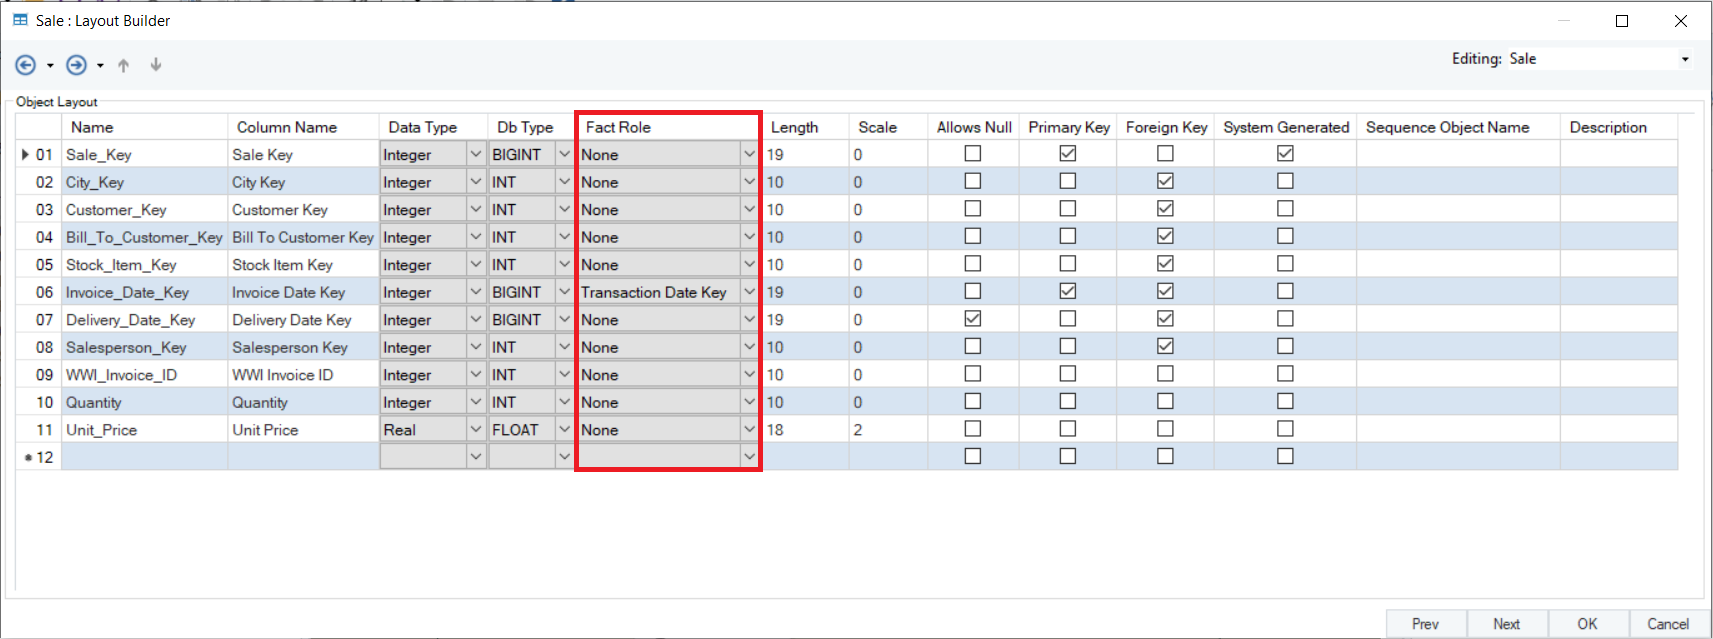
To learn more about fact entities, click here.
Now that the dimensional model is ready, we’ll verify and deploy it for further usage.
Step 3: Populate the Data Warehouse
In this step, we’ll populate Shop-Stop’s data warehouse by designing ETL pipelines to load relevant source data into each table. In Astera Data Warehouse Builder, you can create ETL pipelines in the dataflow designer.
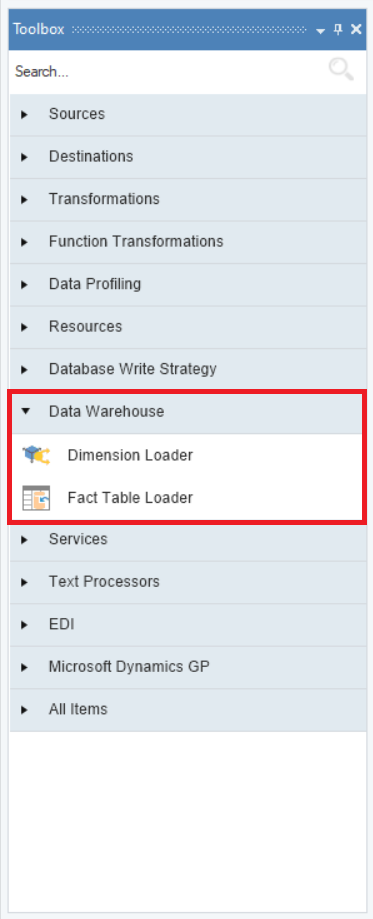
Once you’ve added a new dataflow to the data warehousing project, you can use the extensive set of objects available in the dataflow toolbox to design an ETL process. The Fact Loader and Dimension Loader objects can be used to load data into fact and dimension tables, respectively.
Here is the dataflow that we’ve designed to load data into the Customer table in the data warehouse:
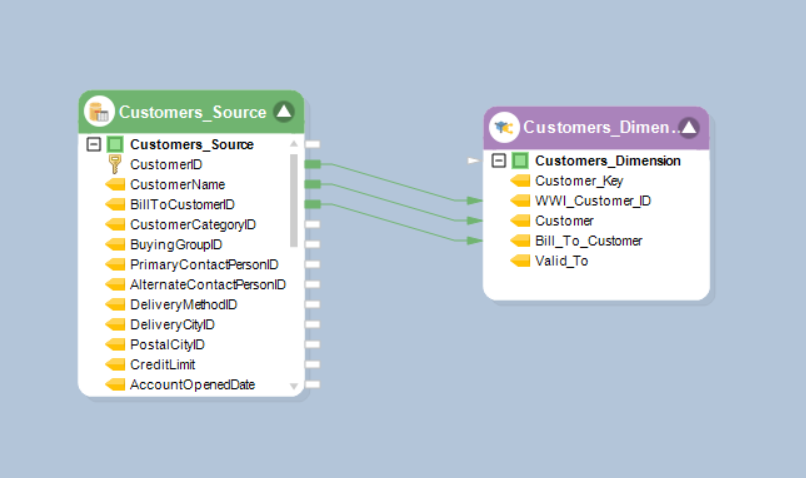
On the left side, we’ve used a Database Table Source object to fetch data from a table present in the source model. On the right side, we’ve used the Dimension Loader object to load data into a table present in the destination dimensional model.
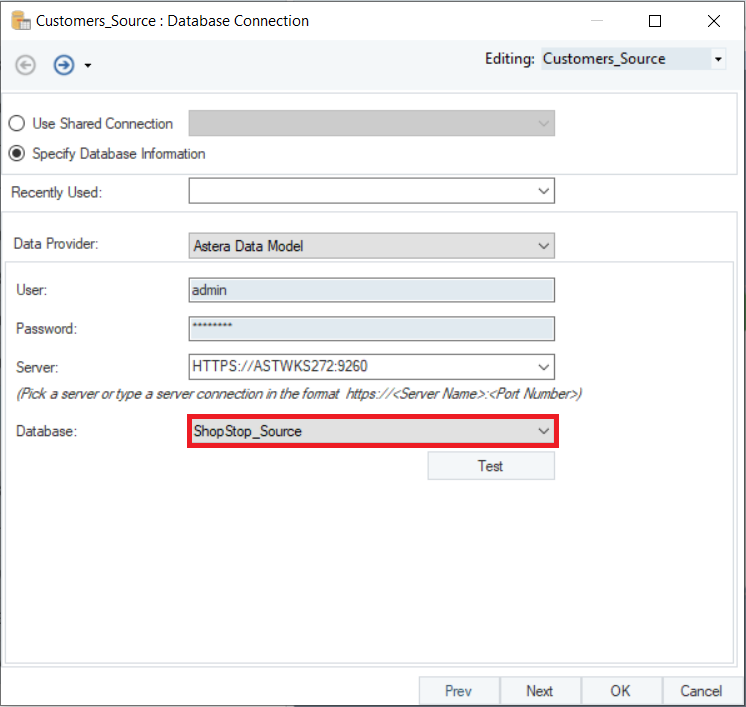
You’ll recall that both of the models mentioned above were deployed to the server and made available for usage. While configuring the objects in this dataflow, we connected each of them to the relevant model via the Astera Data Model connection in the list of data providers.
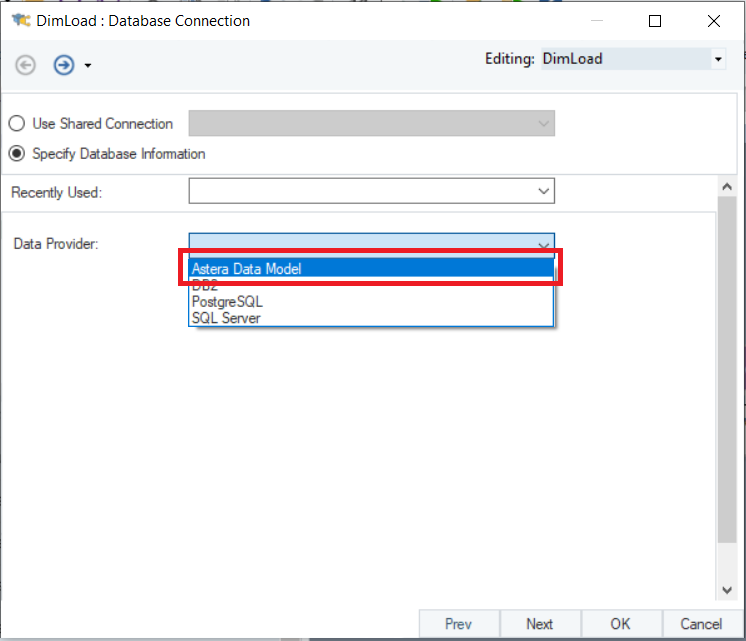
The Database Table Source object was configured with the source data model’s deployment.
On the other hand, the Dimension Loader object was configured with the destination dimensional model’s deployment.
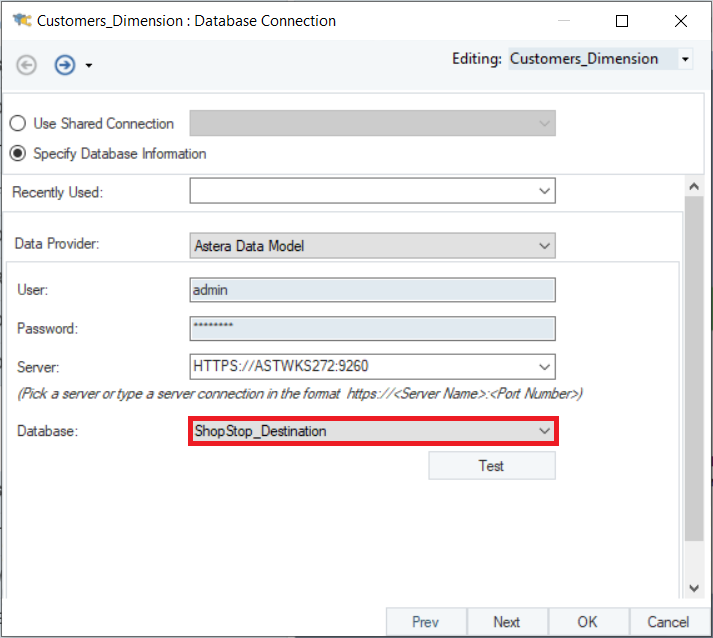
Note: ShopStop_Source and ShopStop_Destination represent each deployed data model.
To learn more about how you can use deployed data models in ETL pipelines, click here.
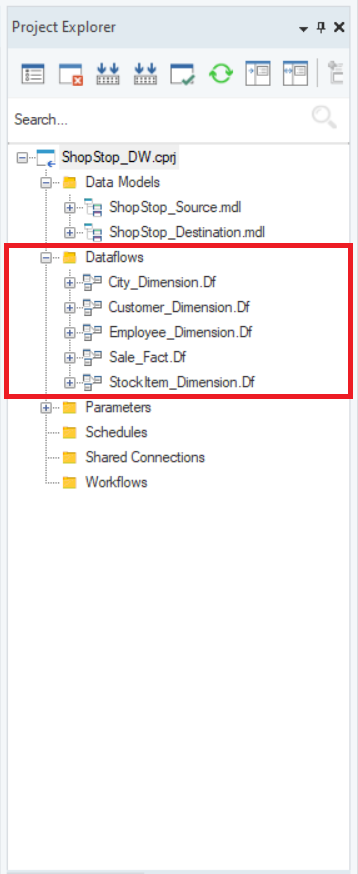
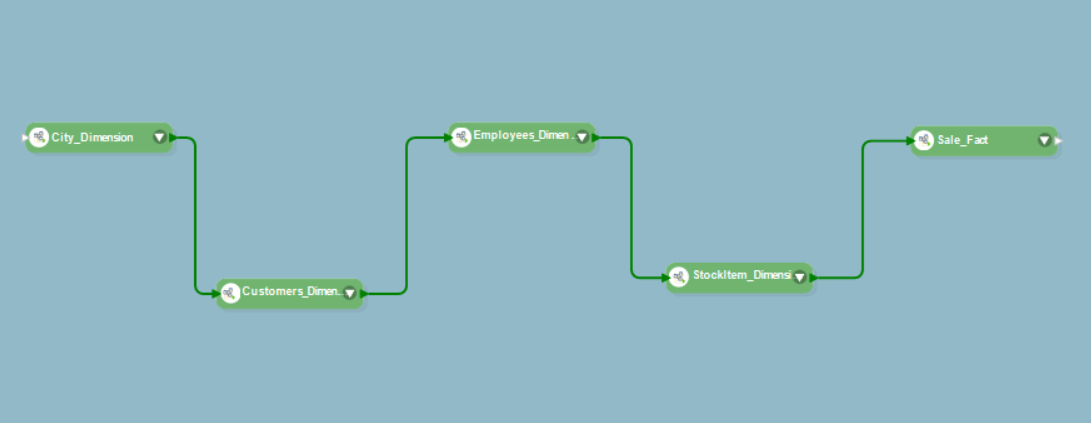
We’ve designed separate dataflows to populate each table present in Shop-Stop’s data warehouse.
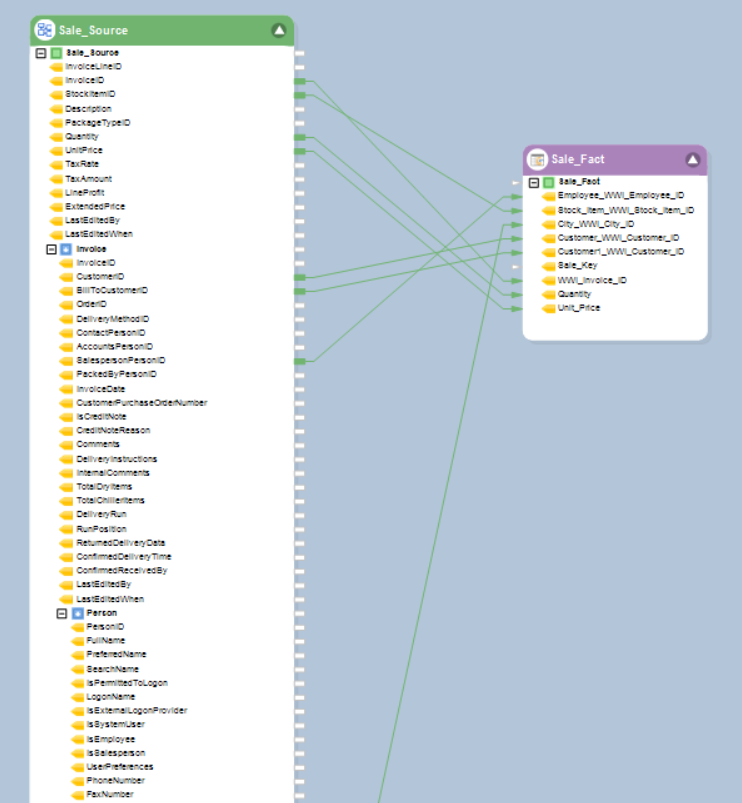
The dataflow that we designed to load data into the fact table is a bit different than the rest of the dataflows because the fact table contains fields from multiple source tables. The Database Table Source object that we saw in the Customer_Dimension dataflow can only extract data from one table at a time. An alternative to this is the Data Model Query Source object, which allows you to extract multiple tables from the source model by selecting a root entity.
To learn more about the Data Model Query Source object, click here.
Now that all of the dataflows are ready, we’ll execute each of them to populate Shop-Stop’s data warehouse with their sales data. You can execute or start a dataflow through the Start Dataflow icon in the main toolbar.

To avoid executing all of the dataflows individually, we’ve designed a workflow to orchestrate the entire process.
To learn about workflows, click here.
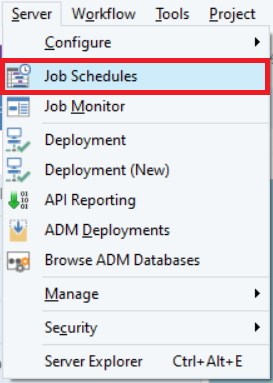
Finally, we’ll automate the process of refreshing this data through the built-in Job Scheduler. To access the job scheduler, go to Server > Job Schedules in the main menu.
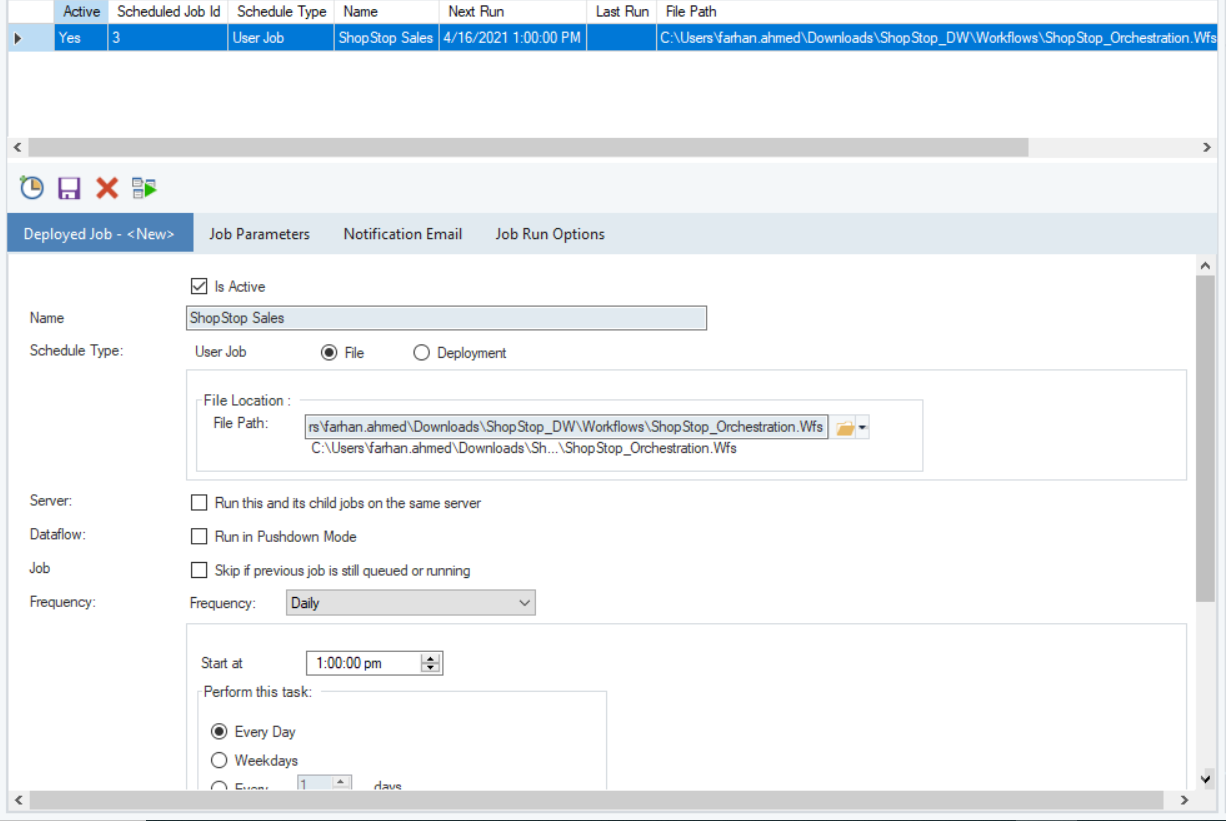
In the Scheduler tab, you can create a new schedule to automate the execution process at a given frequency.
For a detailed guideline on how to use the job scheduler, click here.
In this case, we’ve scheduled the sales data to be refreshed on a daily basis.
Step 4: Visualize and Analyze
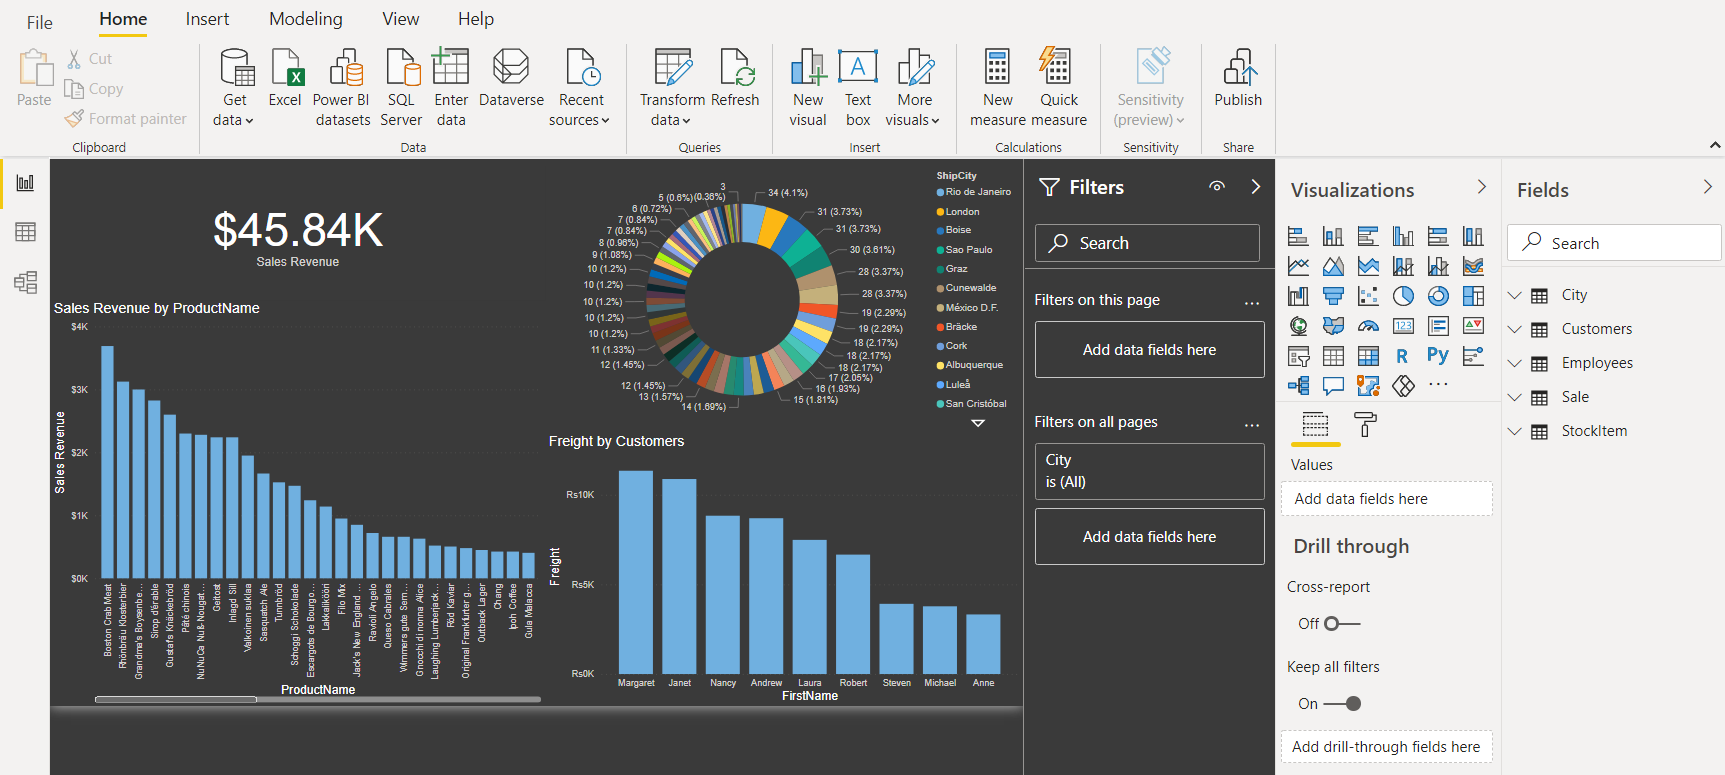
Shop-Stop’s data warehouse can now be integrated with industry-leading visualization and analytics tools such as Power BI, Tableau, Domo, etc. through a built-in OData service. The company can use these tools to effectively analyze their sales data and gain valuable business insights from it.
This concludes our discussion on building a data warehouse with a step-by-step approach using Astera Data Warehouse Builder.