View Based Deployment
Data models can be deployed to the server to provide accessibility to users. Depending on business needs such as controlled access of data, data consumption in ETL pipelines, analysis, etc. users may need to deploy data models separately. Astera Data Warehouse Builder lets you deploy multiple subsets of a data model without creating separate data models and performing redundant tasks for each deployment using view-based deployments.
Views in a data model help you focus on a smaller group of the entities without considering the whole data model, thus enabling users to work incrementally. Deployment of these views lets us verify, deploy, and allow access to only those entities of the data model that are present in a view.
HOW TO USE VIEW-BASED DEPLOYMENT:
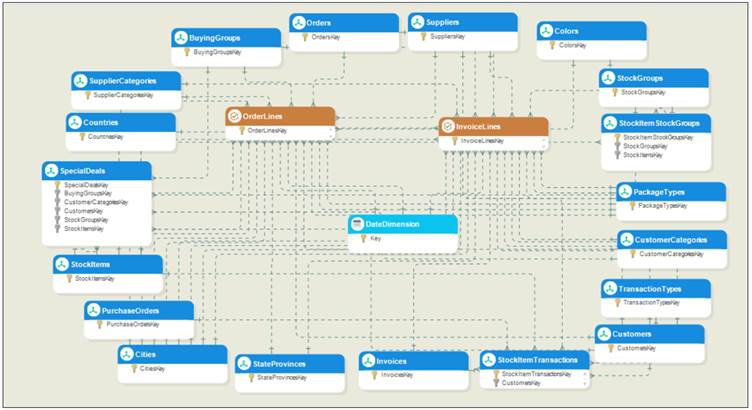
Consider an example of a dimensional model consisting of multiple fact tables. To work with fact tables individually, we can use views in the data model.
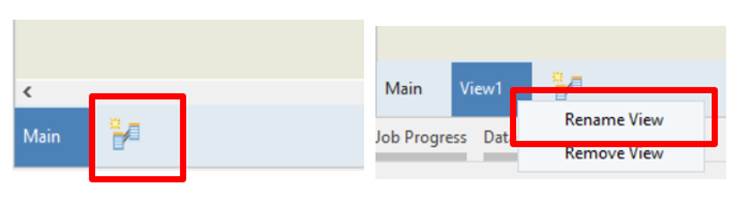
- Create a View by clicking the Add New View icon located in the bottom left of the data model designer. A new view will be created.
- Rename this View as per the requirements by either double-clicking it or by right-clicking the View tab and selecting the Rename View option from the context menu.
- Now, add the desired entities to the view using any of the following methods:
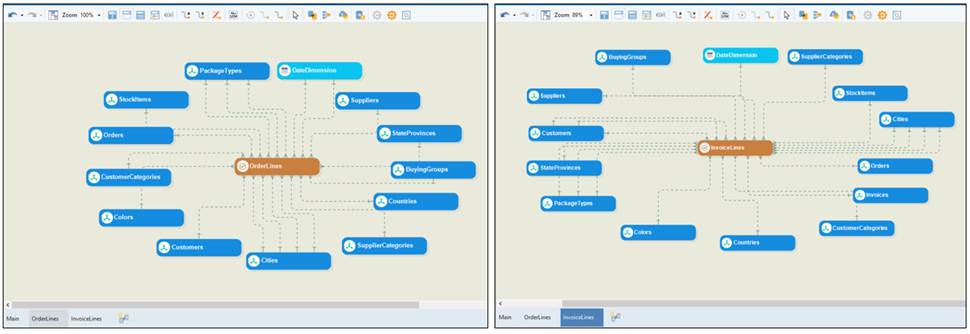
- We can add entities to the View directly from the main model. To do this, right-click the entity that must be added to the view, use the Add to View option in the context menu of entities and select the view.
- We can also add entities to the View by selecting any entity from the data model browser and dragging-and-dropping it onto the designer. Press the shift key while dragging-and-dropping to ensure that the selected entity and all the entities that are connected to it are added to the View on the designer.
Having added the desired entities onto the designer, the Views can now be used for incremental designing.
After finalizing the Views, they can be deployed to the server.
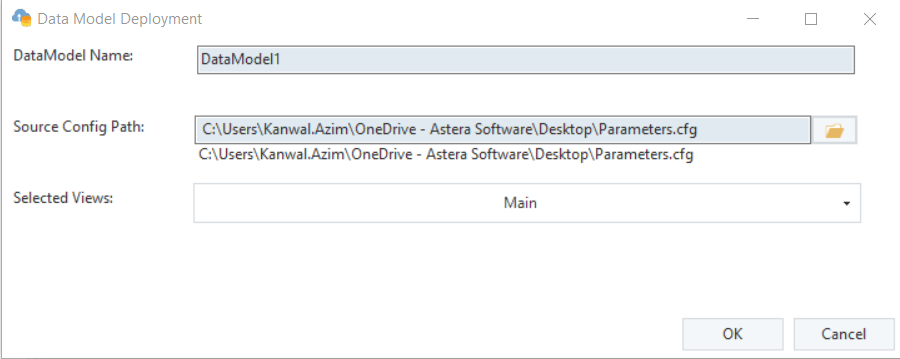
- To deploy a view, Use the Deploy Data Model icon from the toolbar or the short cut key, Shift+Alt+M.

A wizard will open. Here, name the deployment and select the Views that need to be deployed. Once done, click OK. If the data model is verified successfully, the Views will be deployed and available on the server.
Note: When deploying Views, each view will be verified for read and write deployment individually without taking into account other Views. Separate deployments for each View will also be created.