Verifying a Data Model
A data model needs to be checked for any possible errors or warnings before it can be forward engineered to a target database or deployed to the server for usage. In Astera Data Warehouse Builder, you can use the verification option to perform this verification.
Video
How to Verify a Data Model
To verify a data model, click on the Start Verification icon in the DWB toolbar.
![]()
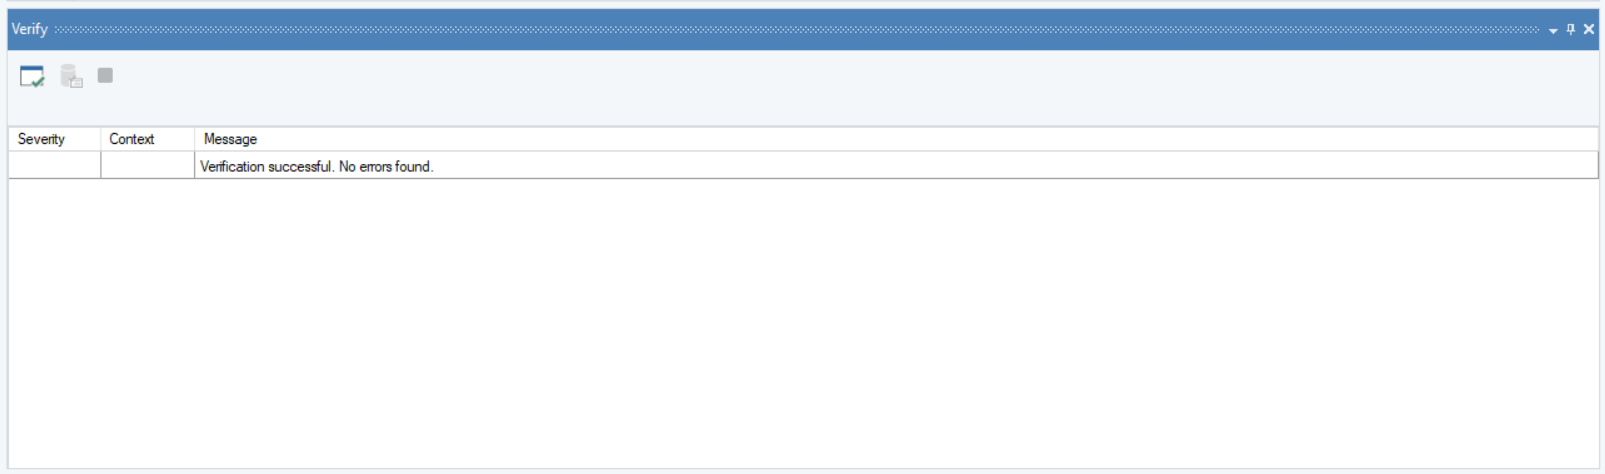
If the model is erroneous, the Verify window will display a list of error and warning messages. If not, it will indicate that the model has been successfully verified and contains no errors. Let’s verify the following model as an example.
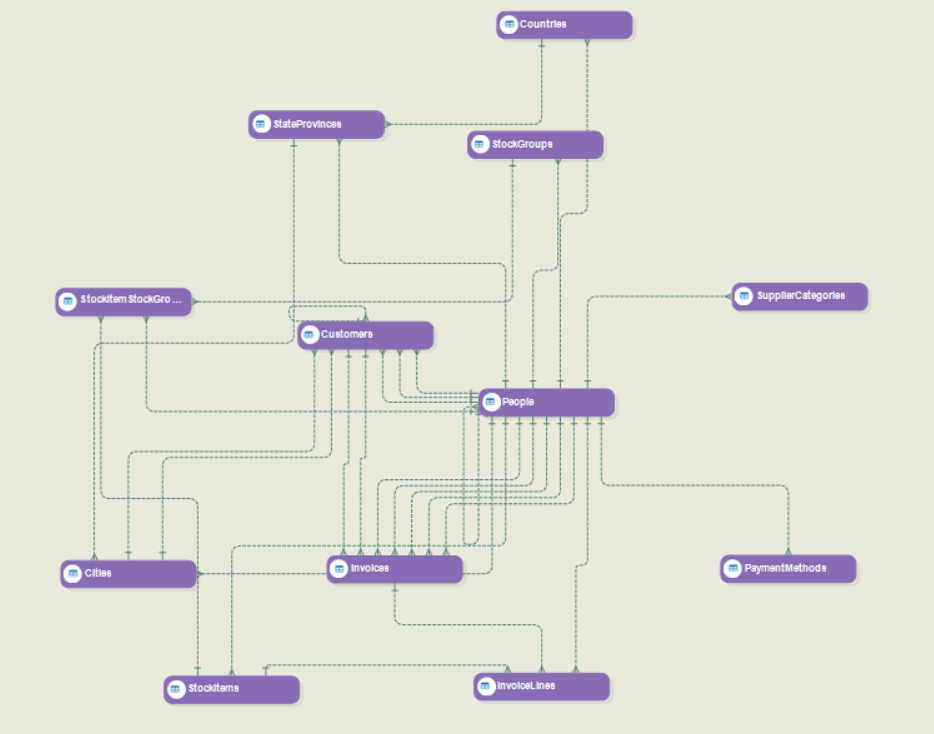
This particular model contains no errors or warnings. Upon clicking the Start Verification option, the Verify window will show that it has been verified successfully.
Types of Verification
When you expand the Start Verification option, you’ll see that there are two types of verification.
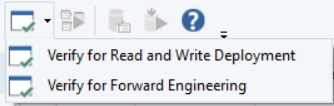
Verify for Read and Write Deployment
This is the default option for the Start Verification button.
Read and Write Deployment refers to publishing the data model to the server for usage in ETL processes or for data visualization through a built-in OData service. For more information on deployment in Astera Data Warehouse Builder, click here.
When the Verify for Read and Write Deployment option is selected, the Verify window shows whether a model is ready to be deployed. In case there are any errors in the model, you’ll have to fix them before you can deploy it.
Verify for Forward Engineer
Forward Engineer refers to mirroring any changes you’ve made to a data model into a target database.
When the Verify for Forward Engineer option is selected, the Verify window shows whether the changes made to model are ready to be reflected into the database. In case there are any errors in the model, you’ll have to fix them before you can forward engineer it.
Common Verification Errors
Here are some common errors that you may encounter when verifying a data model:
Case 1: No Primary Key
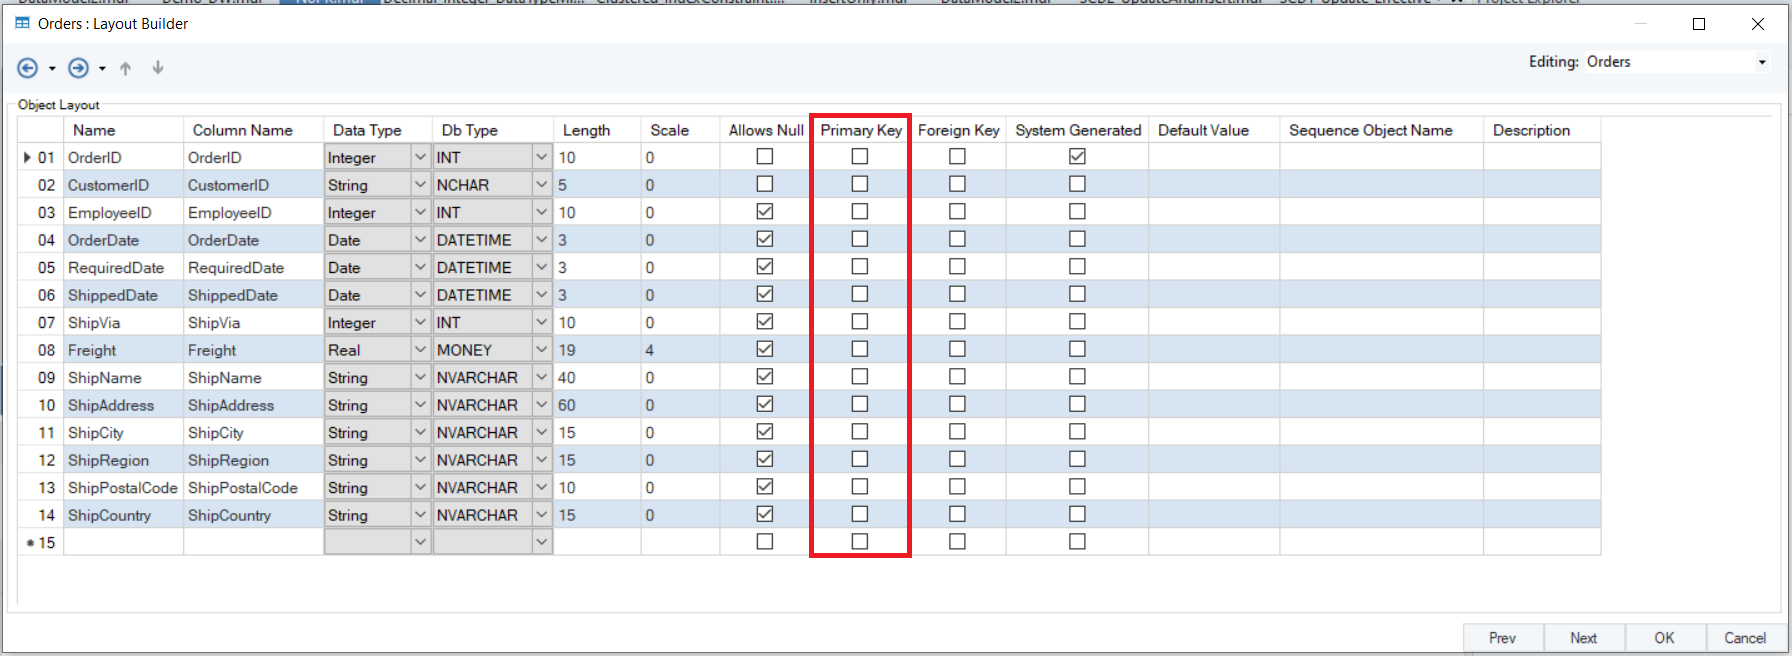
In this case, we have a data model that contains one entity named Orders.

This entity does not contain a primary key, as indicated by its layout.
On verifying for read and write deployment, the Verify window will display the following errors:
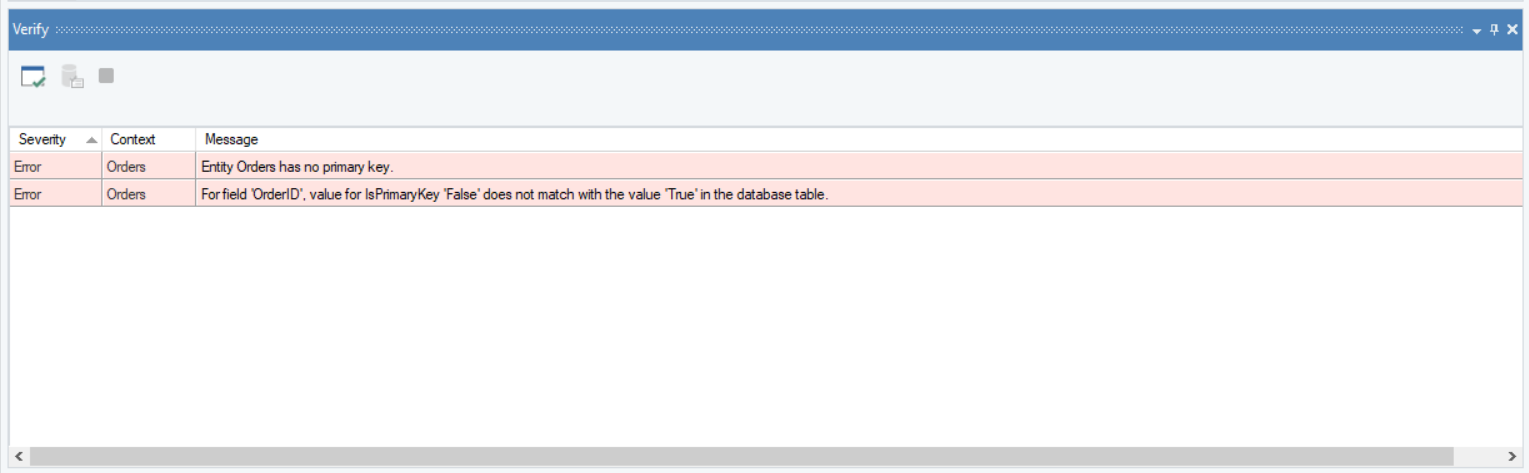
The first error indicates that there is no primary key field in the Orders entity.
The second error indicates that the field OrderID in the entity layout is the primary key within the database table but not within the data model.
Solution: Go to the entity layout and select the Primary Key checkbox for the OrderID field.
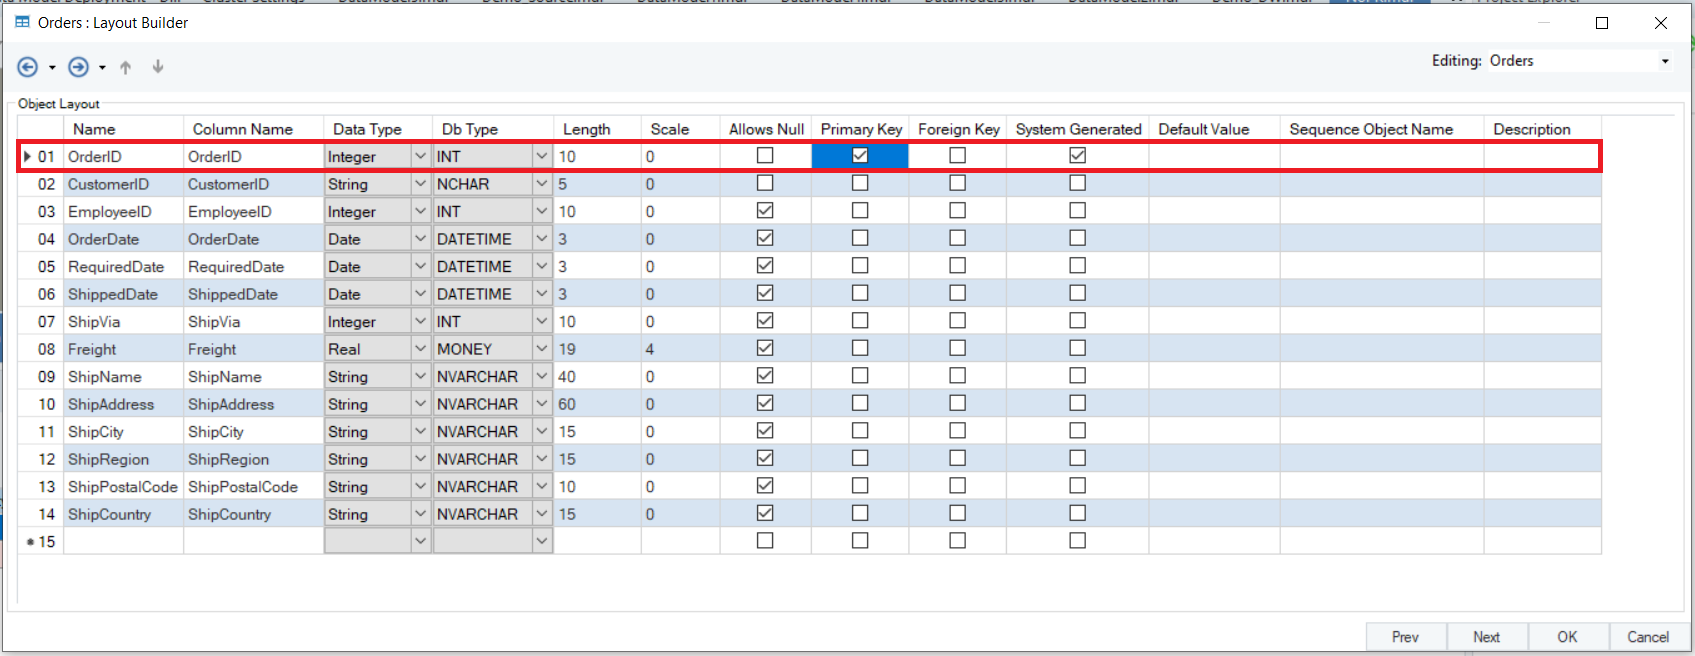
Click OK. The model can now be verified successfully.
Case 2: Data Type Mismatch
In this case, we have a data model that contains two entities, Shippers and Orders, that are related to each other.
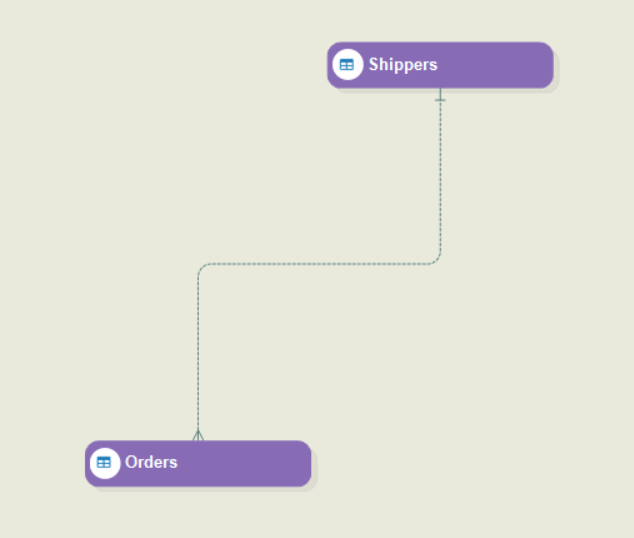
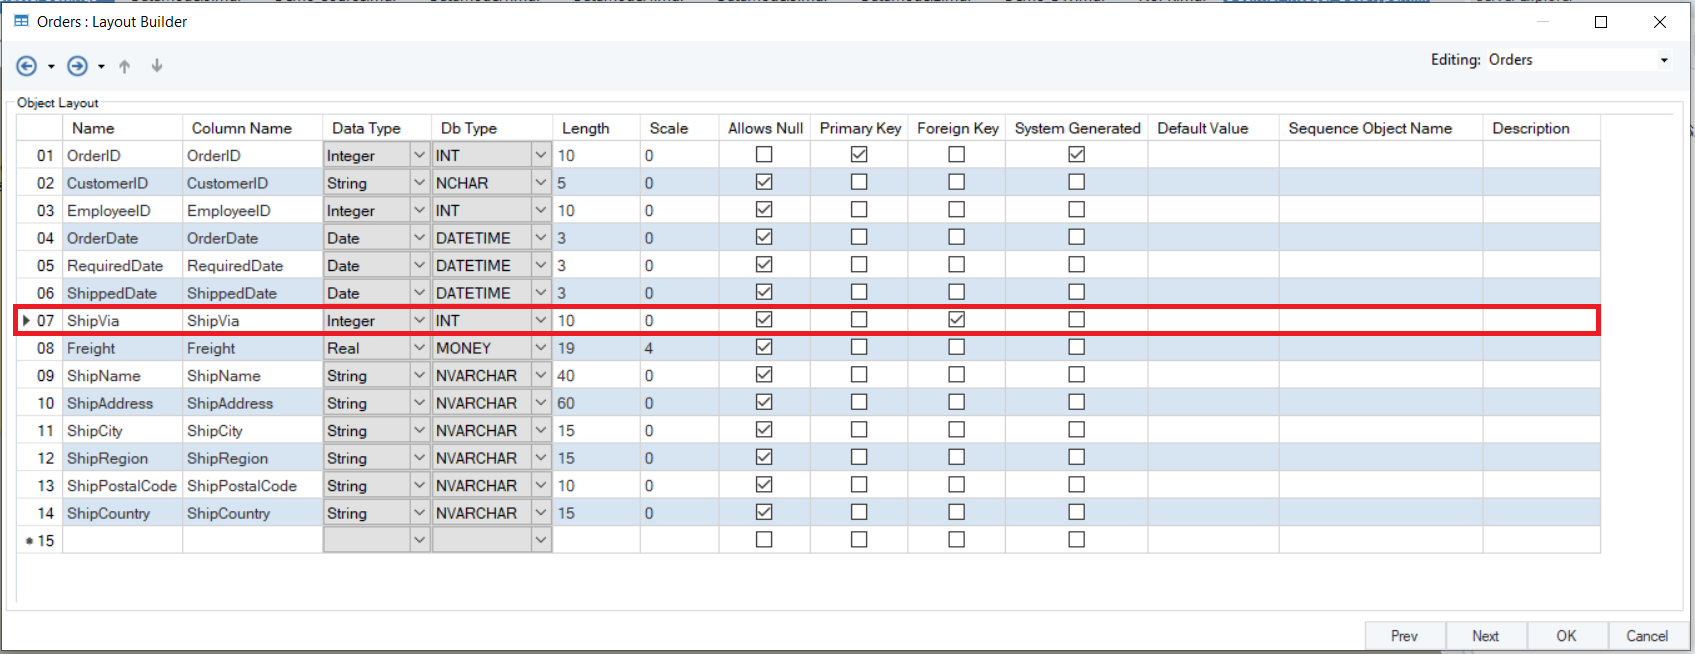
Here is the layout of the Orders entity.
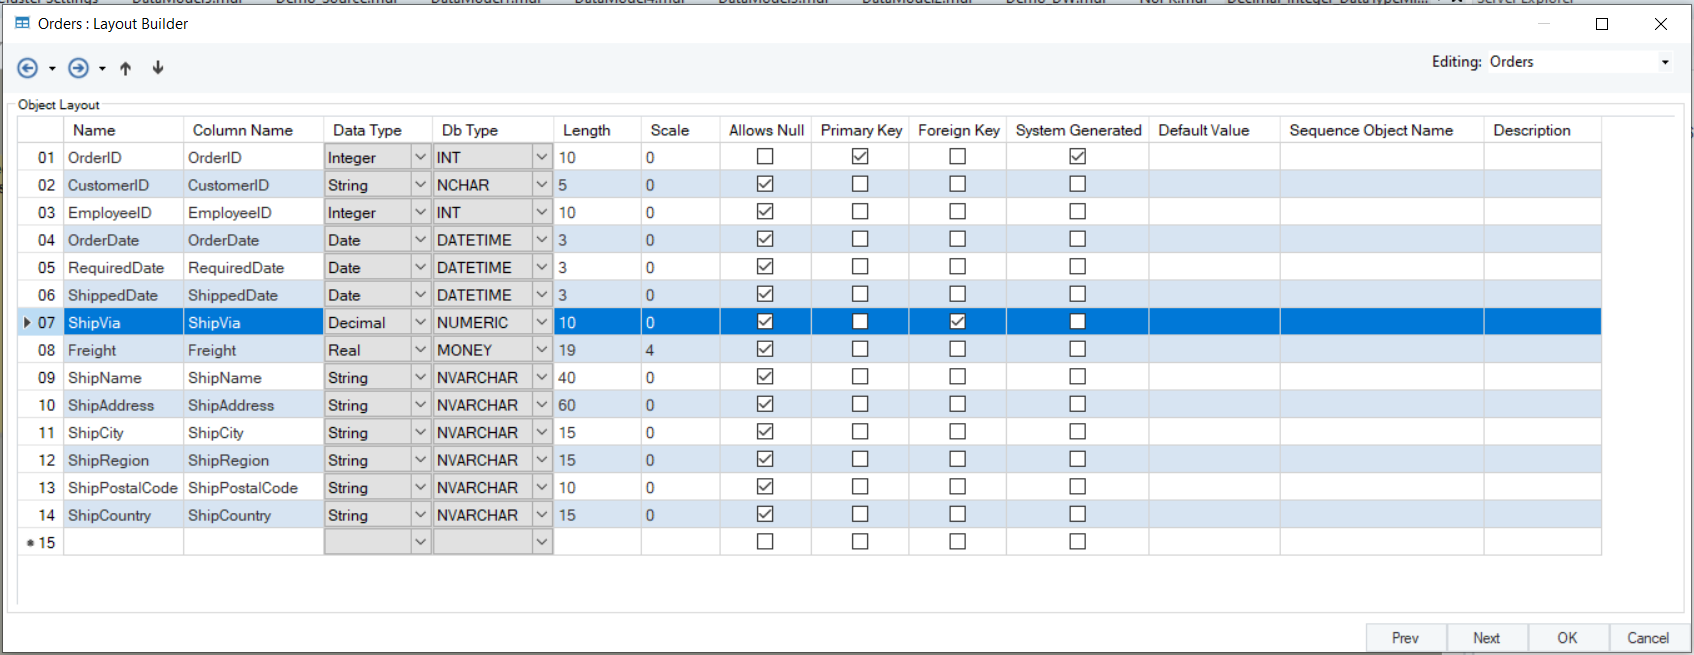
You’ll notice that the data type for the ShipVia field is Decimal and the db type is NUMERIC. In actuality, these should be Integer and INT, respectively.
On verifying for read and write deployment, the Verify window will display the following errors:
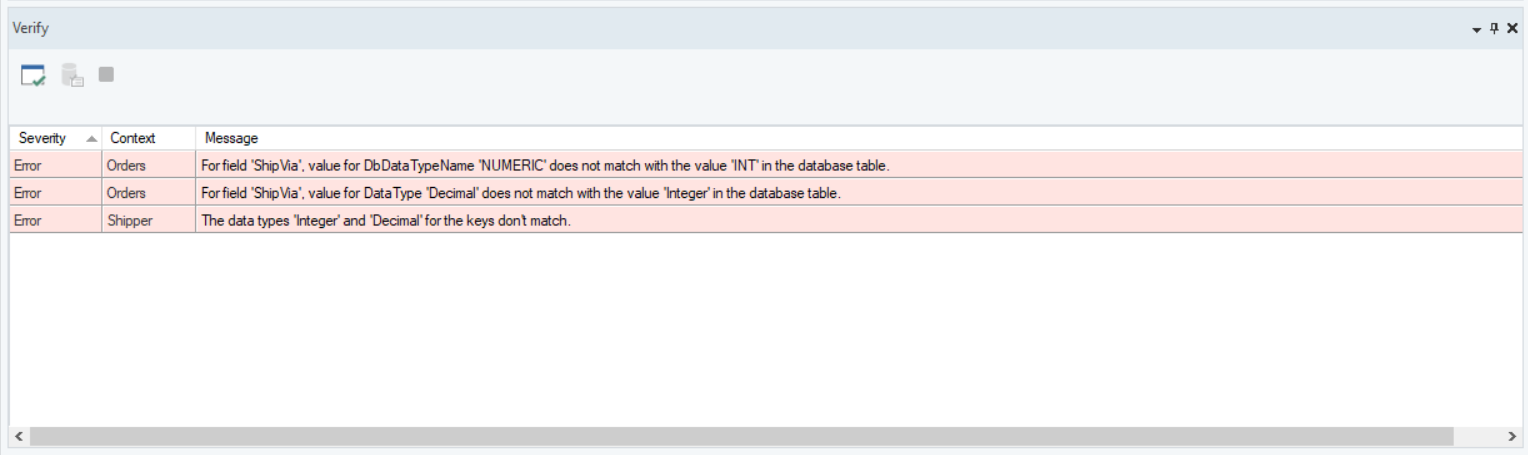
The first two errors indicate that the data type for the ShipVia field in the Orders entity does not match with its data type in the database.
The third error indicates that the data type for ShipVia does not match with its corresponding field in the Shippers entity, which is the parent entity in this case.
Solution: Go to the layout of the Orders entity and change the data type of ShipVia to Integer and change its db type to INT. You can do so using the dropdown menus in the Data Type and Db Type columns.
Click OK. The model can now be verified successfully.
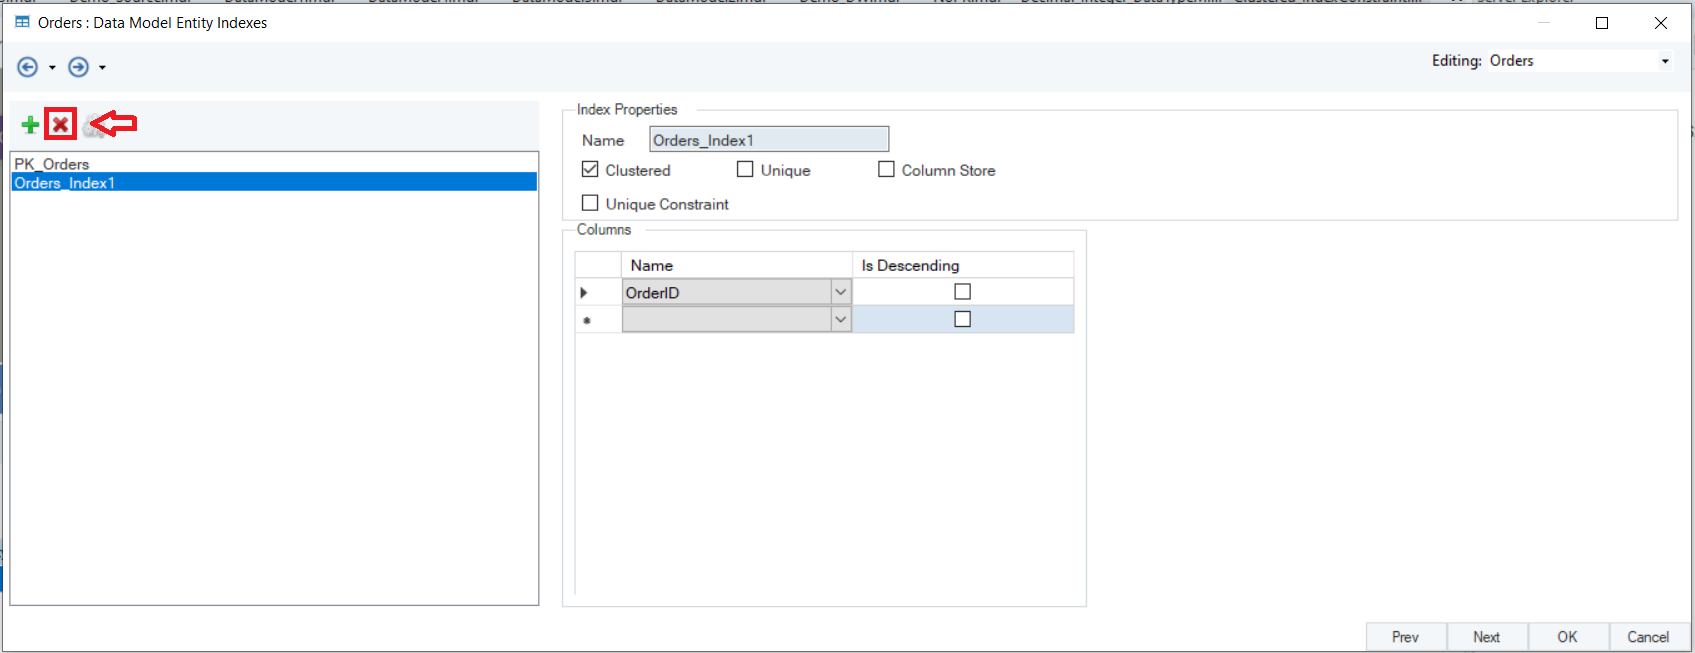
Case 3: More Than One Clustered Index
In this case, we have a data model that contains one entity named Orders.
This entity contains two clustered indexes. However, you cannot have more than one clustered index within an entity.

On verifying for forward engineering, the Verify window will display the following error:
The error simply states that you cannot have more than one clustered index in the entity.
Solution: Go to the Data Model Entity Indexes screen and delete one of the clustered indexes using the Delete Index icon.
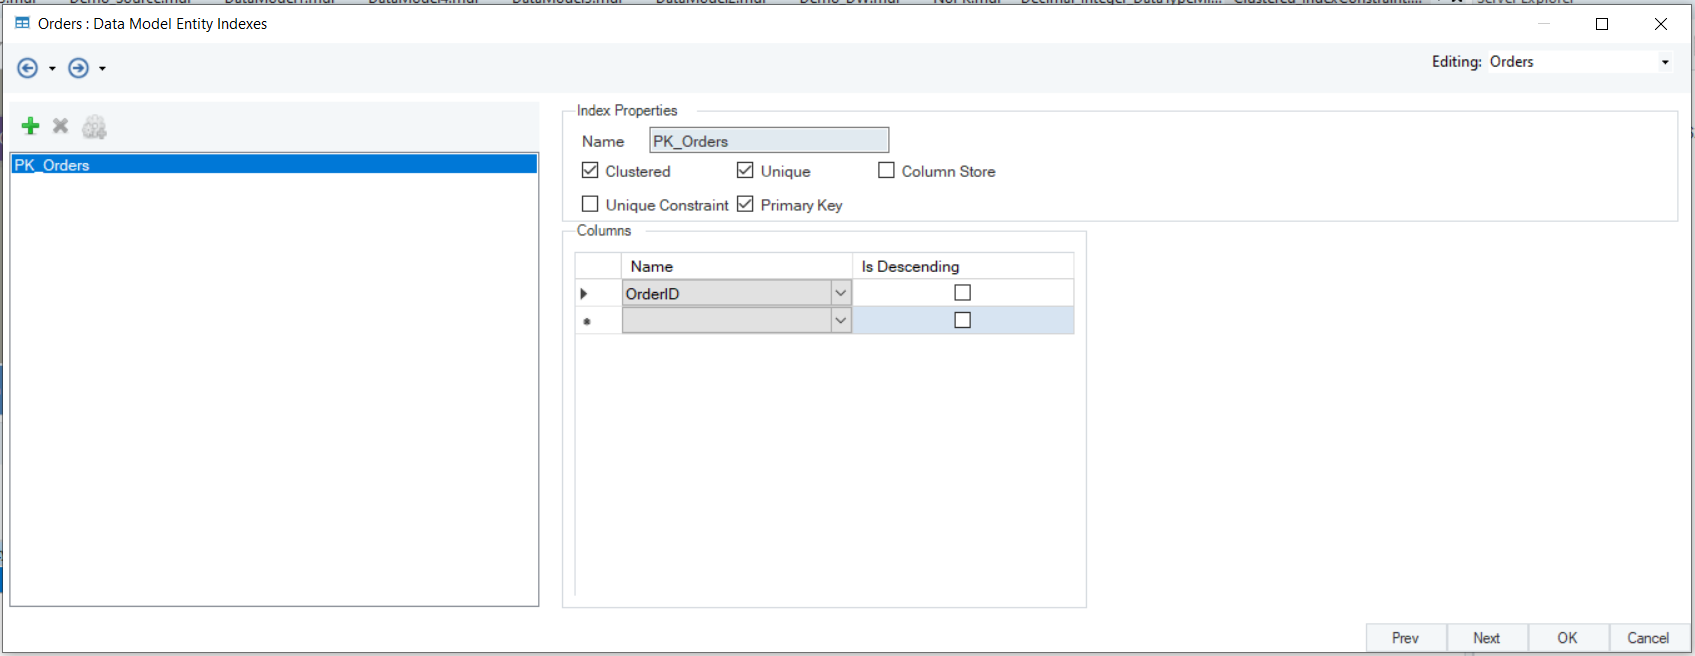
Click OK. The model can now be verified successfully.
This concludes our discussion on verifying a data model. The next section will cover a detailed overview of dimensional modeling in Astera Data Warehouse Builder.