Dimension Entities
In a dimensional data model, a dimension entity represents a table that contains descriptive information regarding a fact. Each attribute in a dimension table provides context to the numeric information present in the fact table. In a star schema, each dimension entity is related to the fact entity.
Video
Overview
Let’s assume that we have a sample dimensional model that looks like this:
The Customer, City, Stock_Item, and Employee entities in this model represent dimension tables. The Sale entity in the center represents the fact table.
In this article, we will examine the layout of the Customer entity to learn how you can configure dimension entities in Astera Data Warehouse Builder.
Layout Builder
To open the properties of an entity, right-click on it and select Properties from the context menu. Alternatively, you can double-click on the entity object.
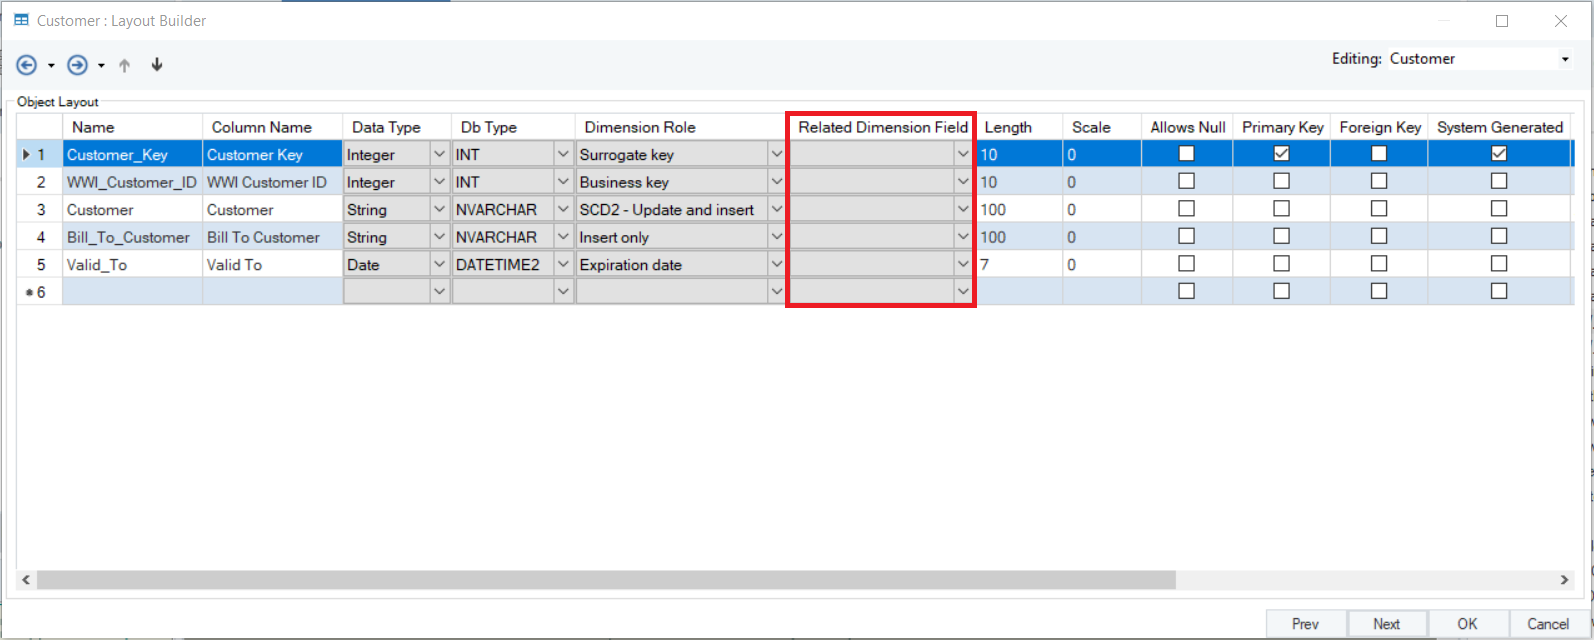
A configuration window will appear. This window provides the same options as it does for a general entity, the only additions being the Dimension Role and Related Dimension Field columns on the Layout Builder screen. To learn about general entity properties, click here.
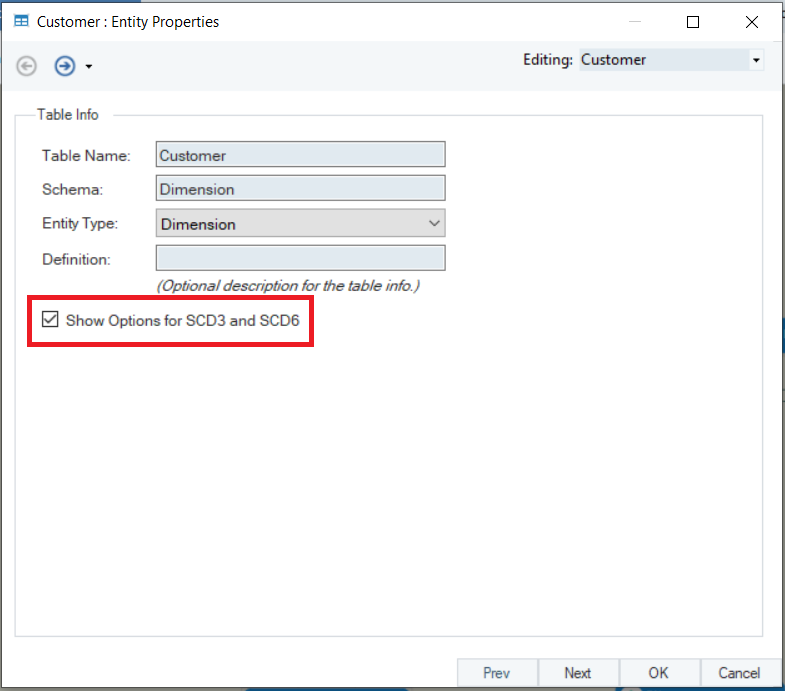
On the first screen, you can view and edit some general information regarding the table, including its name, schema, and type.
Click Next to proceed to the Layout Builder screen.
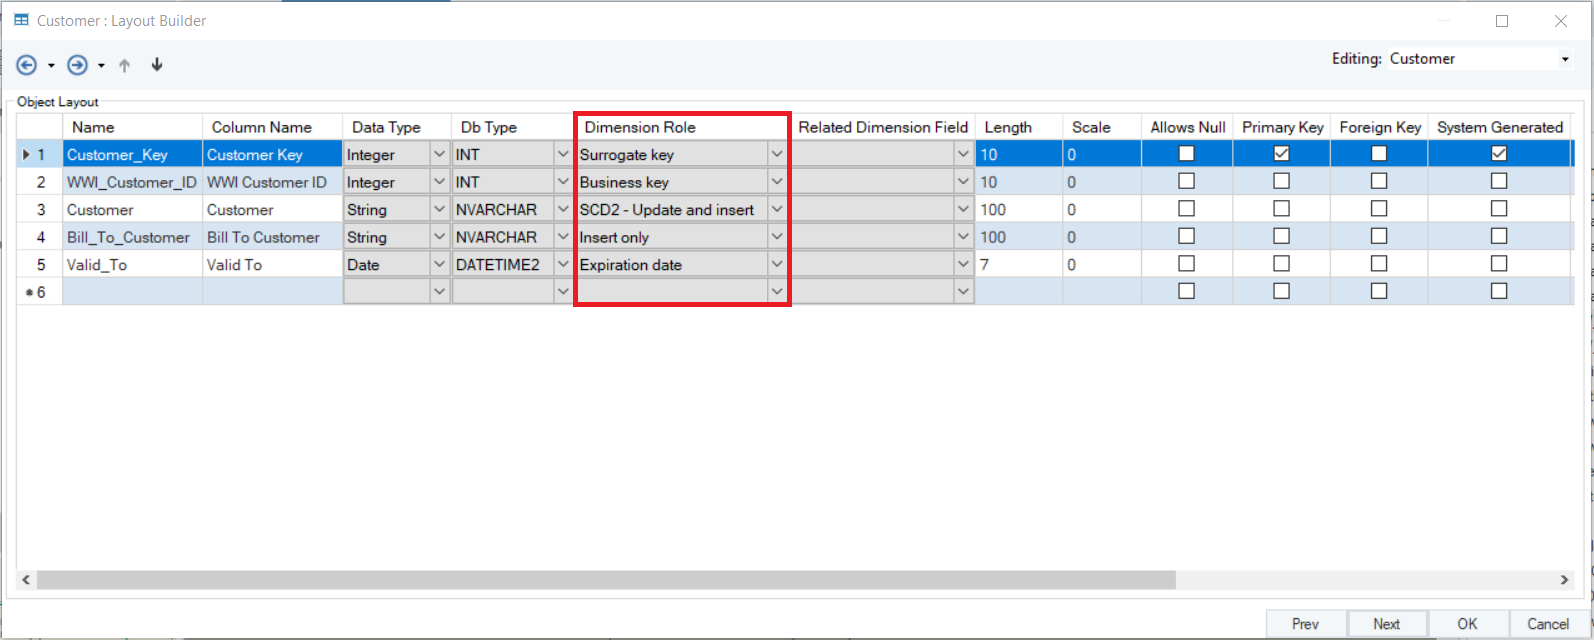
Dimension Role
The Dimension Role column in the layout builder provides a dropdown menu for you to assign a dimension-related role to each field present in the table. These roles mostly constitute Slowly Changing Dimension types and other SCD functions.

Insert Only: Stores a field value that will not be updated, regardless of any updates made to it. Otherwise known as SCD0.
Business Key: Holds the key that is normally used to identify records in the table.
SCD1 – Update: Stores an SCD value which will be updated if modified. The storage of historical data is not considered.
SCD2 – Update and Insert: Stores an SCD value which is expected to change over time. A new record is added each time the value changes. The validity of each record is indicated through additional fields.
Current Record Designator: Stores the Active Value if the record has the current version of the SCD value. Otherwise, it stores the Inactive Value. Active Value and Inactive Value should be entered in the appropriate cells in the grid next to the Current Record Designator.
Surrogate Key: Designates the field holding an extra system generated key that identifies versions of the SCD value with the same business key.
Effective Date: Stores the date at which the SCD value in a record became valid.
Expiration Date: Stores the date at which the SCD value in a record became invalid.
Version Number: Stores the version number of the SCD value.
Previous Surrogate Key: Stores the surrogate key of the previous version of the record.
SCD3 – Current Value: Stores the current value of an SCD Type 3 field.
SCD3 – Previous Value: Stores the previous value of an SCD Type 3 field.
SCD6 – Current Value: Stores the current value of an SCD Type 6 field.
SCD6 – Historical Value: Stores a historical value (not necessarily the previous value) of an SCD Type 6 field.
Placeholder Dimension: Caters to late arriving dimensions and early arriving facts.
In this dimension table, we have the following fields:
- Customer_Key: Surrogate Key
- WWI_Customer_ID: Business Key
- Customer: SCD2 – Update and Insert
- Bill_to_Customer: Insert Only
- Valid_To: Expiration Date
Adding Surrogate Key and Row Identifier Fields
In this case, the Customer dimension entity already contains fields that can be assigned the surrogate key and row identifier dimension roles. However, if your entity layout does not contain such fields, you can create them via the options that appear in the context menu when you right-click on the entity.
Note: In this case, the Add Surrogate Key option is disabled because the layout already contains a surrogate key field.
If you wish to add a row identifier to the layout or change the row identifier already present in the layout, click on the Add Row Identifier option. A pop-up window will allow you to choose from the list of row identifiers that are available in the product.
Once you’ve chosen an option from the list, you can name the new field using the textbox at the bottom of the window. Click OK to close the window and add the field to the dimension entity’s layout.
This concludes our discussion on dimension entities. In the next article, we’ll learn about date and time dimensions in Astera Data Warehouse Builder.

