Data Modeler – UI Walkthrough
Astera Data Warehouse Builder contains a built-in data modeler that you can use to create a data model from scratch or by reverse engineering an existing database. In this article, we will cover a detailed overview of the data modeler’s user interface.
Video
Overview
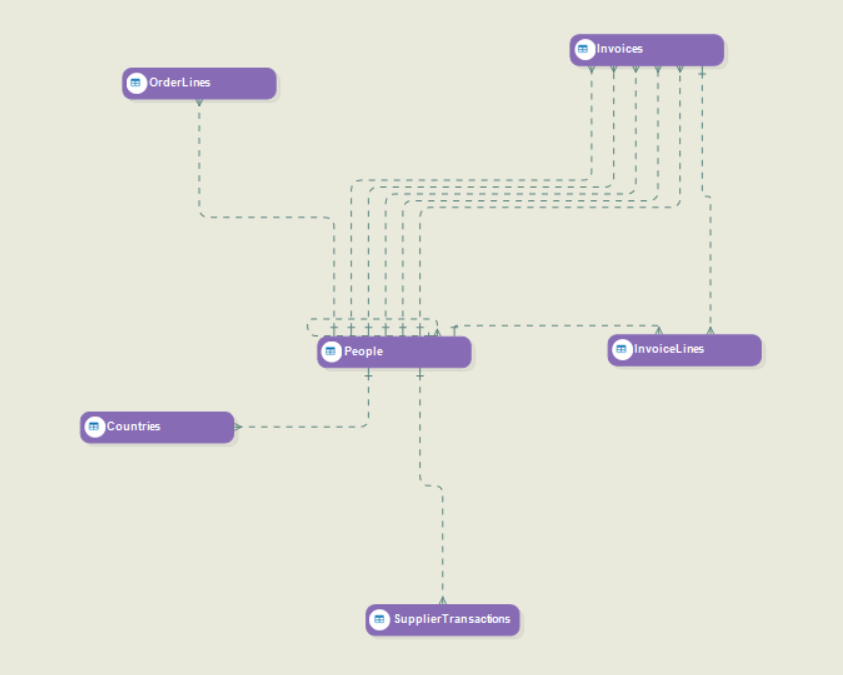
Let’s assume that we’ve created this data model by reverse engineering an existing database:
Toolbar
The data modeler contains a dedicated toolbar that provides an extensive list of options.

You will find the following options or shortcut icons on the toolbar, from left to right.
Undo: Allows you to undo an action that you’ve performed on the data modeler.
Redo: Allows you to redo an action that you’ve negated through the Undo option.
Auto Layout Diagram: Arranges the entities in a model to improve its visual representation.
Zoom: A dropdown menu that allows you to zoom in or out of a model.
Auto-Size All: Adjusts the size of each entity object.
Show Alias Labels: Displays the parent and child alias on each relationship link in the model.

Show Verb Labels: Displays the parent-to-child and child-to-parent verbs, if assigned by the user, on the relationship link. You can assign these verbs to each relationship via the Edit Relationship window.
Show Data Types: Displays the data types of each field in an entity. This option is only applicable if one of the following options has already been selected: View Entity and all Elements or View Entity and Keys.
View at an Entity Level: Reverts to the default setting of displaying only entity names on the data modeler.
View Entity and all Elements: Displays all of the elements or fields in each entity present in the model.
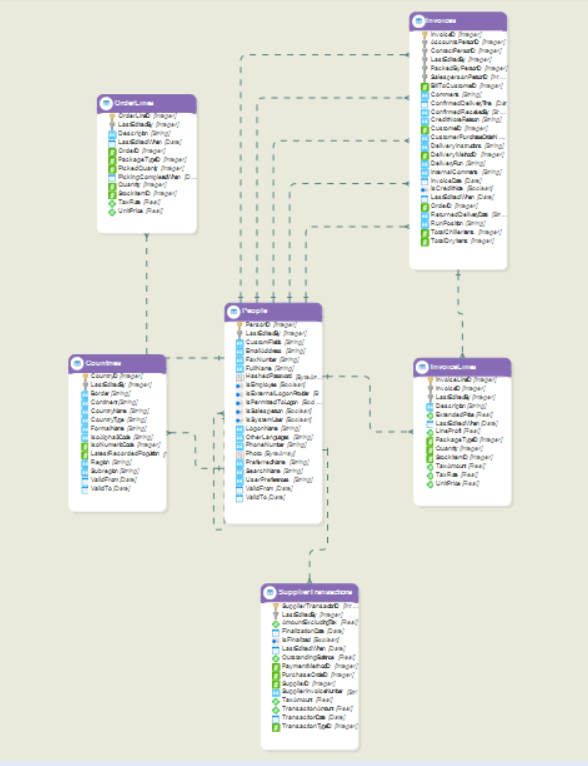
View Entity and Keys: Displays all of the primary and foreign keys in each entity present in the model.

Add Self Reference: Allows you to create a self-reference relationship within an entity. To learn more about how you can use this option, click here.
Link entities to create non-identifying relationships: Allows you to create non-identifying relationships between entities. To learn more about how you can use this option, click here.
Link entities to create identifying relationships: Allows you to create identifying relationships between entities. To learn more about how you can use this option, click here.
Pointer: Reverts back to the default pointer in case you had selected one of the options used to link entities and create relationships.
Infer Relationships from Field Names: Automatically assumes and creates relationships based on common field names between entities.
Denormalize Entities: Enables you to denormalize or combine two entities in the model.
Deploy Data Model: Enables you to deploy a data model. For more information on deploying a data model, click here.
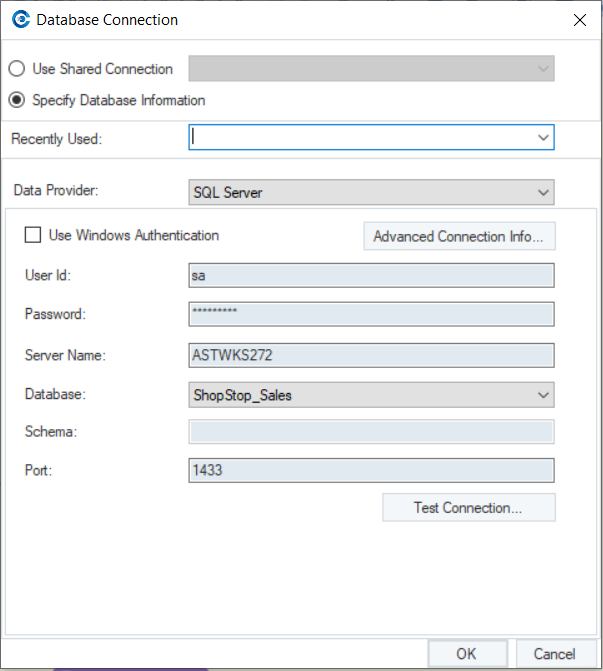
Change Database Connection Info: Allows you to change the database connection of the model via a Database Connection window.
Reverse engineer an existing database: Allows you to create a data model by reverse engineering an existing database. To learn more about the process of reverse engineering, click here.
Generate DDL Script: Allows you to create a DDL script from a data model. This option is also called Forward Engineering.
Toolbox
The toolbox includes a few objects which can be used as part of a model.
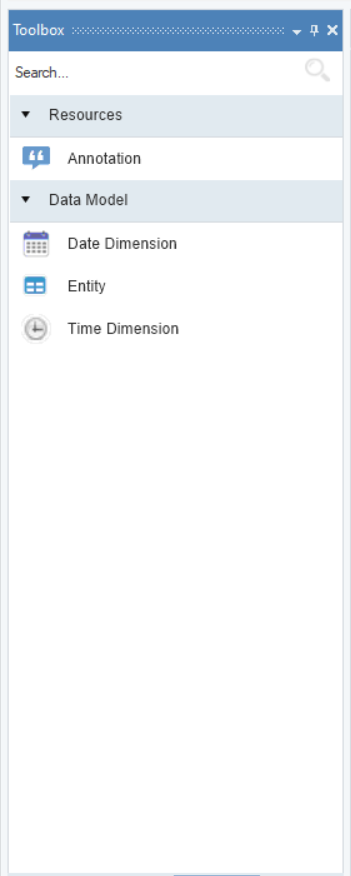
You can drag and drop any of these objects onto the data modeler.
Annotation: Provides a textbox for you to add a comment on the model.
Date Dimension: A non-editable date dimension entity that can be used as part of a dimensional model.
Entity: An editable general entity that can be added to an existing data model or used to create a data model from scratch. To learn about general entities, click here.
Time Dimension: A non-editable time dimension entity that can be used as part of a dimensional model.
For more information on date and time dimensions, click here.
Data Model Browser
The data model browser provides a single window for you to edit the data model and its components without having to look through the entire model and access the entities directly.
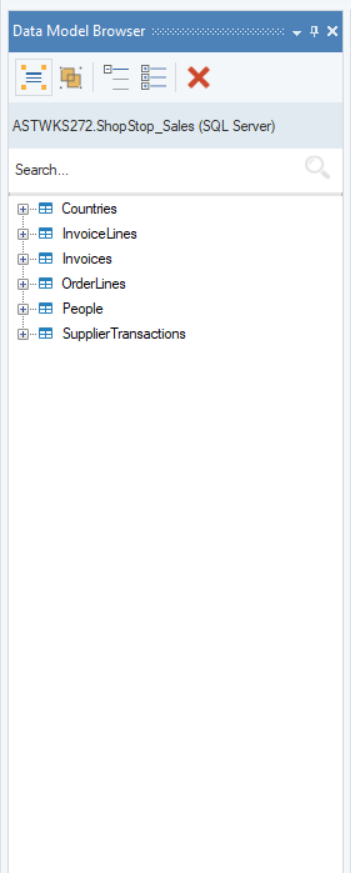
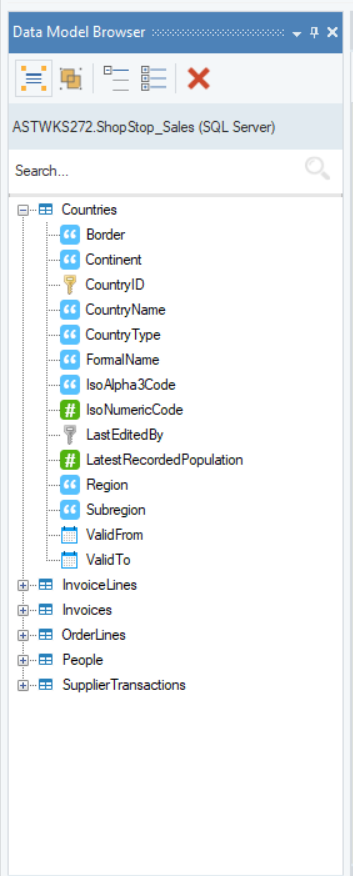
You can expand each entity to view the elements contained in it.
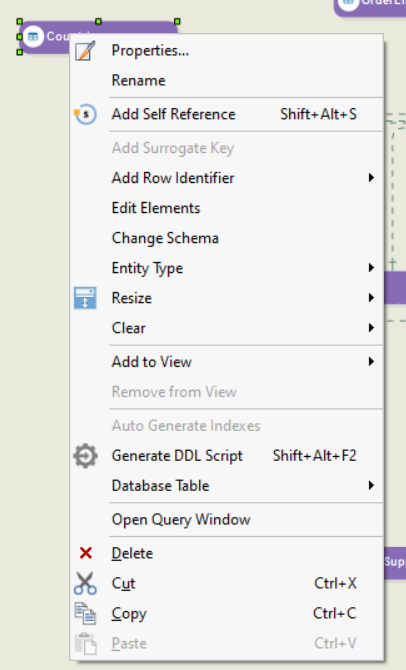
Moreover, you can right-click on an entity name and choose to go to the actual item in the data model.
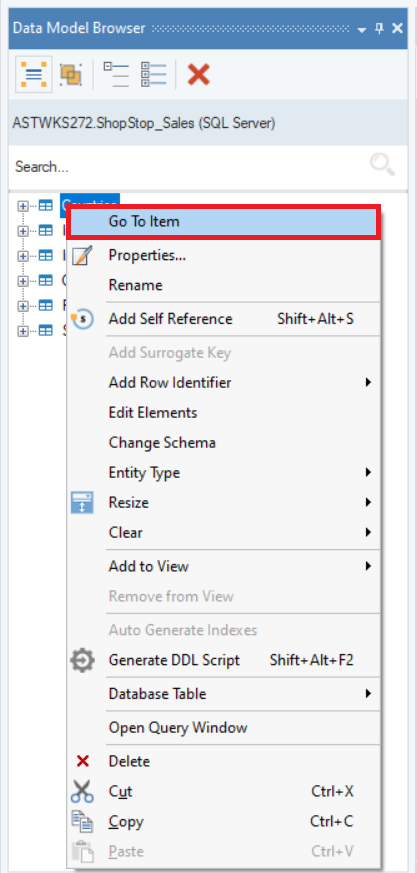
The other options available in the context menu are the same as those that appear when you right-click on an entity in the data model.
At the very top of the data model browser, a few options/icons are available.
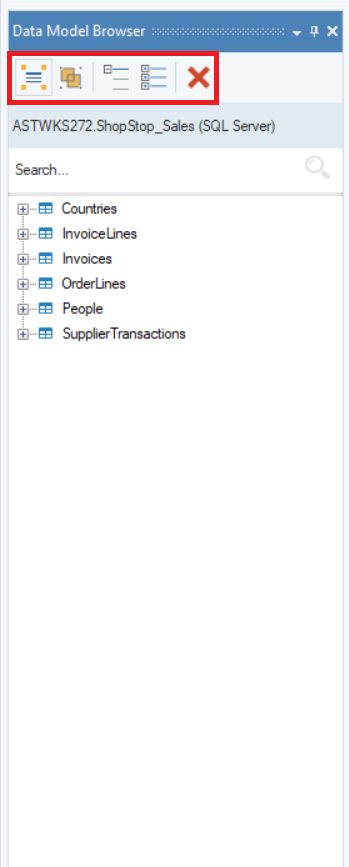
Sort Entities Alphabetically: Sorts the entity names in an alphabetical order. This option is selected by default.
Group Entities by Type: Creates separate nodes for each entity type. In this case, there’s only going be one node, General, if this option is selected.
Expand All: Expands all of the nodes in the data model browser.
Collapse All: Collapses all of the nodes in the data model browser.
Delete this object from the data model: Deletes the selected object from the data model.
You can use the search bar underneath these options to search for any specific entity or field in the model.
Views
At the bottom of the data modeler, you’ll notice a tab titled Main and an icon that represents the Add New View option.
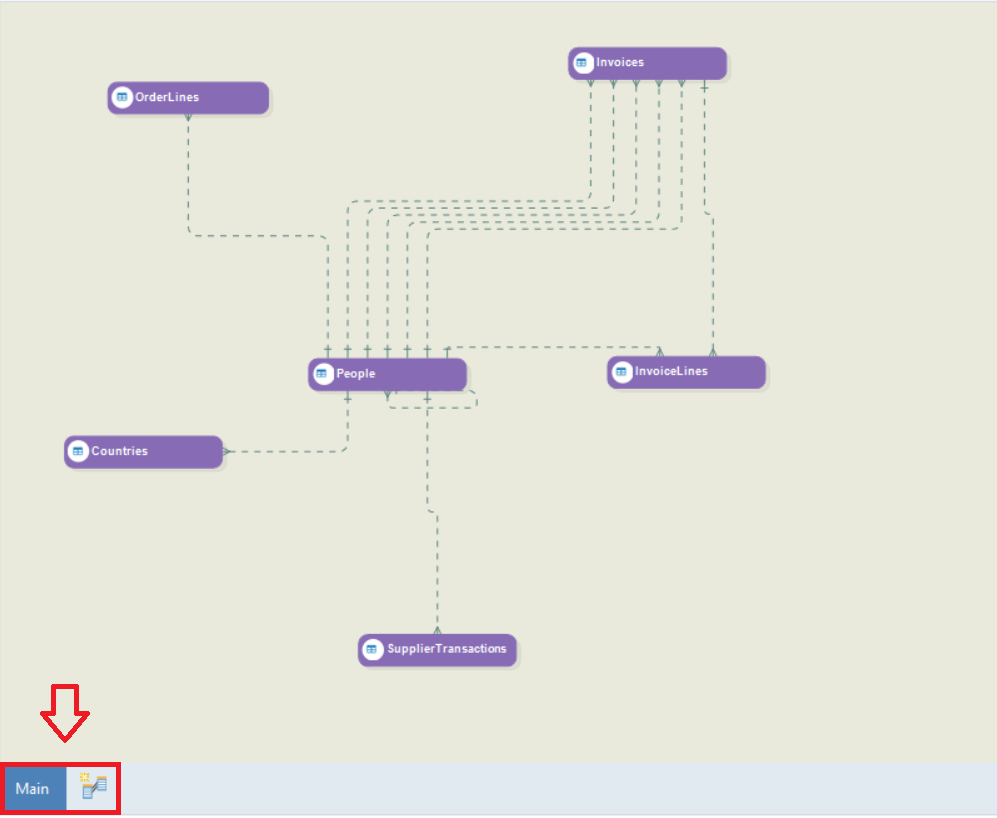
The Main tab contains a view of the complete data model. If you wish to add a new view consisting of a few specified entities, click on the Add New View icon. A blank designer will appear on the screen. Here, you can create a new view by adding entities from the existing model, which can be done in two ways.
1. Drag and drop the entities of your choice from the data model browser.
2. Right-click on the designer and select Add Existing Entities from the context menu.

The following pop-up window will appear on the screen:
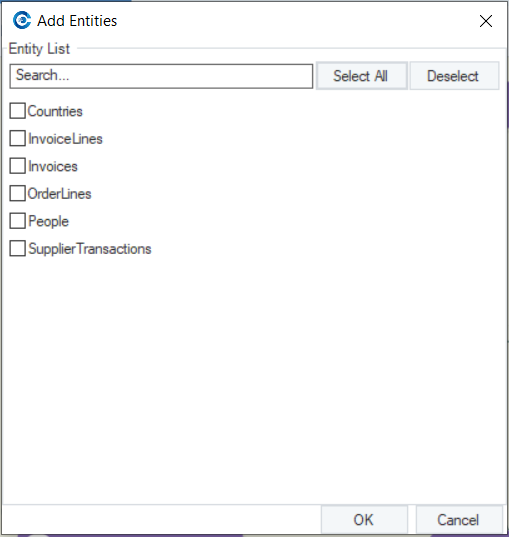
Here, you can select the entities you want to include in the new view. In this case, we’ll select People, Invoices, and InvoiceLines.
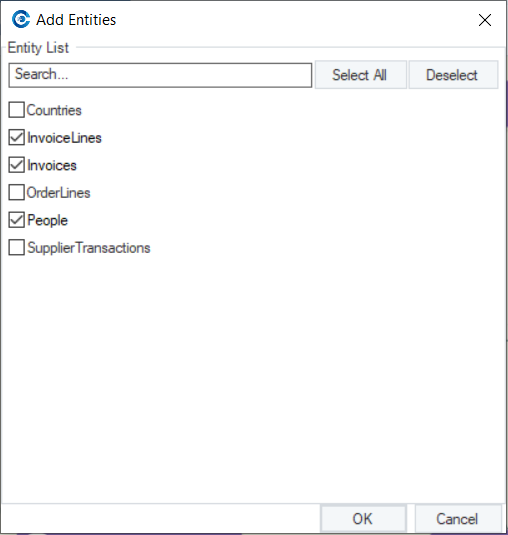
Once you’re done selecting the entities, click OK.
A new view consisting of the selected entities will appear on the screen.
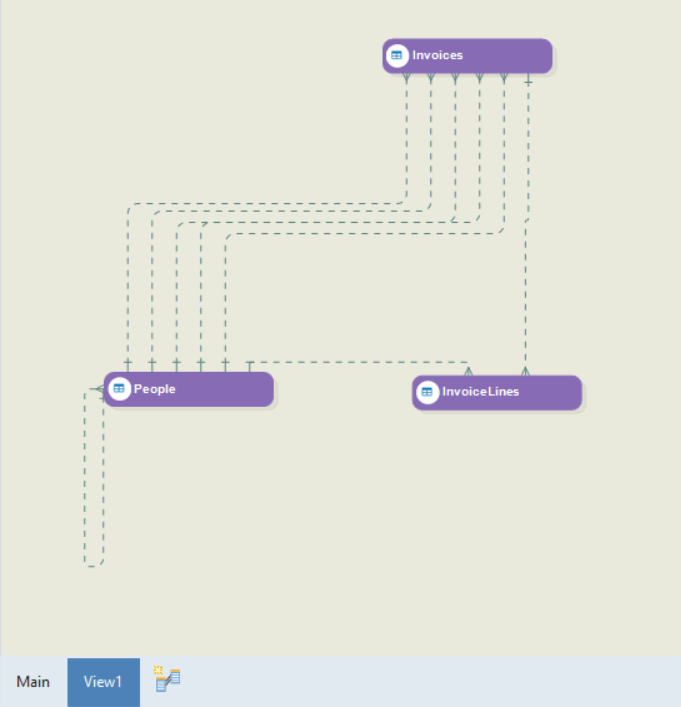
Using the tabs at the bottom, you can switch between different views of the same model.
This concludes our walkthrough of the data modeler’s user interface. In the next article, we’ll talk about how you can reverse engineer an existing database.