General Entity Properties
In Astera Data Warehouse Builder, a general entity represents a read-only table. In essence, it represents a table that could contain readable data but does not require any data to be written to it. All entities are marked as general entities by default when a database is reverse engineered unless you change their type manually. Moreover, you can also add new general entities to your data model via the toolbox.
In this article, we will be discussing the properties of a general entity in a data model.
Video
How to Access the Properties of an Entity
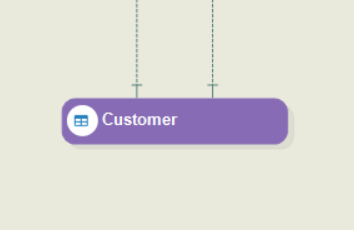
Here, we have a general entity named Customer, which is part of a sample data model that we’ve created by reverse engineering an existing database. To learn about reverse engineering, click here.
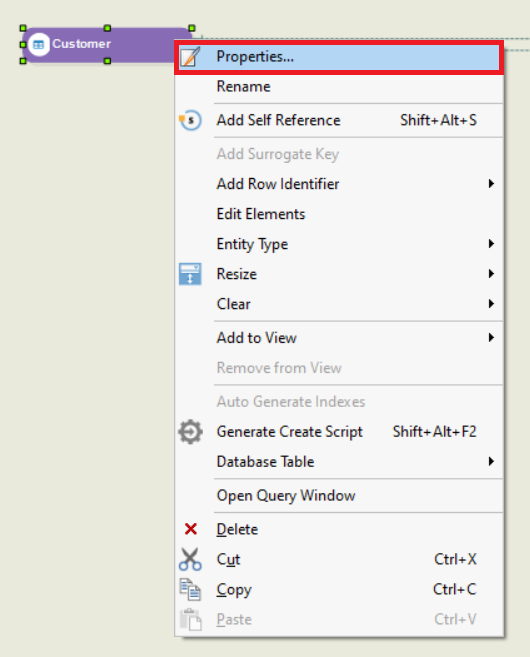
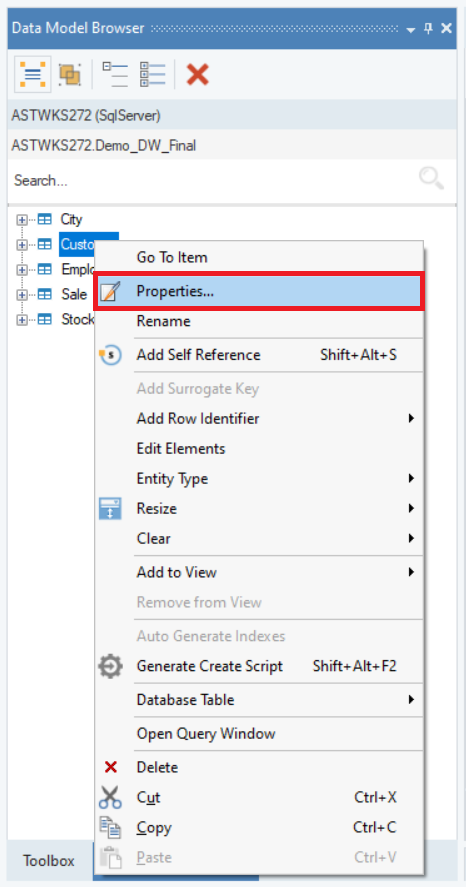
You can access the properties of an entity in three ways:
- Double-click on the entity header.
- Right-click on the entity header and select Properties from the context menu.
- Right-click on the entity name in the Data Model Browser and select Properties from the context menu.
On performing one of these actions, a configuration window will appear on your screen. You can use this window to modify the properties of the entity.
Entity Properties
The first screen of the configuration window is the Entity Properties screen. Here, you can see and change some general information regarding the table.
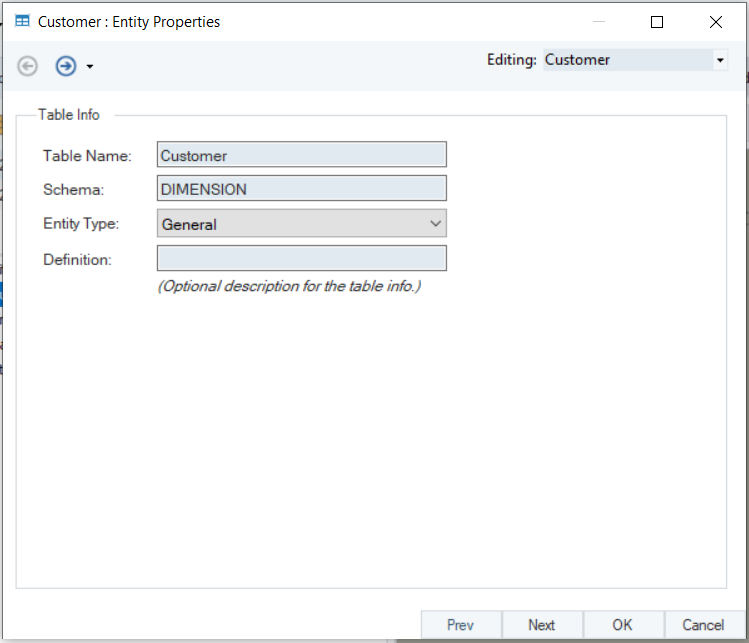
Table Name: Using this text box, you can change the name of the table.
Schema: Using this text box, you can change the schema of the table.
Entity Type: From this dropdown menu, you can select an entity type from the following options.
Definition: Here, you can enter an optional description for the table.
The following options are available in the Entity Type dropdown menu:
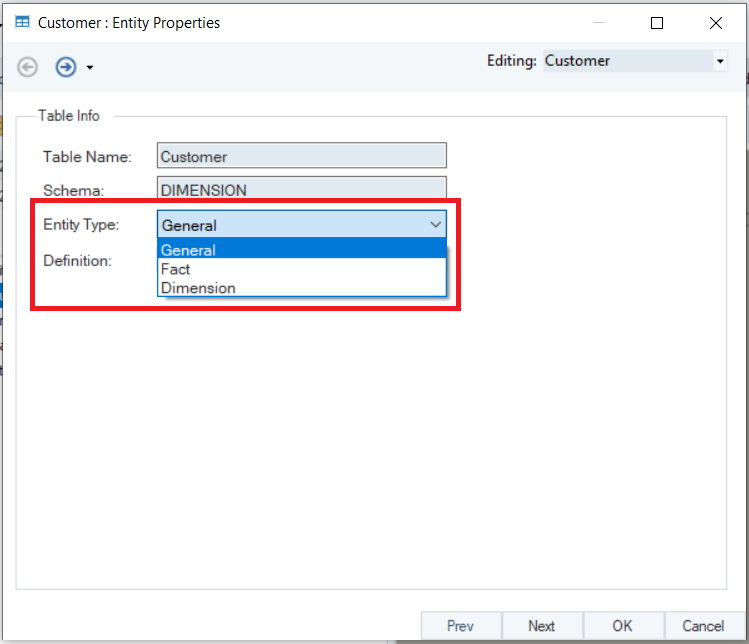
- General: When this type is selected, the entity layout will not contain Fact Field Type options or SCD (Slowly Changing Dimensions) Field Type options. Therefore, the entity will represent a general table.
- Fact: When this type is selected, the entity layout will contain Fact Role options. Therefore, the entity will represent a fact table. To learn about fact tables, click here.
- Dimension: When this type is selected, the entity layout will contain Dimension Role options. Therefore, the entity will represent a dimension table. To learn about dimension tables, click here.
Fact and dimension tables are an integral part of dimensional modeling. For more information on dimensional models, click here.
Click Next to move to the Layout Builder screen.
Layout Builder
Here, you can modify the layout of the table by adding or removing fields.
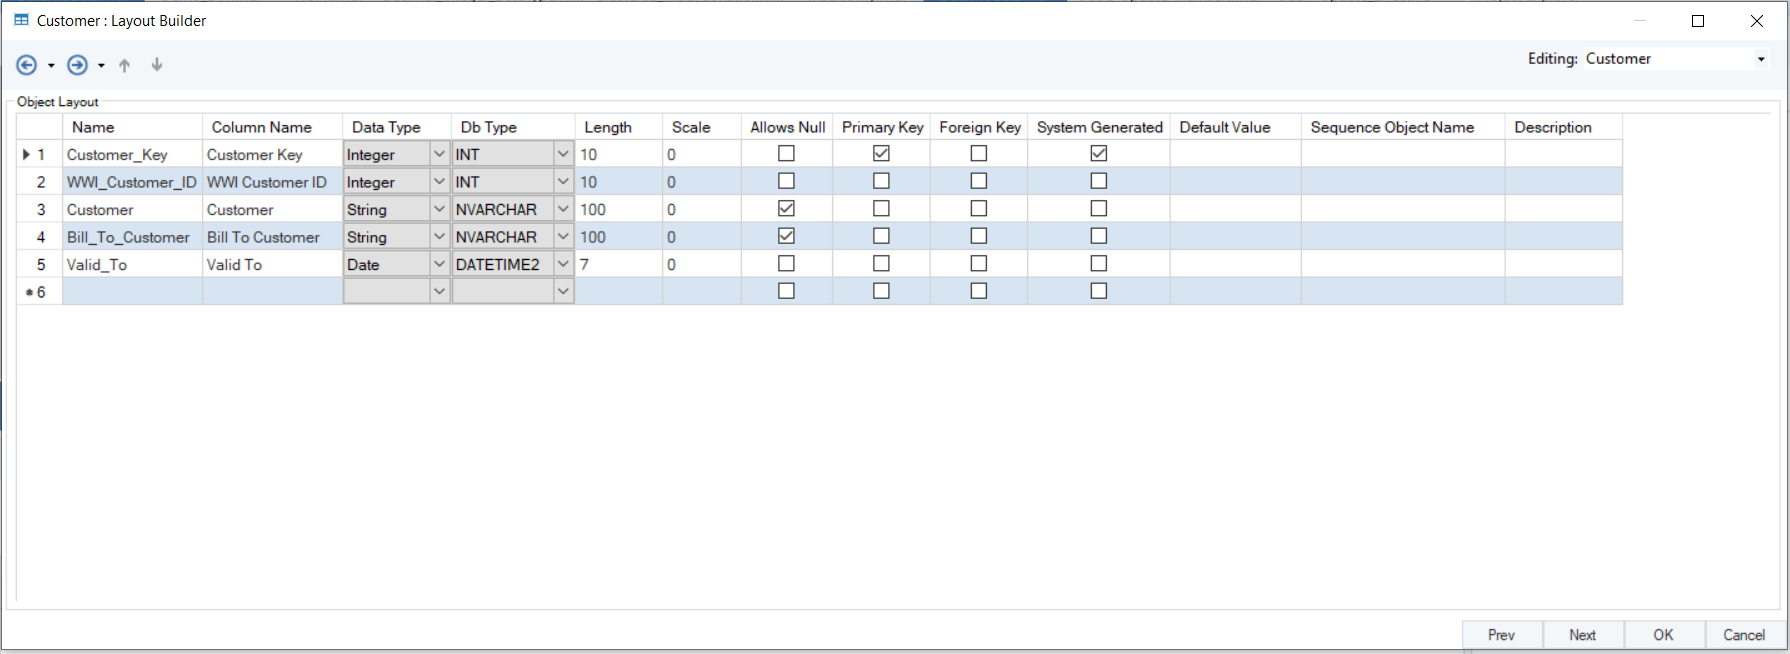
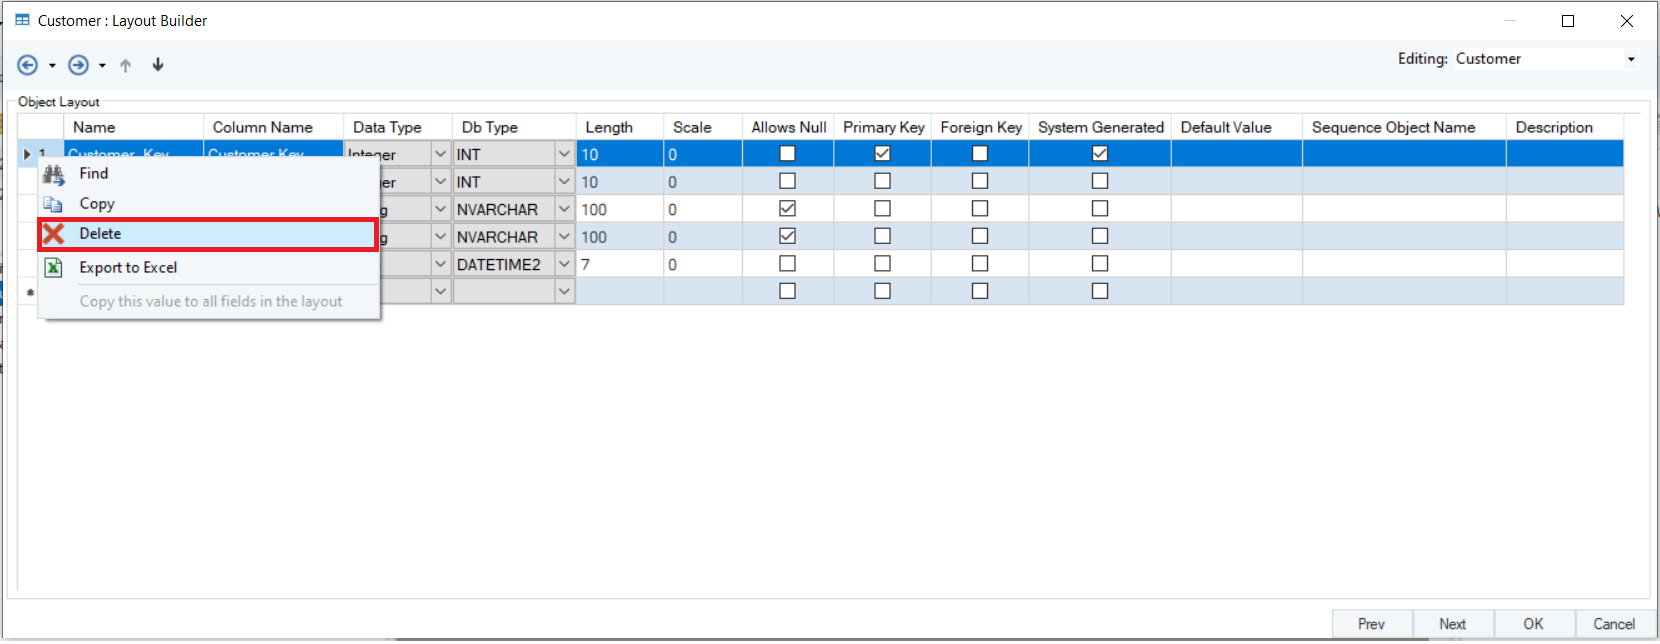
To remove a field, right-click on it and select Delete from the context menu.
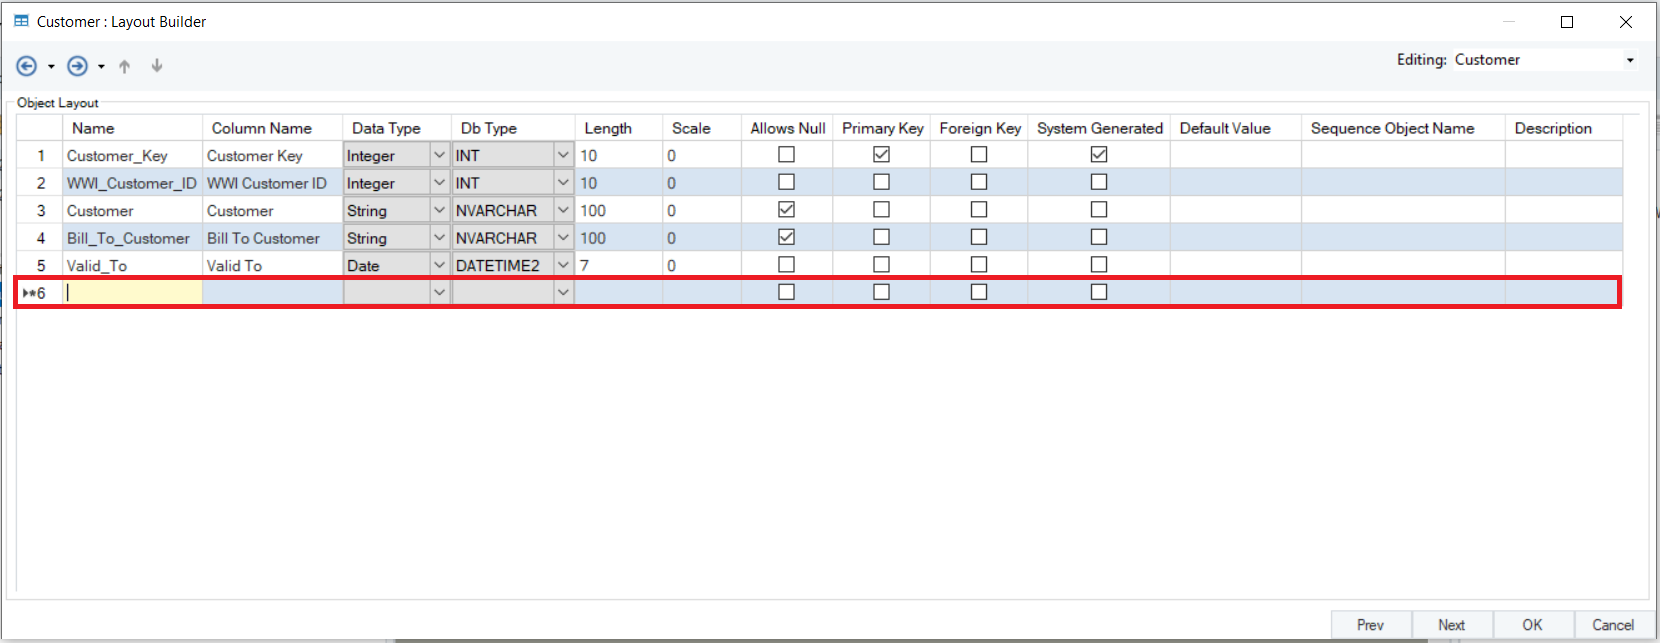
To add a new field, click on the empty row at the bottom, enter a field name, and specify its properties.
You can move a selected field up or down the table layout using the up and down arrow icons at the top of the screen.
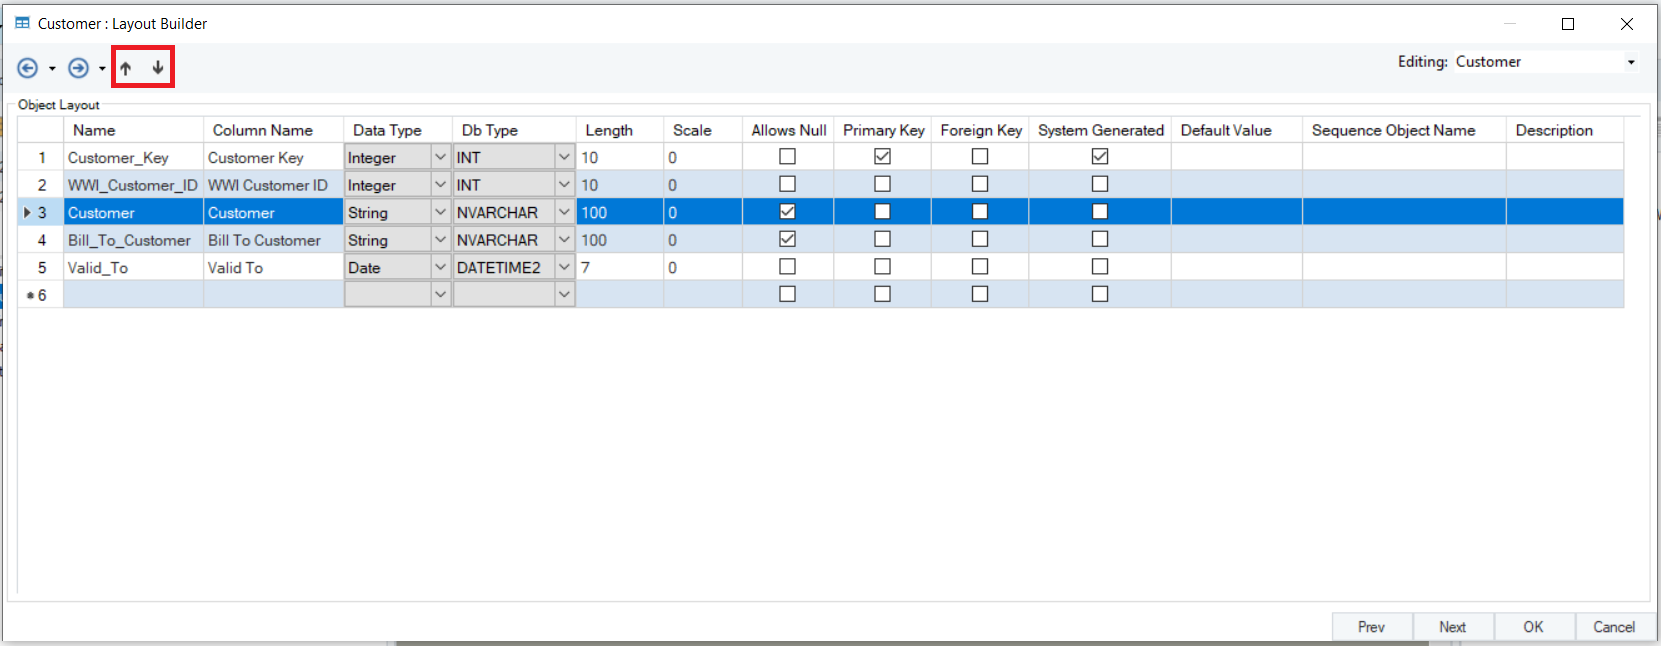
Once you’ve modified the entity layout according to your requirements, click Next.
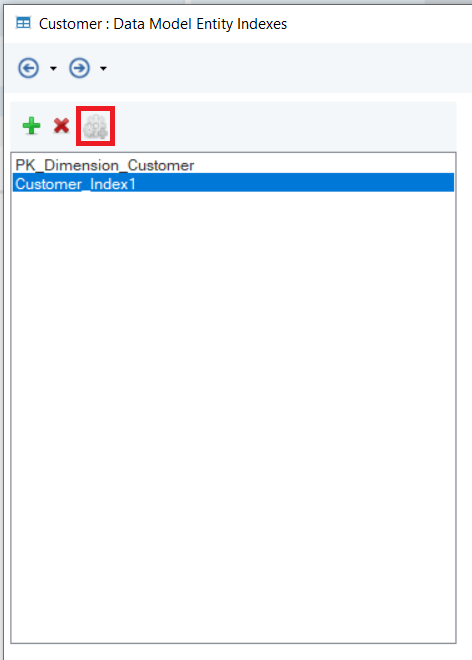
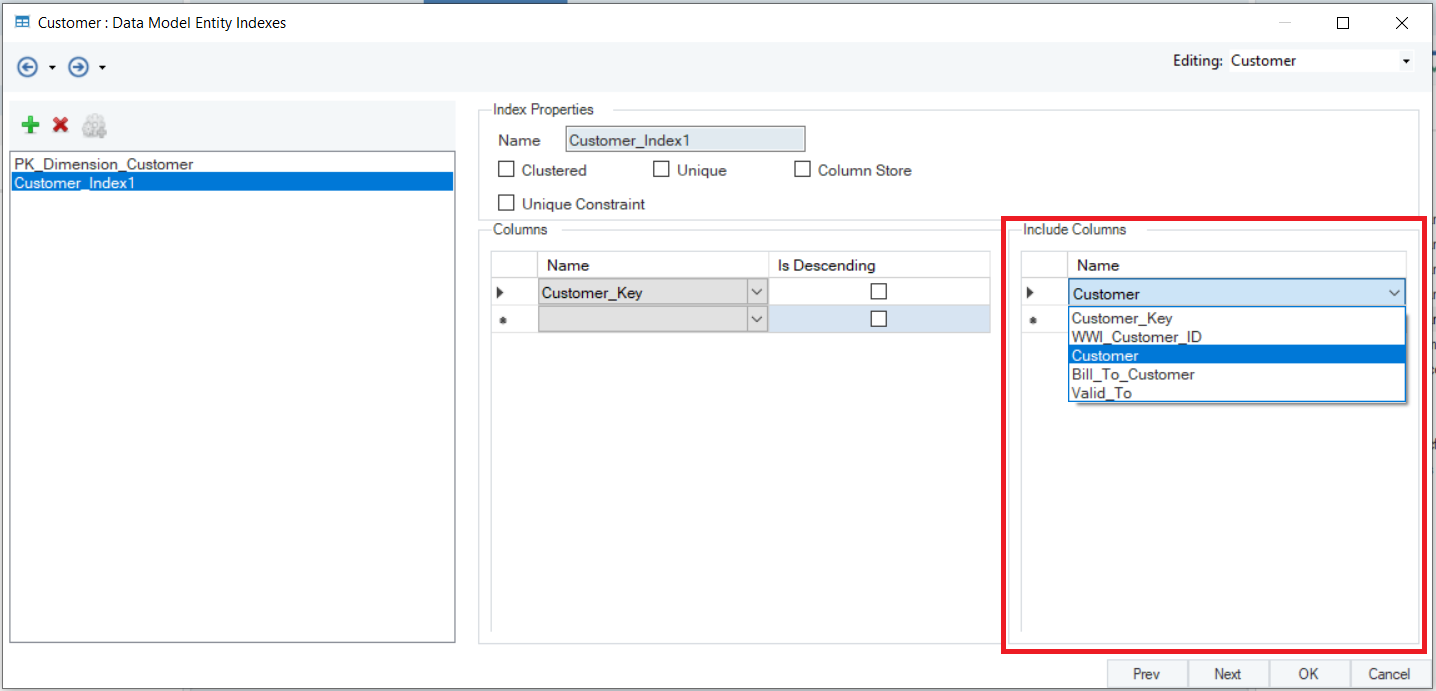
Data Model Entity Indexes
On the Data Model Entity Indexes screen, you can create indexes to increase the speed of data retrieval based on a field or a set of fields.
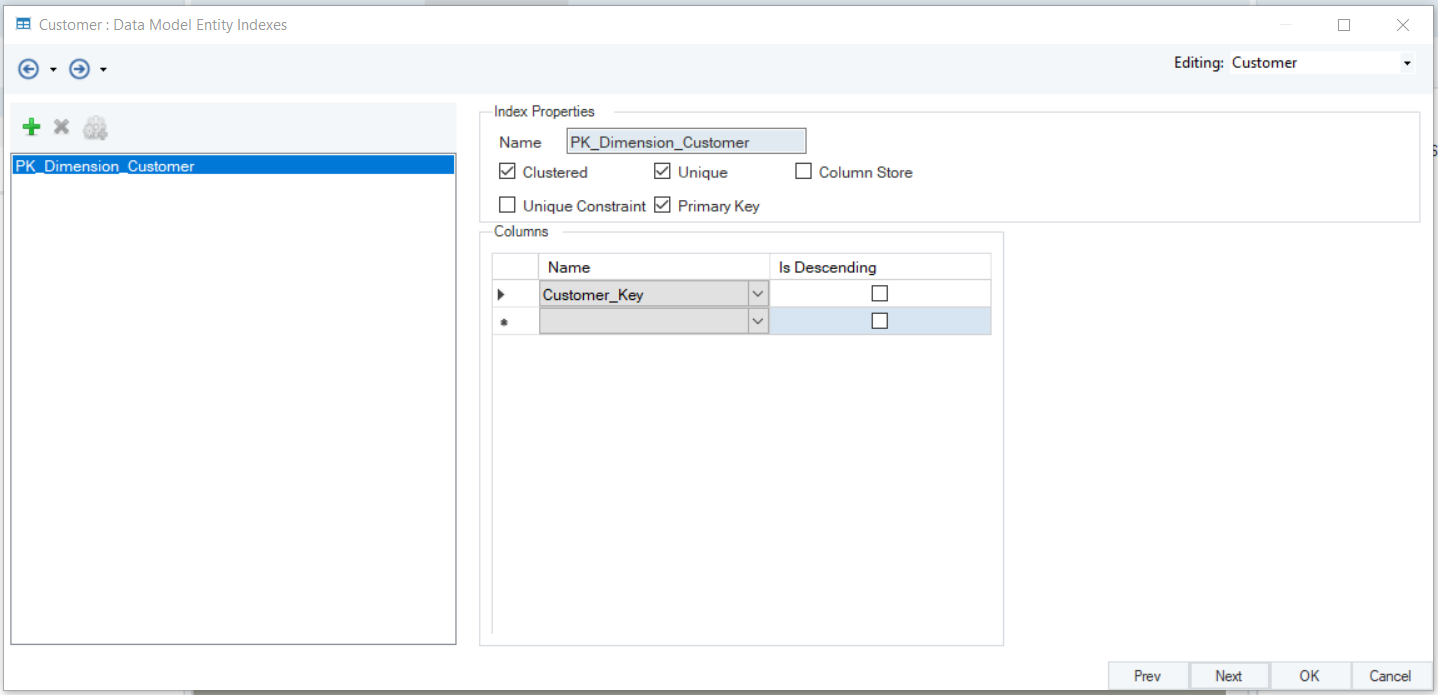
In this case, the Index List contains a pre-existing index. This is the primary key index that was already present in the database from which this entity was reverse engineered.
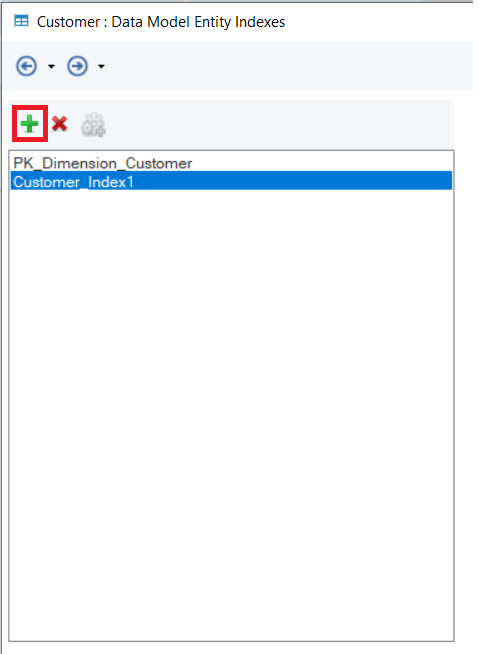
To add a new index to the Index List, click on the Add Index icon on the top left of the screen.
To delete an existing index, click on the Delete Index icon.
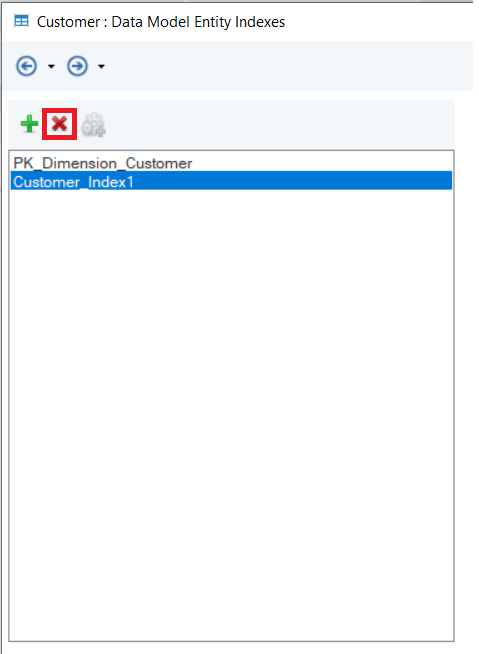
Note: The Delete Index icon is disabled when you select the primary key index.
You can also auto-generate indexes based on field characteristics using the Auto-Generate Indexes icon. This icon is only enabled for fact and dimension entities.
Once you click on the Add New Index icon, a new index with a default name is added to the Index list. You can customize this index using the Edit Index options.
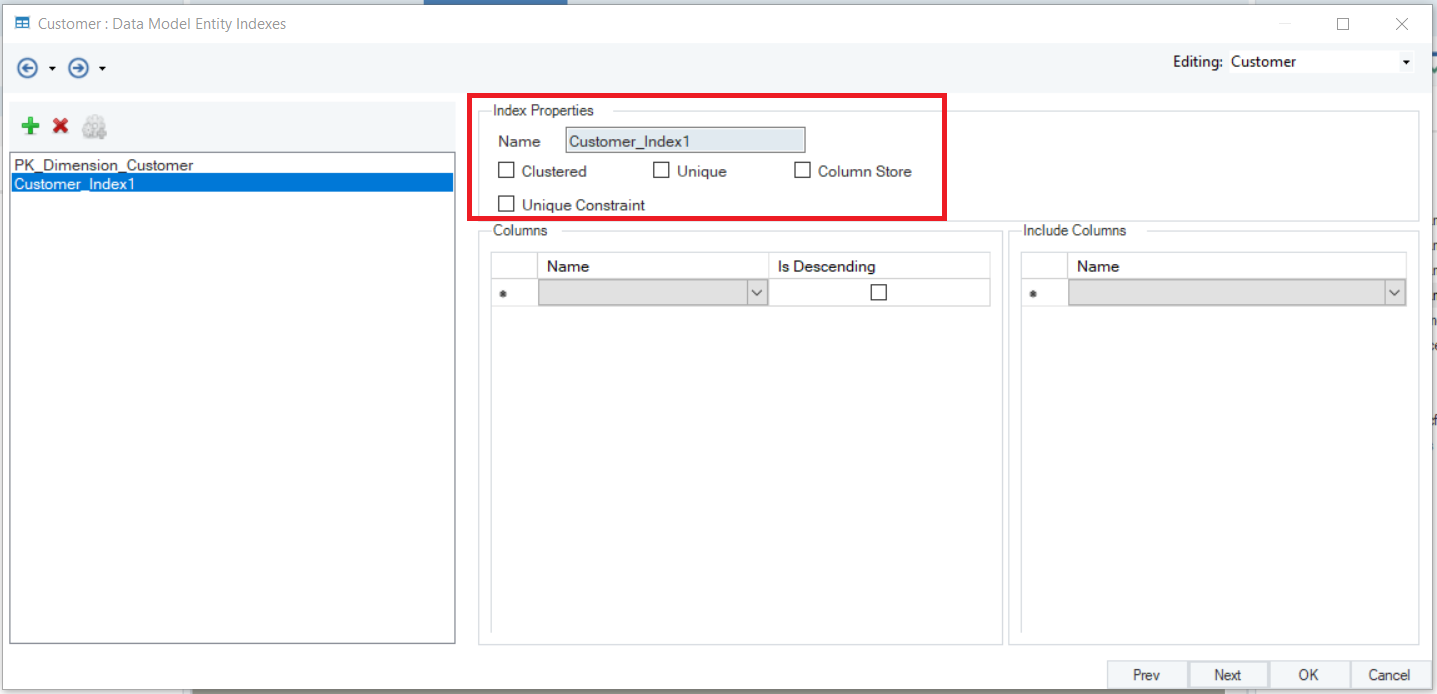
Name: Using this text box, you can change the index name.
Using the provided checkboxes, you can specify the index type.
- Clustered: A clustered index specifies the order in which records are physically stored in a table. We can only have one clustered index per entity.
- Unique: A unique index ensures that two or more rows of data do not contain the same value.
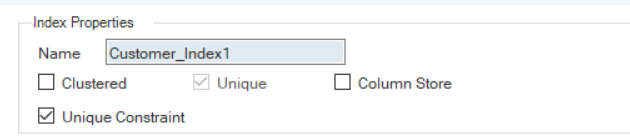
- Unique Constraint: A unique constraint has the same function as a unique index. When a unique constraint is created for a column, a corresponding unique index is also created for that column. Therefore, when you check this option, the Unique option is automatically checked and disabled.
- Column Store: A column store index uses a columnar data format to retrieve data.
Using the dropdown menu under the Columns section of the screen, you can specify the key column(s) of the index.
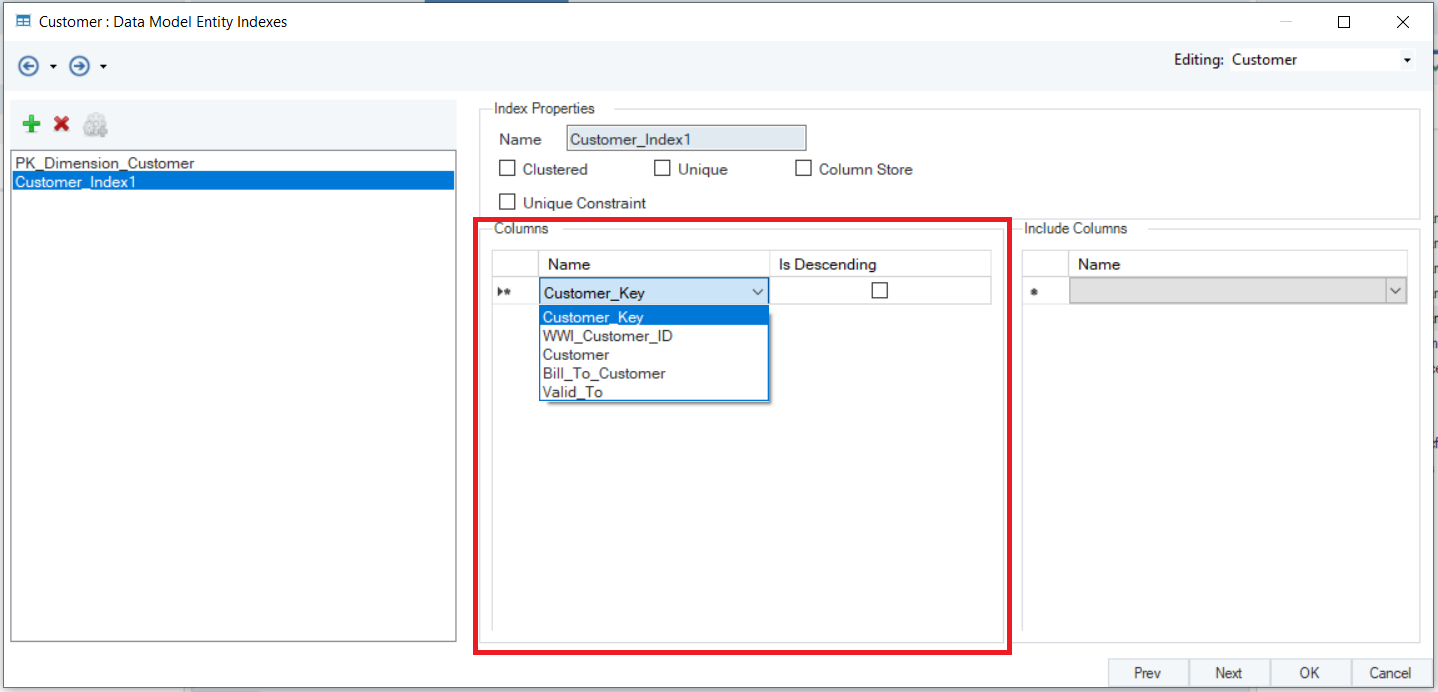
If you wish to include any non-key columns to the index for further optimization, you can utilize the dropdown menu available under the Include Columns section of the screen.
Once you’ve created your desired index or indexes, click OK to exit the configuration window.
This concludes our discussion on general entity properties in a data model. In the next article, you’ll learn how to create and edit entity relationships in Astera Data Warehouse Builder.