Workflows with a Dynamic Destination Path
Workflows are designed to orchestrate an automated and iterative execution of ordered tasks. When designing workflows to orchestrate a process, it requires a source object that can provide access to a directory containing bulk load of source files (in a similar format). A workflow is designed such that each source file in that particular directory goes through the same data processing.
This requires a source file to be replaced in the run-time until all the source files within a directory are processed and loaded to destination. Now, this further involves the associated destination files to be replaced in the run-time as well hence providing a dynamic destination path. For example, a source directory containing 100 excel files in such a workflow will create 100 destination files after going through the process.
In this document, we will learn to create workflows with a dynamic destination path that directs Centerprise to create a unique destination file for each source file.
Creating a Workflow
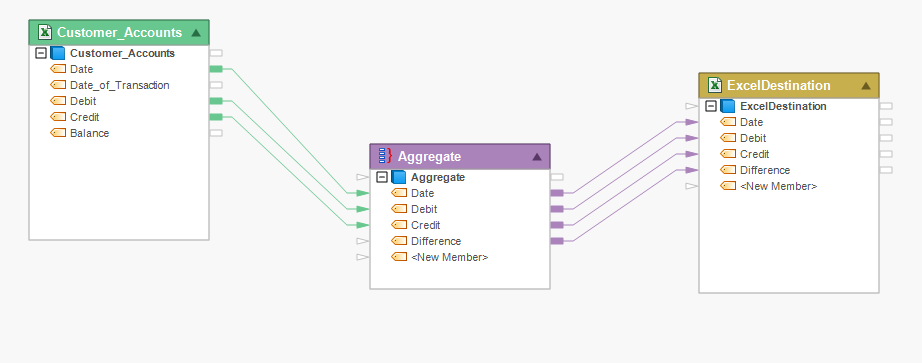
In this case, we are orchestrating a simple dataflow that contains customer account details coming in through an Excel Workbook Source. The source data is passed through an Aggregate Transformation and loaded to an Excel Workbook Destination.
Now, there are 100 Excel source files in a directory containing customer account details of 100 customers. Each of these customer account files must go through the aggregate transformation and loaded to a distinctive Excel destination file.
For this purpose, we will create a workflow.
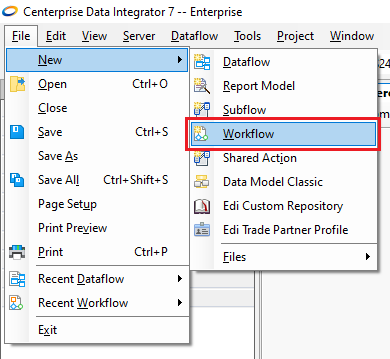
1. Open a new workflow by going to File > New > Workflow.
2. To provide access to the local source directory containing 100 customer account files, go to Toolbox > Sources > File System Item Source and drag and drop the File System Item Source object onto the workflow designer.

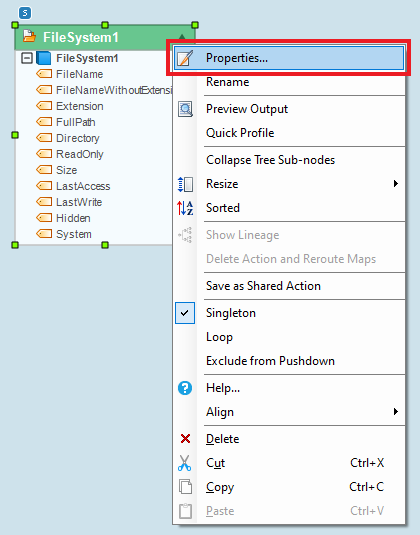
3. Right-click on the object’s header and select Properties from the context menu. A configuration window will open up.
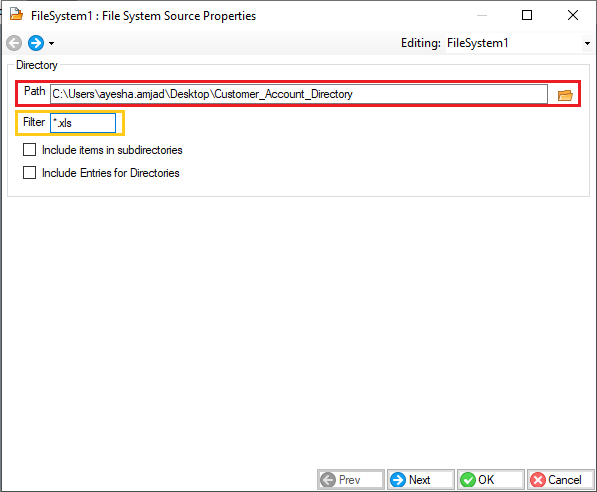
4. Provide the local directory path in File Location. Apply a filter ***.xls ** and click OK.
5. Right-click on the File System Item Source object’s header and select Loop from the context menu. This will direct Centerprise to run the task in a loop ultil all the source files have been processed through it.
6. Go to Toolbox > Workflow Tasks > Run Dataflow and drag and drop the Run Dataflow object onto the workflow designer. Map the header output port of File System Item Source onto the header input port of Run Dataflow object.
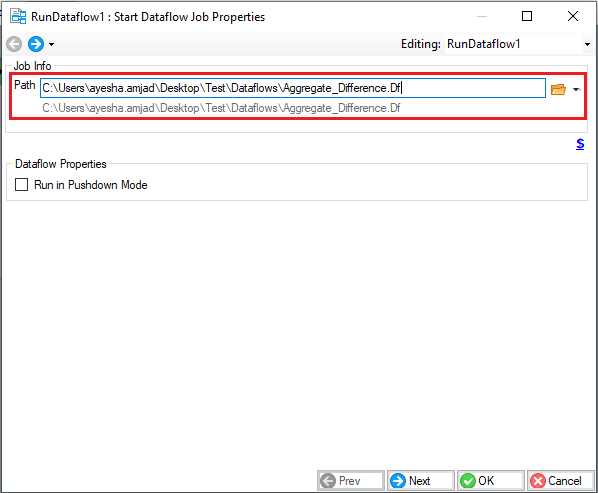
7. Right-click on the Run Dataflow object’s header and select Properties from the context menu. Here, provide the Job Info path for the dataflow that is being orchestrated and click OK.
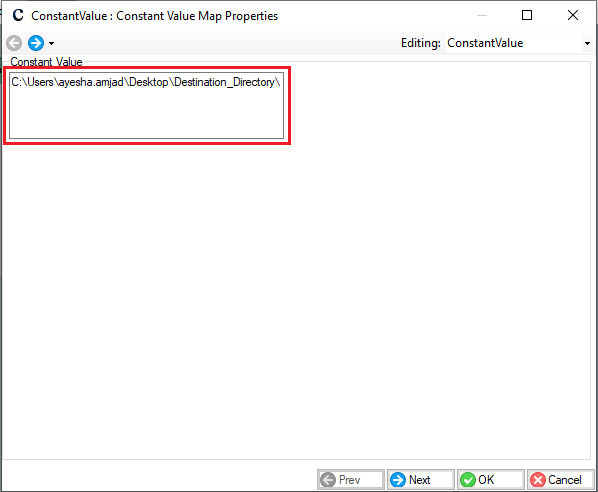
8. Go to Toolbox > Transformation > Constant Value, drag and drop the Constant Value transformation object onto the workflow designer. Double-click on its header, a Constant Value Map Properties window will open.
9. Paste the path to the folder where Centerprise will load the destination files, in the Constant Value box as shown below. Click OK.
10. Go to Toolbox > Transformation > Expression, drag and drop the Expression transformation object onto the workflow designer. Double-click on its header, a Layout Builder screen will open.
11. On this Layout Builder screen, create four new fields and set the data type accordingly.
- FullPath
- DestinationDirectory
- FileName
- DestinationFilePath
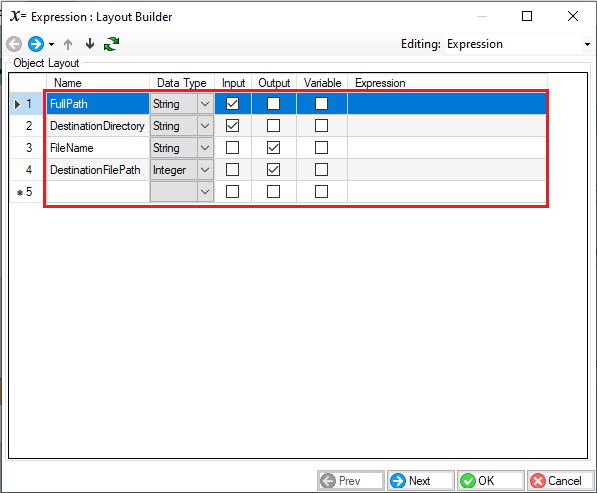
Click OK.
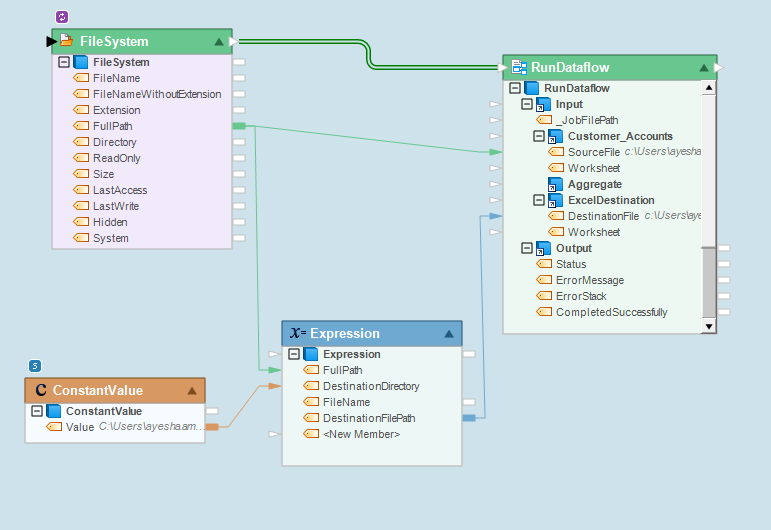
12. Define field mappings as follows:
- FullPath field under FileSystem source object onto the FullPath field under Expression transformation object.
- FullPath field under FileSystem source object onto the SourceFile field under RunDataflow task object.
- Value field under Constant Value transformation object onto the DestinationDirectory field under Expression transformation object.
- DestinationFilePath field under Expression transformation object onto the DestinationFile field under RunDataflow task object.
13. Double-click on the header of Expression transformation object. A Layout Builder screen will open. Write the following expressions for these fields:
- FileName : LSplit(RSplit(FullPath,2,”\”,0),2,”.”,0)
- DestinationFilePath : DestinationDirectory+FileName+”.xls”
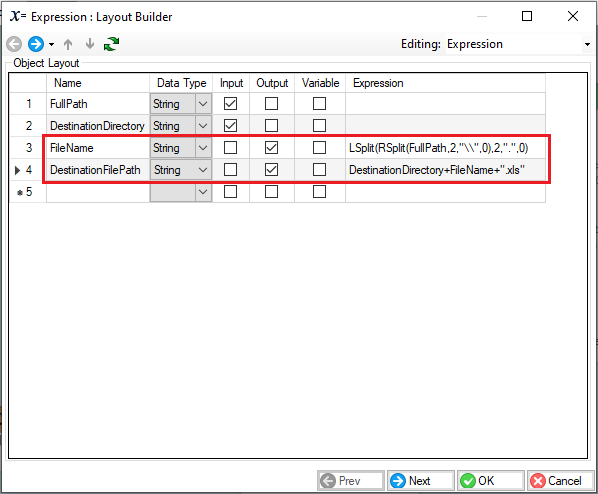
Click OK. A dynamic destination file path has been created.
14. Click on Start Workflow icon placed in the toolbar at the top to execute this workflow.
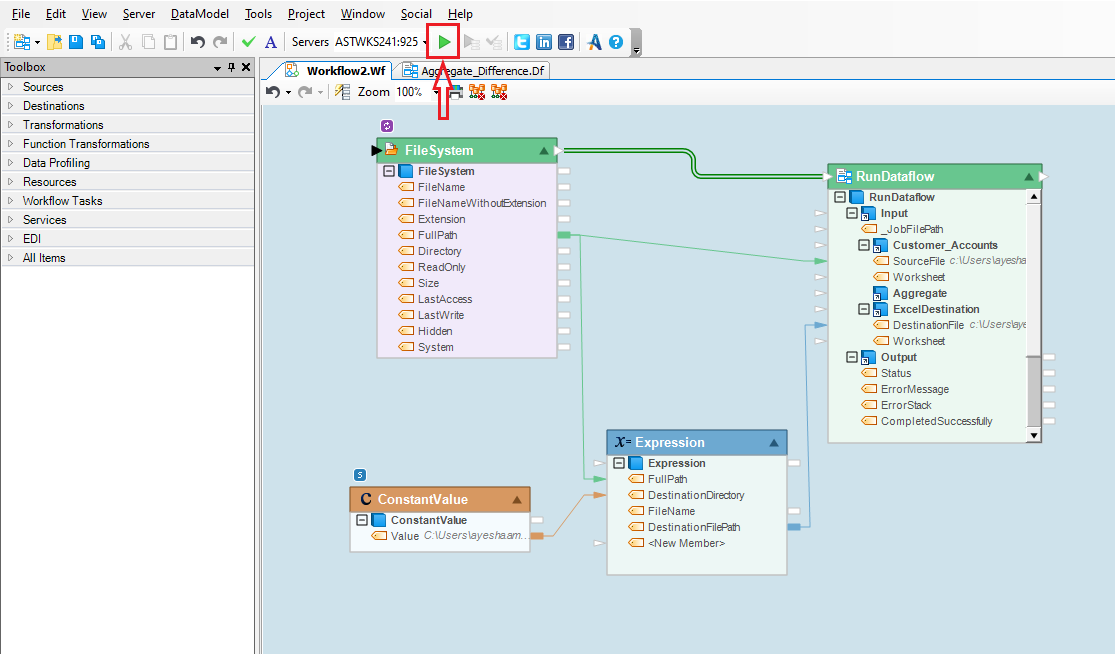
This will create a unique destination files for each source file.