Database Write Strategies
When your dataflow writes into a destination database table, you can configure the database write action (such as Insert, Update, Upsert, or Delete) directly in the Database Table Destination object’s properties, or enable the ‘Single port’ use by the Database Table Destination object linking it to a database write strategy.
An example of using a database write strategy is shown below.

Using a database write strategy allows you to implement advanced logic for handling data updates, using one of the strategies supported by Centerprise.
Centerprise supports the following database write strategies.
- CDC Hash
- Data Driven
- Diff Processor
- Slowly Changing Dimensions
CDC Hash
This is similar to incremental database updates in transfer settings. CDC Hash strategy adds records incrementally to the destination as new records are created in a source feeding into that destination. This improves performance by skipping the reading/writing of records that already existed at the time the dataflow previously ran.
To add a CDC Hash write strategy, open the Flow toolbox, expand the Database Write Strategy group, and drag-and-drop CDC Hash object on the dataflow.
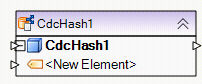
An example of what a CDC Hash object looks like is shown below.
The following properties are available to help you configure the logic of your database update:
Meta Object Builder screen is used to add or remove fields in the field layout, as well as select their data type.
Note: To quickly add fields to the layout, drag and drop the node Output port of the object whose layout you wish to replicate into the node Input port of the CDC Hash object. The fields added this way show in the list of fields inside the node and as well as in the Meta Object Builder.
Incremental Write Options screen:
Select Field for Matching Database Record. – specifies a field (or a combination of fields) that will be used to match incoming records with records that already exist in the destination table.
Case-sensitive. Turn this option on if you need a case-sensitive match of the matching field’s value. The matching is case-insensitive by default.
Sort Input. Turn this option on only if the values in the matching field (or fields) are not already sorted.
Output Options:
Single Output: This is the default selection when using a database write strategy. Single Output means that the database action, such as Insert, Update, Delete, Skip or Error will be chosen by the database write strategy’s logic rather than specified by the user. Using a single output is recommended when a database write strategy is applied.
One Port for Each Action – adds extra flexibility in letting you specify maps for each of the database write actions, such as Insert, Update, Delete, Skip or Error. Each set of maps is completely independent of one another, and will be applied according to logic of the database write strategy.
Incremental Transfer Information File Path – specifies the file path of the CDC file. A CDC file is required for incremental transfers. This file logs which records were previously transferred, so that appropriate records can be skipped during the next dataflow run.
Resetting a CDC file will result in a full transfer of data from source to destination the next time the dataflow runs.
Note: To ensure that your dataflow is runnable on a remote server, please avoid using local paths for the CDC file. Using UNC paths is recommended.
To reset a CDC file, click Reset button on the Incremental Write Options screen.
General Options screen
The Comments input allows you to enter comments associated with this object.
Data Driven
Data Driven strategy processes records based on some predefined criteria, which are expressed in the form of rules. For example, insert records whose LTV > 80, or delete records where CreatedDtTm < UpdatedDtTm.
Each rule has a database action associated with it, such as Insert, Update, Delete or Error. If a record does not pass a rule, the record will be tried against the next rule on the list, until all rules are exhausted.
To add a Data Driven write strategy, open the Flow toolbox, expand the Database Write Strategy group, and drag-and-drop the Data Driven object on the dataflow.
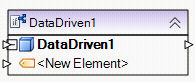
An example of what a Data Driven object looks like is shown below.
The following properties are available to help you configure the logic of your database update:
Meta Object Builder screen allows you to add or remove fields in the field layout, as well as select their data type.
Note: To quickly add fields to the layout, drag and drop the node Output port of the object whose layout you wish to replicate into the node Input port of the Data Driven object. The fields added this way show in the list of fields inside the node and as well as in the Meta Object Builder.
Data Driven Write Strategy Conditions screen allows you to manage rules and associate them with database actions.
To add a new rule, follow these steps:
1. Click the  icon to create a new rule.
2. Type a descriptive name for the rule in the Description field.
3. Make the rule active by checking the Active checkbox.
4. Select a database action, such as Insert, Update, Delete or Error, in the Perform Database Action dropdown. This action will be applied when the rule holds.
5. In the When the Following Condition Holds input, enter the expression making the rule. For example, LoanAmount < 320000. Or click … to open Expression Builder, a tool that allows you to visually build your rule using Record tree and Intellisense.
6. Click Compile to check for any syntax errors in your rule. The Status should read “Successful” for a successful compilation. Close Expression Builder.
7. The new rule is successfully configured.
8. Add other rules if necessary. To delete an existing rule, select it and click the  icon.
icon.
General Options screen
The Comments input allows you to enter comments associated with this object.
Diff Processor
Diff Processor database writing strategy synchronizes records between two tables. The destination table is compared against a diff table, and any differences between the two tables are reconciled in the destination table.
To add a Diff Processor write strategy, open the Flow toolbox, expand the Database Write Strategy group, and drag-and-drop Diff Processor object on the dataflow.
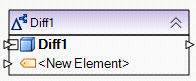
An example of what a Diff Processor object may look like is shown below.
The following properties are available to help you configure the logic of your database update:
Database Connection screen – allows you to enter the connection information for the diff table, such as server name, database and schema, as well as credentials for connecting to the selected diff table.
Pick Table screen:
Using Pick Table screen, select the diff table for this database write strategy.
Select Field for Matching Database Record – specifies a field (or a combination of fields) that will be used to match records from the diff table with records that exist in the destination table.
Output Options:
Single Output: This is the default selection when using a database write strategy. Single Output means that the database action, such as Insert, Update, Skip or Error will be chosen by the database write strategy’s logic rather than specified by the user. Using a single output is recommended when a database write strategy is applied.
One Port for Each Action – adds extra flexibility in letting you specify maps for each of the database write actions, such as Insert, Update, Skip or Error. Each set of maps is completely independent of one another, and will be applied according to logic of the database write strategy.
Slowly Changing Dimensions
The Slowly Changing Dimensions (SCD) database write strategy addresses scenarios where a field’s value for a record varies over time. Centerprise supports industry-standard Type 1 and Type 2 methods to handle slowly changing values in the selected fields of a dimension table.
The Type 1 method is used when no historical data is required on how values changed in the SCD field over time. Type 1 method simply updates a record in the dimension table, overwriting an old SCD value with a new value.
The Type 2 method makes it possible to track historical data by creating multiple records in the dimension table. The records are identified by using an extra surrogate key in addition to any other keys already present in the table. With Type 2, you have unlimited history as a new record is inserted each time a change to the SCD value is made. Additional fields, such as EffectiveDate, ExpirationDate, or Version may be used to track the timeline of SCD value updates, as well as identify the current SCD value.
To add the Slowly Changing Dimensions write strategy, open the Flow toolbox, expand the Database Write Strategy group, and drag-and-drop Slowly ChangingDimensions object on the dataflow.
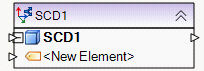
An example of what an SCD object might look like is shown below.
The following properties are available to help you configure the logic of your database update:
Database Connection screen – allows you to enter the connection information for the SCD table, such as server name, database and schema, as well as credentials for connecting to the selected SCD table.
Pick Table screen:
Using Pick Table screen, select the SCD table that will be updated by this database write strategy.
Output Options:
Single Output: This is the default selection when using a database write strategy. Single Output means that the database action, such as Insert, Update, Skip or Error will be chosen by the database write strategy’s logic rather than specified by the user. Using a single output is recommended when a database write strategy is applied.
One Port for Each Action – adds extra flexibility in letting you specify maps for each of the database write actions, such as Insert, Update, Skip or Error. Each set of maps is completely independent of one another, and will be applied according to logic of the database write strategy.
Layout Fields screen:
Using the SCD Field Type dropdown, select among the following designations for each field in the layout:
For SCD Type 1 updates:
Business Key - designates the field holding the key that is normally used to identify records in the table
Not Used - designates a field that is not used by the SCD update logic. However, this field may still be updated if it is mapped.
Update Not Allowed - designates a field that is not used by the SCD update logic. This field may not be updated even if it is mapped. An attempt to update the field will result in an error status for the entire record.
SCD1 - Update - designates a field that stores an SCD value. This is the value that slowly changes over time.
Audit - Last Changed - stores the date and time when the record with the SCD value was last updated.
Audit - SCD1 Change - stores the date and time when the record with the SCD Type 1 value was last updated.
For SCD Type 2 updates:
Business Key - designates the field holding the key that is normally used to identify records in the table.
Surrogate Key - designates the field holding an extra key that identifies versions of the SCD value with the same business key.
Not Used - designates a field that is not used by the SCD update logic. However, this field may still be updated if it is mapped.
Update Not Allowed - designates a field that is not used by the SCD update logic. This field may not be updated even if it is mapped. An attempt to update the field will result in an error status for the entire record.
SCD2 - Update and Insert - this field stores an SCD value changing over time. A new record will be added each time the SCD value changes. The existing record may be updated with the new ExpirationDate.
Current Record Designator - stores the Active Value if the record has the current version of the SCD value. Otherwise it stores the Inactive Value. Active Value and Inactive Value should be entered in the appropriate cells in the grid next to the Current Record Designator.
SCD2 Effective Date - stores the effective date of the SCD value in the record.
SCD2 Expiration Date - stores the expiration date of the SCD value in the record. Expiration Date is Null in the record storing the current SCD value.
Audit - Created - stores the date and time when a new record with a new SCD value was created.
Audit - Last Changed - stores the date and time when the record with an SCD value was last updated.
Audit - SCD2 Change - stores the date and time when the record with an SCD Type 2 value was last updated.
Version - stores the version number of the SCD value.