REST Client
Rest Client
A REST Client Service uses the RESTful API to access and/or modify data using HTTP methods. It can be used as a Source or a Destination on the dataflow.
Usage
To add a REST Client Service, drag the ‘REST Client’ object from the Services group in the Flow toolbox and drop it on the dataflow.
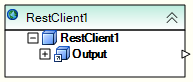
An example of what a REST Client object might look like is shown below.
To configure the properties of a REST Client object after it was added to the dataflow, right-click on it and select Properties from the context menu.
An example of a REST Client object configuration is shown below.
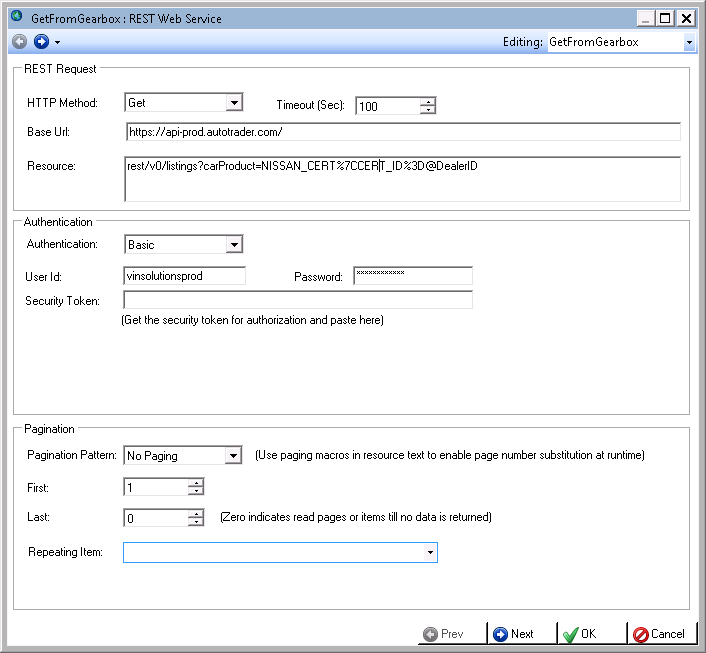
On the first screen of the properties wizard, the following properties are available:
HTTP Method
- None
- GET
- PUT
- POST
- DELETE
Timeout (Sec) – allows you to set timeout value in seconds, controlling how long the client will wait for the server to respond before throwing timeout error.
Authentication
- None - No authentication used
- Basic – accepts UserId, Password and/or Security Token as required by the REST service
- OAuth V1 – consumer key / access token driven authentication, as supported by the REST service that the client is connecting to
- OAuth V2 – application key / access token driven authentication
Pagination
Using Pagination control, you can control whether your REST request will fetch all of the records from the REST service. You can have the output split, or paginated, so you can retrieve certain records, or pages of records, only. The boundaries of the record set being returned are controlled by the First and Last page selections, as well as the Paging macro that is fed to the REST service as part of the resource string. An example of a resource string with a paging macro ‘NextPage’ is listed below:
rest/v0/listings?carProduct=NISSAN_CERT%7CCERT_ID%3D@DealerID?pageNo=@NextPage
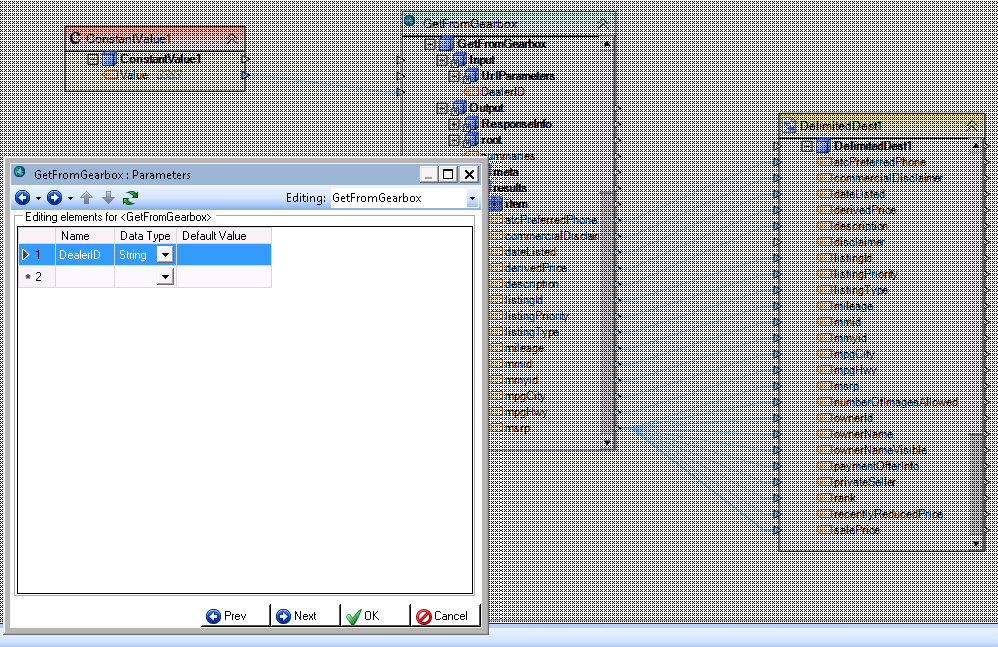
Parameters
Input parameters for a REST call are specified in the second screen of the wizard. In the example below, we have specified that the REST service accepts DealerId parameter of type String. This same parameter would also be specified in the Resource string using @ prefix, for example,
rest/v0/listings?carProduct=NISSAN_CERT%7CCERT_ID%3D@DealerID
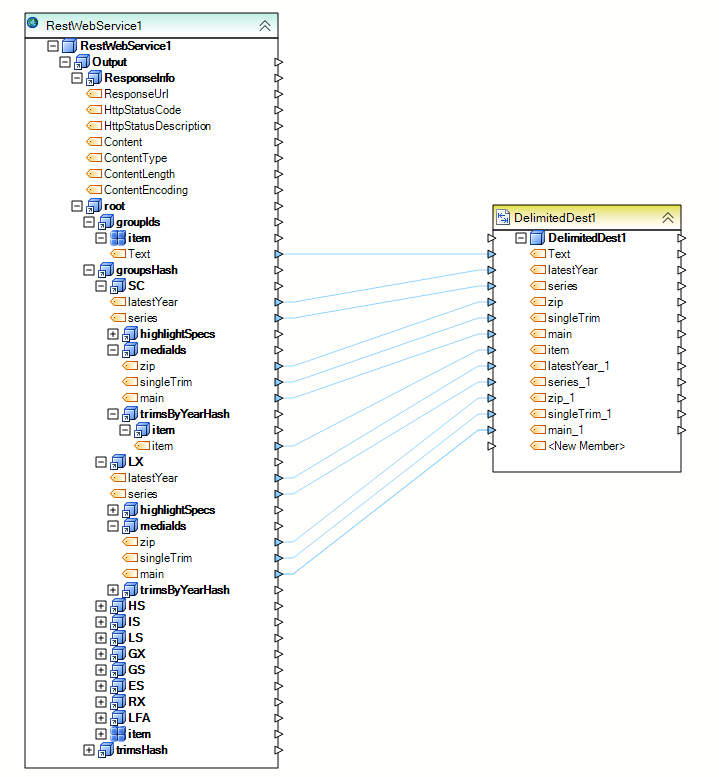
Building REST Webservice Input and Output Layout
This is done in the next two screens of the properties wizard. A screenshot below shows the controls available to help you build the output layout.
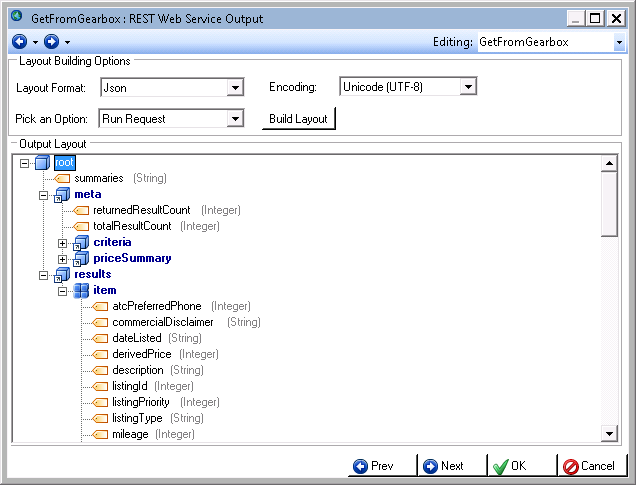
The easiest way to build the layout is to select ‘Run Request’ in the ‘**Pick an Option’**dropdown. You also need to select either JSON or XML as appropriate for your layout format, and specify the encoding used.
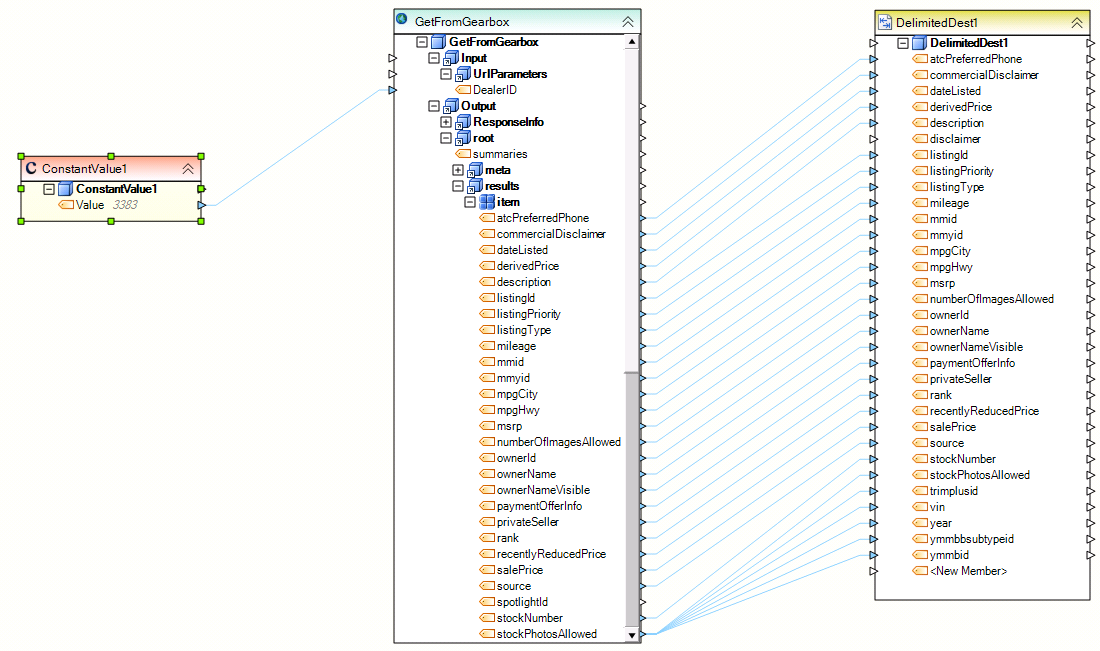
Click ‘Build Layout’. This will run the request through the REST service and use its output to create the layout. Your REST object will then show this output layout on the flow. You can map it to other objects in Centerprise and/or perform data transformations with it as appropriate for your needs. An example of a layout tree is shown in the screenshot above.
A layout can also be built using a sample text or an XSD file.
Examples
REST GET as a Source with one input parameter
REST GET as a Source with no input parameters