Function Transformations
Function Transformations apply built-in expressions on the incoming data to transform it according to the expression’s logic.
There are several built-in functions in Centerprise that help in string manipulation, data conversion, time manipulation, calculations, comparisons, and data parsing.
Name and Address
Name and Address Parser is a collection of built-in functions in the Function Transformations section. The functions in this category process the input stream of Name and Address data and give elements such as Suffix, First Name, Last Name, City, Country, Street, Zip code etc. as parsed outputs.
In this section, we will learn how to parse name and address strings using built-in function transformations in Centerprise.
In this case, we have a sample data coming in from a fixed length file source.
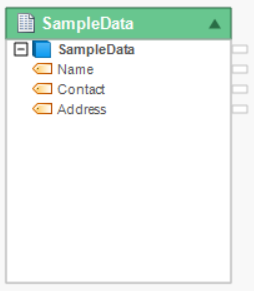
The source file contains Name, Contact and Address details of customers.
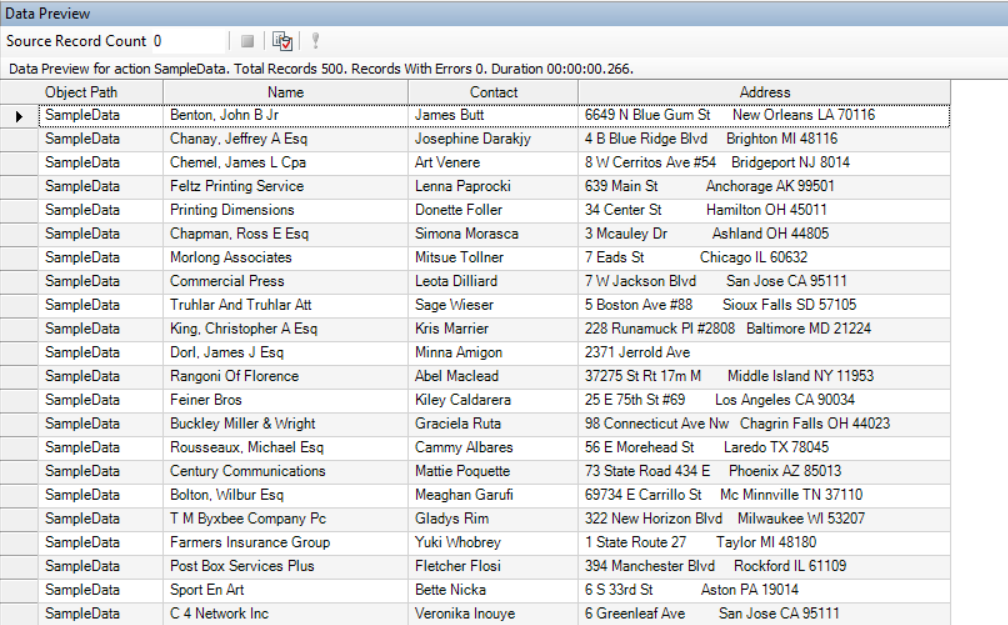
Preview data by right-clicking on the source object’s header > Preview Output.
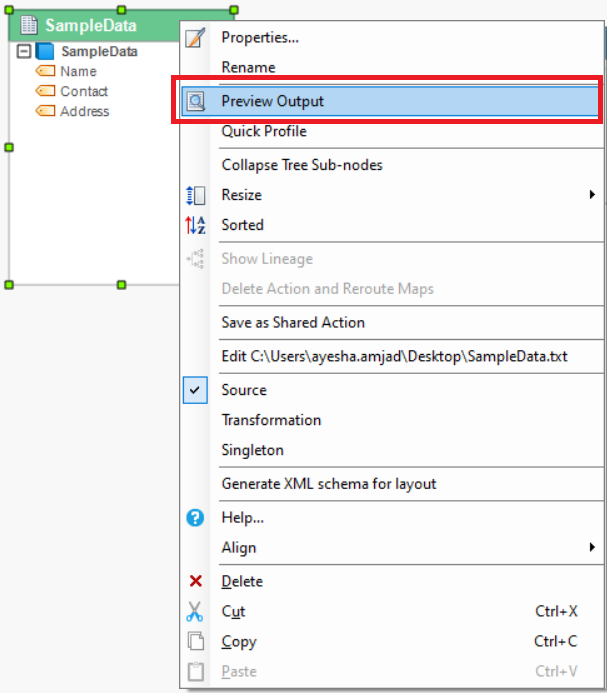
A Data Preview window opens up displaying the information in each field.
Using Name Parser
Now, we want to parse the Name field into Suffix, First Name, Last Name etc.
For this purpose, we will use Name Parser Function Transformation.
1. To get a Name Parser Function Transformation, go to Toolbox > Function Transformations > Name and Address > ParseName(String name) - ParsedName.
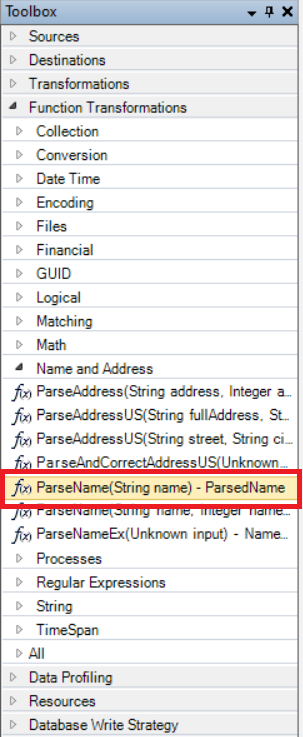
2. Drag-and-drop the Parse Name object onto the designer.
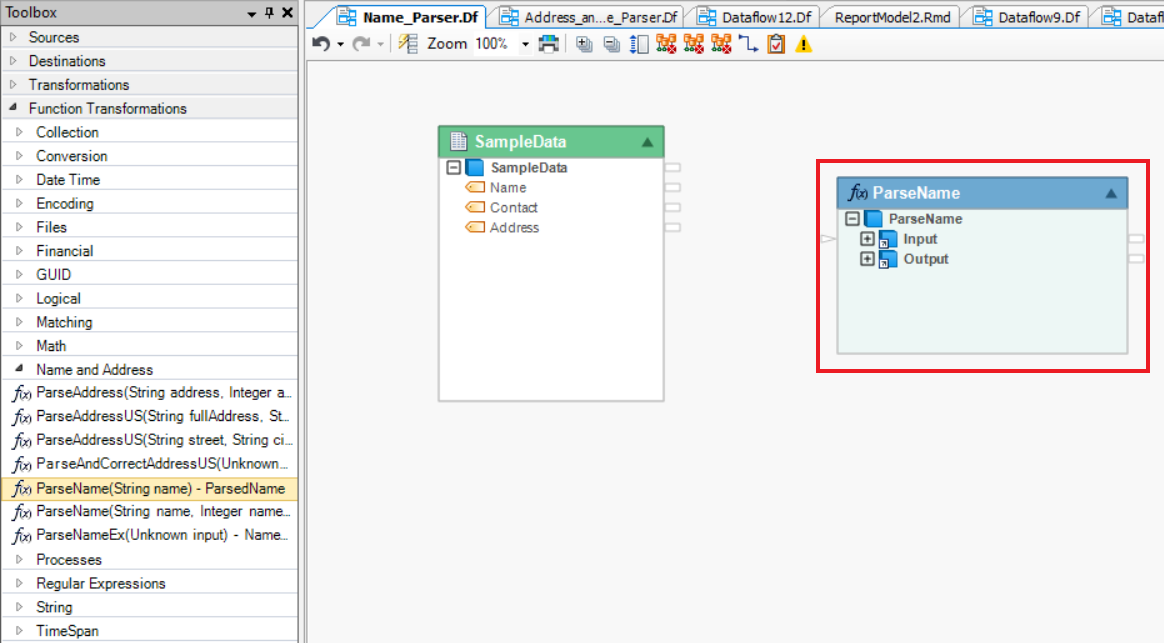
You can see that the dragged transformation object has two sub-nodes - Input and Output.
3. Expand the Input node and map the Name field from the Sample Data object to the name field inside the Parse Name object.

4. Right-click on the Parse Name object’s header and select Preview Output from the context menu.
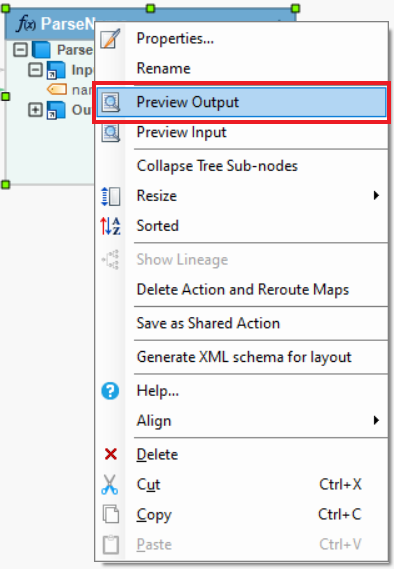
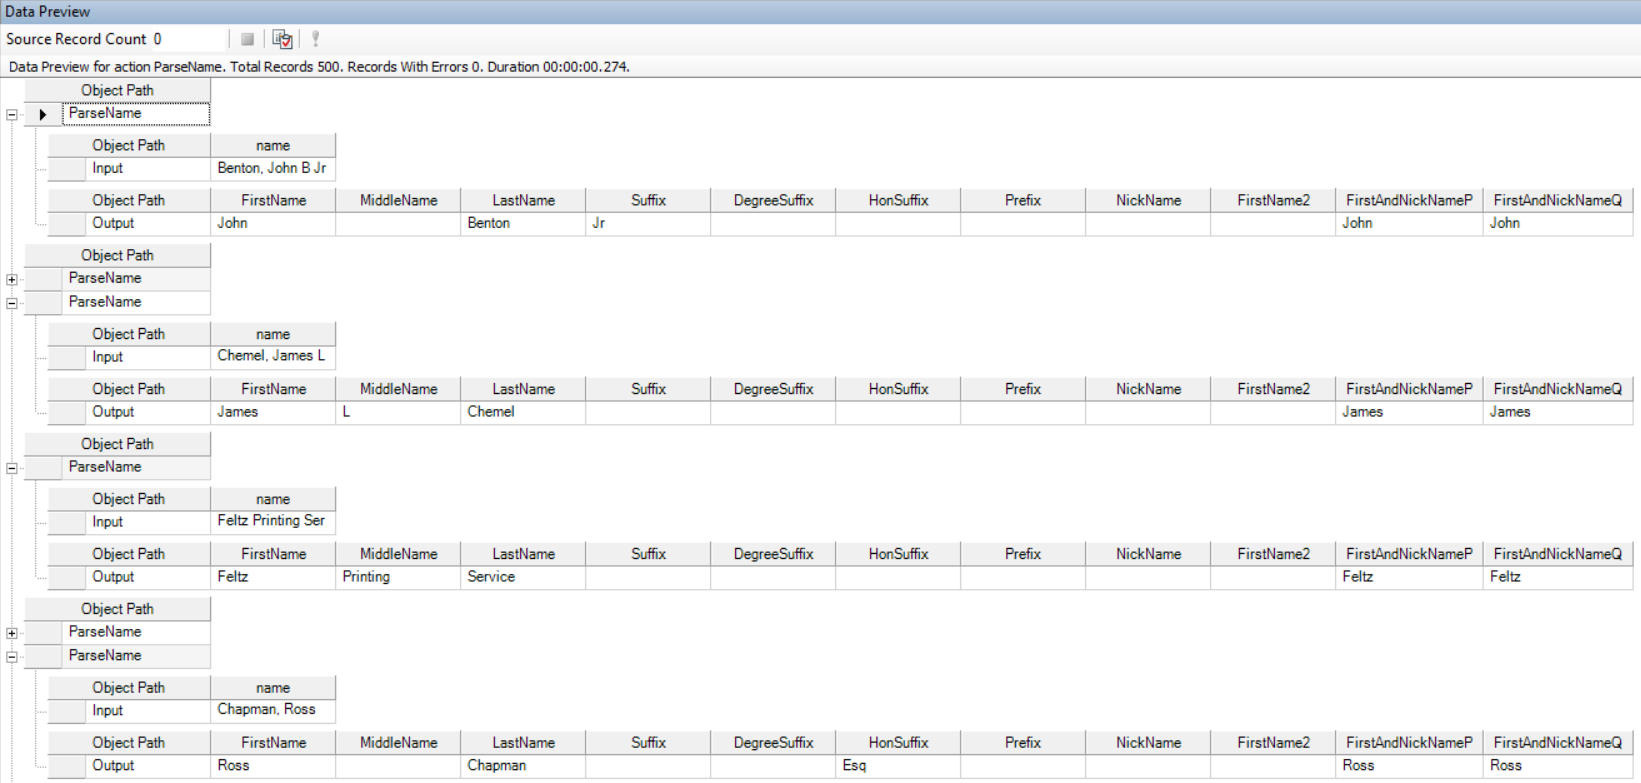
A Data Preview window will open, displaying parsed data for the Name field.
To store this output, write it to a destination file.
5. Right-click on the Output sub-node inside the Parse Name object, go to Write to > Excel Workbook Destination.
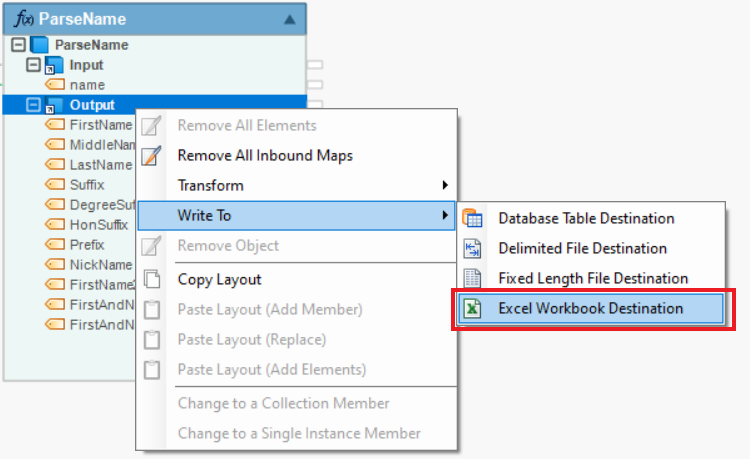
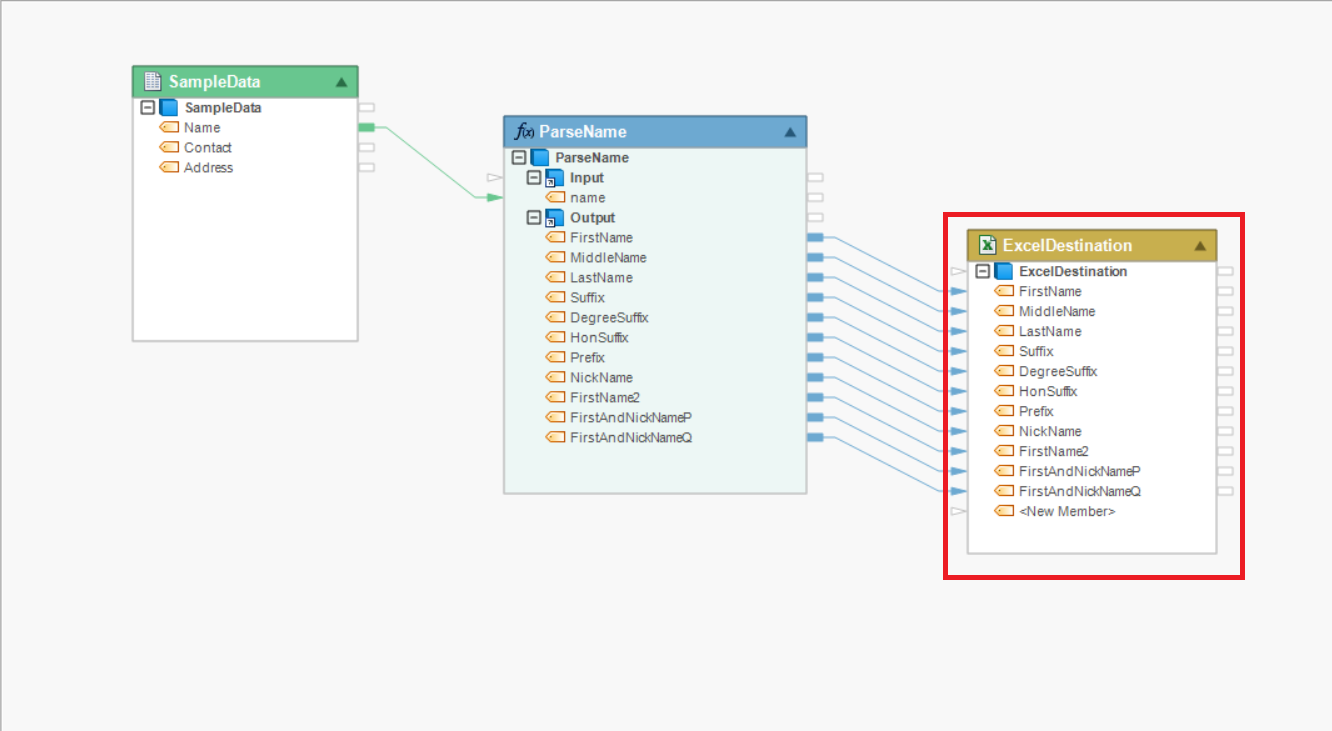
An Excel Workbook Destination object is added to the dataflow designer with auto-mapped fields.
6. Configure settings for the Excel Workbook Destination object.
Learn how to configure settings for Excel Workbook Destination from here.
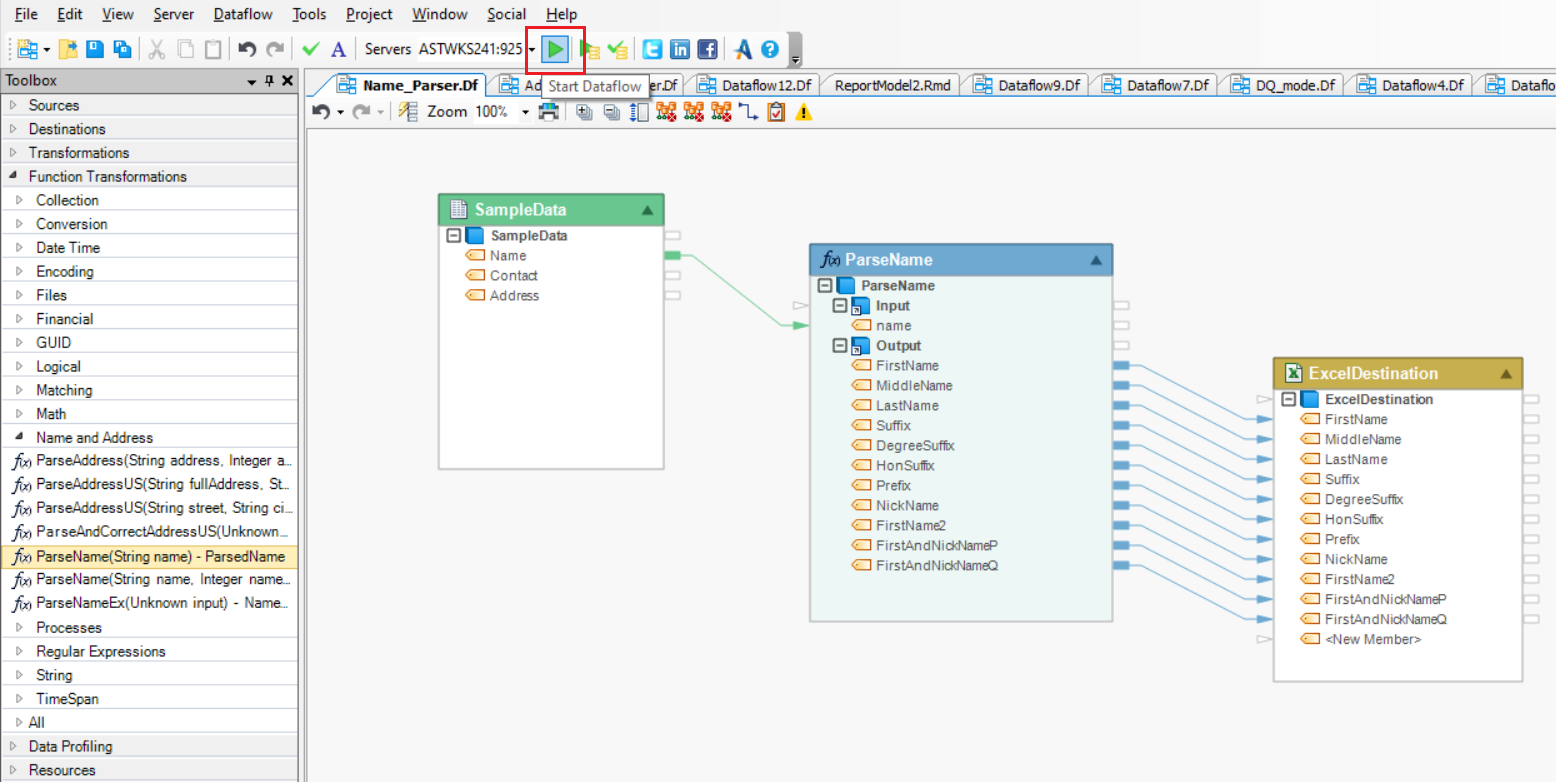
7. Click on the Start Dataflow button placed in the toolbar at the top to create this destination file.
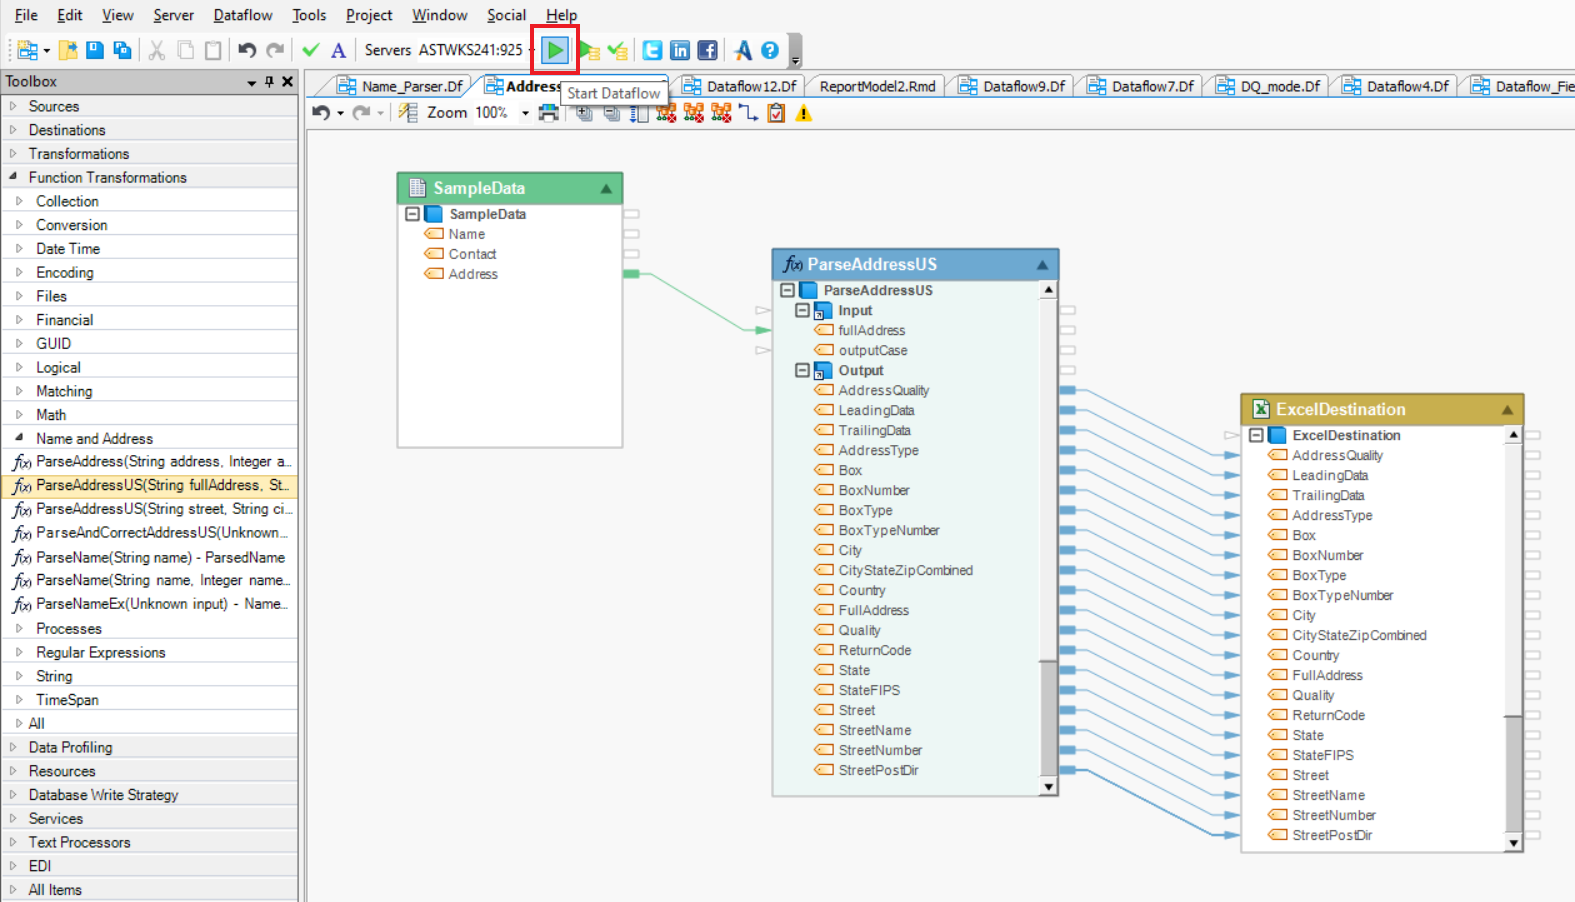
Using Address Parser
Now, we want to parse the Address field into Country, City, Street, Zip Code etc.
For this purpose, we will use Address Parser Function Transformation.
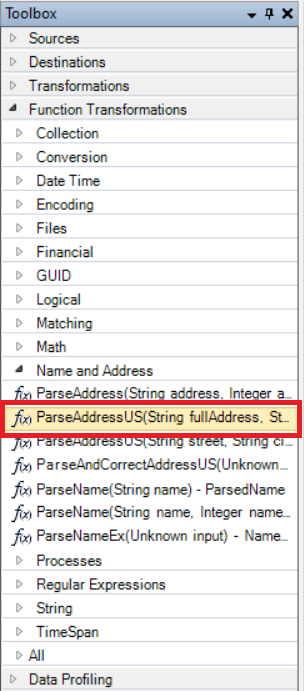
1. To get a Address Parser Function Transformation, go to Toolbox > Function Transformations > Name and Address > ParseAddressUS(String fullAddress, String outputCase) - ParsedAddress.
2. Drag-and-drop the Parse Address US object onto the designer.
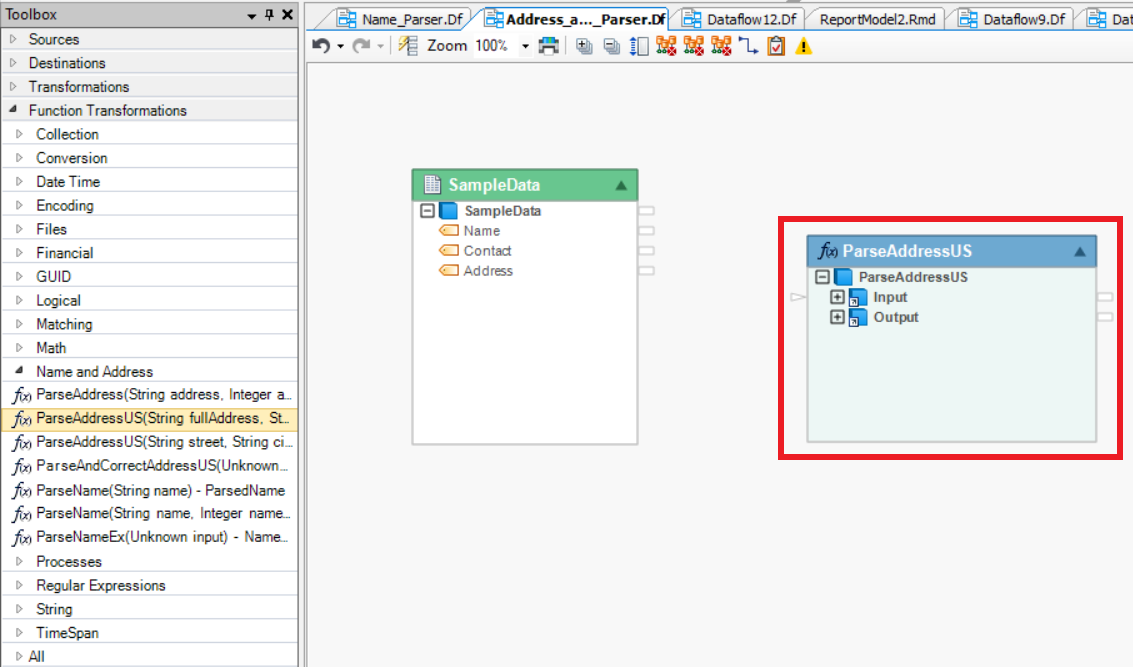
You can see that the dragged transformation object has two sub-nodes - Input and Output.
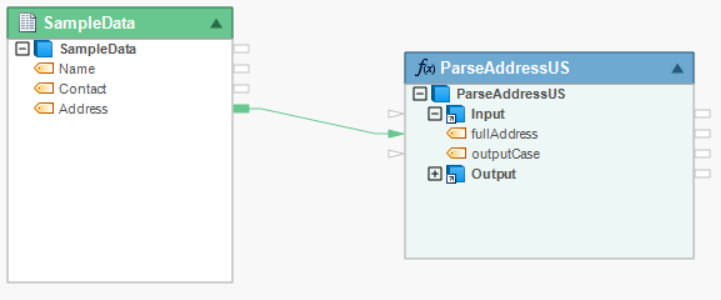
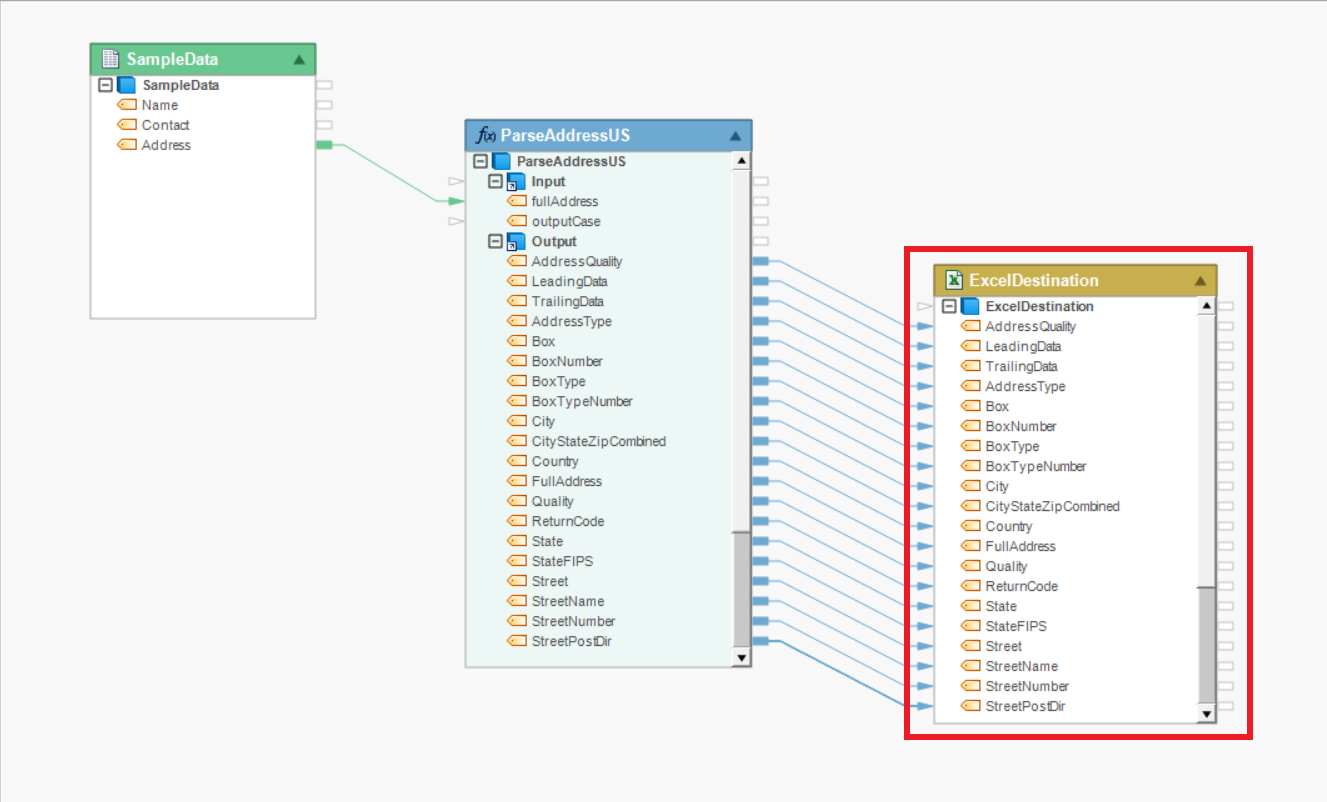
3. Expand the Input node and map the Address field from the Sample Data object to the fullAddress field inside the Parse Address US object.
4. Right-click on the Parse Address US object’s header and select Preview Output from the context menu.
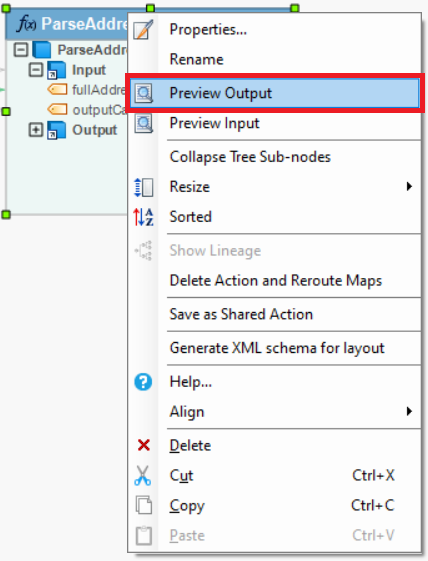
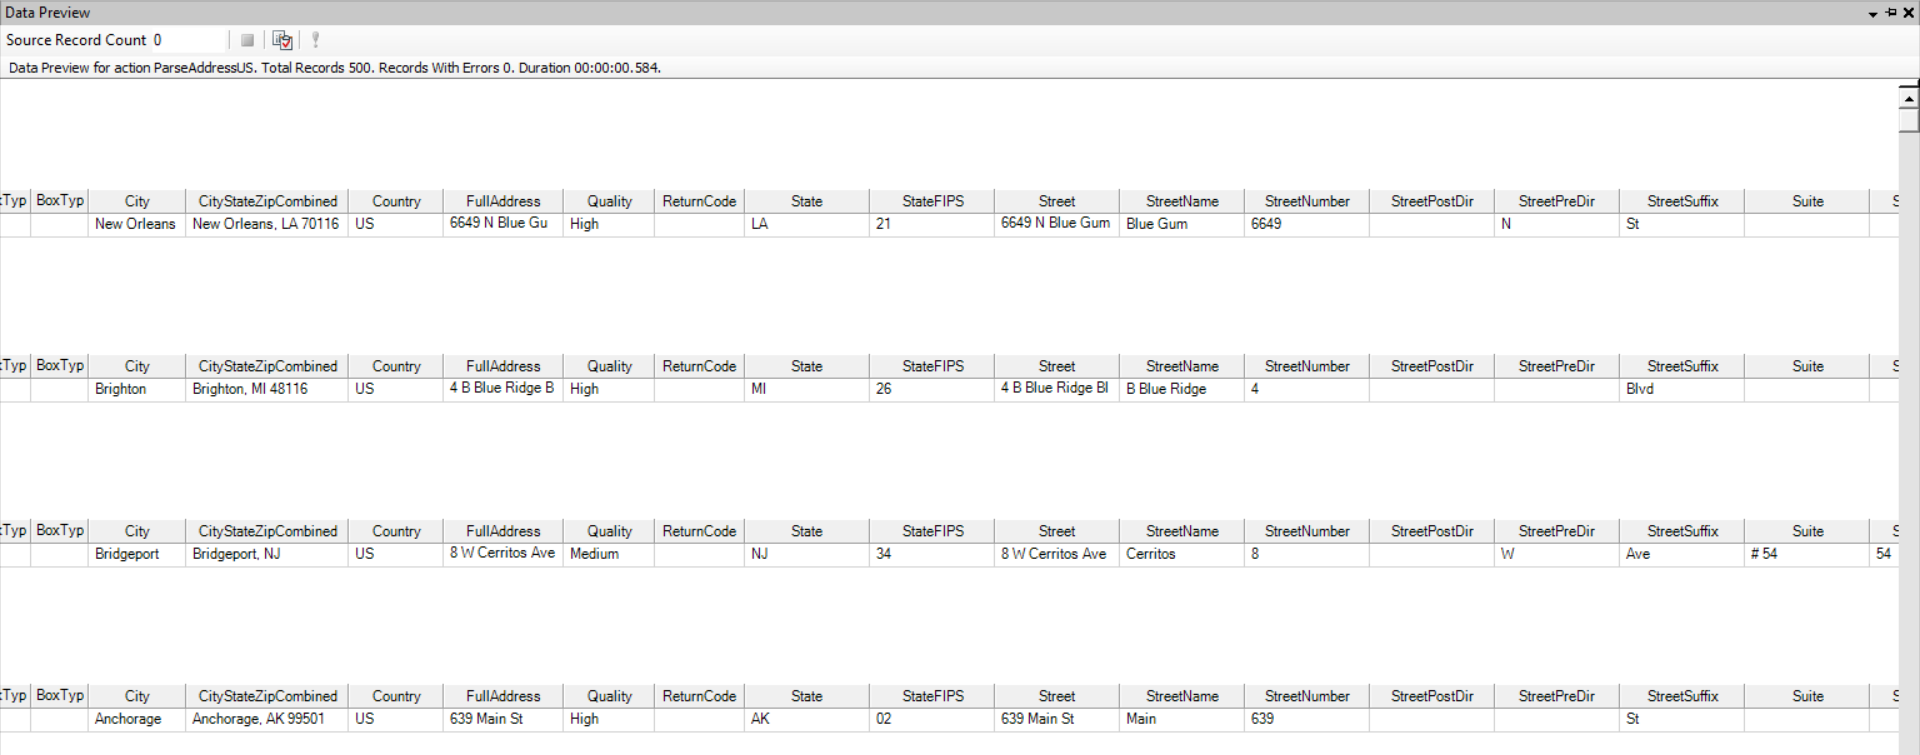
A Data Preview window will open, displaying parsed data for the Address field.
To store this output, write the parsed data to a destination file.
5. Right-click on the Output sub-node inside the Parse Address US object, go to Write to > Excel Workbook Destination.
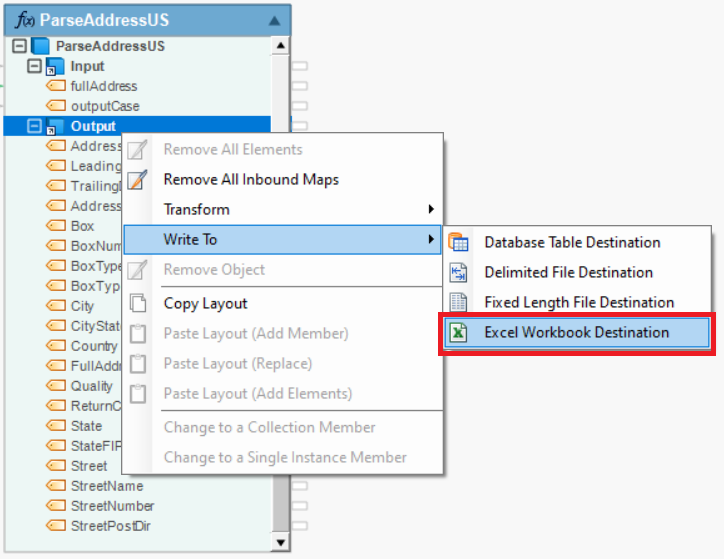
An Excel Workbook Destination object is added to the dataflow designer with auto-mapped fields.
6. Configure settings for the Excel Workbook Destination object.
Learn how to configure settings for Excel Workbook Destination from here.
7. Click on the Start Dataflow button placed in the toolbar at the top to create this destination file.