Setting up Astera Integration Server 7
Prerequisites
- SQL Server 2005 and up
- An existing database (new dedicated db recommended)
- Ability for the Centerprise Server to communicate to the SQL Server. This entails either having a dedicated Windows account that has access to the SQL Server or a dedicated SQL Server login.
- A TCP port must be open for the Centerprise client to communicate to the server. By default, this is set to be 9259.
Building the Cluster
Before being able to use the server, a repository must be set up on a SQL Server instance somewhere in the network. This repository is where job logs, schedules, and queues are kept. The cluster database repository can be set up either via Centerprise directly or by having Centerprise generate the SQL script for manual creation. In either case, click the Server menu.

There are two options to build a cluster database: “Build Cluster Database” and “Generate Cluster Database Script”. In either case, the first step is to point to the SQL Server instance and database where the repository is to be housed and supply the credentials to it. Note that Centerprise will not create the database itself, just the tables. A database will have to be created before hand or an existing database can be used. We recommend Centerprise to have its own database for this purpose.
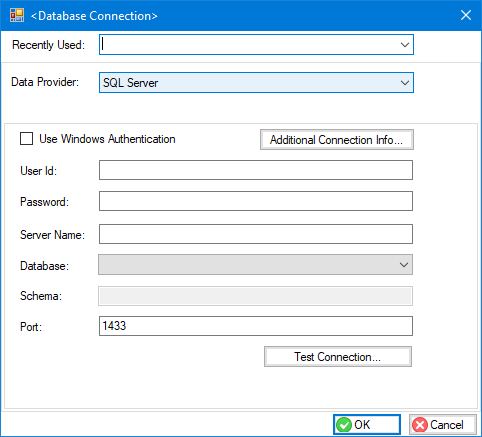
Note that the credentials supplied here will be used from the server’s point of view. In many cases, the server cannot use Windows’s Authentication from the default “Local System” account the server normally runs under. So, make sure that the credentials supplied are accessible from the server’s local system account and not just the client’s. Clicking on “Test Connection” will not tell you this.
If the “Build Cluster Database” option is chosen, then the following message will be shown before the SQL script will be run on the database specified in the previous step.

Clicking yes will create the repository. It will also overwrite any existing repositories, so great care must be taken before clicking “Yes”.
If the “Generate Script” option is chosen, then a window prompting for the target location of the resultant .sql file is shown.

Clicking OK here will save the file.
Configuring the Server
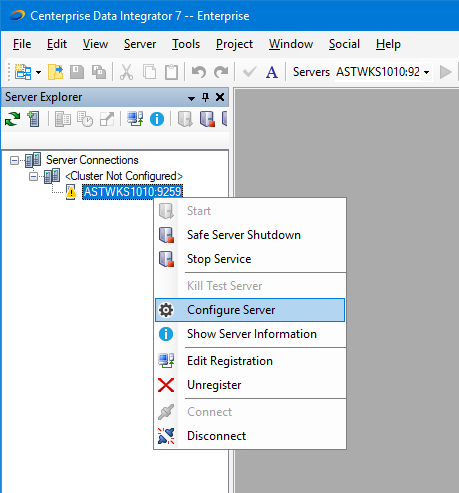
Once the cluster database has been set up, the next step is to link the server to this cluster database. To do this, right-click on the server node in the server explorer tree and select “Configure Server.”
The configure server screen will appear. Click the ellipses button next to “Repository DB Info” to link the server to the cluster database.
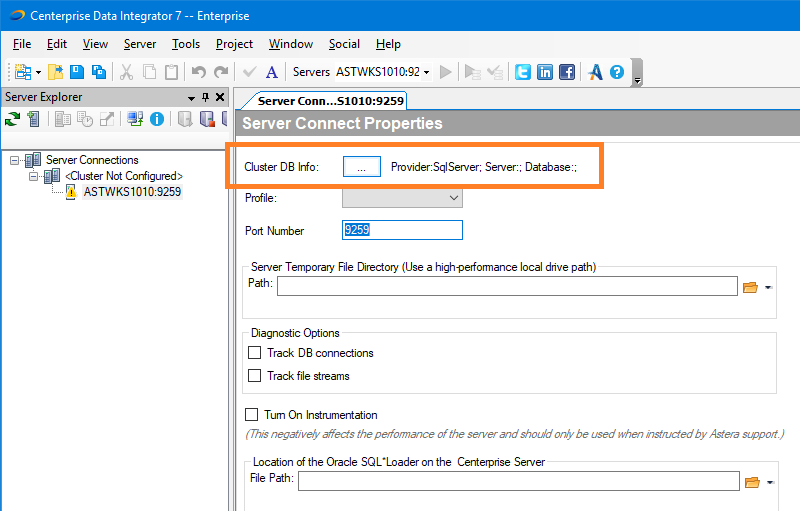
You can ignore the server profile for now. This is only useful if you have multiple servers, each with a different role to play in the Centerprise deployment. After this is configured, click the standard “Save” button for the changes to take place.
Once you’ve clicked the save button, the server will appear under the cluster node in the Server Explorer and the job commands are now available.
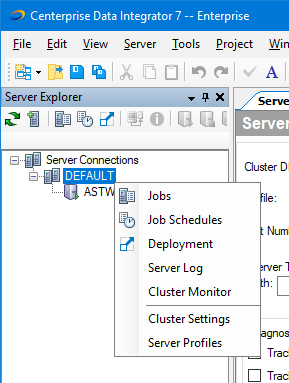
To add servers to a cluster, simply follow the exact same steps to configure another instance of a server and point to the same cluster. The default profile for the server is set to perform all tasks, including automatic fail-over and load balancing. To check the health of any particular server in a cluster, select the “Cluster Monitor” command.