Installing Centerprise Data Integrator
This document details the installation of the Centerprise client. The server has a separate installer. The server also requires additional set-up post install. The server must be configured post-install in order to run any flows.
Installing Centerprise Data Integrator
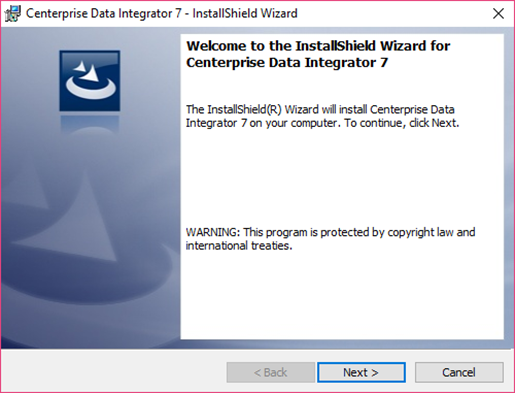
1. To start the installation of Centerprise 7, run setup.exe.
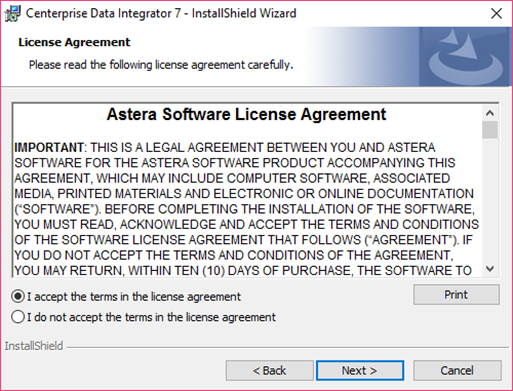
2. To continue with the installation, you must read and agree to the license terms.
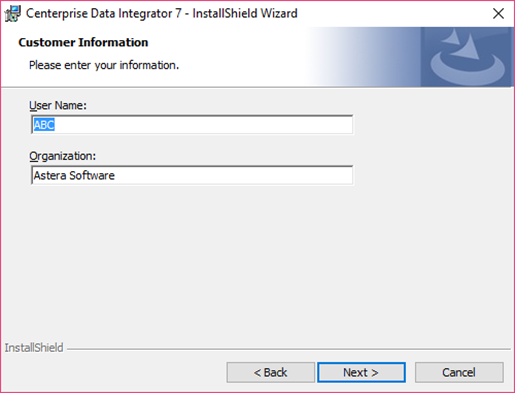
3. Enter the user name and company name.
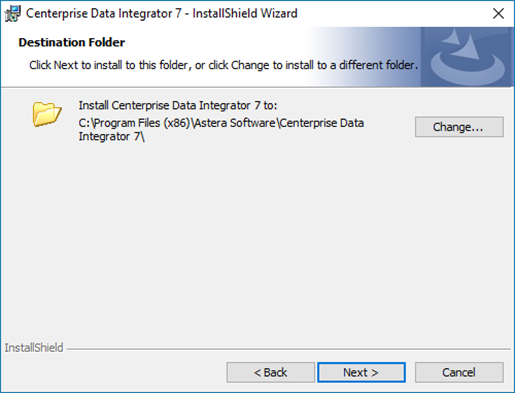
4. Enter Destination Path. The default installation folder is C:\Program Files(x86)\Astera Software\Centerprise Data Integrator 7.
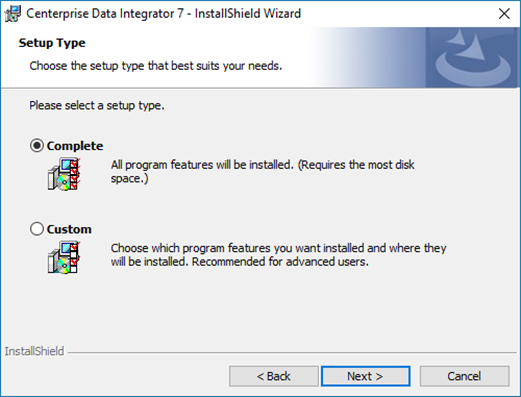
5. Choose between complete or custom installation.
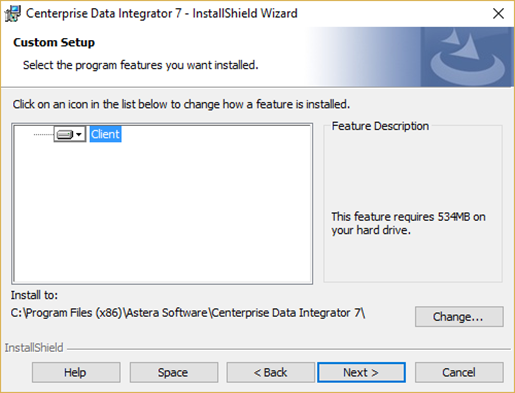
6. You can customize your installation by selecting Custom. The following options are available for a custom installation:
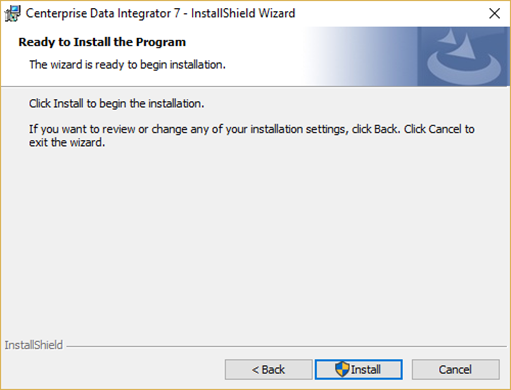
7. This completes the configuration steps, and you are now ready to complete the installation, click Install.
Starting Centerprise
To start Centerprise using a Windows shortcut, navigate to
All Programs -> Astera Software -> Centerprise Data Integrator 7 -> Centerprise Data Integrator 7.
Licensing Centerprise
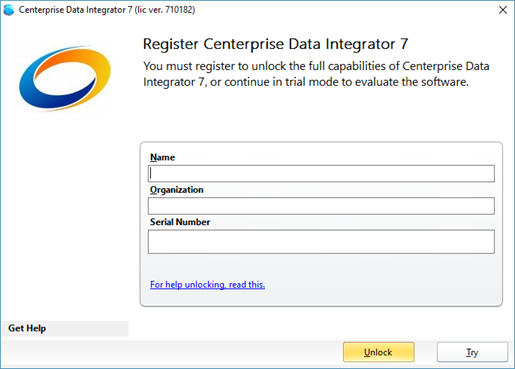
When you first start Centerprise, you will see the Register Centerprise Data Integrator screen. To use Centerprise, you must enter either a trial key or a license key in the Serial Number input.
You must also enter your name, your company name, and the serial number provided to you.
- Enter in the required information and click Unlock.
At this point, the software will contact Astera’s licensing server and register your copy. If this not a trial key, it will also lock this key to your machine so that the key cannot be used again on another machine unless the key is deactivated via the Deactivate License wizard from within the product.
If you enter a trial key, the registration screen will appear every time Centerprise is run, showing how many days of trial are left.
At the end of your trial period, you will be asked to register a non-trial license key.
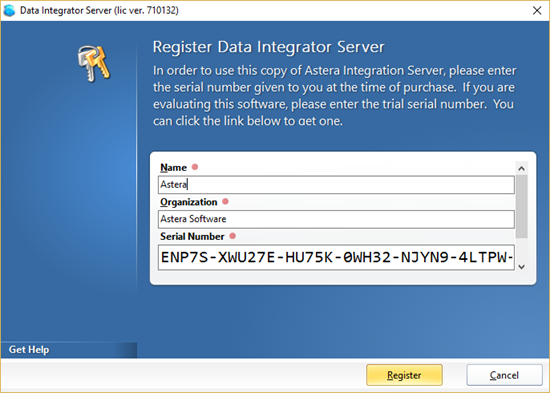
Licensing the Server Component
Licensing the Data Integrator Server (Server) is separate from the licensing of Centerprise Studio.
Prior to running any jobs on the Server, you must install a license using Server License Manager.
To run Server License Manager, go to:
All Programs -> Astera Software -> Centerprise Data Integrator 7 -> Server License Manager.
The Server License Manager executable’s default location is
C:\Program Files\Astera Software\Centerprise Data Integrator 6\Server ServerLicenseUI.exe
The remaining steps of the server licensing process are similar to the client licensing described above.
Note: The Server must be restarted in order for the new license to take effect.
Troubleshooting License Issues
Errors While Activating
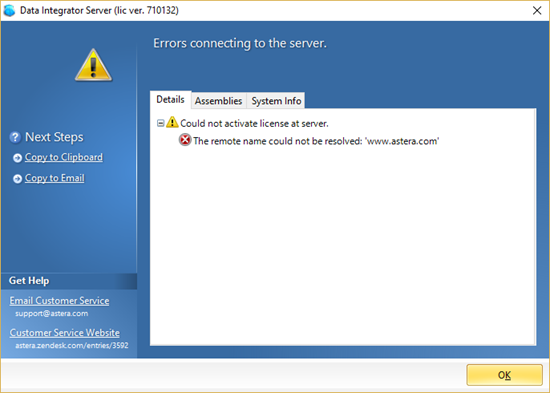
- If you get an error while registering or activating, click the Details… button to display the details of the issue.

- In the example shown below, activation is not possible as there’s an Internet issue. You must be connected to a working Internet connection for the activation to complete.
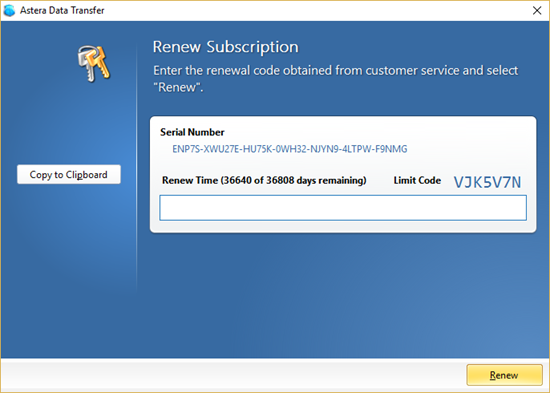
- If your license has an expiration date, you may be prompted to extend it. Please contact support@astera.com to request an extension code.
Other Licensing Issues
If you believe you have a valid license and are still having issues, try deleting the license file (.lic file) found in Centerprise’s shared data folder. This can usually be found at
C:\Documents and Settings\All Users\Application Data\Astera Software
in XP and
C:\Program Data\Astera Software
in Vista / Windows 7 & Up.
In this folder, expand the respective sub folder for the client or the server depending on which edition was installed.
Note: You might have to change folder settings to show hidden files.