Defining the Start Position of Data Fields
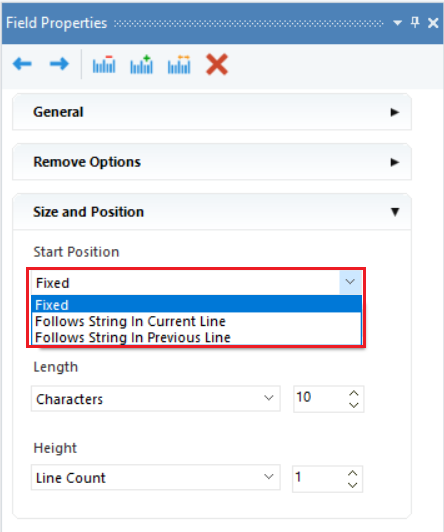
Start Position options are useful for defining the start position of a selected data field. They appear in the Size and Position group-box in the Field Properties panel. There are three options available in the drop-down menu of the Start Position option:
1. Fixed
2. Follows String in Current Line
3. Follows String in Previous Line
In this document, we will discuss how to work with the Follows String In Current Line and Follows String In Previous Line options to define the start position of a data field.
Loading An Unstructured File
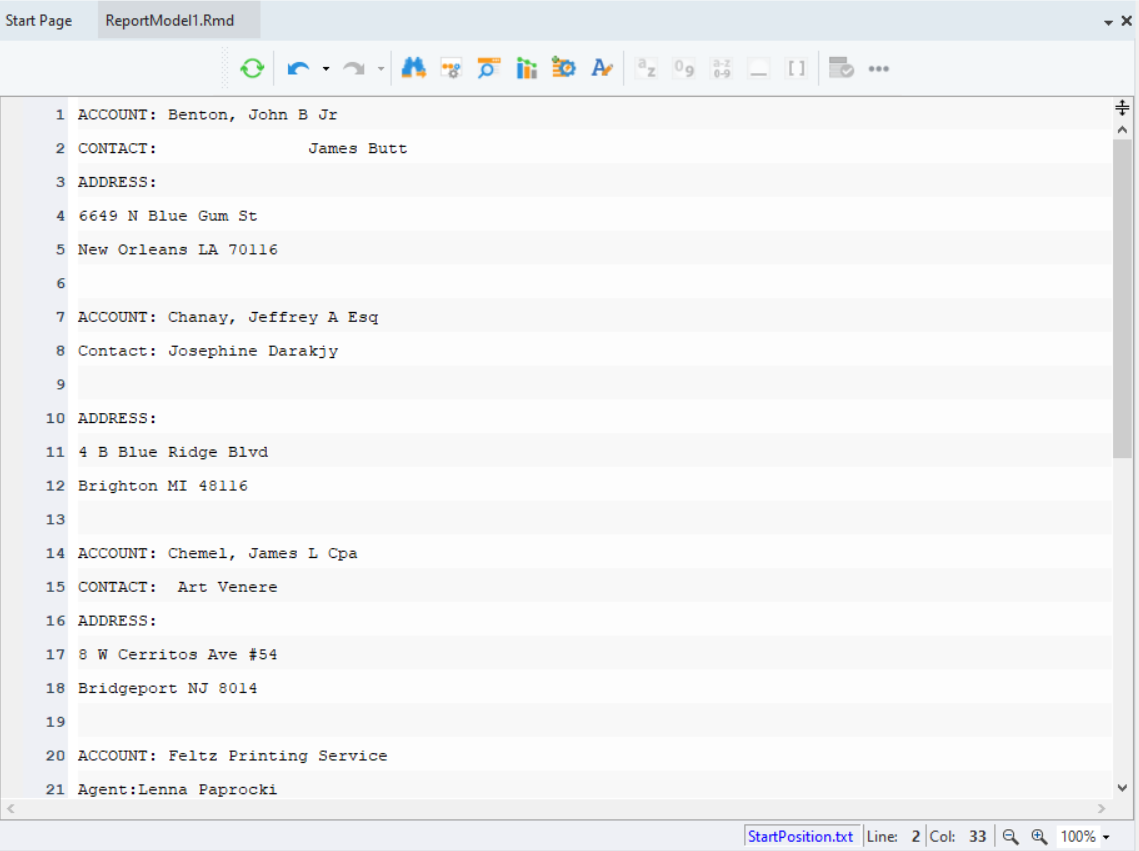
Before creating an extraction template, we need to import the unstructured source file that we want to extract data from in Astera ReportMiner. To learn how to load an unstructured document in a report model, click here.
The Report Options panel provides the configuration options for loading the unstructured file. You can change the source file by specifying its Path in the Data File Location group-box.

There are also some other configuration options. To learn more about the Report Options, click here.
Creating the Report Model
Add a new data region and specify an appropriate pattern to capture all the lines in that region.
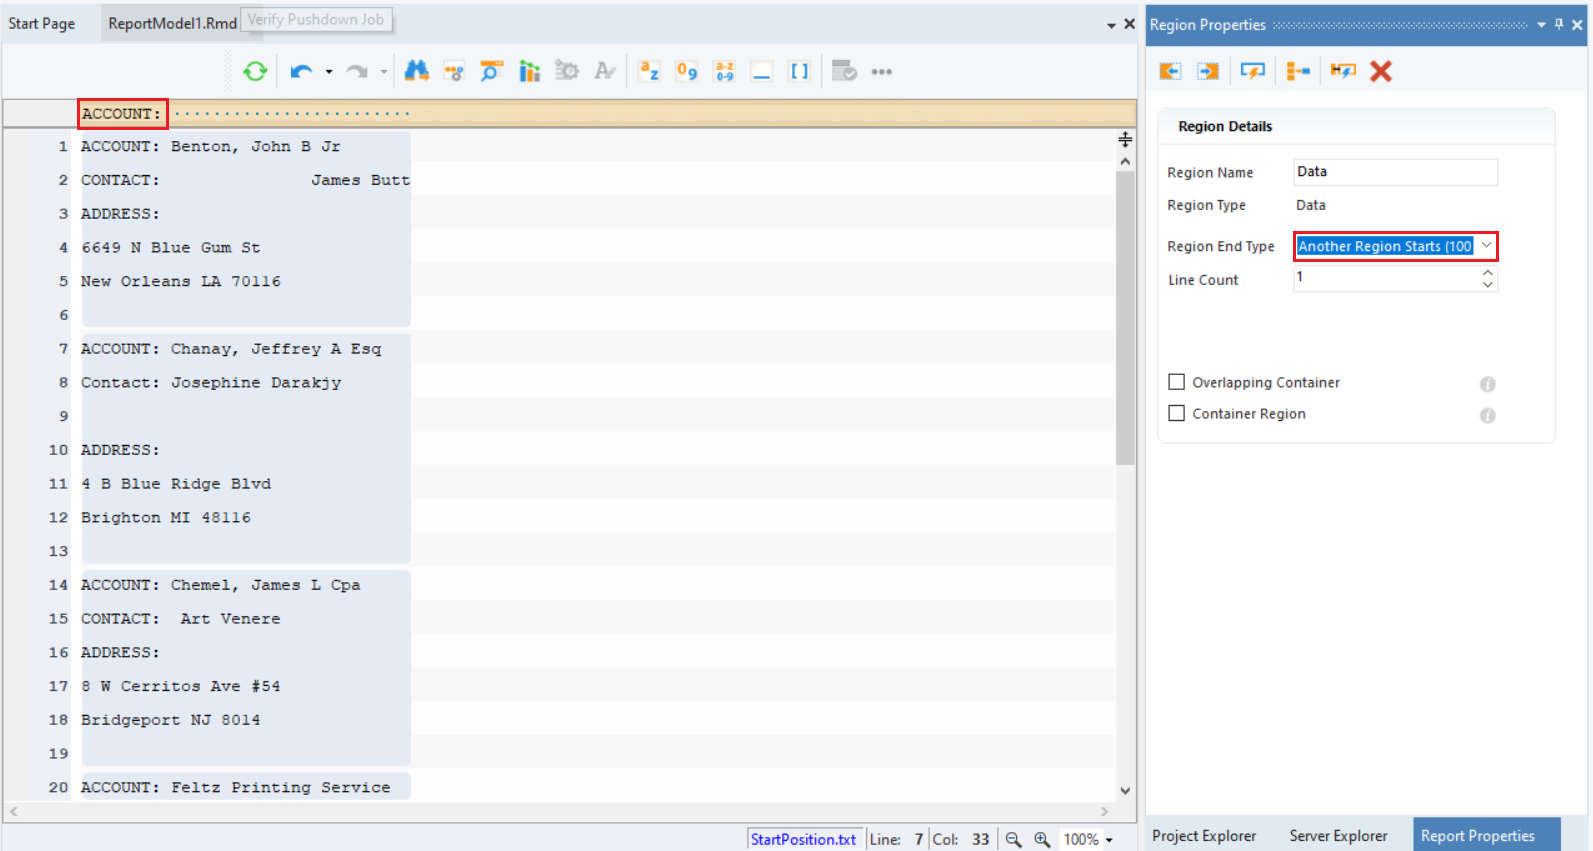
Here, we have defined the pattern as ‘ACCOUNT:’ and the Region End Type is set to Another Region Starts, which means that the current data region will end when another one starts.
Using Start Position Options to Capture Data Fields
We have captured the data region of our interest in the report model. Let’s extract relevant data points by Adding Data Fields.
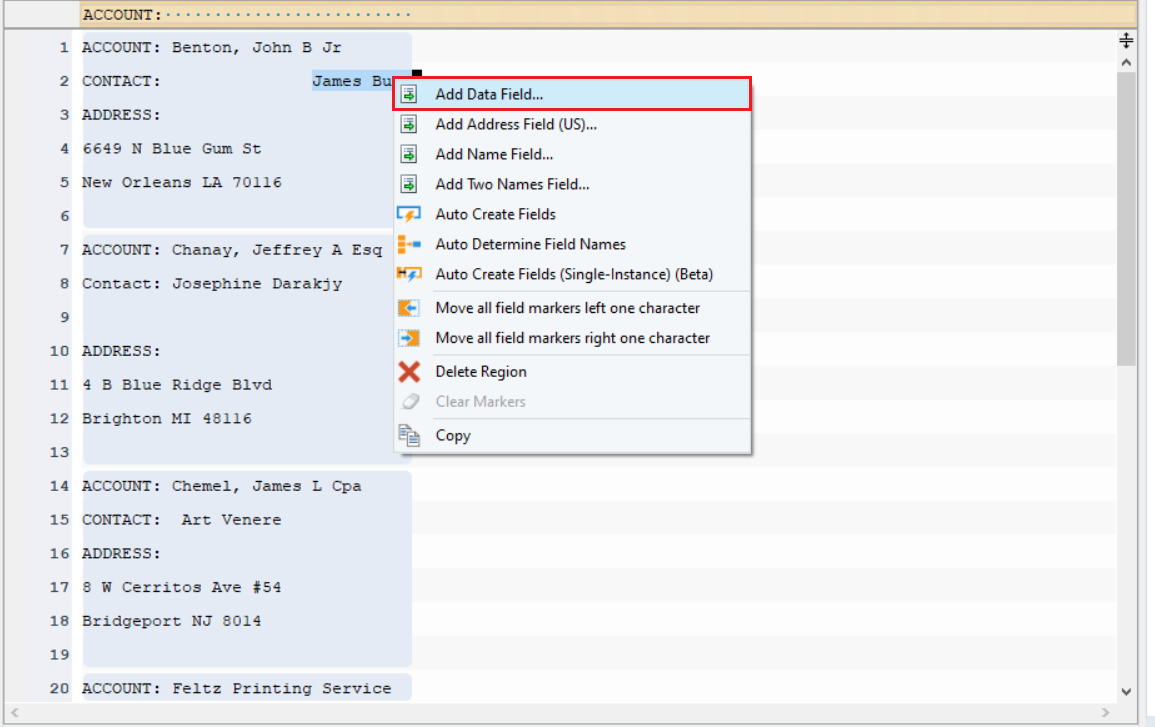
1. To create the data field, highlight the desired field area, right-click on it and select the Add Data Field option from the context menu.
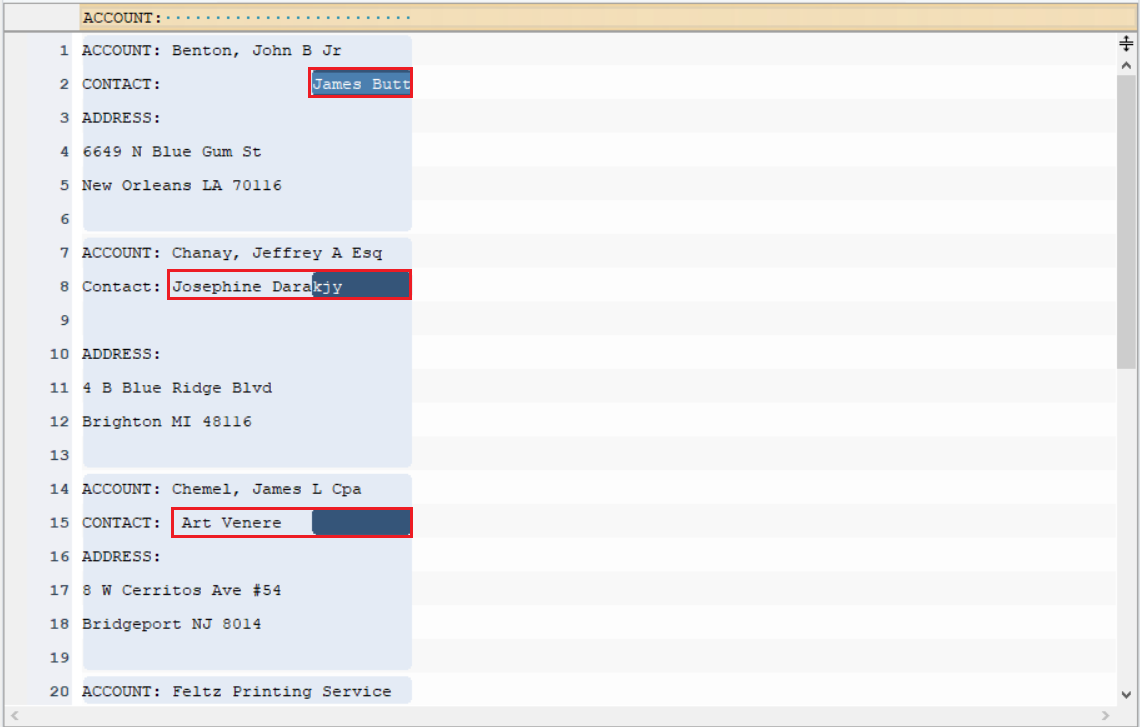
2. As you can see below, the data is misaligned and therefore is not being captured correctly.
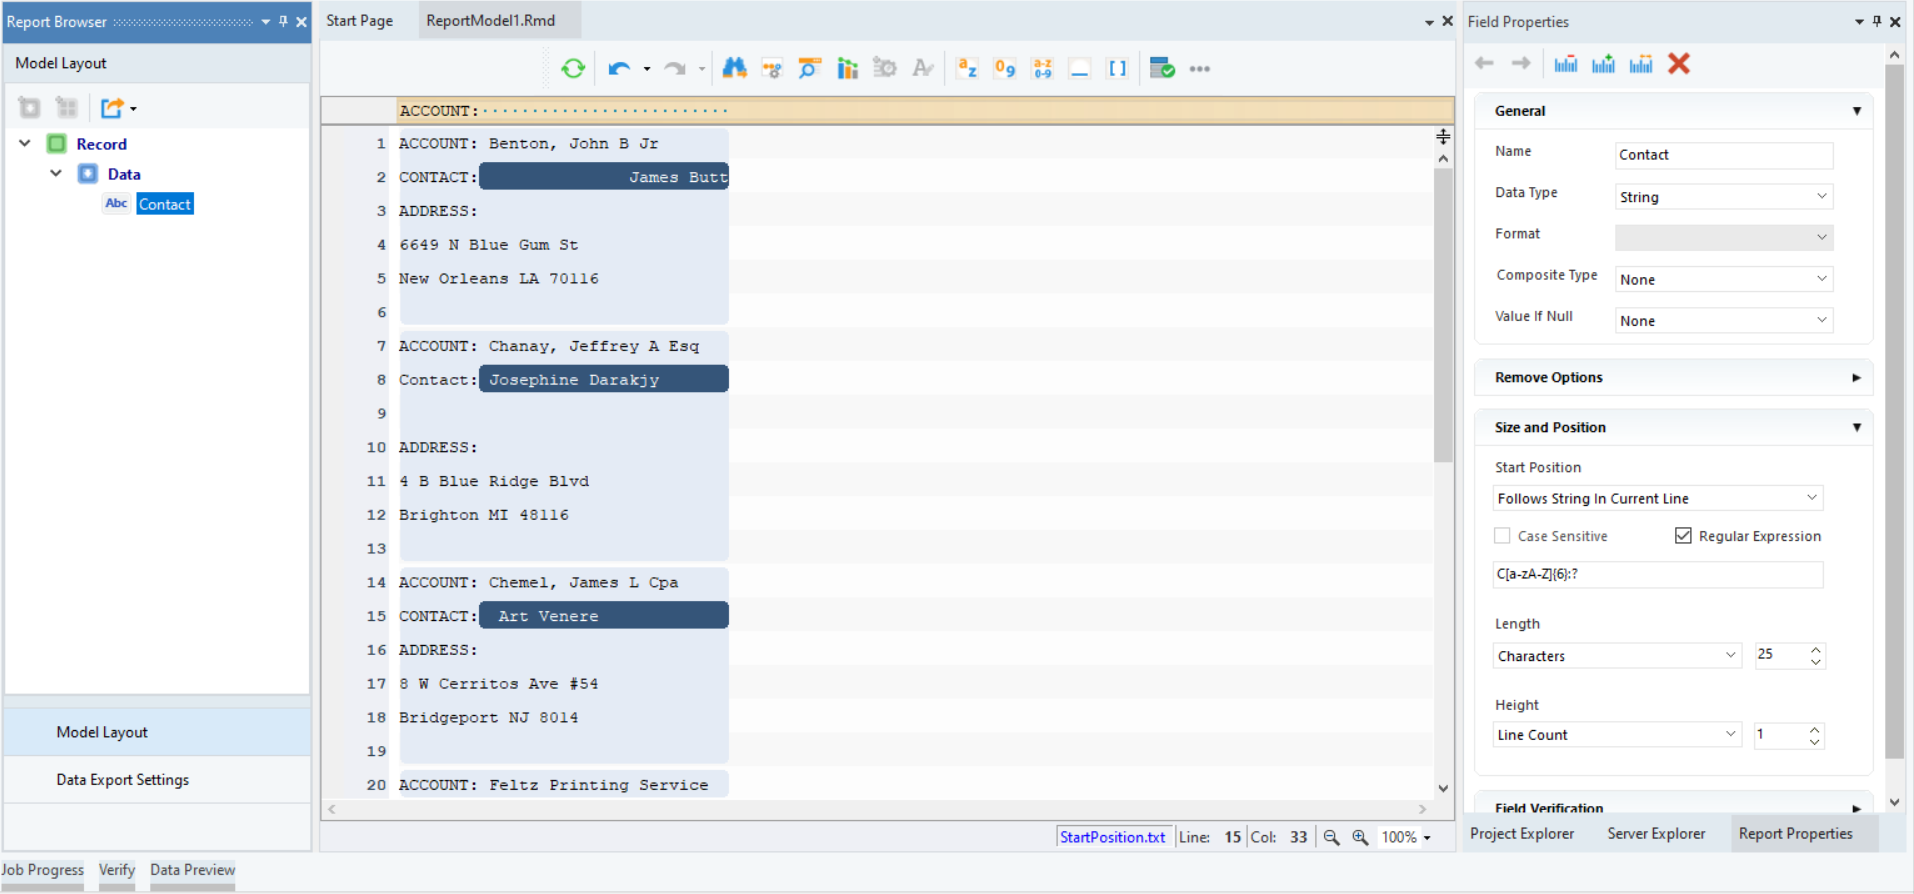
3. To solve this problem, we can use the Follows String in Current Line option from the Start Position drop-down menu in the Field Properties panel to specify a string which defines the start position of this field.
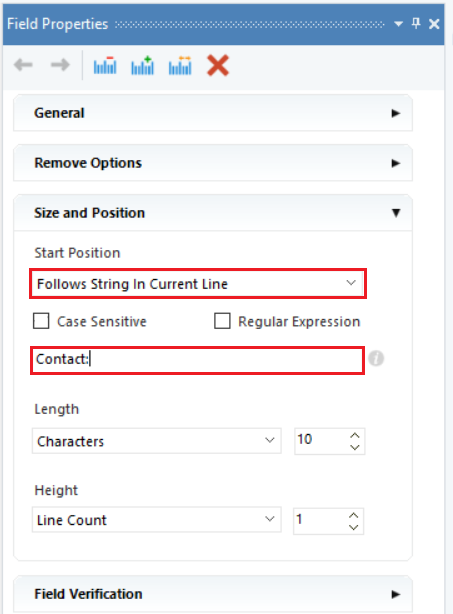
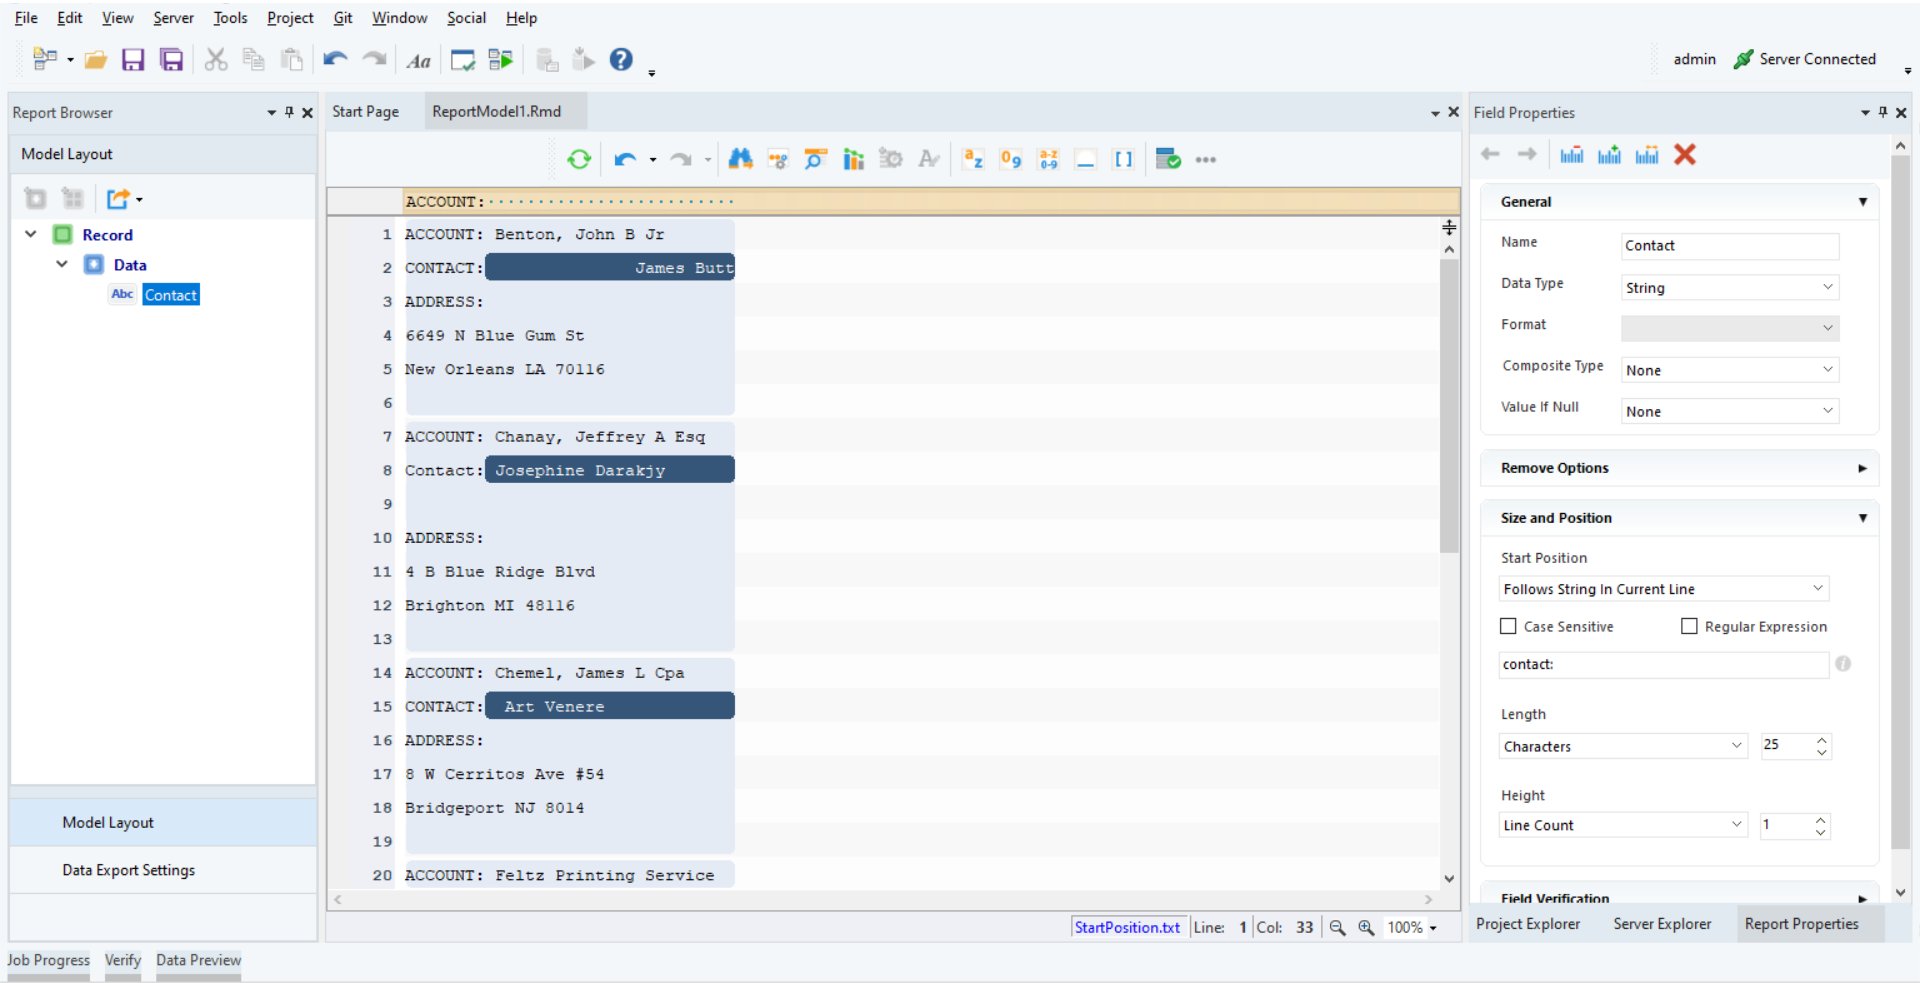
Here, we have defined ‘contact:’ as the string in the textbox and Length Till End Of Line to define the start position. Now, all the data points in this field have been captured completely.
4. Notice that two checkboxes, Case Sensitive and Regular Expression, have appeared in the Field Properties panel.

Case Sensitive: Allows users to search the specified string on a case sensitive basis.
Regular Expression: Allows users to use a regular expression to search the preceding string of the data field.
5. Let’s go ahead and select the Case Sensitive option and see what happens.
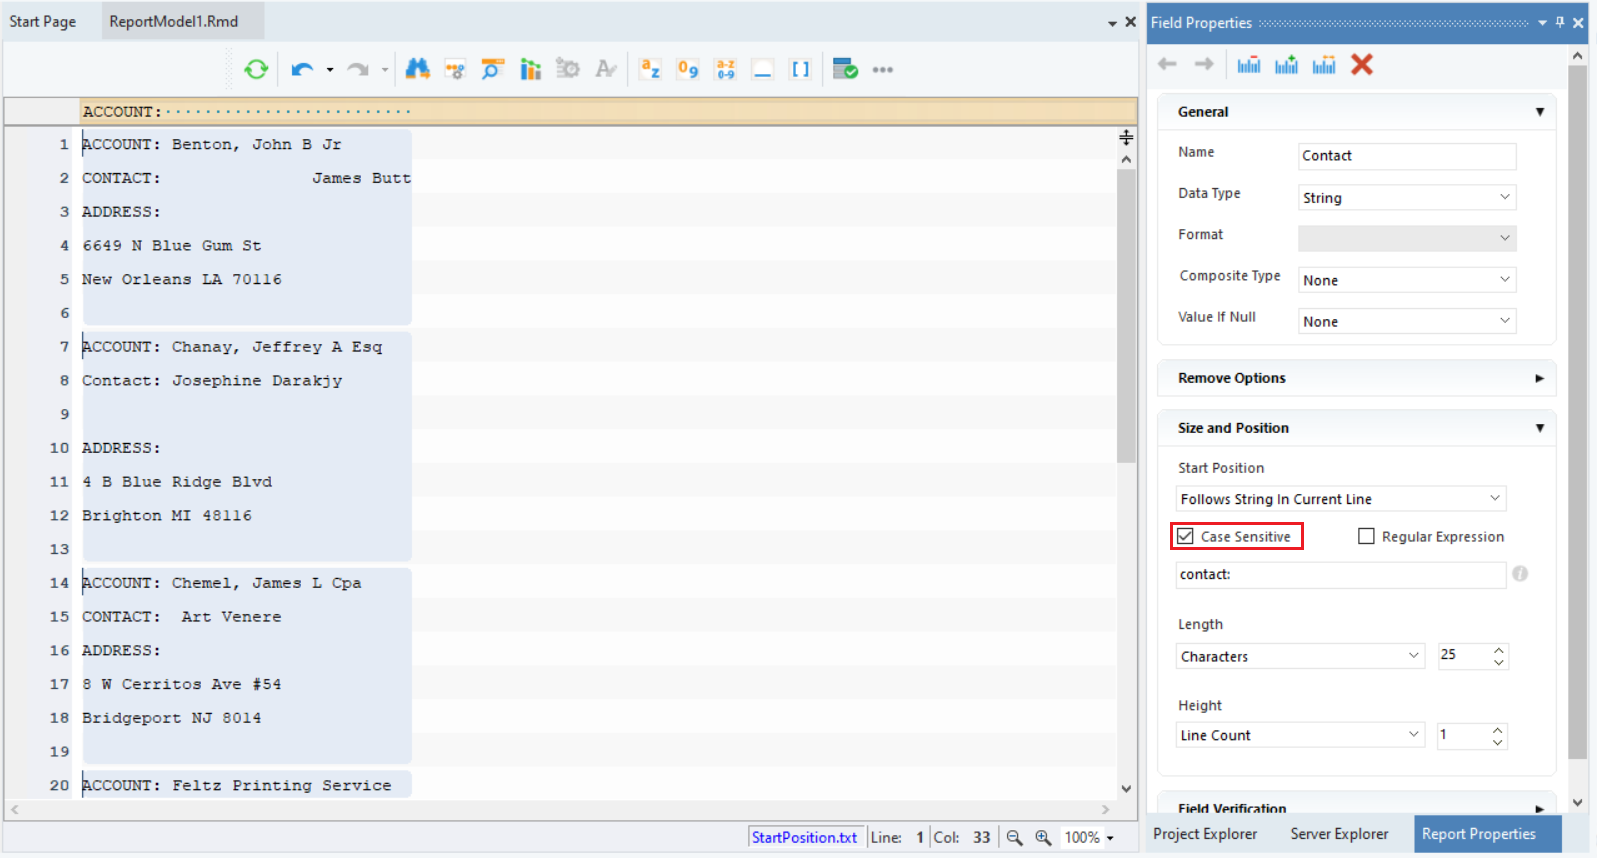
The fields are no longer being captured as they are no longer highlighted in blue. This is due to the case sensitive comparison of the two strings ‘CONTACT:’ and ‘contact:’ (they are currently not matching due to the difference in upper and lower cases). Uncheck the Case Sensitive option.
6. Select the Regular Expression checkbox and define a regular expression in the textbox to capture the data points.
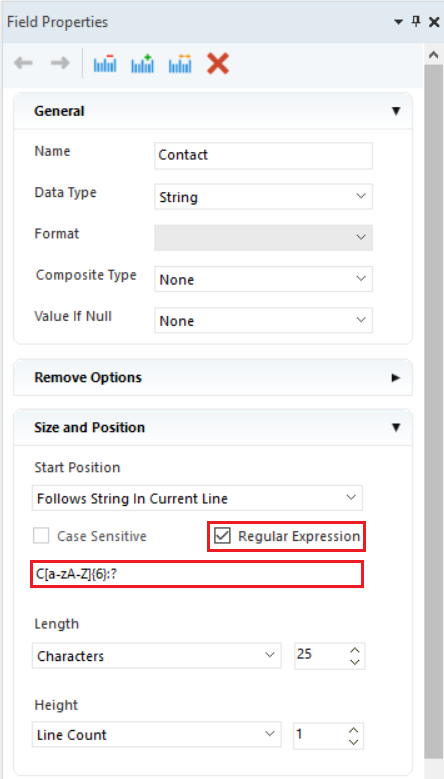
The data is now being captured correctly.
7. Next, capture the data points for the field, Address. This time, define the Start Position as Follows String in Previous Line as the address starts from the following line of the string ‘ADDRESS:’.
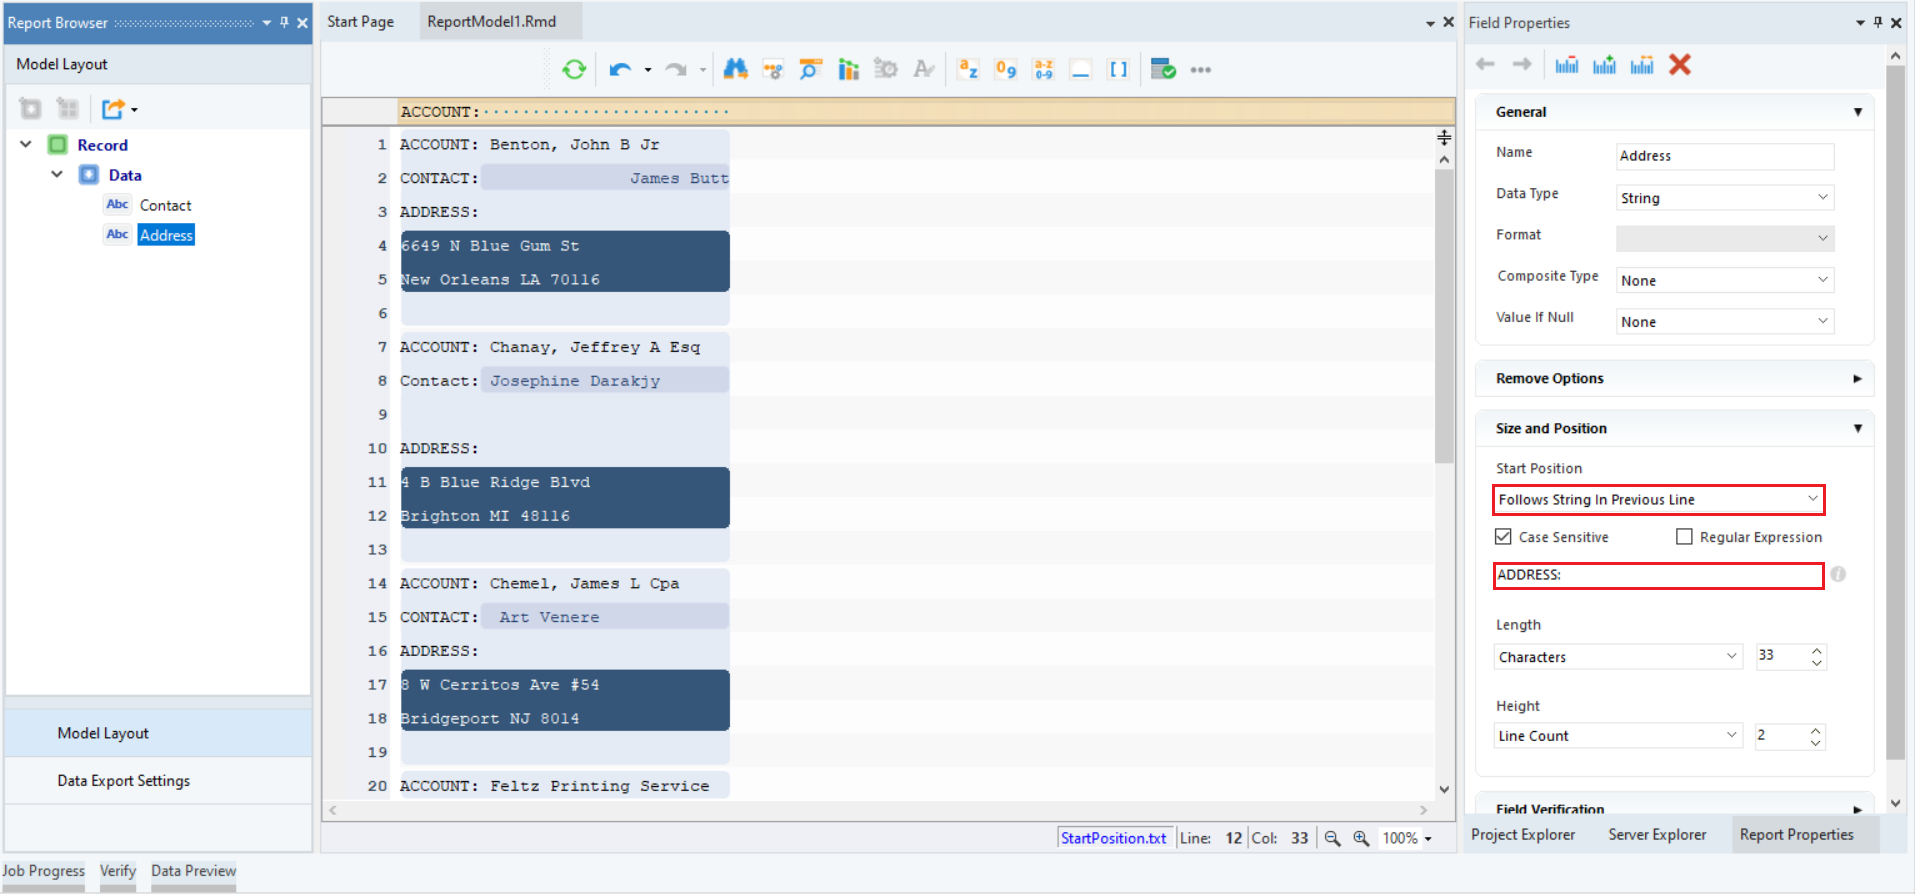
Notice that we have matched the case of the string specified in the textbox with the case of the string in the document since the Case Sensitive checkbox is selected. Therefore, the data is being captured correctly.
8. Lastly, capture the data in the field Account, by using the Follows String in Current Line option.
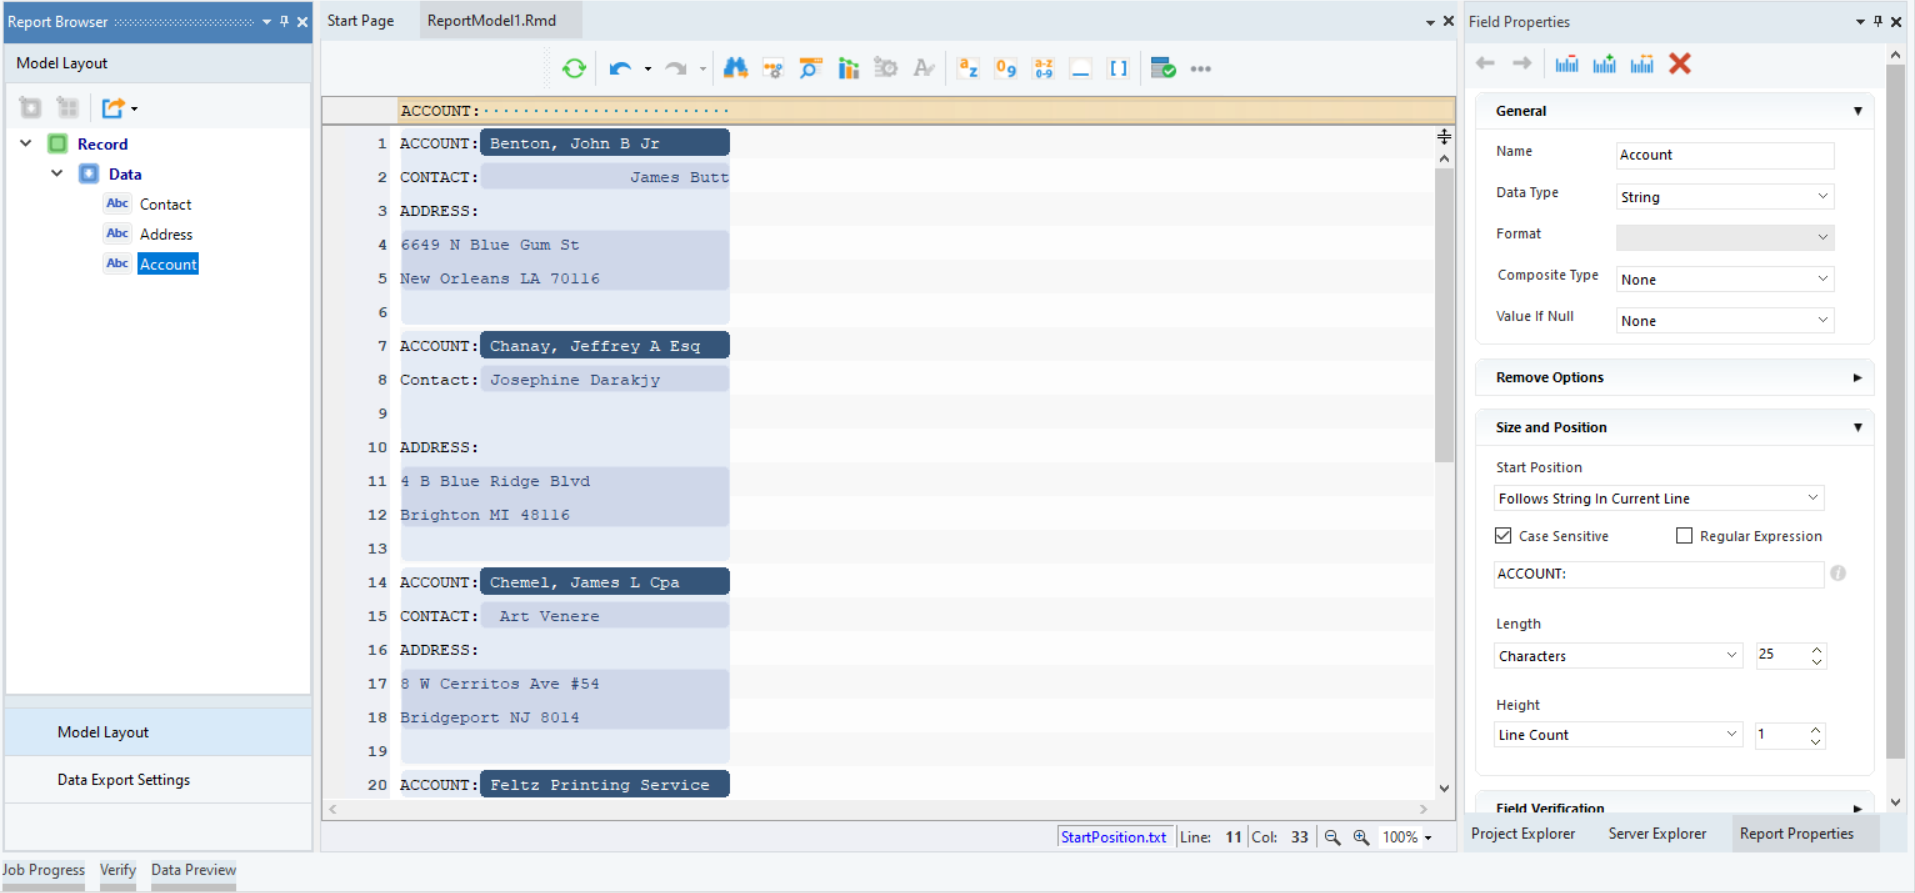
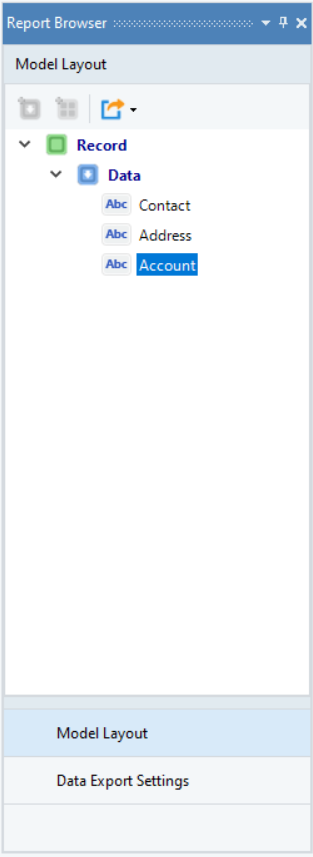
9. You can rename the fields in the General section of the Field Properties panel. This is what our Model Layout looks like:
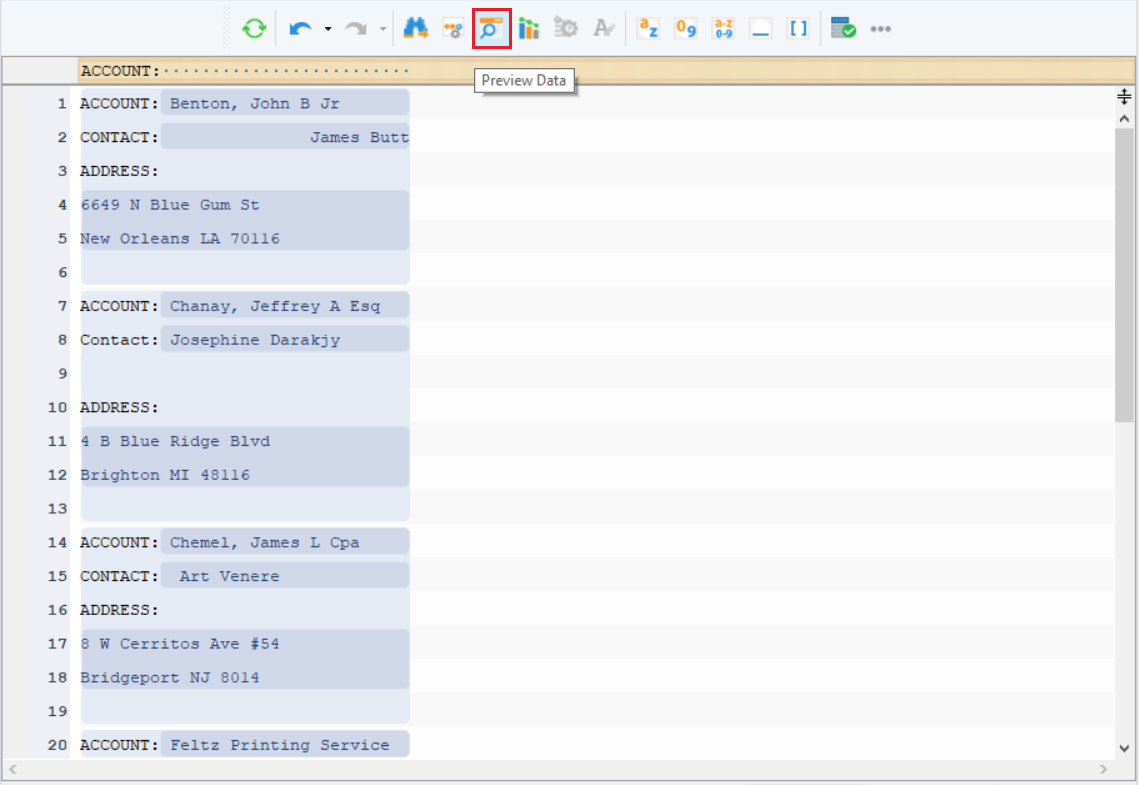
10. Preview the data by clicking on the Preview Data icon to check if all the fields are being extracted correctly from the unstructured document.
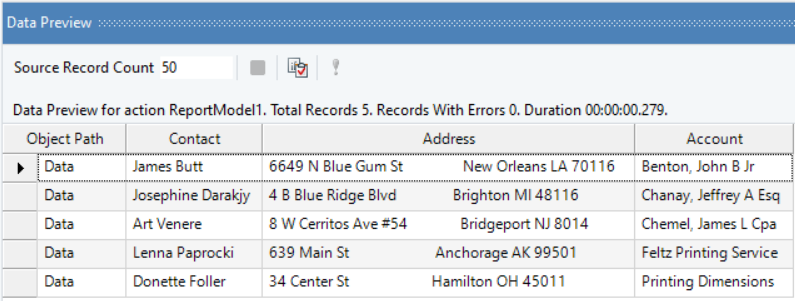
The Data Preview window shows the data extracted from the unstructured document.
This is how we can extract data from an unstructured file by specifying Start Position options in Astera ReportMiner.