Applying Pattern to Line
Apply Pattern to Line is useful when the specified pattern does not capture the first line of the desired data region or when there is some information above the pattern keyword. In that case, we increase Apply Pattern to Line from 0.
In this document, we will explore how Apply Pattern to Line feature helps with the selection of a data region.
Loading Unstructured File
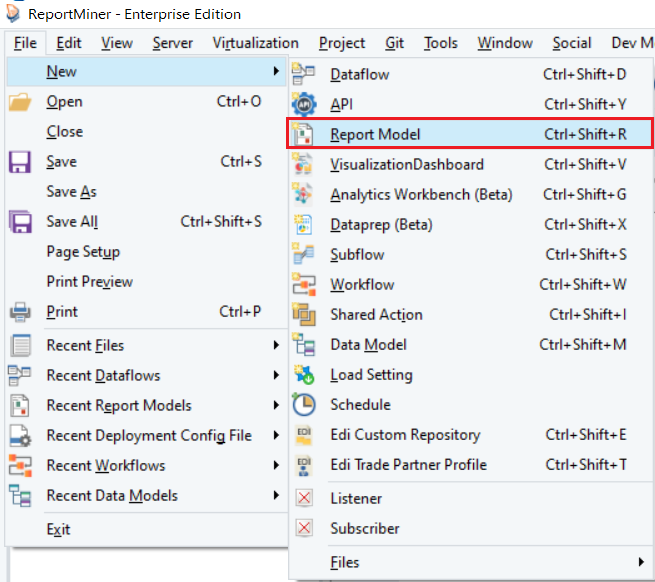
1. Open a Report Model in ReportMiner by going to File > New > Report Model.
2. Select your file in the window that opens.
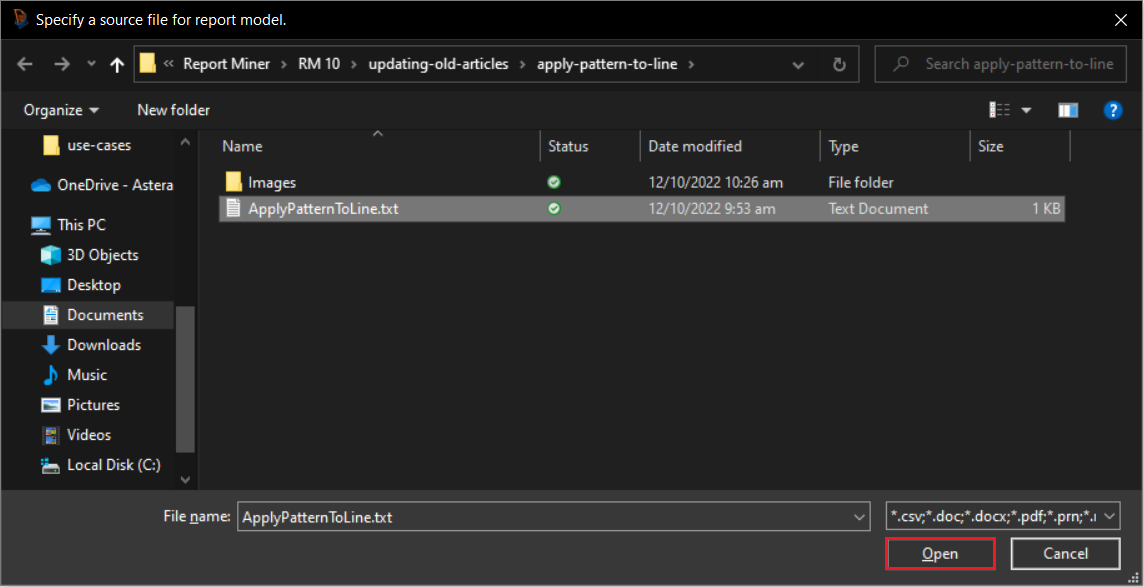
Download the sample txt file from here.
ReportMiner supports extraction of unstructured data from text, EDI, Excel, PRN, and PDF files. In this example, we are extracting data from a text file. Download the sample text file from here.
There are many options available on the Report Options panel to configure how you want ReportMiner to read your file. The reading options depend on the file type. For example, if you have a PDF file, you can select the scaling factor, font, tab size, and passwords.
You can read about these options here.
3. Click Open. A text file containing contact information will open in Report Model designer.
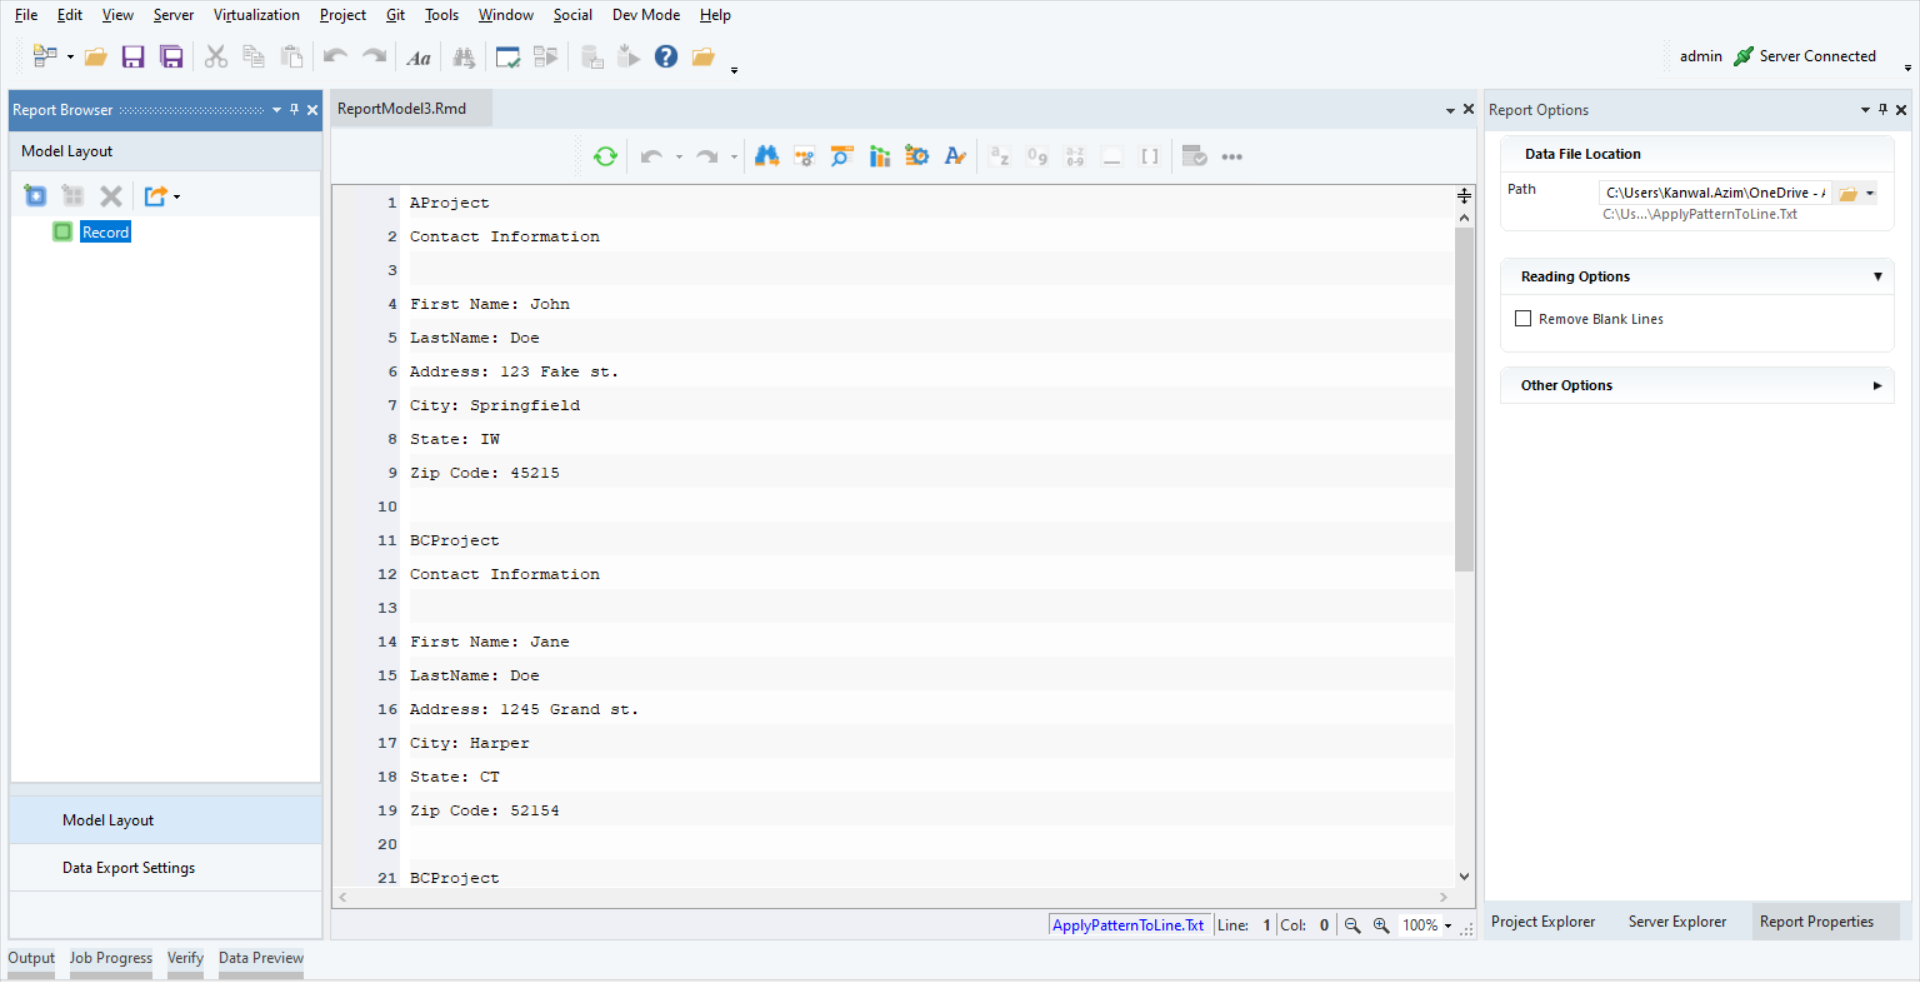
Now that our file has been loaded to ReportMiner, we will create an extraction template.
Creating a Report Model
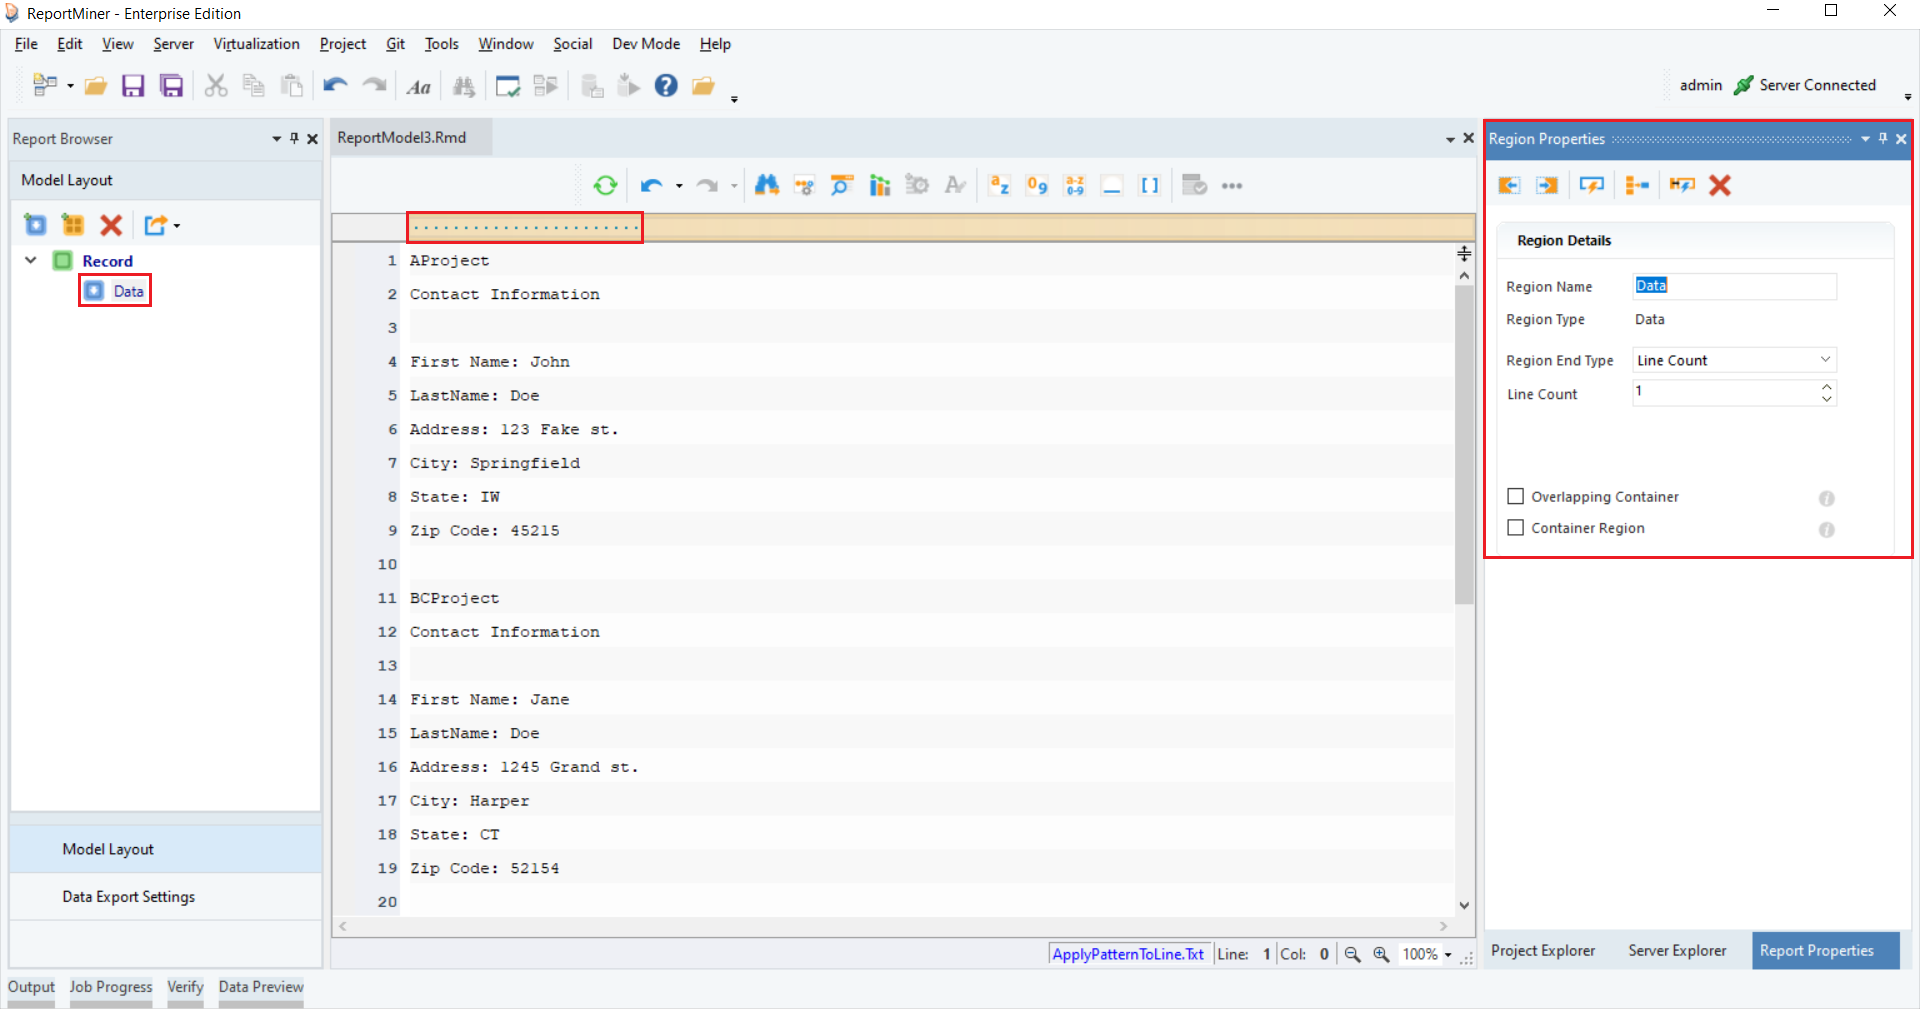
1. Right-click on the Record node in Model layout under the Report Browser panel. Select Add Data Region.
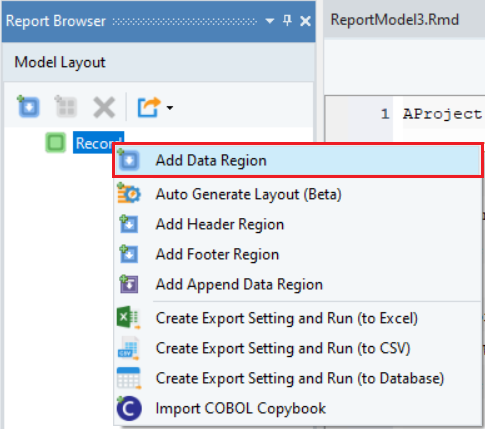
A pattern box, Region Properties panel, and Pattern Properties panel appears above the Report Model designer.
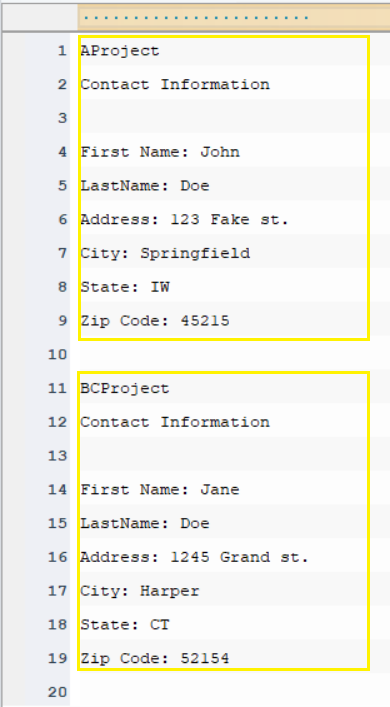
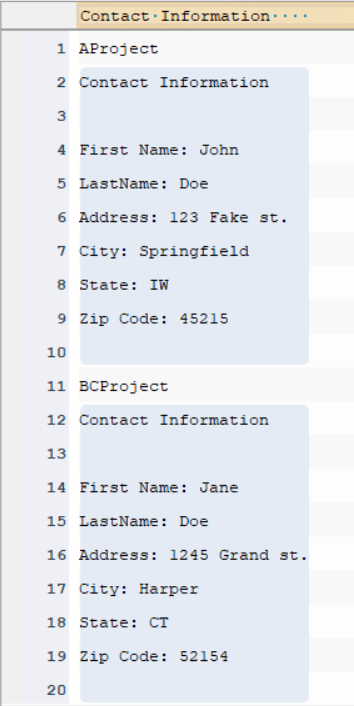
2. Specify a pattern that ReportMiner can match on your file to capture data. In this example, we want to capture the data region highlighted in yellow.
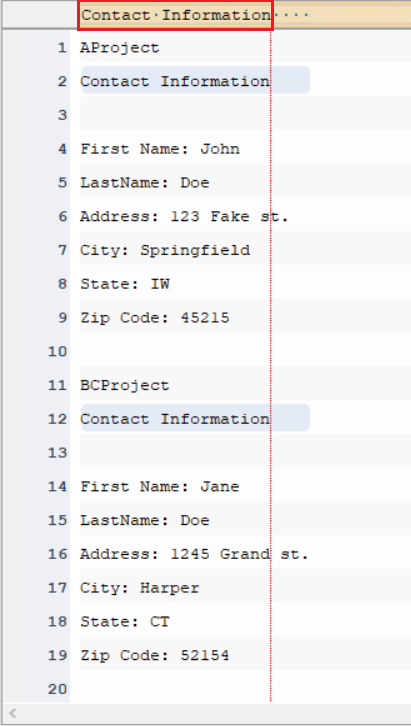
For this, write “Contact Information” in the pattern box to match it on the file as shown below.
3. Notice that specifying a pattern alone is not enough to capture the entire data region in this example. Hence, we will increase its Line Count to 9.
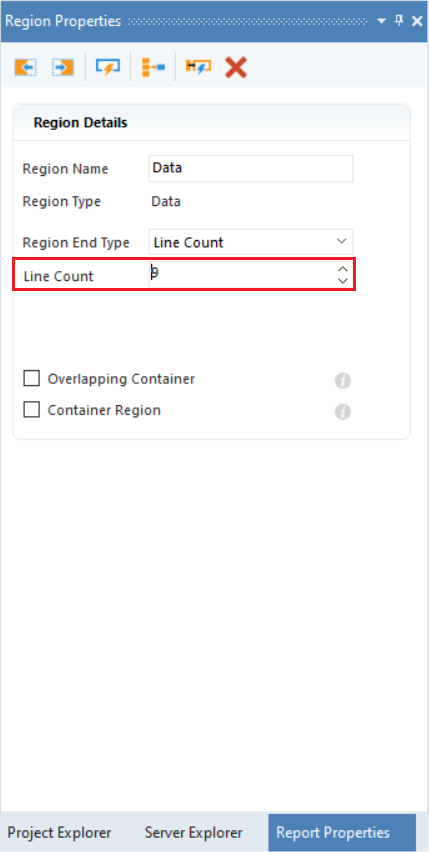
Observe that the data in lines above the data region (highlighted in grey) is still not captured.
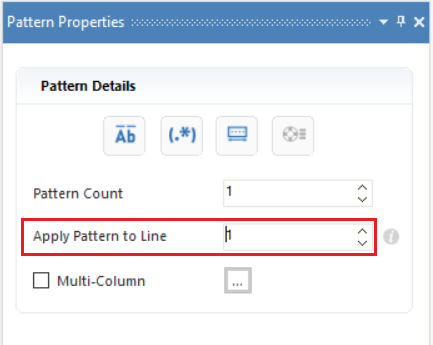
4. To capture data in these lines, increase the Apply Pattern to Line to 1 in the Pattern Properties panel as shown below.
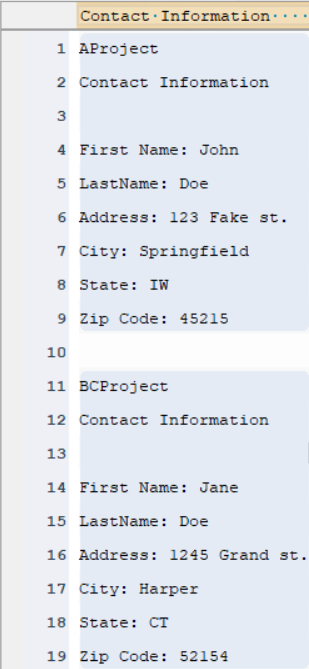
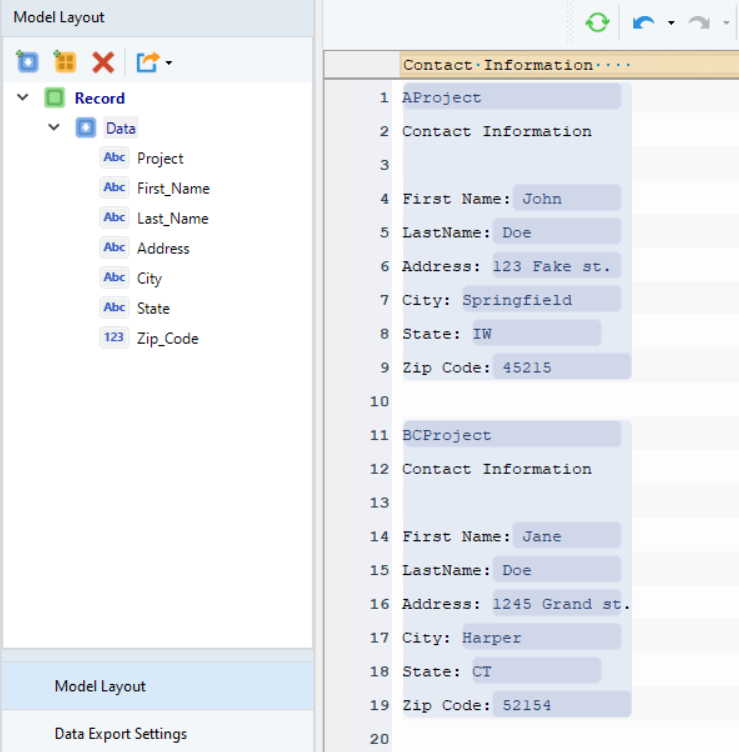
Now, the region is completely captured.
5. Once our data region has been defined, the next step is to create fields. For that, highlight each field area, right-click and select Add Data Field.
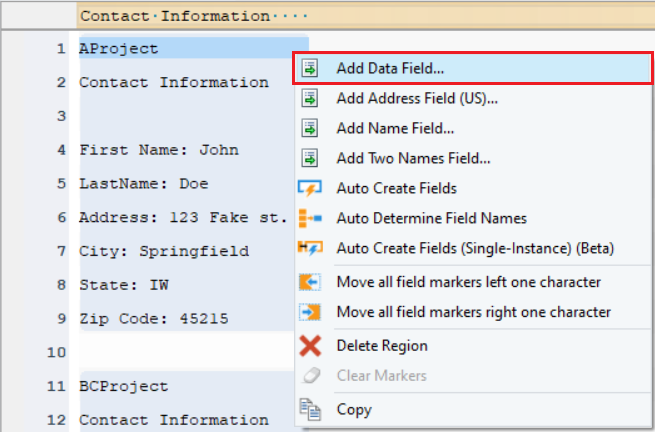
Repeat the process to create more data fields and name them as shown below. You can see the layout of the extraction template in the Model Layout panel.
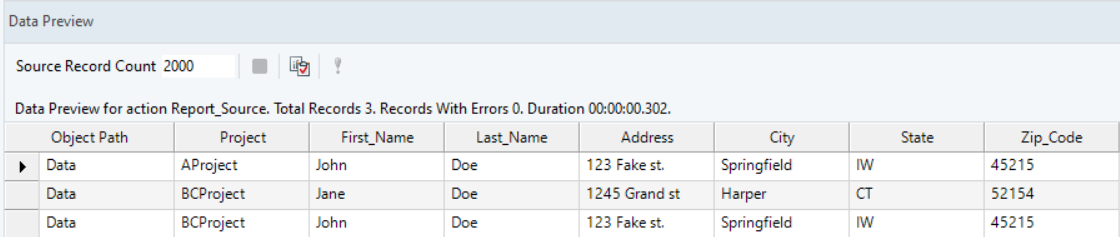
6. Preview data by clicking on the Preview Data icon placed in the toolbar at the top of the designer window. It will first ask you to save the file.
Once saved, a Data Preview window will open displaying a preview of the extracted data.