API Connection
To make an API call, an API Connection object needs to be configured first. This object stores all the common information that can be shared across multiple API requests.
Configuring The API Connection Object
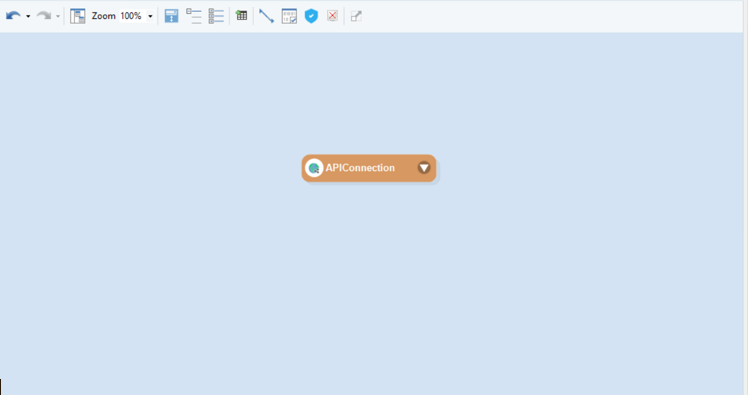
1. Drag-and-drop the API Connection object from the Toolbox onto a dataflow.
Note: It can also be stored as a shared action file.

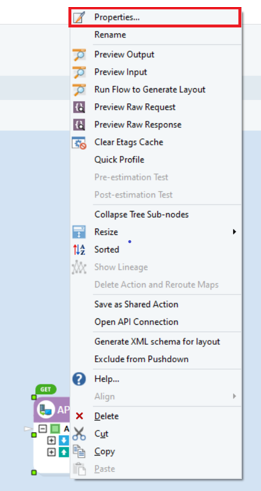
2. Right-click on the API Connection object and select Properties from the context menu.
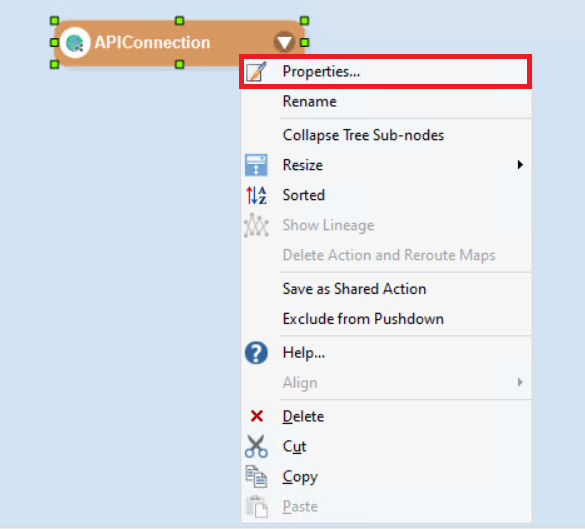
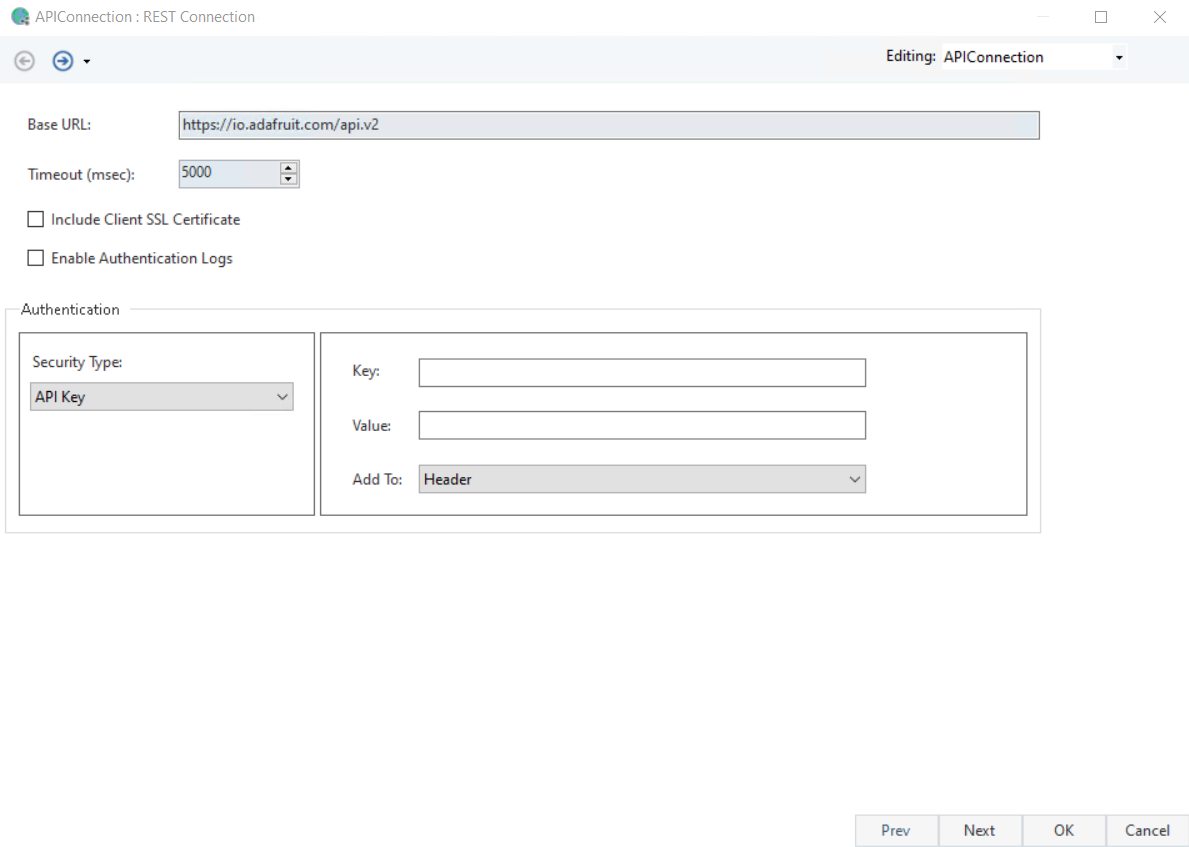
A configuration window will appear on your screen.
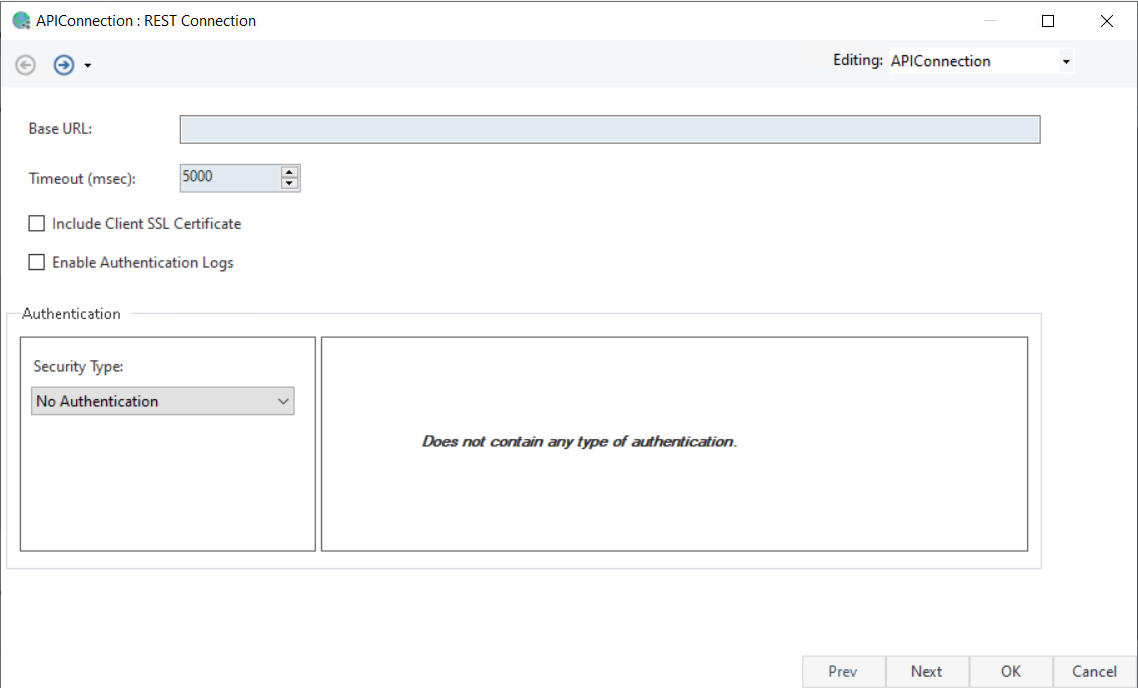
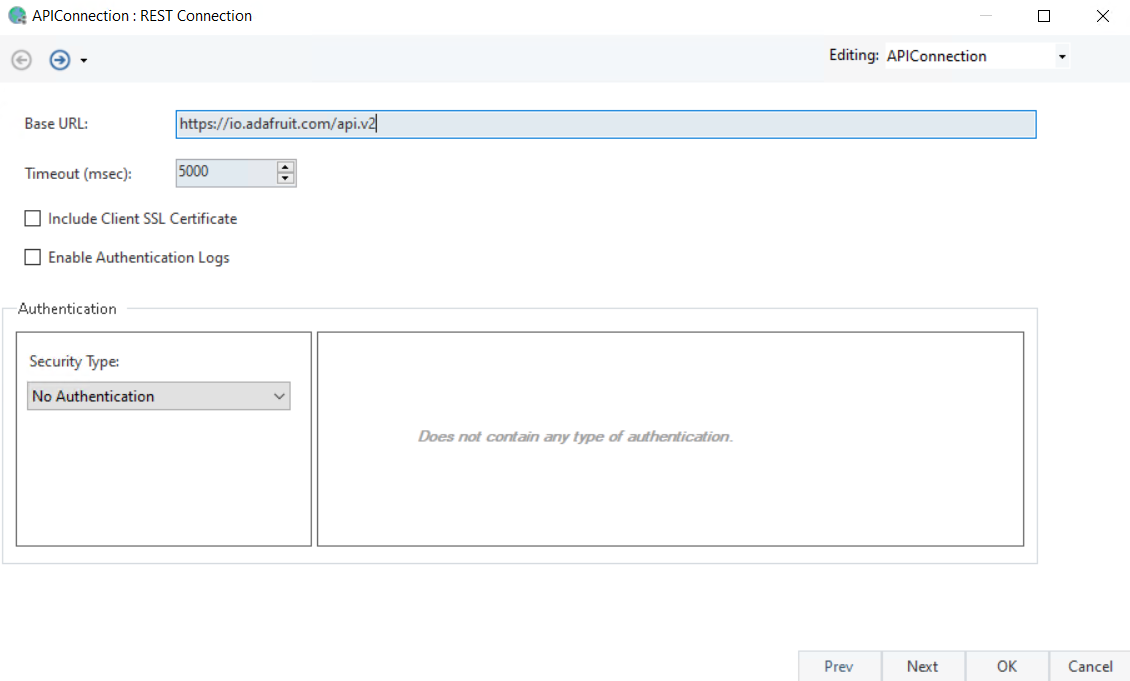
Base URL: Here, you can specify the base URL of the API which will prepend as a common path to all API endpoints sharing this connection. A Base URL usually consists of the scheme, hostname, and port of the API web address.
Note: When a user imports an API definition, a shared connection file containing the Base URL and authentication type is automatically created within the project. To learn more about importing APIs in Astera Centerprise, click here.
Timeout (msec): Specify the duration, in milliseconds, to wait for the API server to respond before giving a timeout error.
Include Client SSL Certificate: Check this box to include an imported client certificate for the specified base URL. To learn more about importing SSL certificates, click here.
Enable Authentication Logs: Select this checkbox to enable authentication logging for APIs.
Authentication – Security Type: Specify the authentication type for the API.
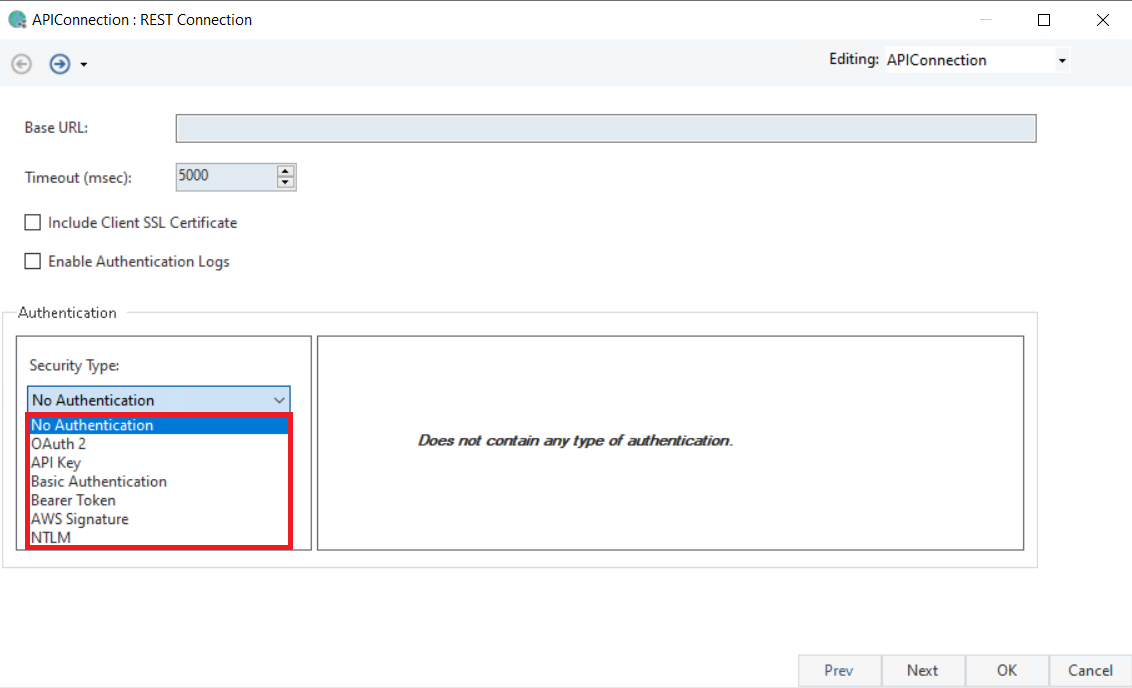
Astera supports the following authentication types
Types Of Authentications:
Identification and verification of a user is an important aspect of authentication. Authentication allows an application to determine whether a user identity is valid/authorized; based on the outcome, a user is provided access control to the application.
For APIs, authentication plays a key role in authorizing requests to the API platform’s resources. The following authentication types are available within the API Connection object.
1. No Authentication
2. OAuth 2
3. API Key
4. Basic Authentication
5. Bearer Token
6. AWS Signature
7. NTLM
No Authentication
With this security type, the user can send API requests without including any authentication parameters.
OAuth 2
This type is used when an unrelated application login is used to acquire permission to access data on your behalf for another application. Instead of giving away your password to the application, OAuth 2 enables delegated authorization through a third-party Authorization Server.
In response to a valid authorization, the Auth Server issues an Access Token with a restricted scope and validity to authenticate the user with permissions. When the Access Token expires, its Refresh Token is used to obtain another valid Access Token.
Configure an OAuth 2 request to generate Access and Refresh tokens. The tokens will be implicitly added to the request and auto-refreshed if expired.
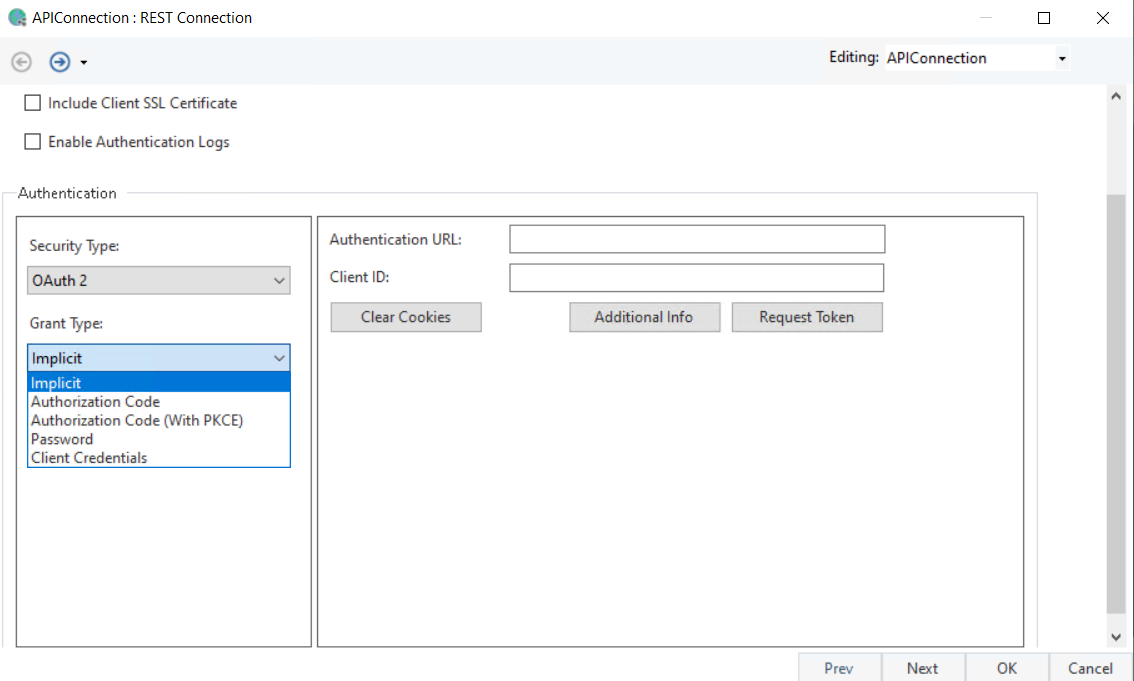
The OAuth 2 authentication supports different flows for various scenarios. You can select any of the following Grant Types:
1. Implicit
2. Authorization Code
3. Authorization Code (with PKCE)
4. Password
5. Client Credentials
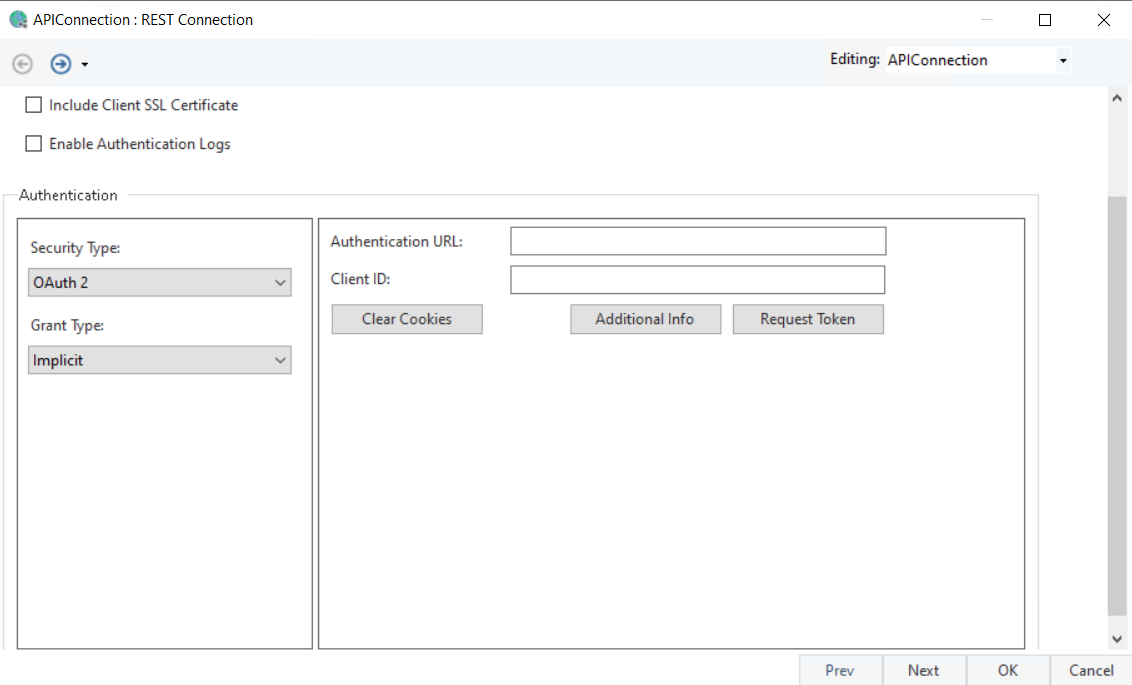
Implicit
In this Grant Type, you only need to provide an Authentication URL and Client ID to request a token without an intermediate code exchange. It was built for apps such as native Java script clients, and mobile or browser-based applications where client secrets cannot be exposed.
Hence, this flow promptly gets the token directly exposed in the URL and is considered less secure for web applications.
Authentication URL: This is the login page, where the API user authorizes itself to the Authentication Server.
Client ID: This is the public identifier for accessing the registered API Server application.
Authorization Code
This flow type is popular for mobile and web server-side applications.
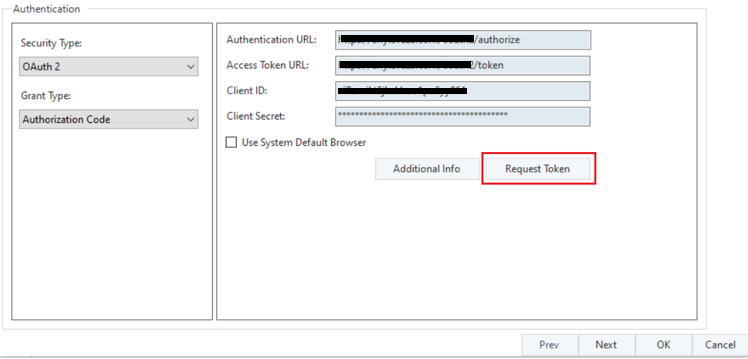
In this Grant Type, you need to provide an Authentication URL, Access Token URL, Client ID, and, optionally, a Client Secret to authorize.
The flow first requests a one-time authorization code from the authorization server. The authorized request is redirected to the API Server along with its client secret which then authenticates the user for its resources by exchanging the code for an Access Token.
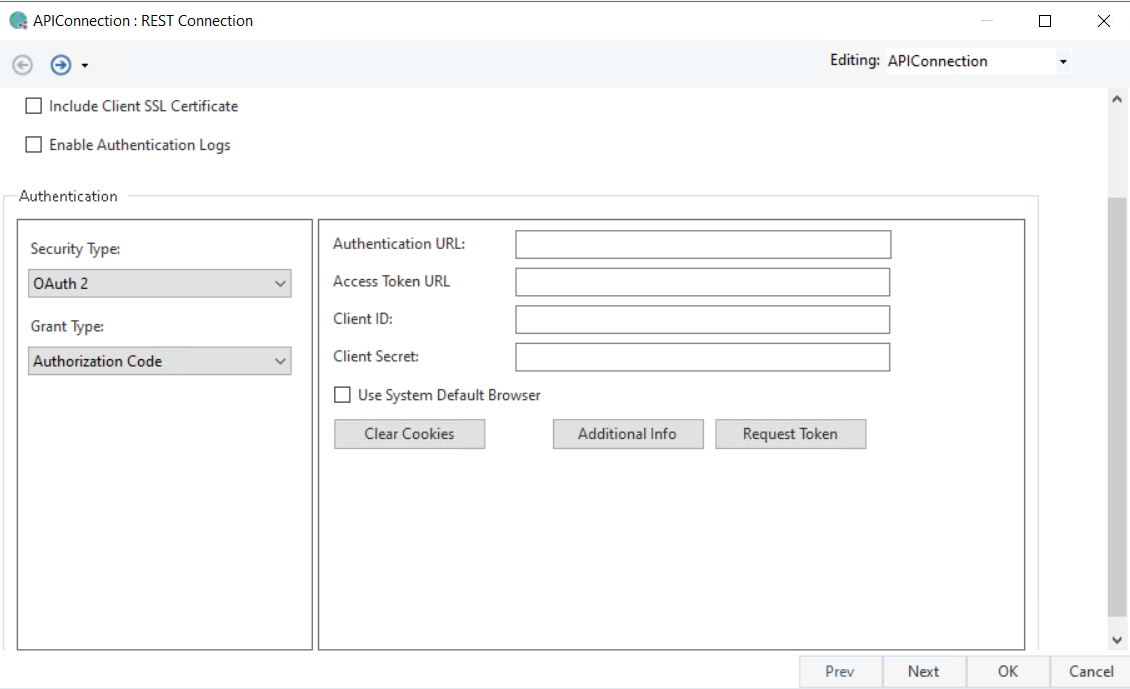
Authentication URL: This is the login page, where the API user authorizes itself to the Auth Server.
Access Token URL: This URL is provided to generate an Access Token for authentication after the user has been authorized successfully.
Client ID: The public identifier for accessing the registered API Server application.
Client Secret: It is provided alongside the Client ID, as a secret credential to access the registered application from the Auth Server.
After providing the authentication details, click on the Request Token option to sign in and fetch the token(s).
Authorization Code with PKCE
The Proof Key for Code Exchange flow has replaced implicit authentication flow by being more secure to be used in single-page native, mobile, and browser-based apps. As such apps existing on the browser cannot store client secrets, this Authorization Code flow keeps the client secret hidden.
Instead, the client sends a dynamically generated string generated using a code_verifier hashed to a code_challange to the Auth Server. The Auth Server stores this for verifying the client during the OAuth2 exchange.
The Client app then makes an authorization request and receives the Auth Code as a result. It then requests an Access Token by sending the Auth Code together with the code_verifier that is hashed by the Authorization server and compared to its saved copy for verification.
In this Grant Type, you need to provide an Authentication URL, Access Token URL, and the Client ID to authorize.
Password
In this Grant Type, you need an Access Token URL, Username, Password, Client ID, and Client Secret to authorize. It is considered for internal services and not recommended for third-party applications as it authenticates the given credentials in a single step.
Since user credentials are exposed to the client application, this flow type outlaws the OAuth2 principles and is now deprecated.
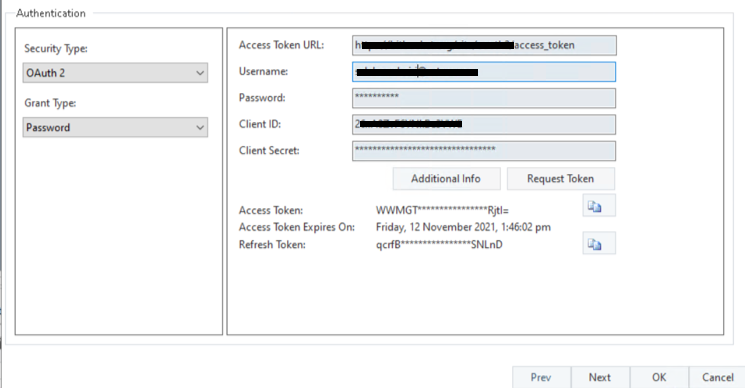
Access Token URL: The URL through which the Access token is going to be generated for authentication.
Username: The application login name of the user for authentication.
Password: The application user password is provided for authentication.
Client ID: The public identifier for accessing the registered API Server Application.
Client Secret: It is provided alongside the Client ID, as a secret credential to access the registered application from the Auth Server.
After providing the authentication details, click on Request Token to fetch the token(s).
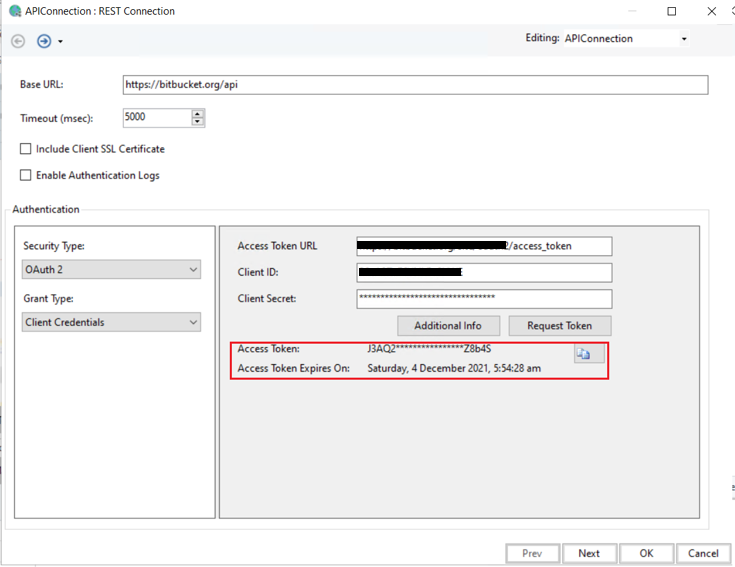
Client Credentials
In this Grant Type, you need the Access Token URL, Client ID, and Client Secret to authorize. This is used with the client application. It self-authenticates access to its resources without a user context.

Access Token URL: This URL is provided to generate an access token for authentication.
Client ID: The public identifier for accessing the registered API Server application.
Client Secret: It is provided alongside the Client ID, as a secret credential to access the registered application from the Auth Server.
After providing the authentication details, click on Reqeust Token to fetch the token(s).
Additional OAuth 2 Info
An OAuth 2 authentication flow requires some additional parameters to specify resources and scope permissions associated with the given Access Token.
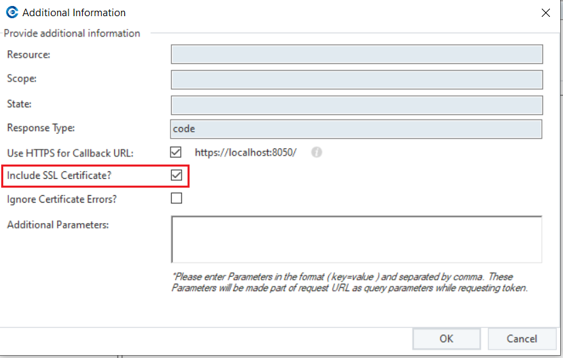
To provide additional information required by an API provider for an OAuth2 request, click on the Additional Info button.
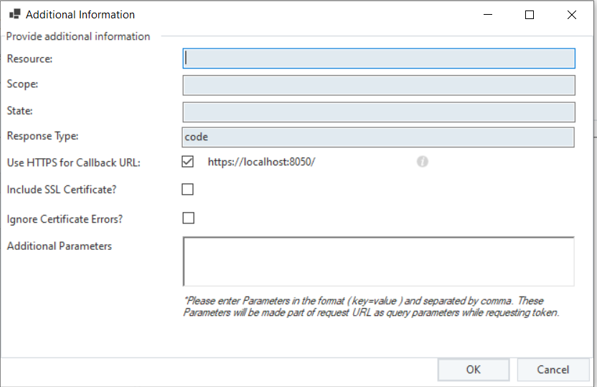
Resource: Use this to identify the URL of the web API intended for user access.
Scope: Use this to specify what the authenticating application can do on behalf of a user by imposing a limit on which resources it can access and with what rights.
State: This parameter is useful to protect against XSRF as the client generates and sends a random string while the Auth Server returns it back again on authenticating as a verification.
Response Type: This parameter is used to specify the expected type to be received from the authorization server on valid authorization. The most common inputs are “code” and “token”. Code is used for the Authorization Code grant type where it is exchanged in the follow-up request for the token. A token is used for implicit grant type where the Access Token is returned directly.
Callback URL: Redirected URL after the authentication request at which the token/code will be returned. For Astera Centerprise, use “http://localhost:8050/” or “https://localhost:8050/”
Include SSL Certificate: To include the client certificate in the OAuth2 token generation request.
Ignore Certificate Errors: Check to ignore any certificate errors while authenticating.
Additional Parameters: Any additional parameters apart from the above list that are required to be sent in the authentication request can be added here as key-value pairs, separated by a comma.
Token Caching and Auto-Refresh
Following the security policy of authenticating an API call, clients are required to obtain Access/Refresh tokens for authenticating an API request. These tokens may have a defined validity and need to be invoked again to generate a new token.
Once authentication details are fully configured, users need to manually ‘Request Token’ in the API Connection.
Handling token expiry and Automation
For the OAuth2 grant flow which requires users to authenticate when requesting a token, the refresh token can be used to obtain a new access token. While other grant flows directly make the call to request an access token, Astera Centerprise can automatically obtain a new token in the background so your flows can be automated.
You can make use of the auto-generation and caching of these tokens which enables you to automate API requests ensuring new tokens are generated for use without needing to manually update the tokens each time.
Using ‘Client Credentials’ or ‘Password’ OAuth2 Grant Types
These grant flows work by making a single call requesting an Access Token along with the provided client application credentials. Since the flow is not dependent on any user input for authentication, it can be automated for the regeneration of a new token when the existing token expires.
Here, I have a pre-configured authentication with an expired token. Let’s see what happens when this flow is executed with an expired token.
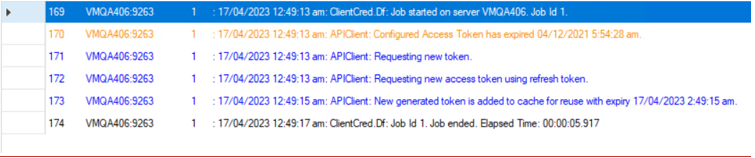
The job trace shows that an expired token was found, and a new token has been generated for this connection and saved to the server cache for future reuse.
On the next run, the server is bound to check the cache for a valid token before opting to generate a new one. The cache stores a token for each unique connection used across all jobs running on the server.
Use of a Refresh Token
For other OAuth2 grant flows that require the user to authenticate first, the refresh token is used to regenerate the access token automatically.
Using Default User Browser for User Authentication
Some API Providers restrict using an embedded browser for authenticating using the OAuth2 code exchange. An alternate option is to request token through a more secure browser-based OAuth authentication.
In this article, we’ll discuss how to run an OAuth2.0 flow for Google Calendar API using the user’s default browser. Users will first need to create an oauth2 application on the Google Developers’ account and obtain the client id and secret.
Authenticating the Client Application
For this example, we will be authenticating Google APIs which do not allow the use of an Embedded Browser for an OAuth2 exchange.
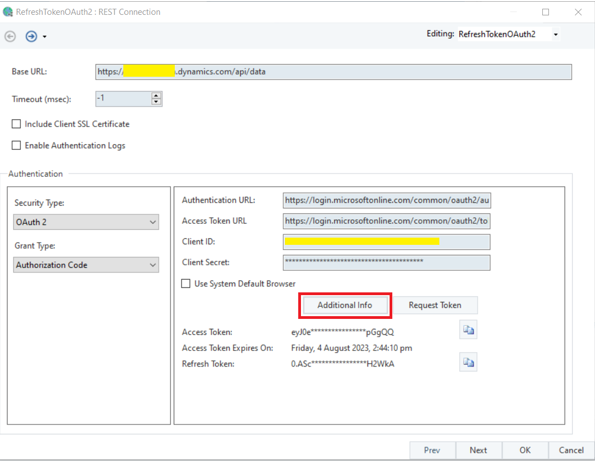
1. Open the API Connection to configure authentication information.
As Google Calendar API works with OAuth2.0 security with Authorization Code grant type, we can select and configure it accordingly.
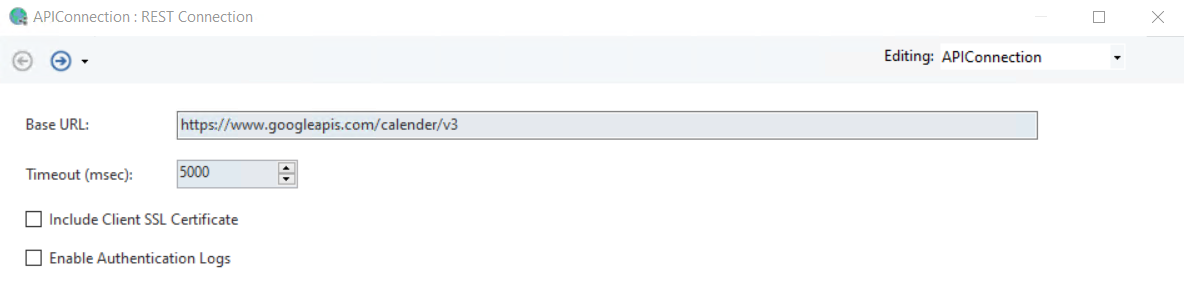
We must enter parameters such as Authentication URL, Access Token URL, Client ID, Client Secret, and Additional Information according to the authentication and authorization information provided by Google. Now, let’s click on the Request Token button to generate the access and refresh tokens.
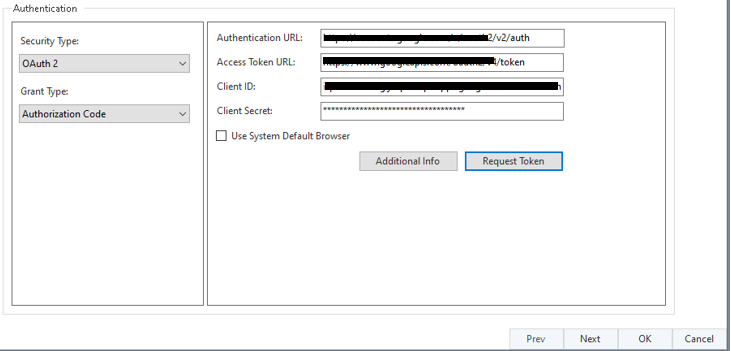
This opens the Embedded Browser of the Astera Client which will result in an error as Google does not allow authentication via an embedded browser. For such platforms, it is necessary to use a more secure user-default browser for OAuth2 authentication exchange.
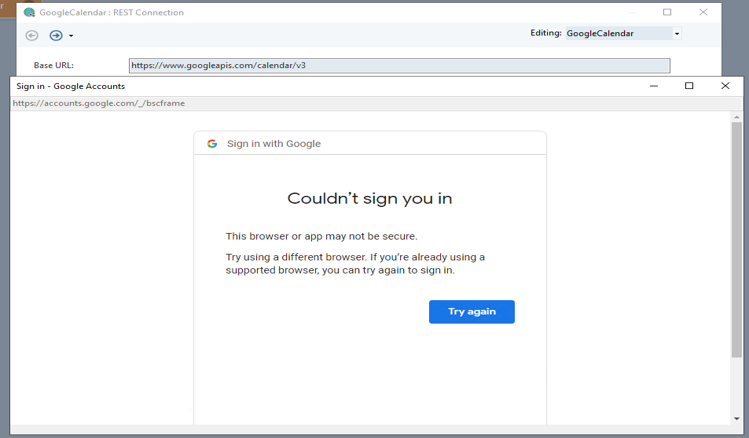
Close the embedded browser window. Now, check the option to Use System’s Default Browser and click on the Request Token button again.
This opens the user system’s default browser for authentication, and this allows us to successfully retrieve the access token on logging in. In our case, the default Microsoft Edge web browser has opened.
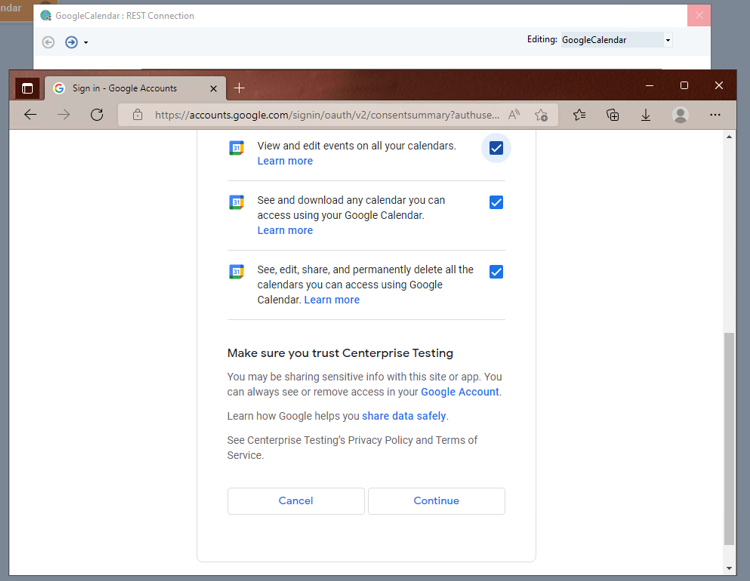
Note: Whether the embedded or secure browsers are allowed for authentication strictly depends upon the API provider.
Click on Continue.
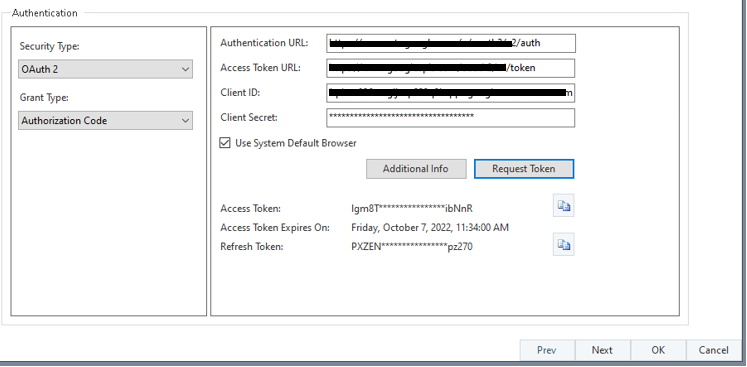
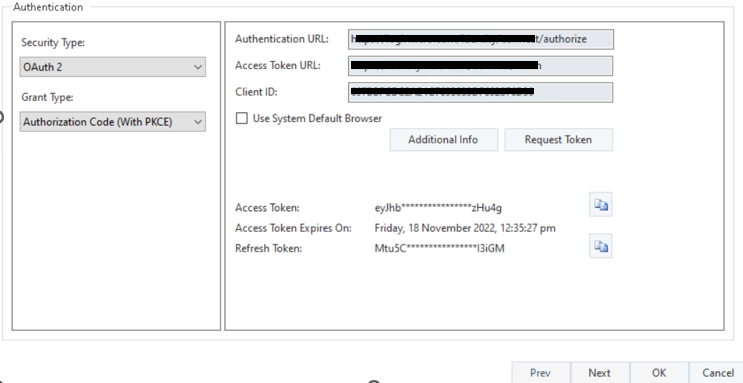
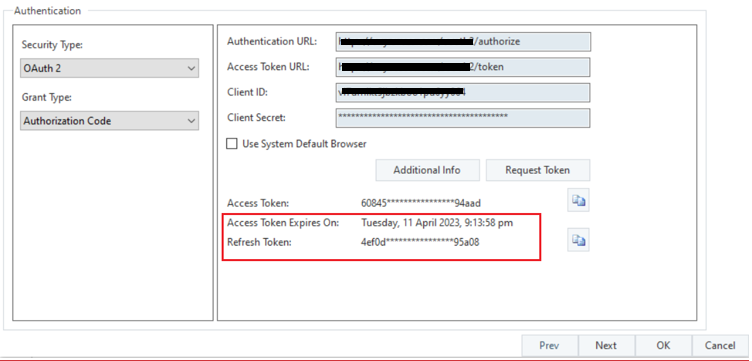
The generated Access Token along with the Refresh Token (if supported by the API provider) are displayed on the REST Connection window with their respective expiry date and time.
Tested System Browsers
The following browsers have been successfully tested for the Astera Client,
Google Chrome
Microsoft Edge
Firebox
API Key
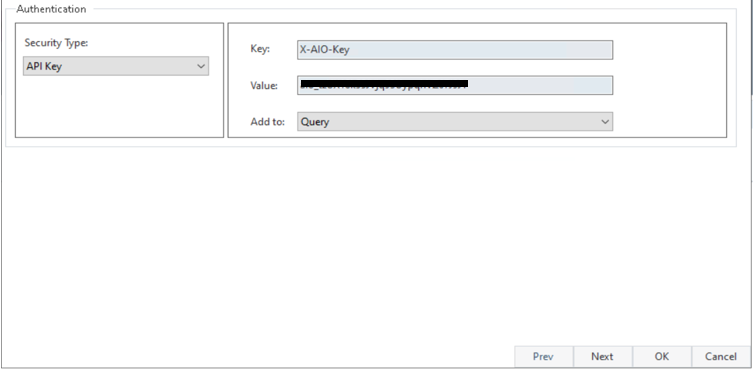
An API Key is a key-value pair that a client provides when it makes an API request. They can be sent in the Query string or as a request Header.
It requires two parameters for authentication:
1. Key
2. Value
API Key as a Query
API Key as a Header
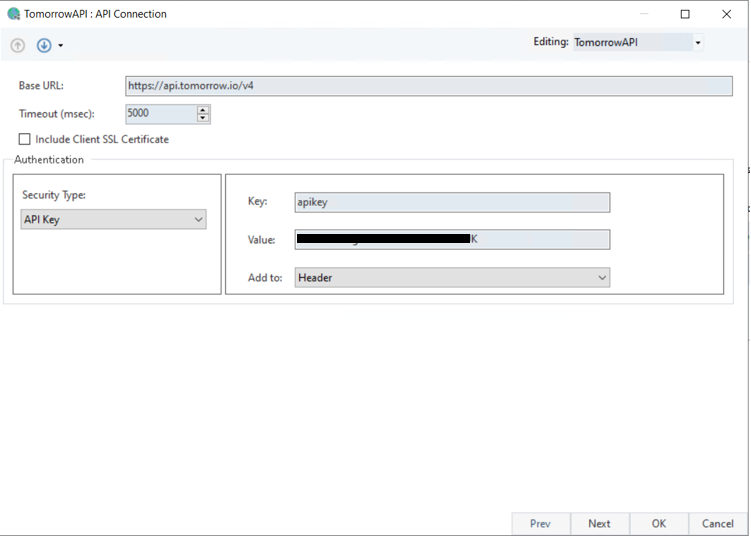
Note: API Key is sent in as a key-value pair in the header such as “apikey: cZRcTZt7R3gnTt9l2C9YHXke0SNDAPJK”
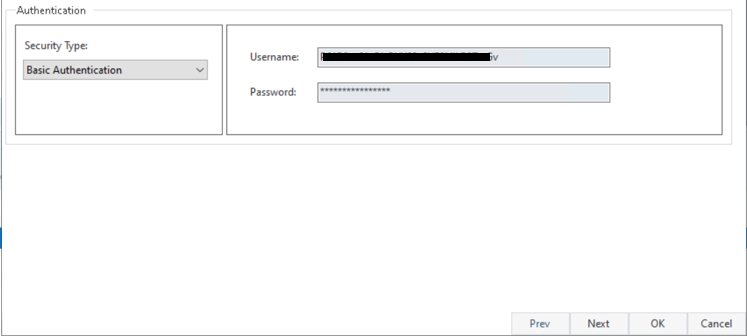
Basic Authentication
Basic Authentication is structured according to the HTTP protocol to provide a Username and Password when making an API request.
In basic HTTP authentication, a request header parameter is included in the form of “Authentication: Basic
Bearer Token
Bearer Token is an HTTP-based authentication. The access token generated by the server in response to a login request is in turn included in the request header.
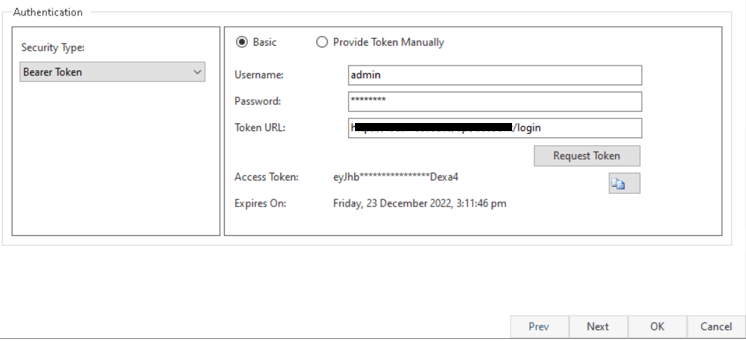
To generate a Bearer Token, you need:
1. User Name
2. Password
3. Token URL
Note: This Authentication type is needed to access Astera APIs, and the request is sent as “application/JSON”.
SSL Certificate Authentication
API clients can enable the use of a private signed certificate to authenticate themselves when accessing APIs through mutual TLS. You can configure APIs to use a .pem or a .pkt certificate paired with a certificate key or password.
A Client certificate contains information used to identify the client including a digital signature and it is imported for a specific domain. All HTTPS - SSL-enabled requests matching the domain URL will authenticate using the installed client certificate.
All certificates used in authenticating API requests from the client will be imported to Astera’s Server and are included as authentication when an API request is sent. To import a client certificate for authenticating API requests,
1. Navigate to the Server tab on the main menu bar.
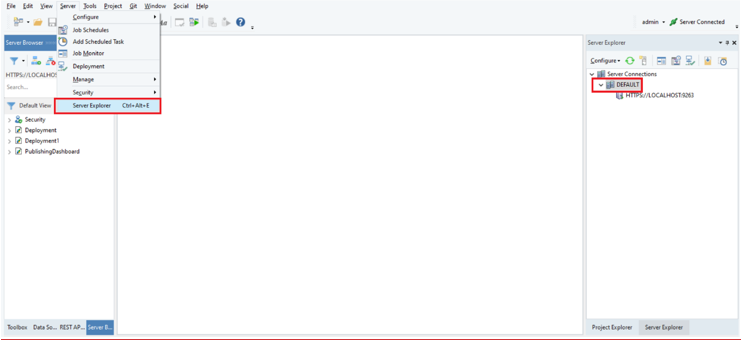
2. Right-click on the cluster node and select Client Certificates.
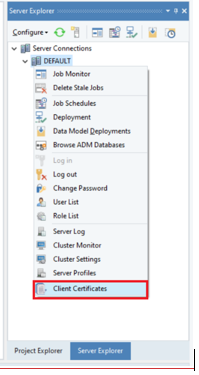
This opens the wizard to manage client SSL certificates.
3. Click on the import icon at the top left to add a certificate authenticating to a domain.
Importing a .pem certificate
Define the requested domain which will include this certificate.
Browse the .pem client certificate file obtained as a counterpart to the authenticating server certificate present on the API provider.
Provide the matching key file for the given client certificate.
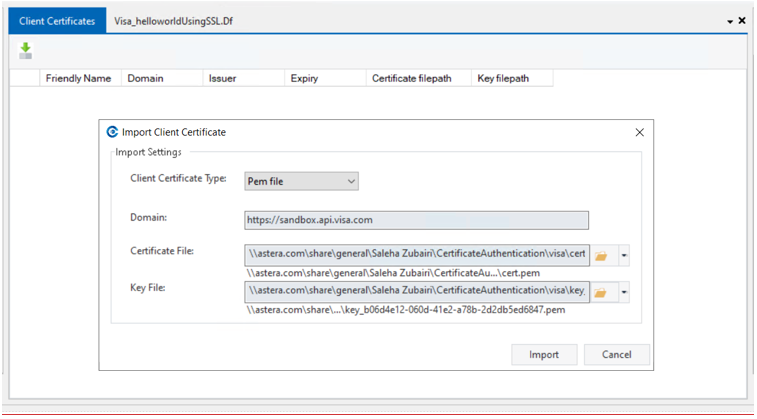
Click import.
Now this certificate can be used with SSL-enabled authentication for API requests sent to the given domain.
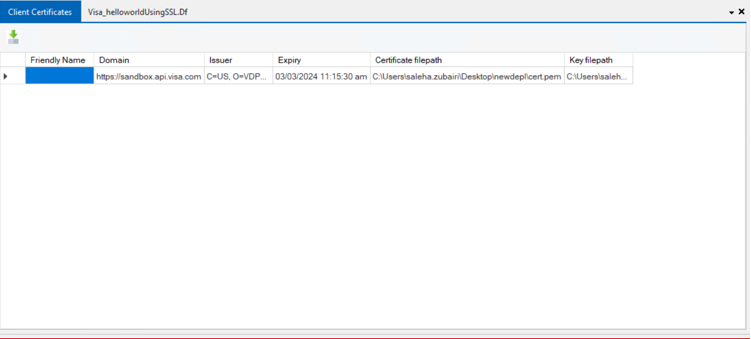
Importing a .pfx certificate
Define the requested domain which will include this certificate.
Browser the .pfx client certificate file obtained as a counterpart to the authenticating server certificate present on the API provider.
Enter the password for the certificate.
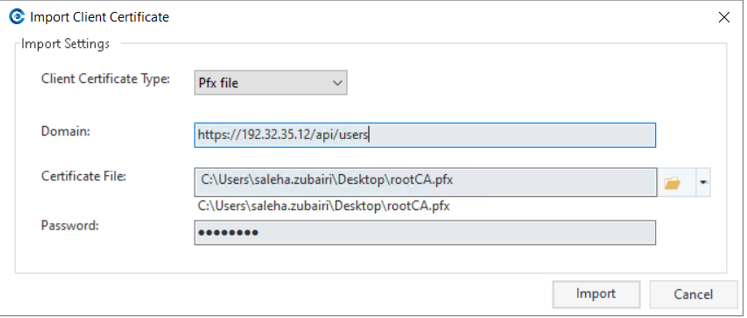
Click Import.
Now this certificate can be used with SSL-enabled authentication for API requests sent to the given domain.
Enabling SSL Certificate Authentication
Once the certificate has been imported for the respective domain, let’s see how to make an API request with SSL enabled.
You need to enable SSL verification to include the certificate when making an API call. To enable SSL, open the API Connection object which has the Base URL domain, and the authentication configured. To include the SSL certificate, check the option to “Include Client SSL Certificate”.
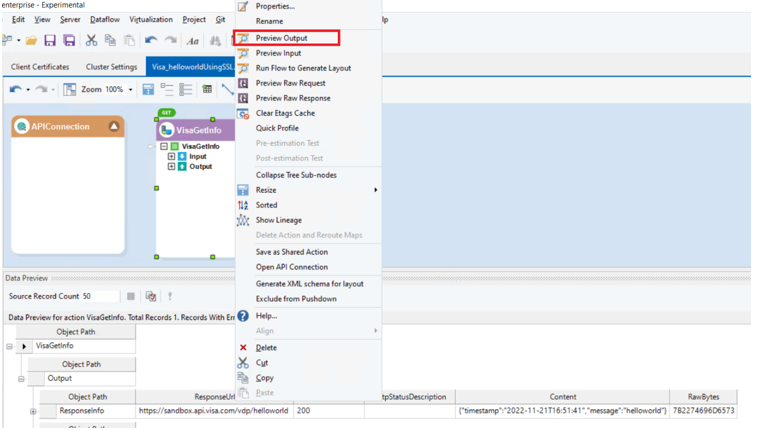
Click Ok and preview the API Client to send a request.
This request now includes the certificate to validate the client on the mutual TLS authentication.
Note: To include the client certificate in the Oauth2 request from the API Connection, check this option from Additional Info.
Shared Parameters
This is where you can define query or header parameters to be shared across all clients using the same connection.
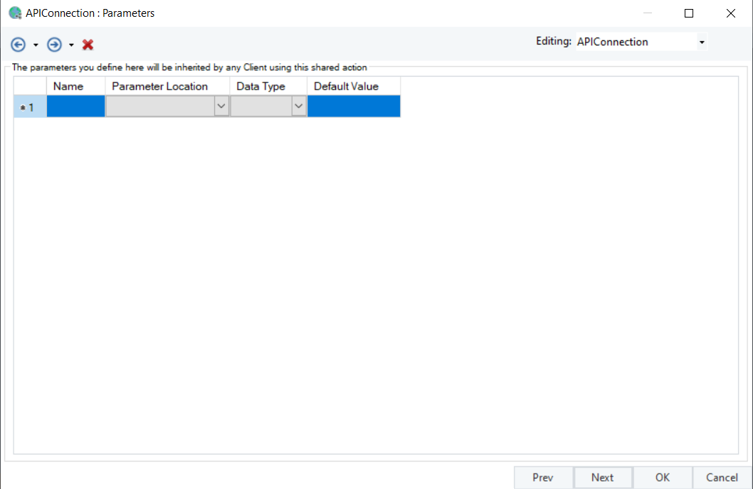
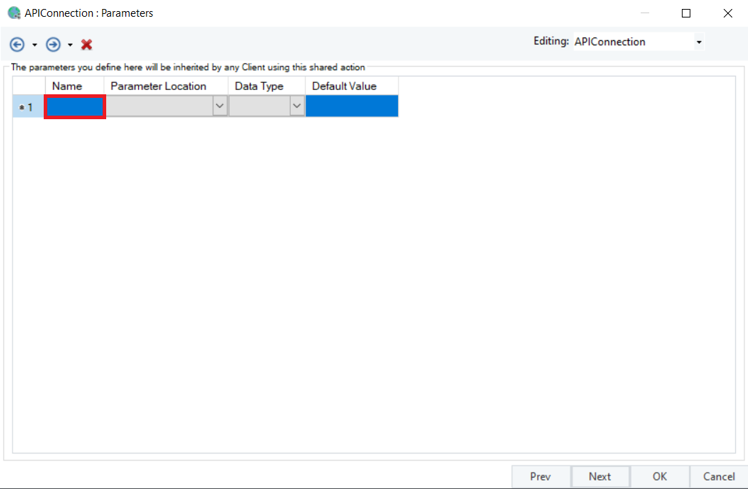
Name: The name of a Query or Header parameter can be defined here.

Parameter Location: This option defines whether the parameter has a Query location or a Header location.
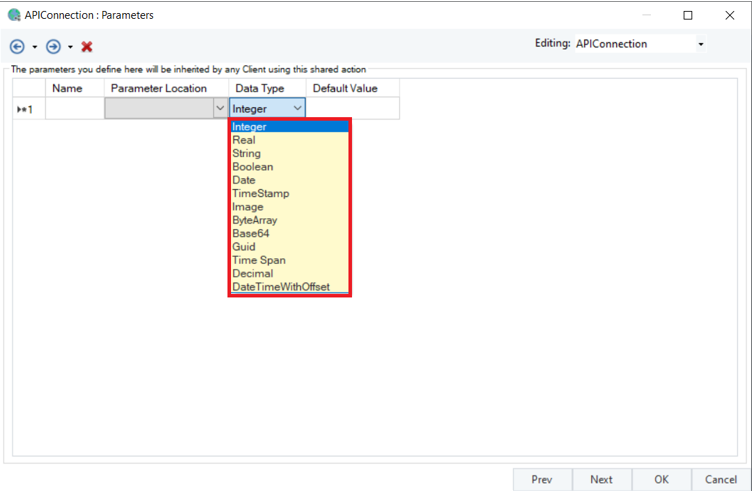
Data Type: This option defines the data type of the parameter from a list of options.
The parameter values defined here will be inherited by all API clients using this connection unless overridden individually.
4. Once done, click Next and you will be led to the Config Parameters screen.
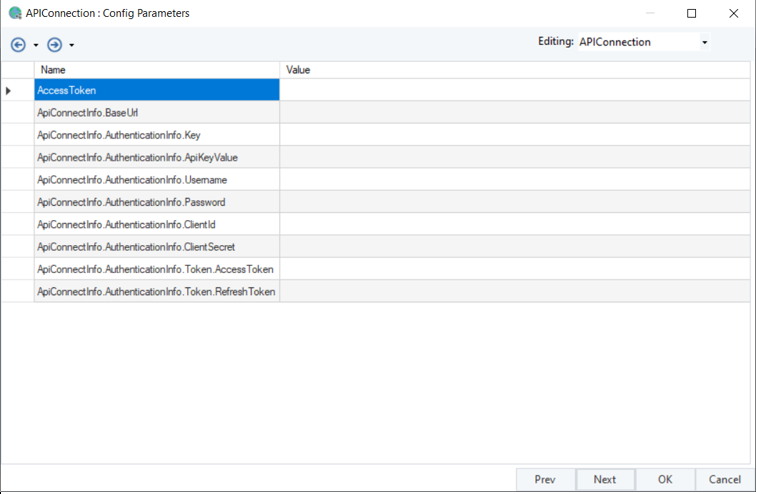
Here, config parameter values can be changed according to your application. Parameters not changed will use their default values.
5. Click Next, and you will be led to the General Options screen.
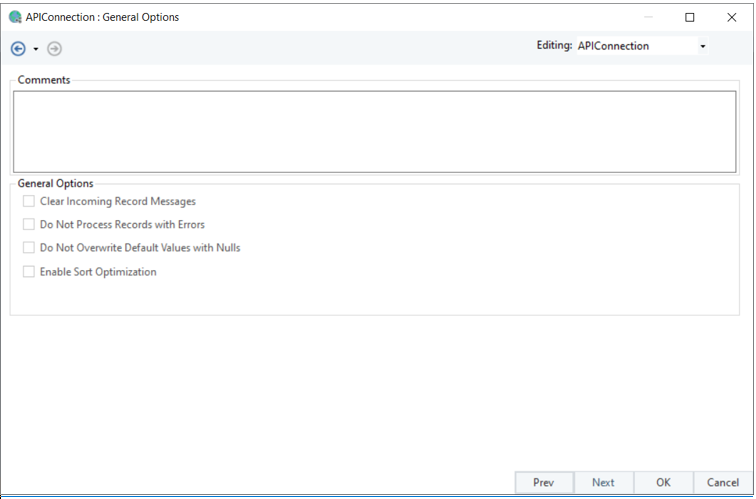
Here, you can add any Comments that you wish to add. The rest of the options for this object have been disabled.
6. Click OK to close the window.
You have successfully configured the API Connection object.
Using the API Connection Object
In a Dataflow
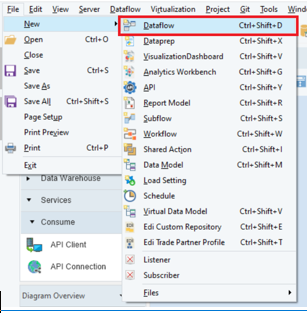
1. Click on File in the main toolbar, hover over New, and select Dataflow from the drop-down menu.
2. Once the dataflow is open, drag-and-drop the API Connection and API Client objects from the Toolbox onto the dataflow.

Note: The API Connection here can only be accessed within the scope of this dataflow.
3. Configure the API Connection object for the Base URL, Authentication.
Right-click on the API Client object and select Properties from the context menu.
A new API Client Properties window will open.
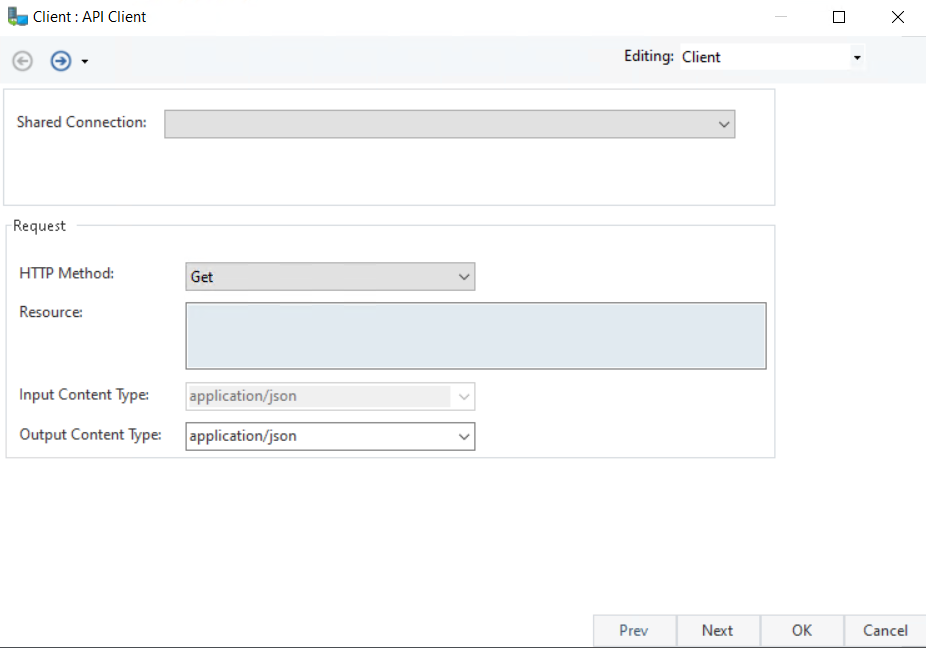
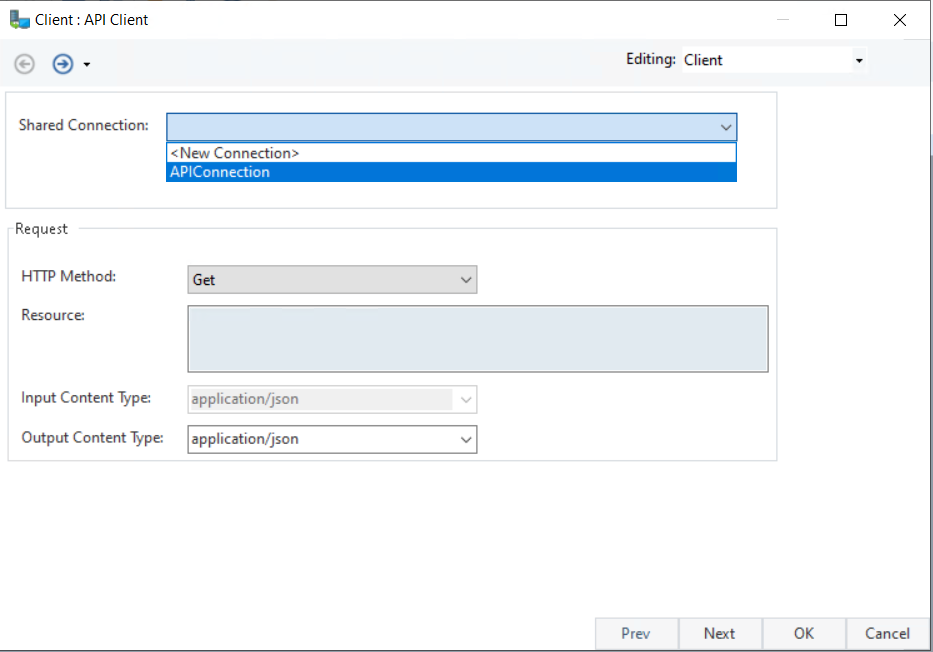
The Shared Connection dropdown list shows us the API Connection object present in the same dataflow.
You can now use this API Client object to make API calls within Astera API Management.
In a Project
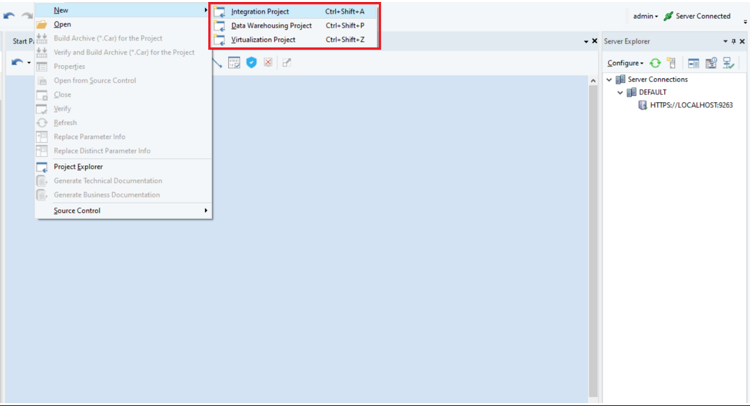
1. Navigate to the main toolbar, click Project, hover over New, and select a project type. Please click here for more information on creating projects.
Note: You can also open a previously existing project.
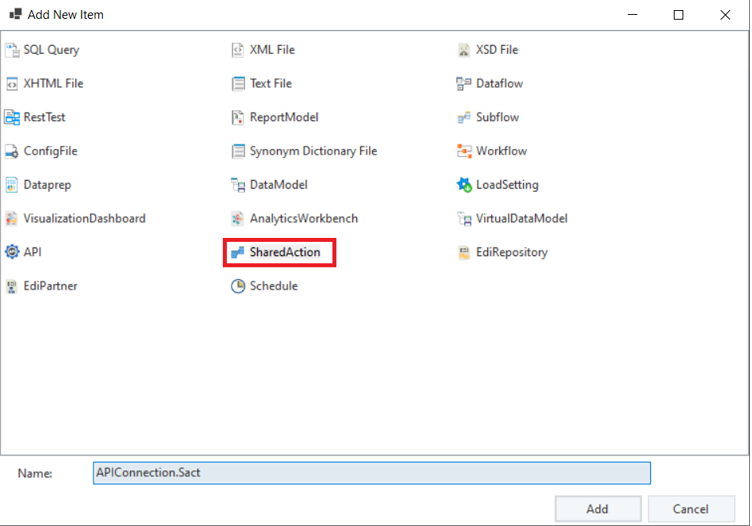
2. Locate the Project Explorer on the right, right-click on the project or one of its folders and select Add New Item from the context menu.
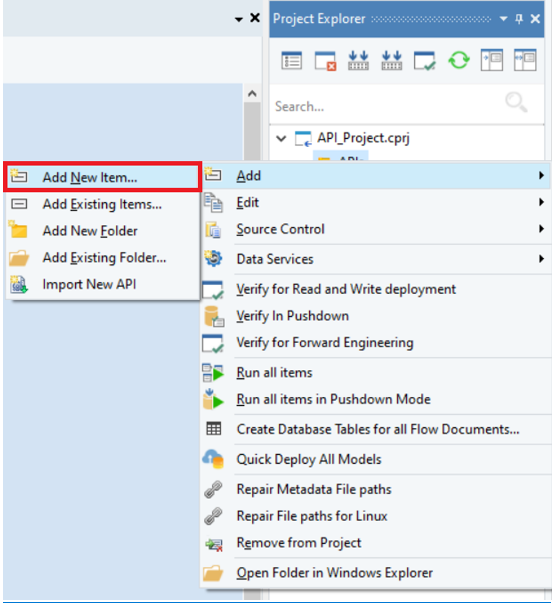
This will open a new window where a new SharedAction can be added to the project.
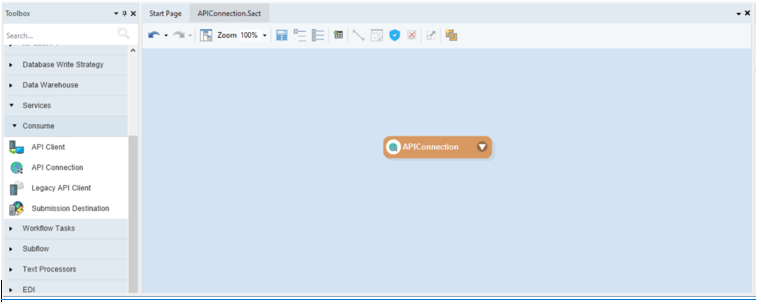
3. Within the SharedAction file, drag-and-drop the API Connection object from the Toolbox.
Note: The SharedAction file should only contain a single API Connection object.
4. Configure the API Connection object with Base URL, Authentication, and Shared Parameters and save the SharedAction file
This API Connection can be used in any flow document contained in the same project.
5. Next, open a new dataflow within the project.
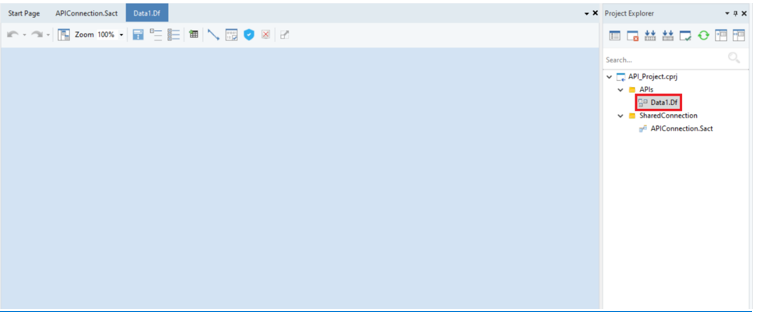
6. Drag-and-drop the API Client object onto the dataflow, right-click on it, and select Properties from the context menu.
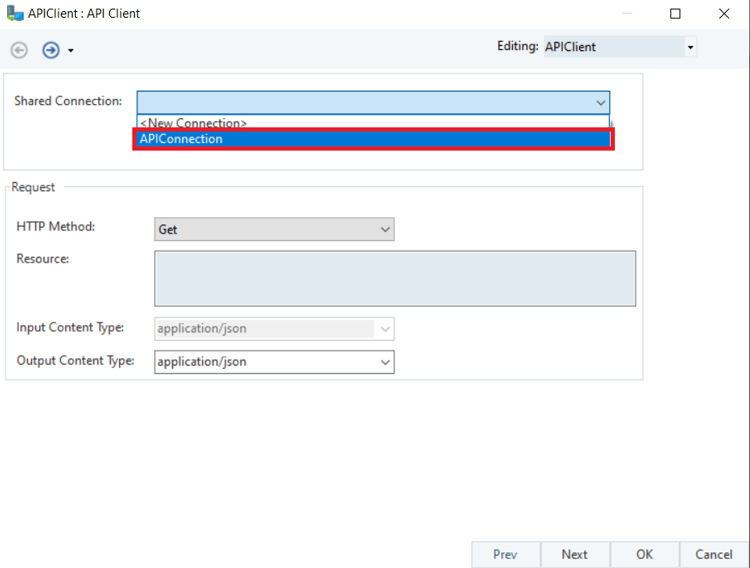
A new window will open.
Here, you can see the name of the Shared Connection within the drop-down menu of the Properties option.
Note: Within the project, the shared API Connection can be accessed within any flow.
If shared connections with duplicate names exist in the project, only one will be shown and used.
If duplicate connections exist in the flow and the project, the flow connection will be given preference.
This concludes our discussion on the configuration and use of the API Connection object in Astera API Management.