Enable File Download-Upload Through APIs
Users can utilize APIs to upload and download files to and from the Astera API Management server.
1. Head to the Server Explorer, right-click on the cluster node, and select Server Profiles from the context menu.
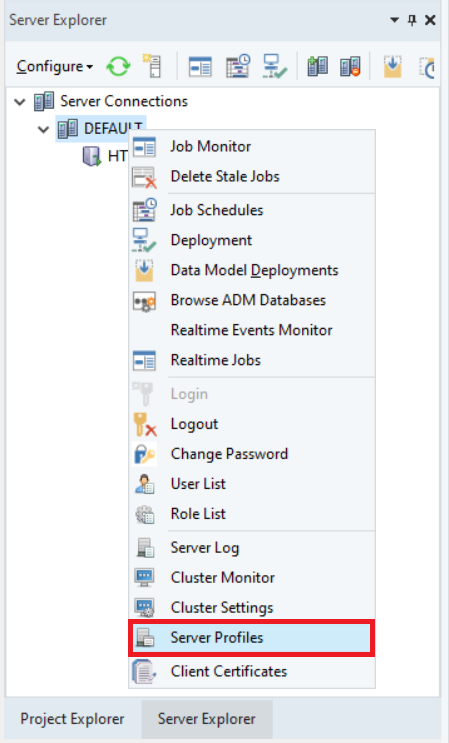
This will open a new window.
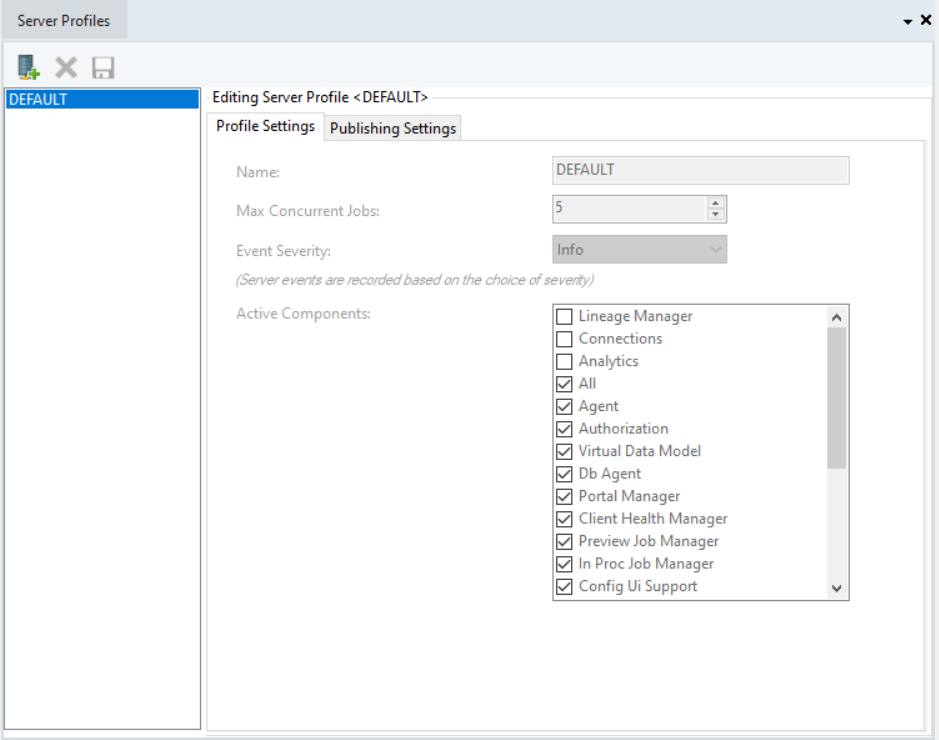
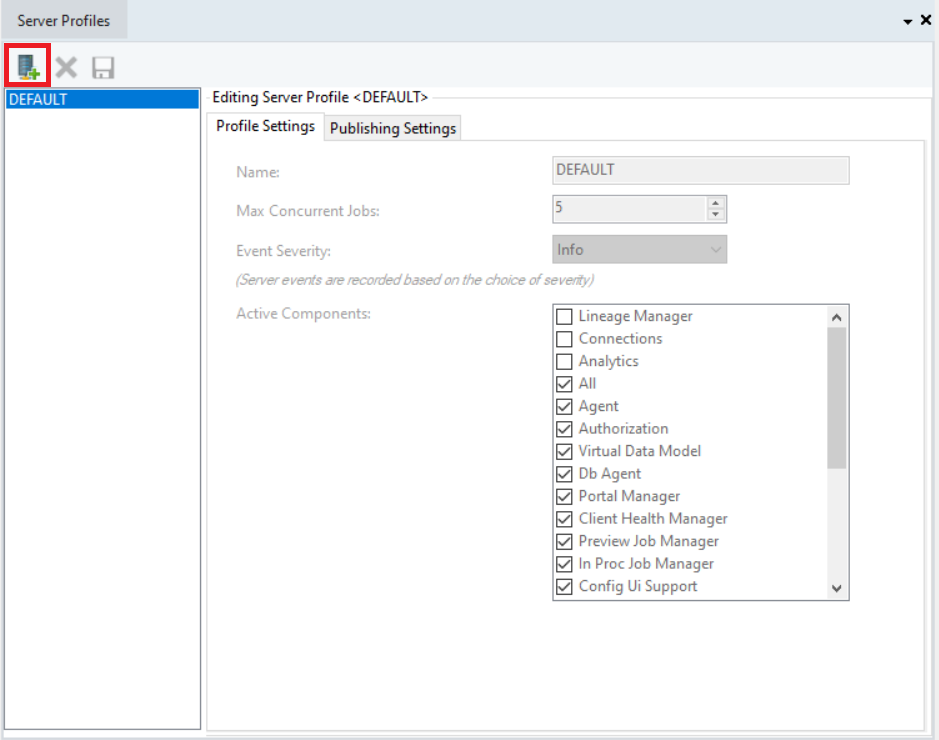
2. Create a new profile by clicking on the following icon,
3. Once the new profile is created, select the Publishing Settings tab,
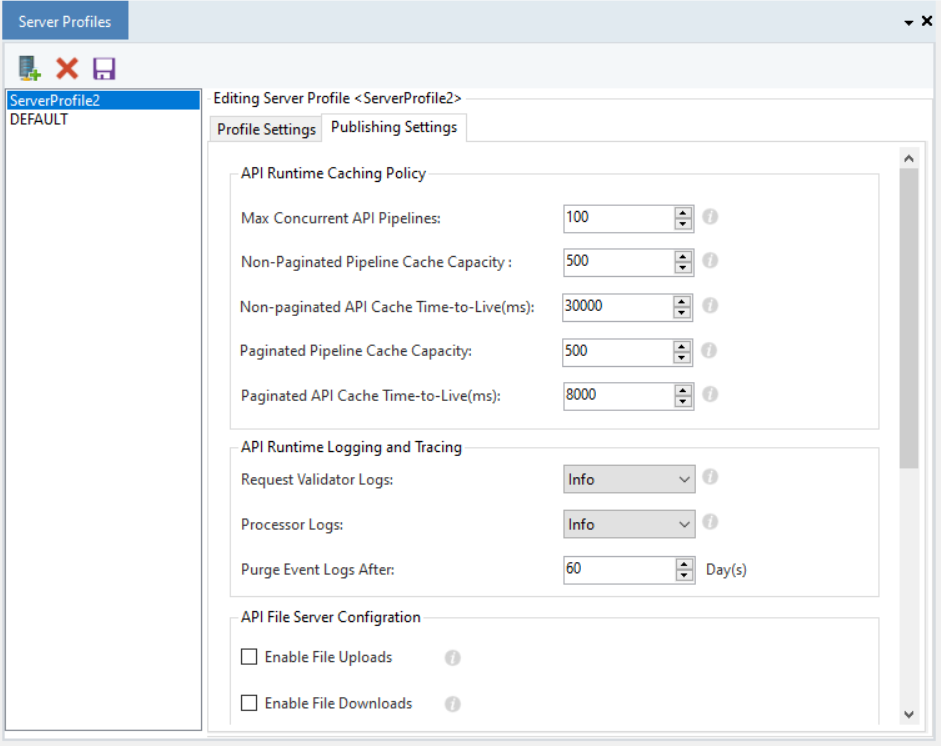
4. Go to the API File Server Configuration section. Here, we can configure the file action functionalities.
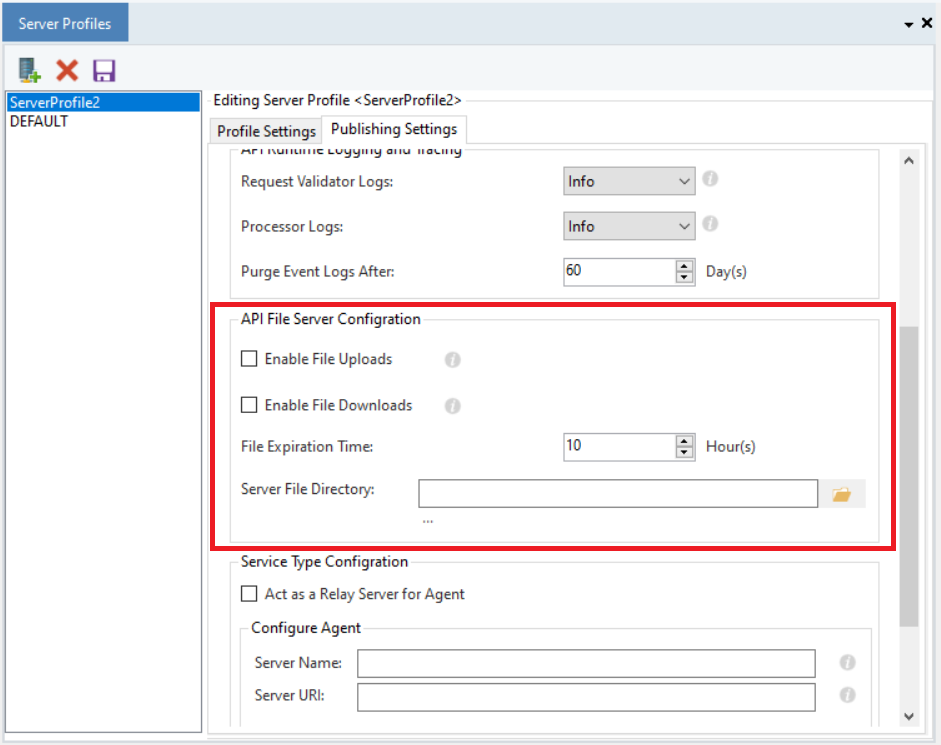
Enable File Uploads: Selecting this checkbox will let the user upload files onto the specified server directory.
Enable File Downloads: Selecting this checkbox will let the user download files from the server.
File Expiration Time: This counter determines how long the file will be kept in the Server File Directory before it is automatically removed.
Server File Directory: This is where the file path will be given to the Server File Directory. All the file uploads will be saved here, which can also be downloaded.
Note: We can download a file from anywhere on the server as long as that location is accessible by the server using the Download Path Generator object.
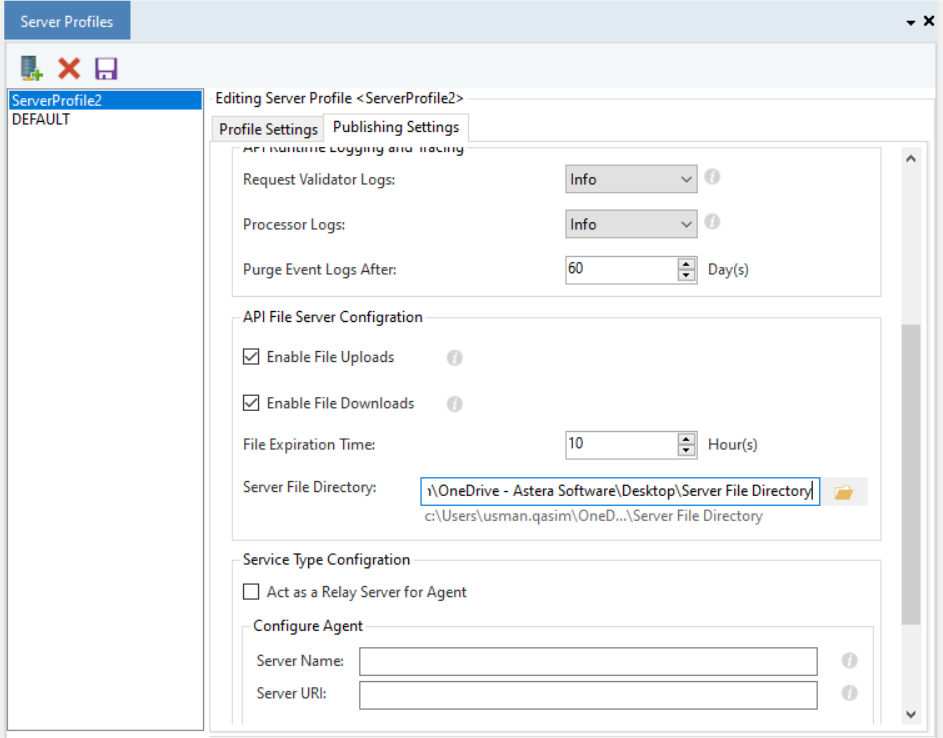
5. Select both checkboxes and provide a file path.
Note: The Server File Directory file path can be at any location that is accessible by the Astera server, be it on local or remote.
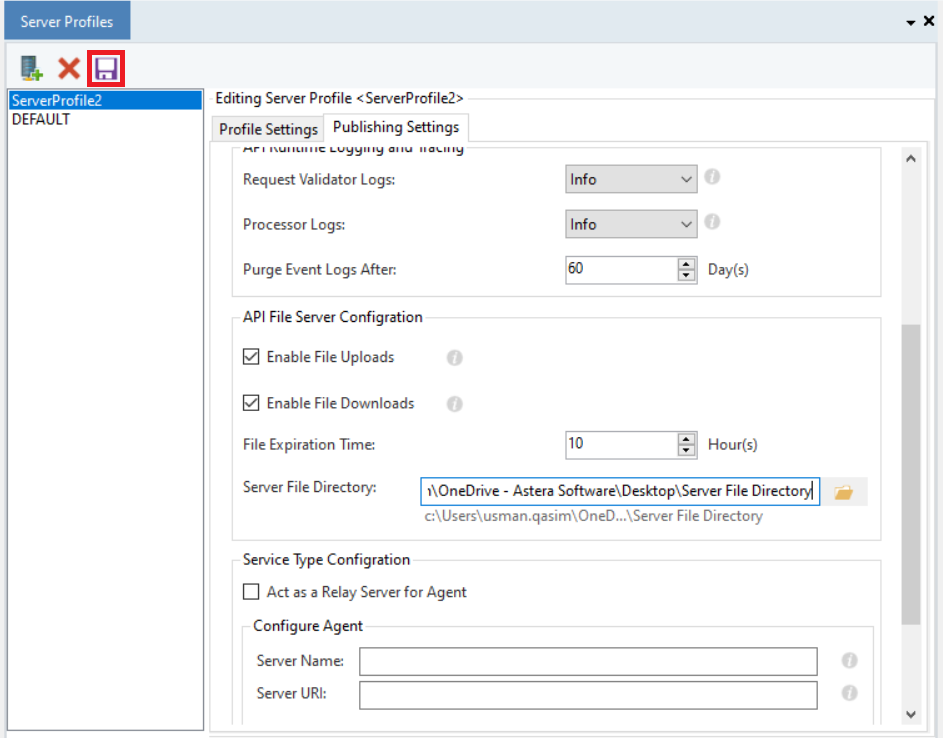
6. Once done, save the changes to the server profile.
7. Next, right-click on the Server URL node in the Server Explorer and select Server Properties from the context menu.
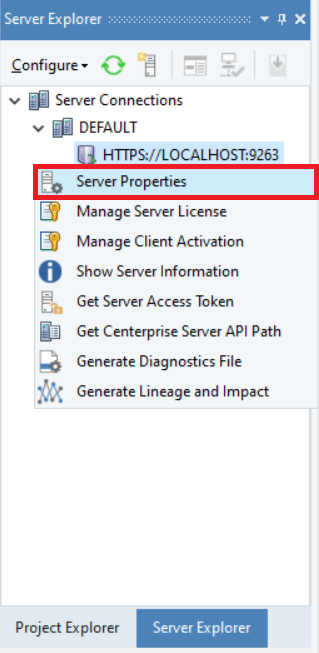
This will open the Server Properties window.
8. Select the Profile that you have just configured and save it.
File upload and download functionalities have now been enabled with this profile on the server.
Enable Download-Upload for Non-Admin/Non-Root Users
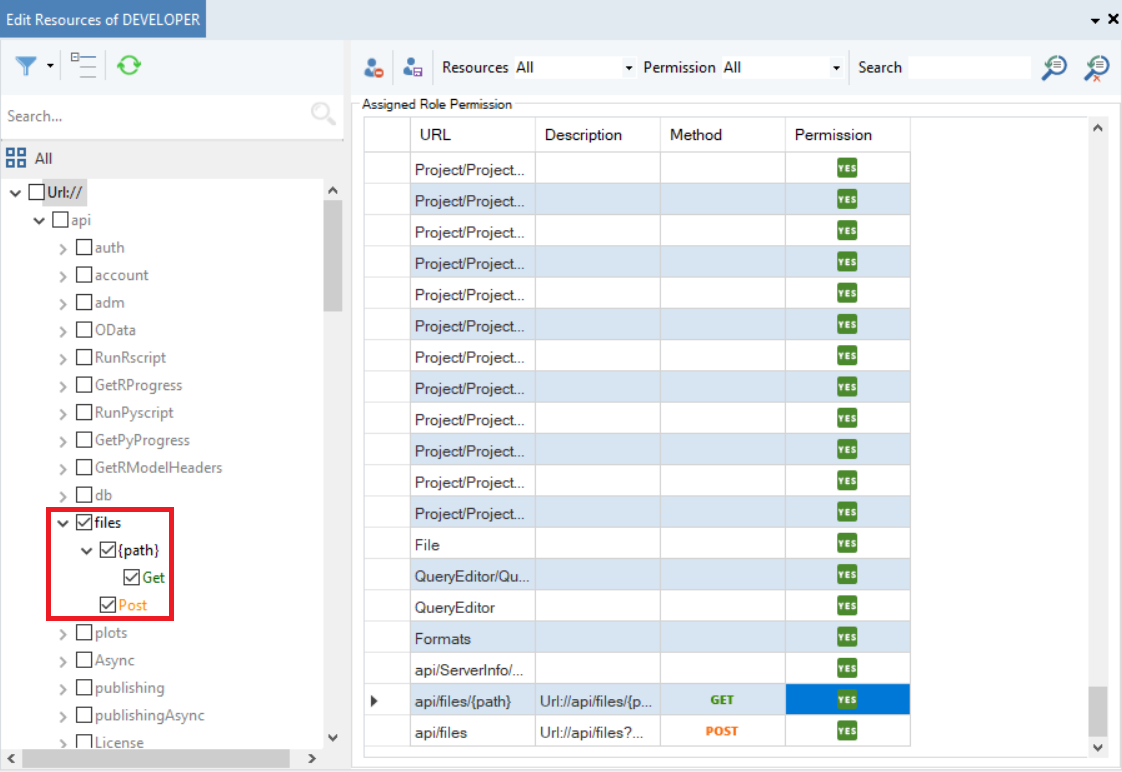
For a non-admin or a non-root user, we must go to the user roles and enable the Upload Download File APIs option, otherwise, the user cannot proceed with the upload document.
1. Right-click on a non-root role and select Edit Role Resources from the context menu,
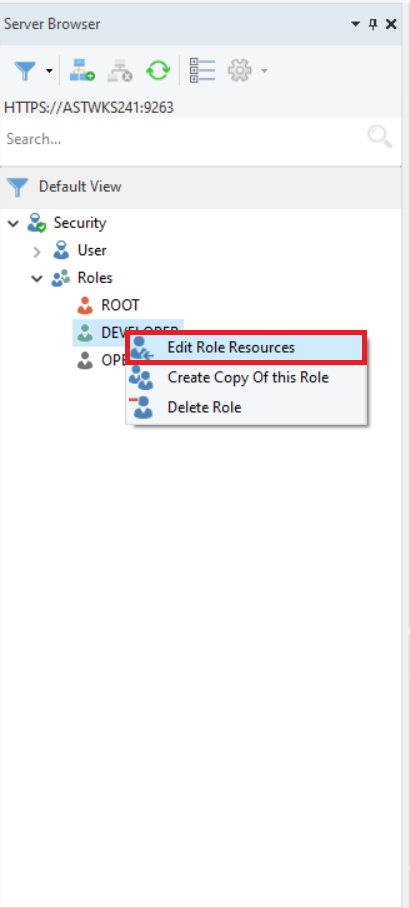
This will open a new window.
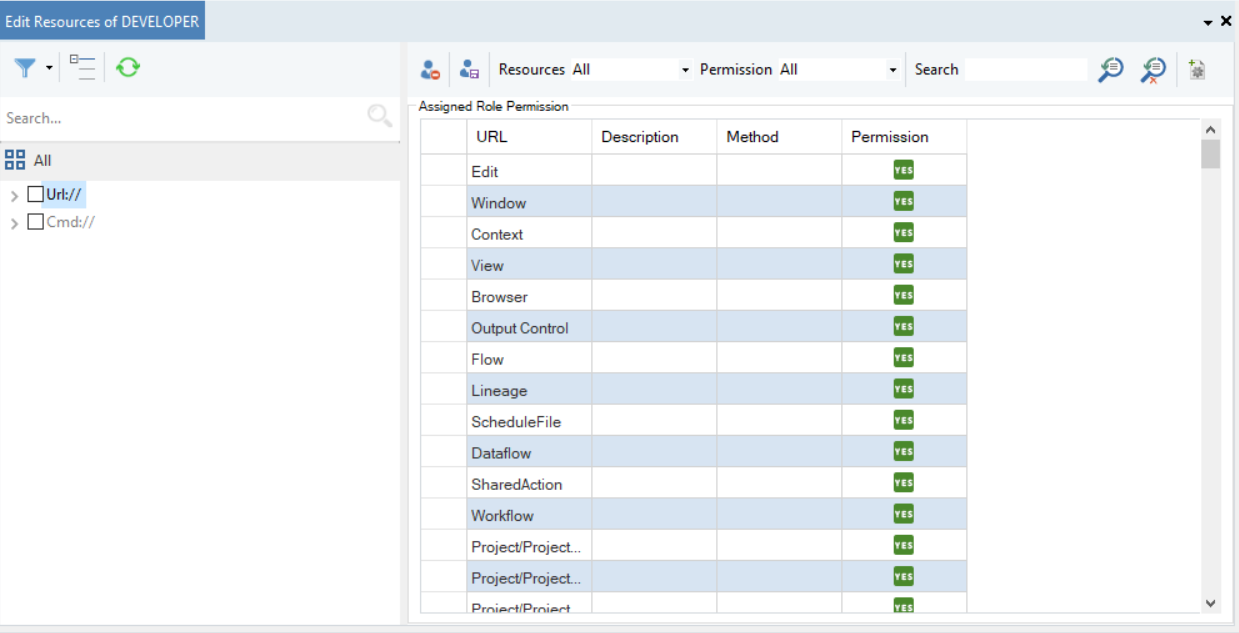
2. Expand the Url node and select the files node under api to enable download-upload,
Uploading a File
For our use case, we will be using the Postman API Client from another remote machine.
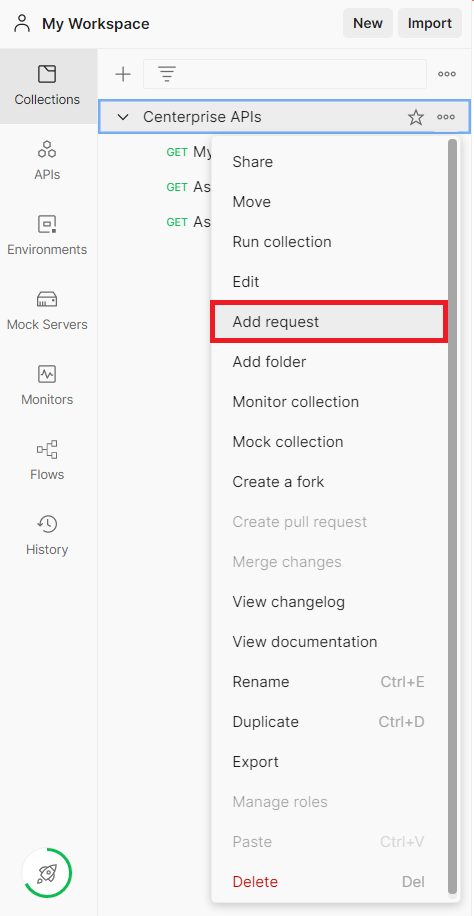
1. Add a new request to your Postman collection by right-clicking on the collection and selecting Add Request from the context menu.
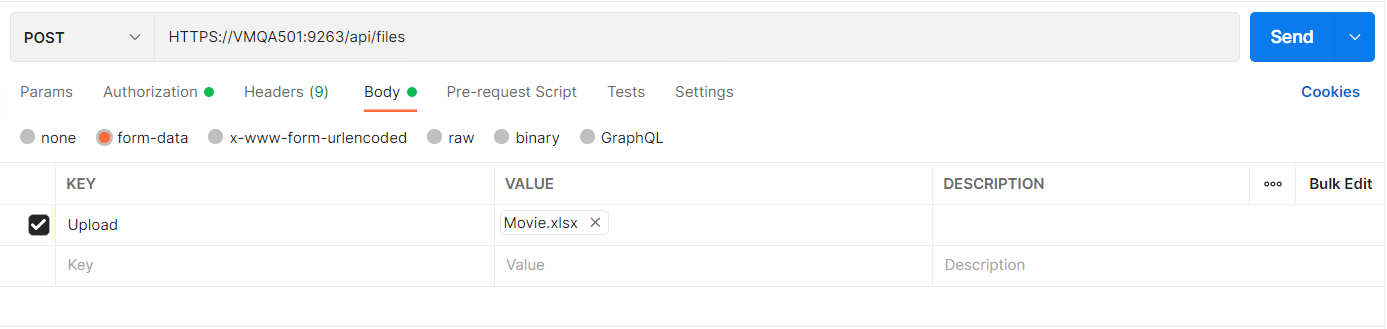
2. Select the HTTP method as POST, provide the file API URL deployed at the Astera Server and define a multipart/form-date request body,
“HTTPS://ServerHostName:9263/api/files”
Note: ServerHostName is referring to the Server Machine Name for Astera API Management.
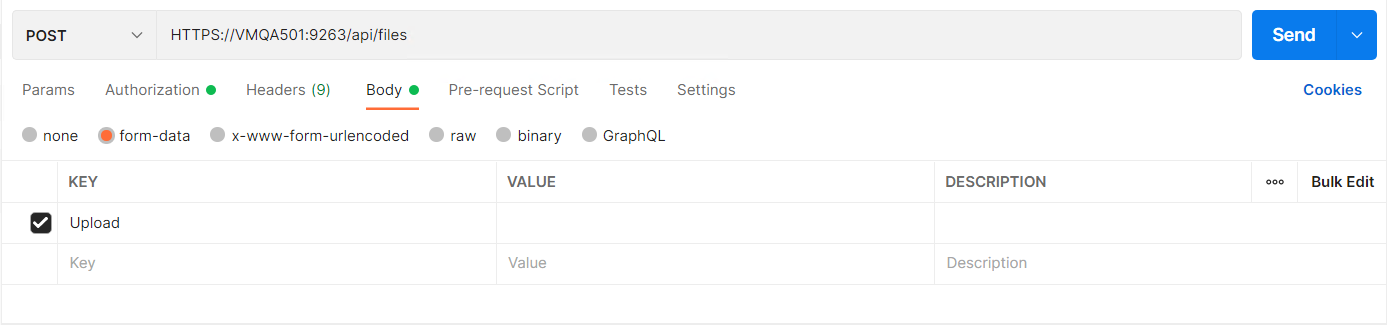
3. Define a Key of your choice and select its value type as File,
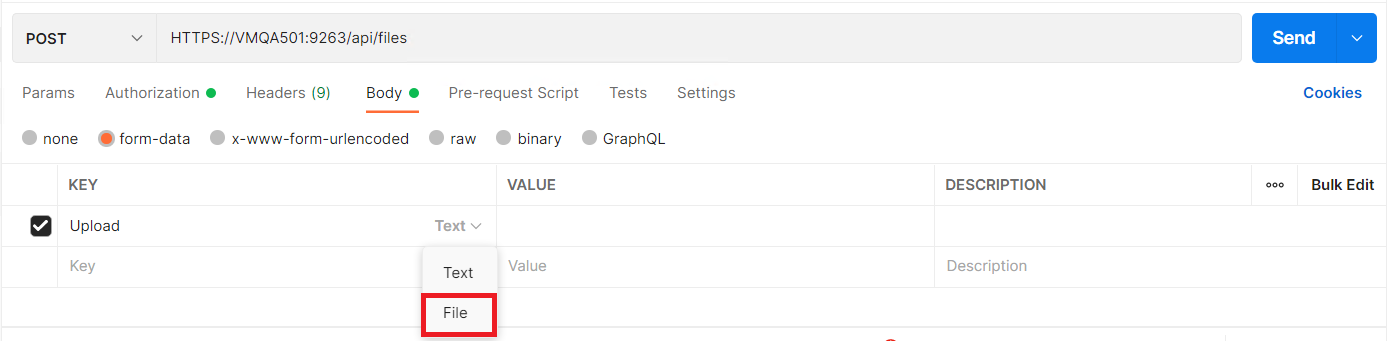
4. Browse your desired file to the VALUE,
5. Click Send and the file will be uploaded to the specified file directory on the Astera Server.
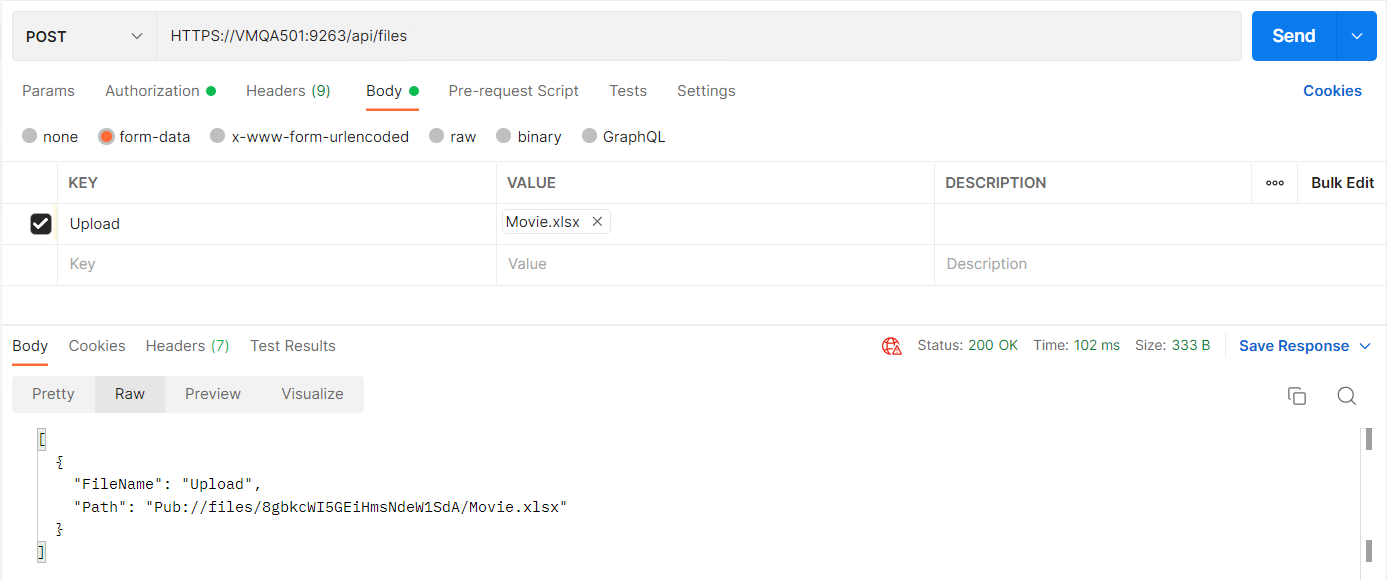
As seen from the response above, the respective file has been uploaded.
The FileName is the key defined whereas the path is the relative path of the uploaded file on the Astera Server.
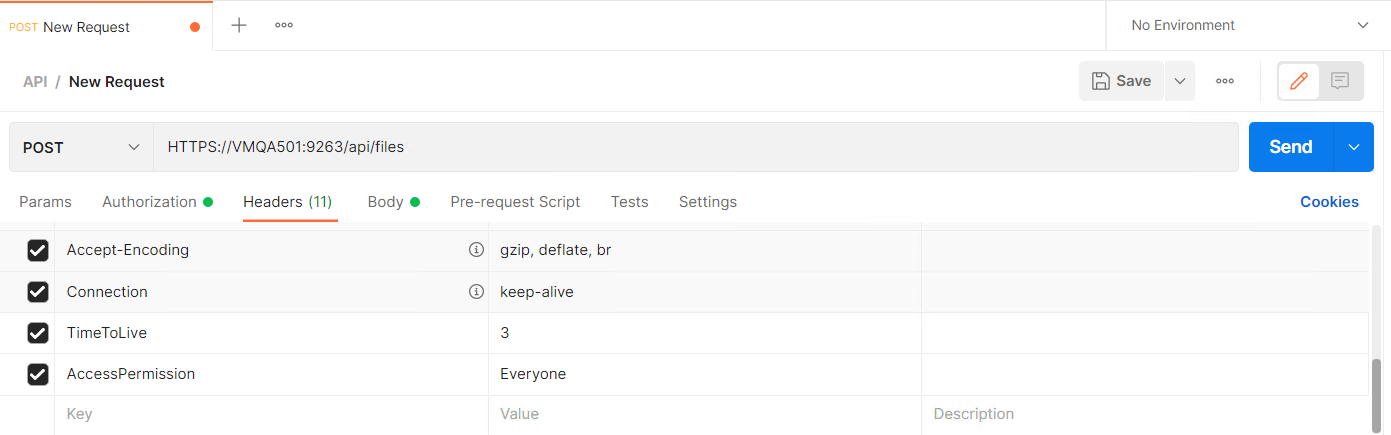
Note: Custom parameters can be defined with the same upload file call as well,
This allows the user to define custom values and overwrite predefined values from Astera API Management. ‘TimeToLive’ refers to the time that the file is kept before it expires. ‘AccessPermission’ defines who has access permission other than the user.
Downloading a File
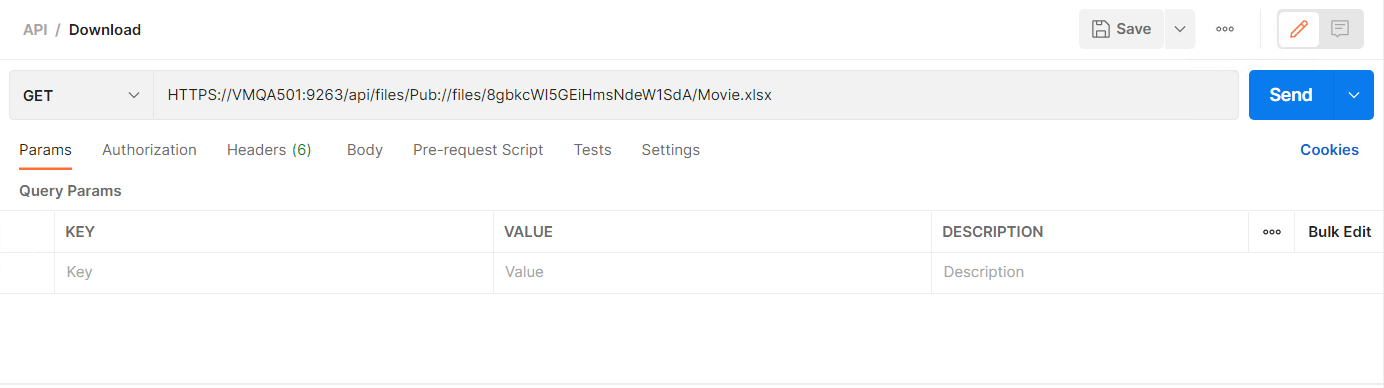
1. To download a file from the server, create a new request on Postman.
For our use case, we will be downloading the same file that we previously uploaded to the server.
2. Keep the HTTP method as GET and enter the request URL.
“HTTPS://ServerHostName:9263/api/files/{filepath}”
Note: ServerHostName is referring to the Server Machine Name for Astera API Management.
We are using the same file upload API resource as GET for the download function. However, the difference is that we provide the relative path of the uploaded file as a resource.
3. For the server to identify the relative file from the request URL, we need to encode the value.
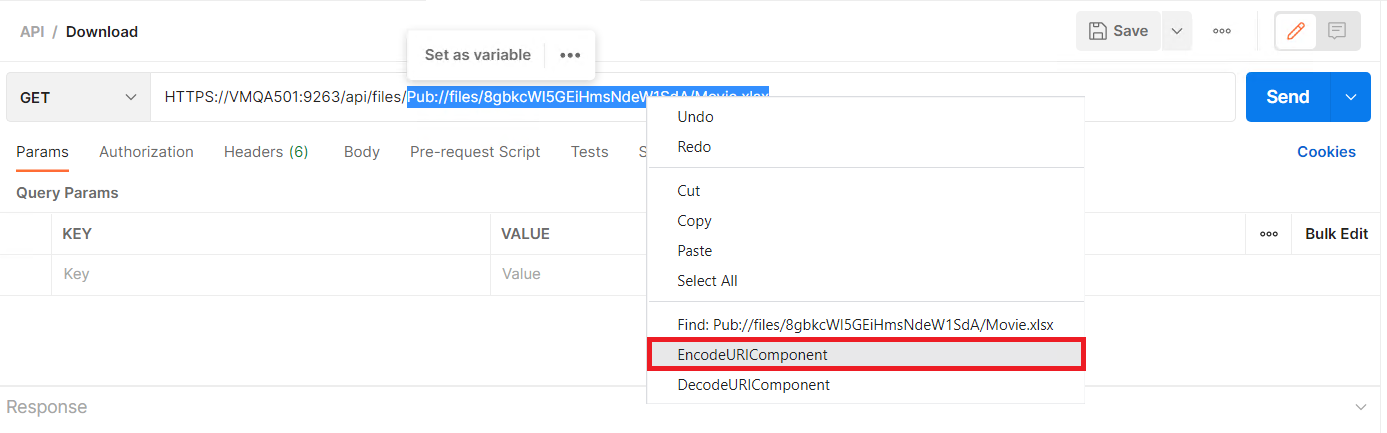
Note: If we send this request from the Astera API Client, then the object automatically encodes the resource (file path).
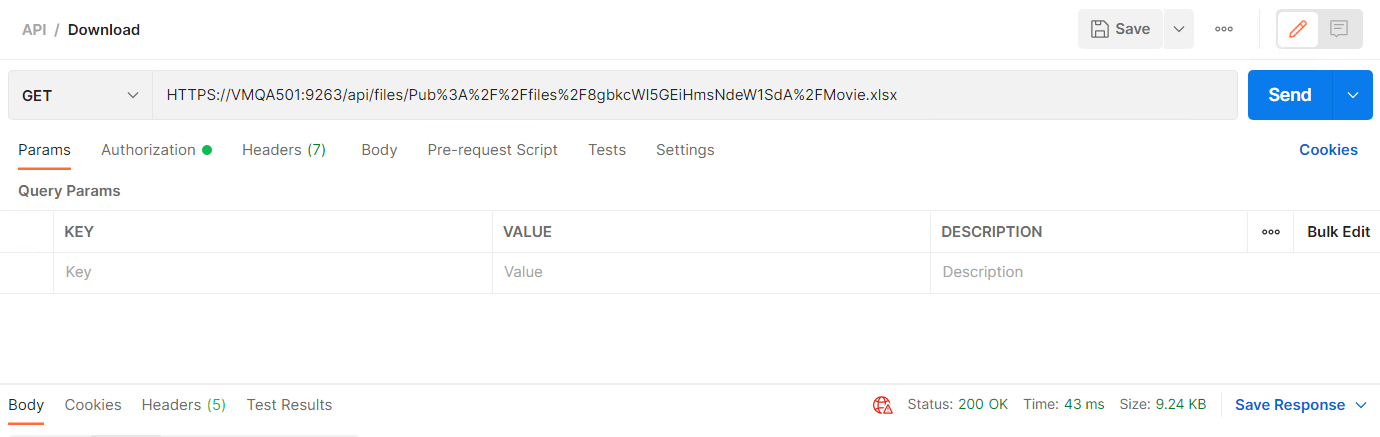
4. Click Send and the request will fetch the file’s content in the response body.
5. The response can then be saved to a file using the following option,
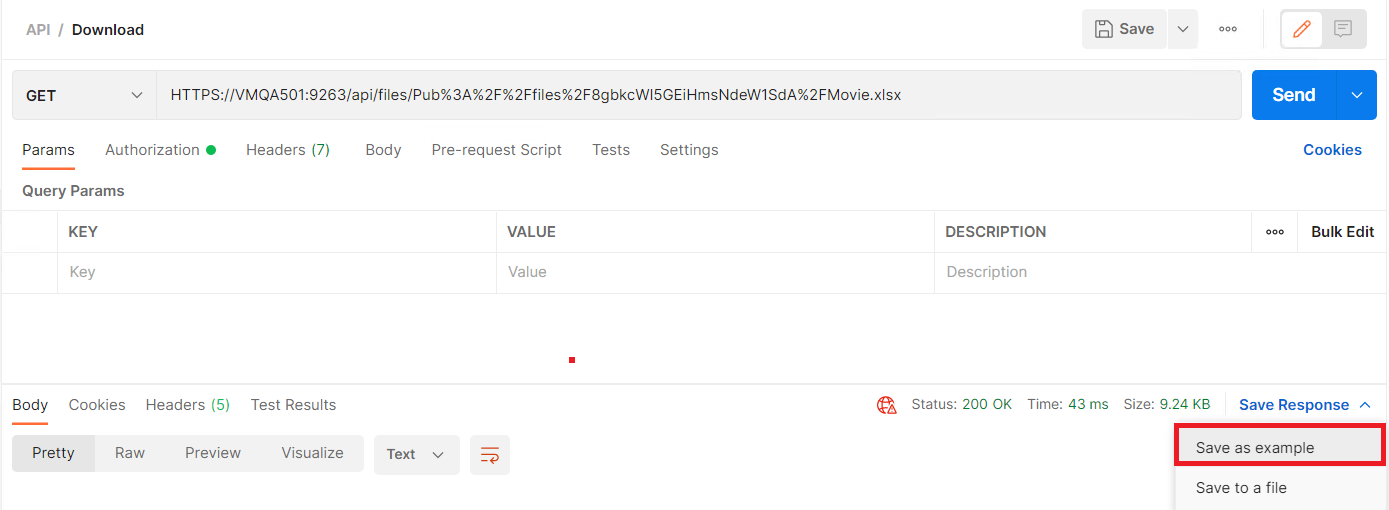
This is how a file can be downloaded from the Astera API Management server.
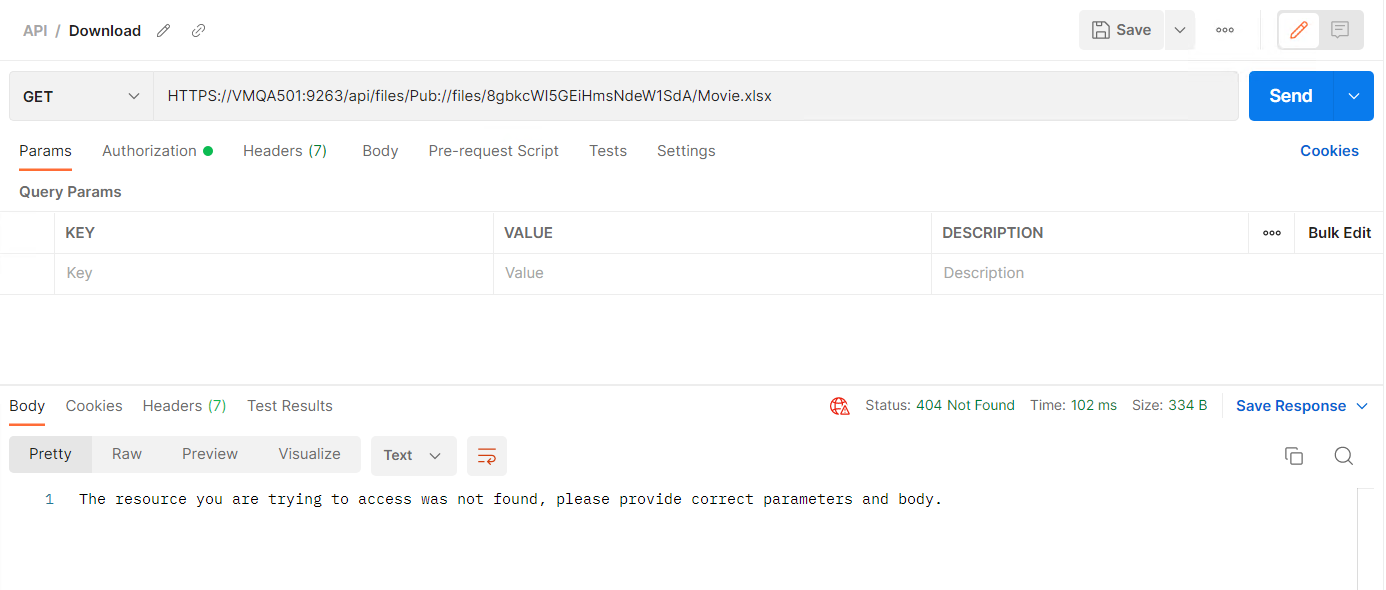
Note: On providing an invalid, wrong, non-encoded, and none-existing file’s file, the request will result in a ‘404 Not Found’ error with an appropriate message,
Generating Downloadable path for files through Astera API Management
Astera API Management offers the user the ability to generate the downloadable path for any destination file using the Download Path Generator object.
This functionality can be seen within the scope of an API flow.
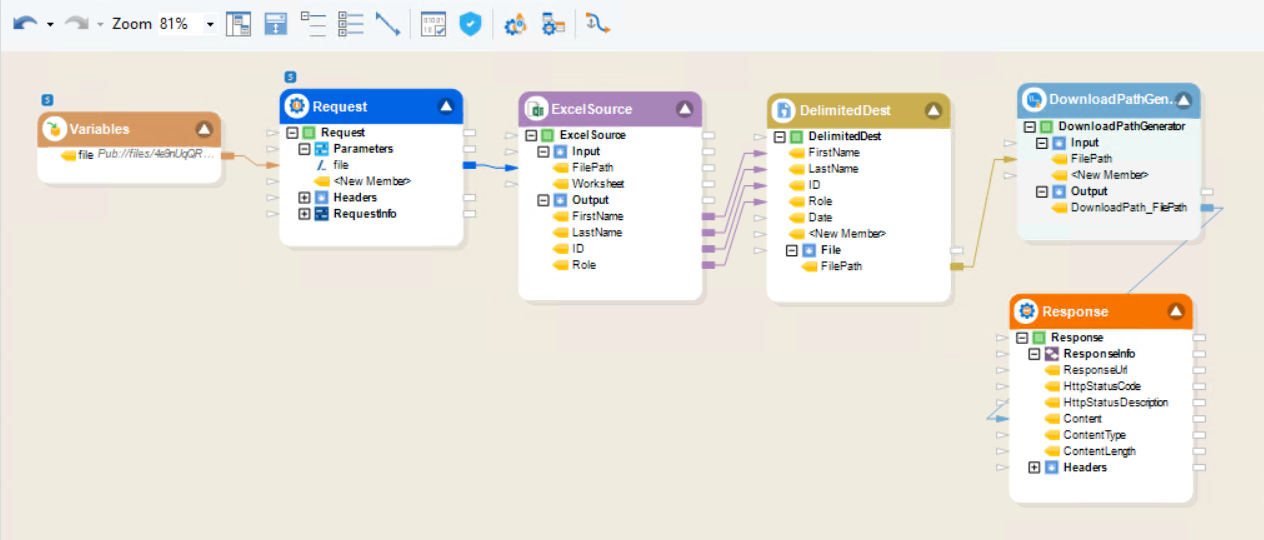
For our use case, we have the following API flow,
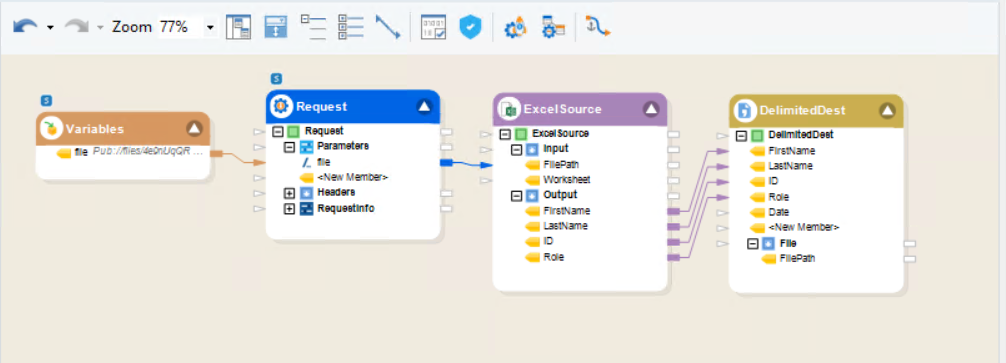
In the above flow, we can see that a file path has been given to an API Request object through a Variables object. We are trying to consume the uploaded file here using its relative path.
The flow then maps the request object to an Excel Source object, used as a transformation, and writes the records to a Delimited Destination object.
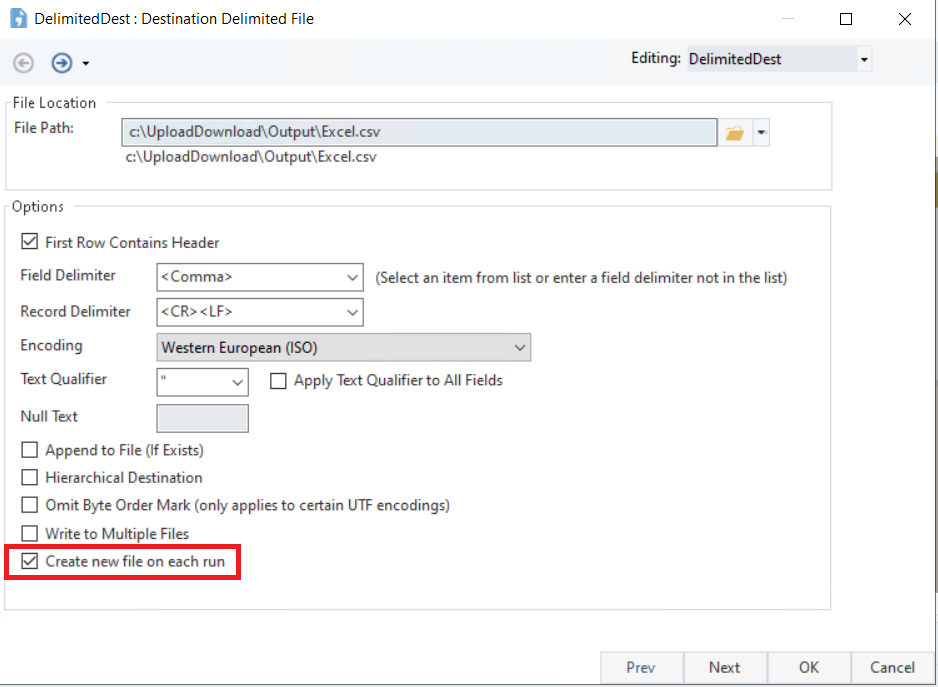
The Delimited Destination object has an additional File node. This enables us to create a new destination file on each run. Each file is created by appending a unique ID to the destination path given in the object, eliminating the chances of overwriting an existing file. This FilePath field outputs the unique path generated at runtime.
This can be enabled for any destination object.
1. Right-click on the Delimited Destination and select Properties. Next, check the Create new file on each run option. This will add the unique file path node to the destination object.
2. Drag and drop a Download Path Generator object from the toolbox onto the API flow.
In order for us to obtain a downloadable path for our file, we require the use of this object.
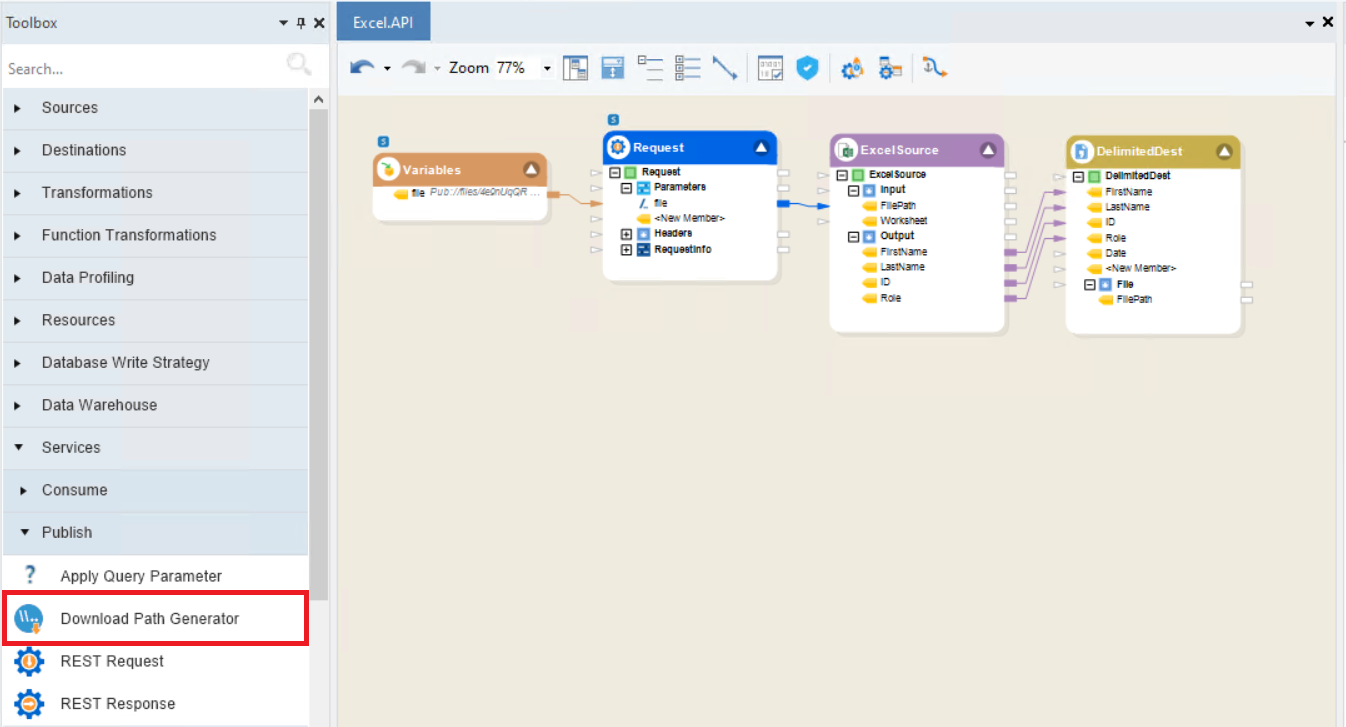
3. Map the input using the File Path field from the Delimited Destination object and map the output towards the API Response object.
This downloadable file path can now be used in further applications where the file is required.
Note: The Download Path Generator object cannot be previewed at design time because the downloadable path is generated at run-time.
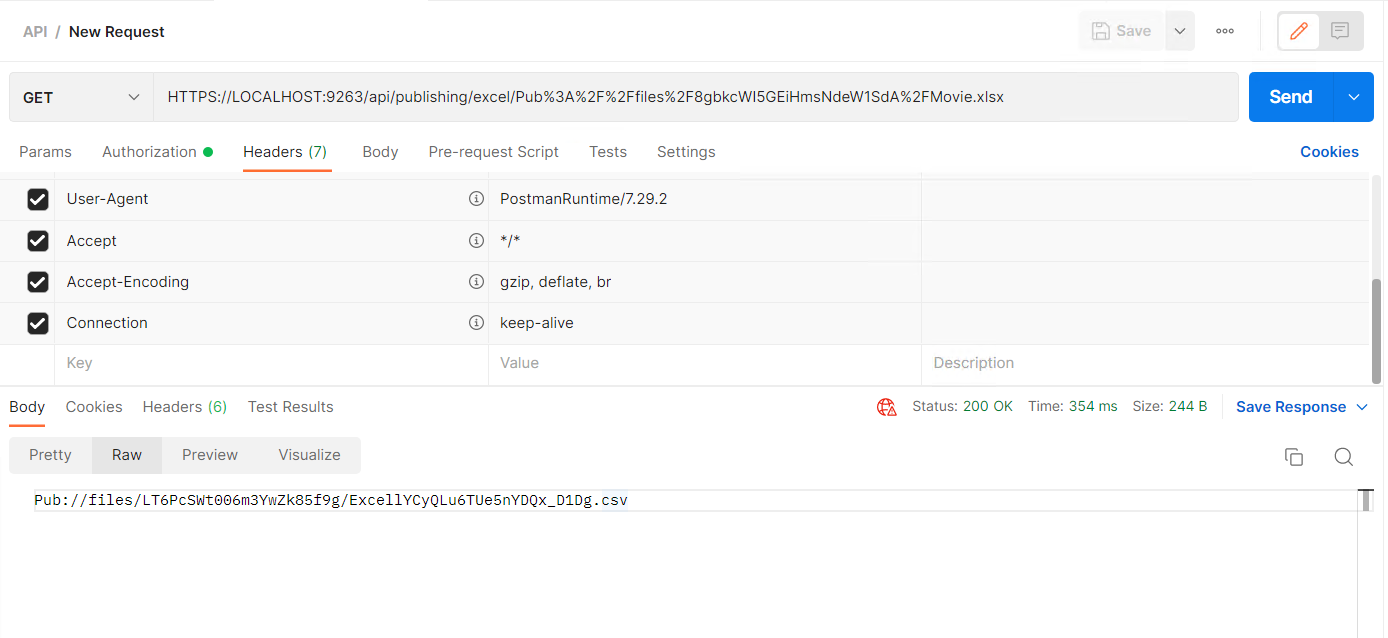
Below, we can see the request being sent from Postman and the user receiving the downloadable path in the response.
This concludes our document on enabling and using file download/upload in Astera API Management.