Asynchronous API Request
In Astera API Management, we can process an API request either synchronously or asynchronously.
In Synchronous execution, the response to the API call does not return until the process has been completed or there has been an error.
In Asynchronous execution, the response to the API call is returned immediately with a polling URL while the request continues to be processed.
To check the functionality of such execution, we have created an API flow that will process the request Asynchronously.
Processing an API Request Asynchronously
For our use case, we are deploying an API flow, which calls another 3rd party API and may take long to respond.
1. To enable Asynchronous execution, right-click on the Request object and select Properties from the context menu.
This will open the Properties window.
2. Click Next and you will be led to the API Configuration screen.
By default, the synchronous option has been selected,
After we select the Asynchronous checkbox, the API controller path in the Example URL also changes to ‘publishingAsync’.
If we plan to deploy both processing types, the Example URL just shows the Synchronous API example,
3. Click OK and deploy this flow through the option present in the API flow toolbar.
This will open a new window where the deployment name can be defined.
4. Once the deployment has been created, you can view it in the Server Browser.
As you can see, the GET endpoint icon here represents Asynchronous processing,
If we had selected both processing types, the endpoints would have looked like this,
To show each of the steps associated with Asynchronous API requests, we will be using the Postman API Client to execute a request on the deployed Astera API.
5. Open your Postman Client, create a new collection and add a new request to it.
We have named our first request as ‘PetStore’
6. Select the appropriate method and enter the API URL copied from the API Browser,
We can see the respective Postman request below,
7. Click on Send.
It shows us that the request was accepted.
We have received a location response header and this parameter contains the successive status API’s URL that can be used to inspect the API request’s processing status.
8. Next, send a follow-up request to the status API URL received in the location header.
9. Click Send and you will be able to view the status of the API call in the response body.
‘Status: Completed’ means that the request we sent was completed.
Apart from this, the other status possibilities are,
Running: The request is still being processed.
Error: The request processing has encountered an error.
Unknown: The request for the given ID was not found or purged.
10. The location response header received with a ‘Completed’ status API call is then used to make the successive API call to retrieve the API results.
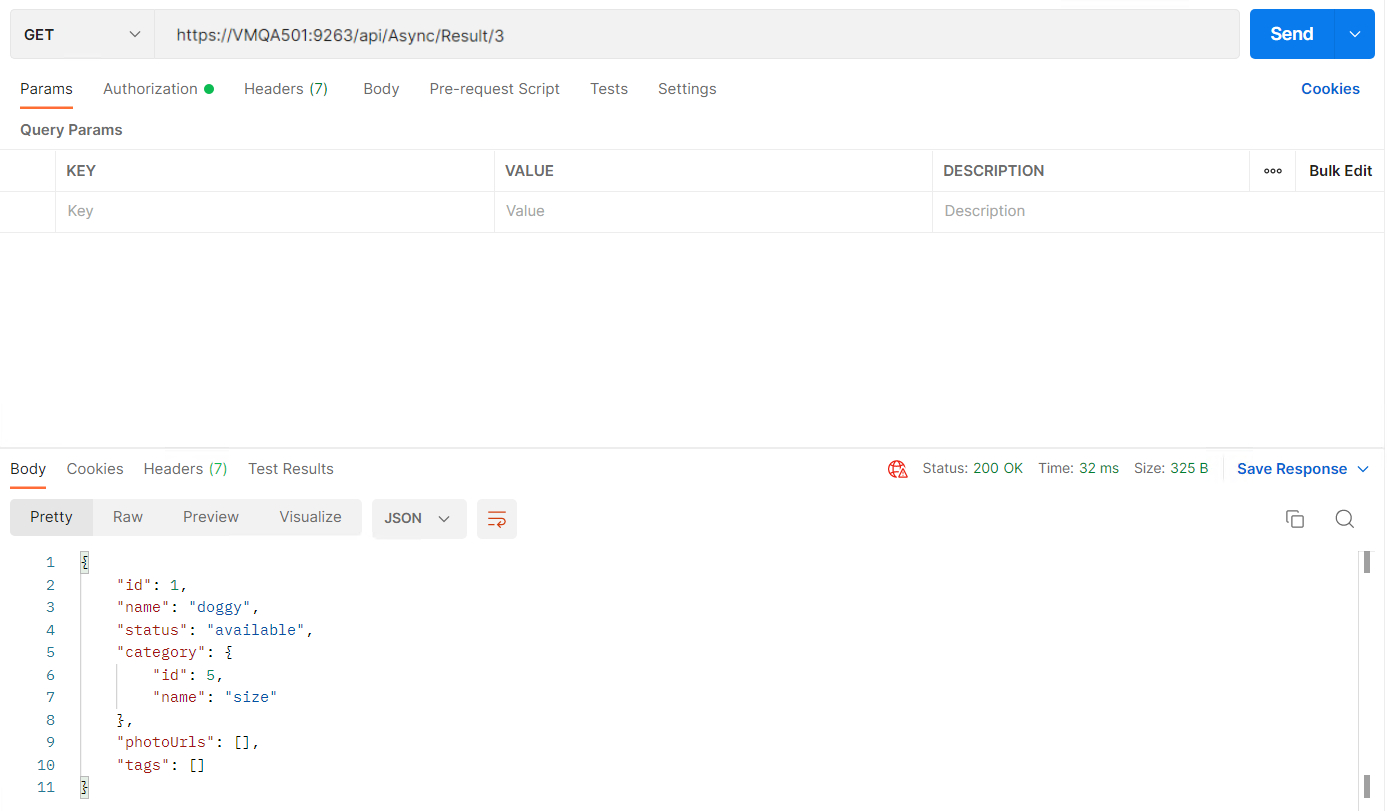
11. Make a request to this result API to see the actual API response processed.

The result of an Asynchronous request is preserved for a duration of 24 hours after which it is purged/removed.
As you can see, after 24 hours, the status becomes ‘Unknown’ and the Status/Result APIs return a ‘404 Not Found’ response.
Callback URL
Attaching a Callback URL in an Async request allows the API client to get the response at the server specified in the URL, rather than polling for a response at various intervals.
The Callback URL’s functionality is implemented for the Asynchronous API Requests. A query parameter called callbackUrl defining the URL of the listening server is required in the Asynchronous request. Once the request is sent to the Astera server, it stores this call-back URL and periodically checks for the availability of the response. When the status is “completed” i.e., when the response is available, the Server sends it to the address that was specified in the URL.
The visual representation of the process will look like this,
1. Callback URL to the Listening Server,
2. Callback URL to the Local Host,
Let us consider such a use-case in which a callback URL query parameter with the value “http:
It is necessary to encode the callback URL. After that the request will look something like this,
Once the request is sent, the Astera server checks if the Status of the request is completed or not, and when it is, the response is sent, and it can be seen at the specified destination address.
Note: We have created a listening server at our end using the JavaScript Code. Its purpose was to continuously send requests till it receives the status response from the Astera Server and display its headers parameters on the terminal screen.
Now, the returned Result API’s URL in the Location header parameter can be used to retrieve the response body of the initial Asynchronous call.
This concludes the article on Asynchronous API Request Execution and Callback URL with respect to Astera API Management.