API Deployment
Using Astera API Management, users can design a complete set of API (Application Programming Interface) endpoint flows in a drag-and-drop interface. These APIs can then be deployed to the Astera Server before they can be consumed.
In this document, we will learn how to deploy API flows on the Astera Server. API flows can be deployed individually or as a group set in folder hierarchies.
Deploying a single API Flow
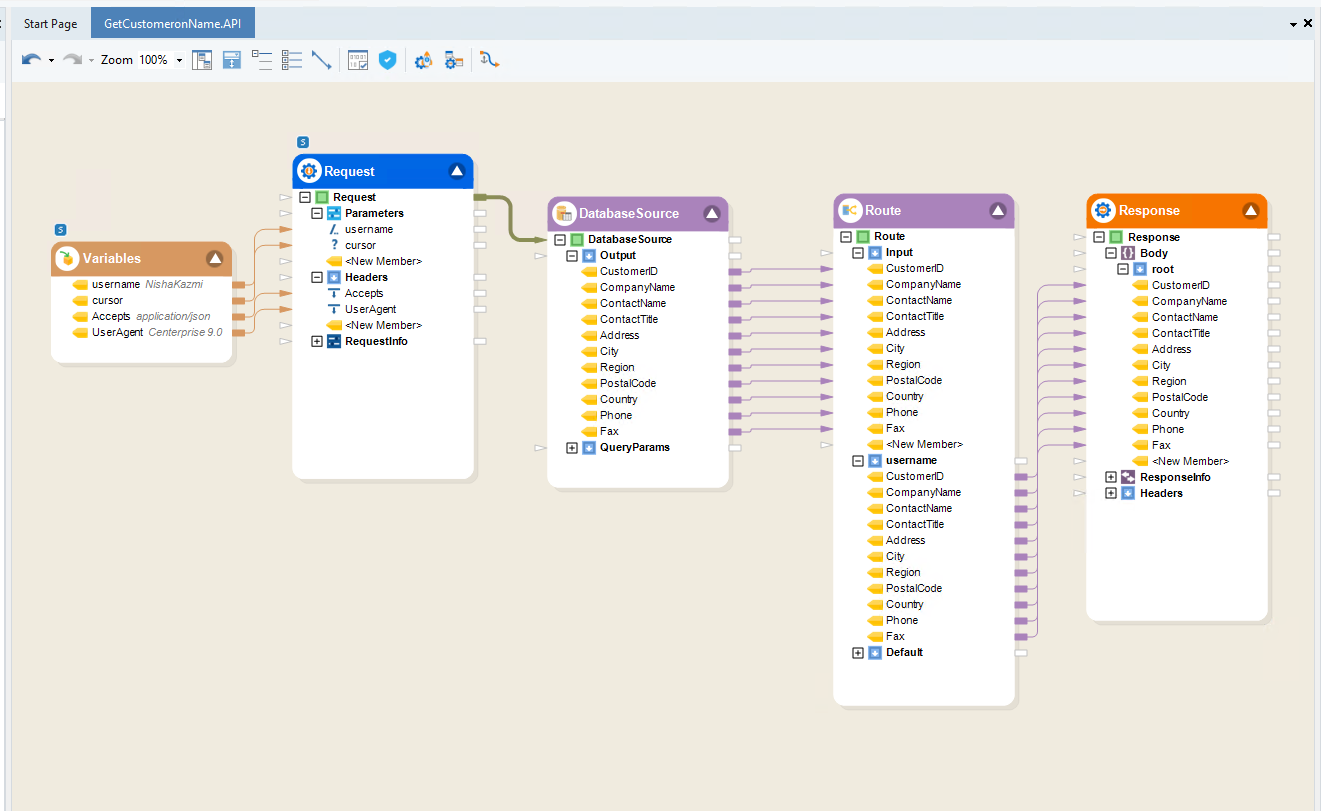
Here, we have a pre-designed API flow,
Let’s see how we can deploy this.
1. Click the Deploy API Flow icon on the API flow toolbar.

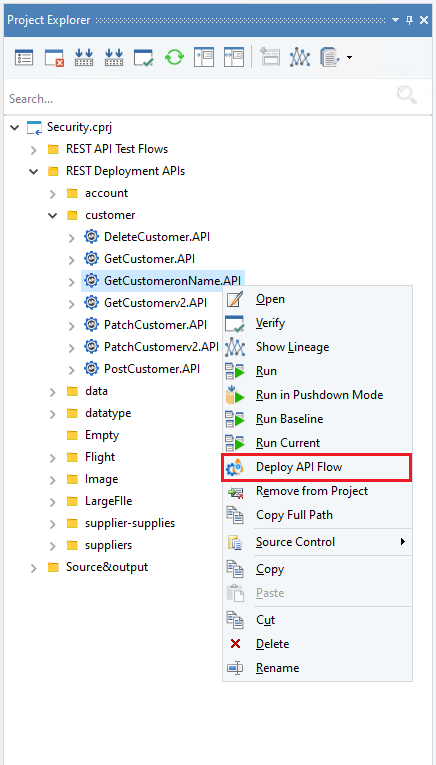
Similarly, the Deploy API Flow option from the Project Explorer context menu can also be used. This option is only available for API flows.
The Deployment window will appear like this,
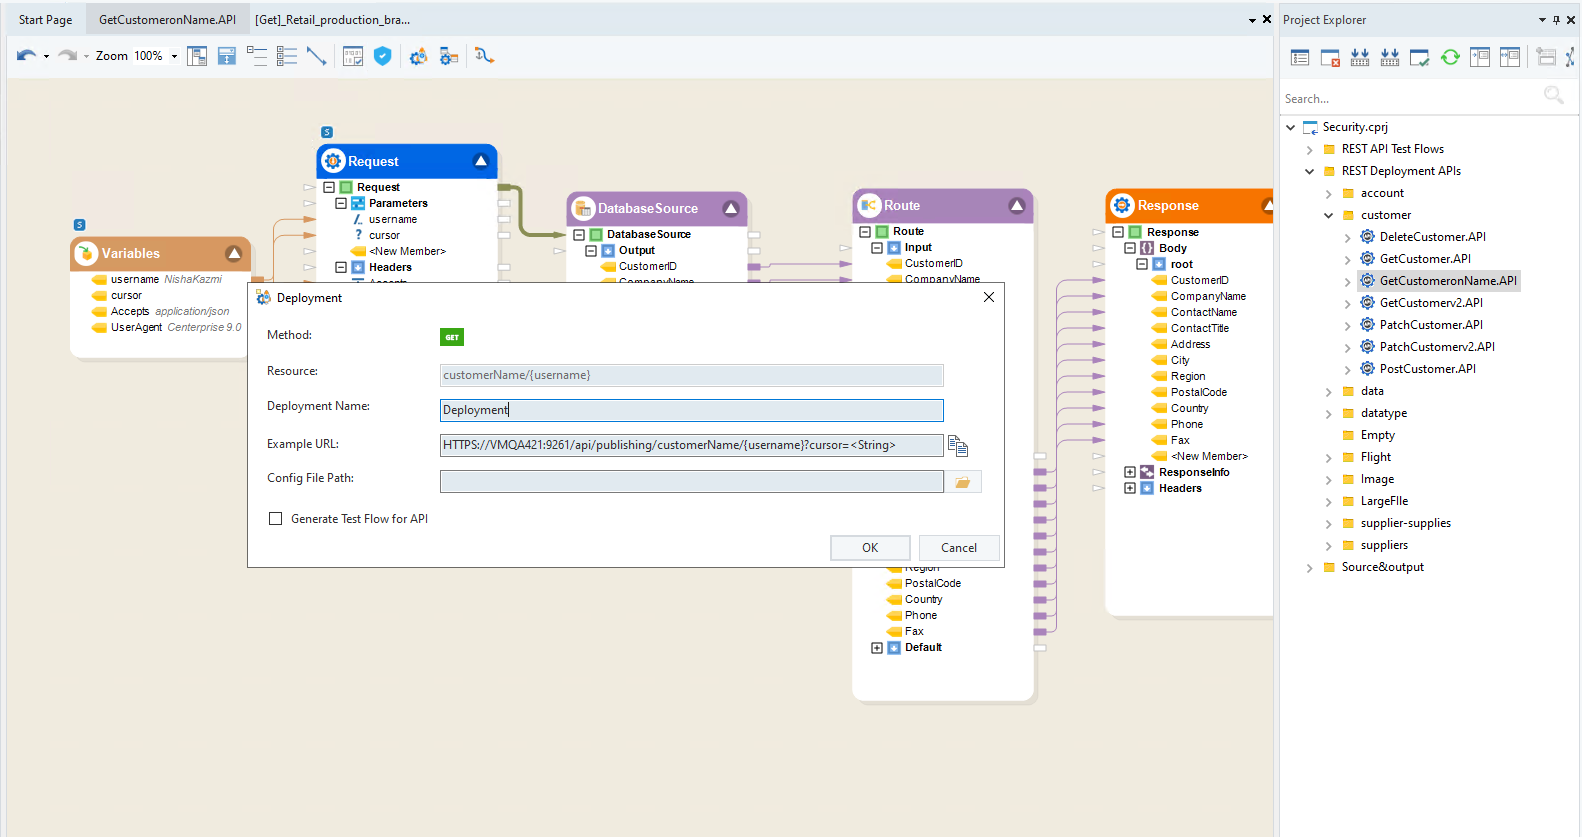
Method: It’s the HTTPS method selected in the Request object in the API flow.
Resource: The endpoint defined in the Request object.
Deployment Name: The name used to refer to this deployment in the Server Browser.
Example URL: The complete URL that will be used to make the request. It includes the Base URL, Resource, URI, and Query parameters.
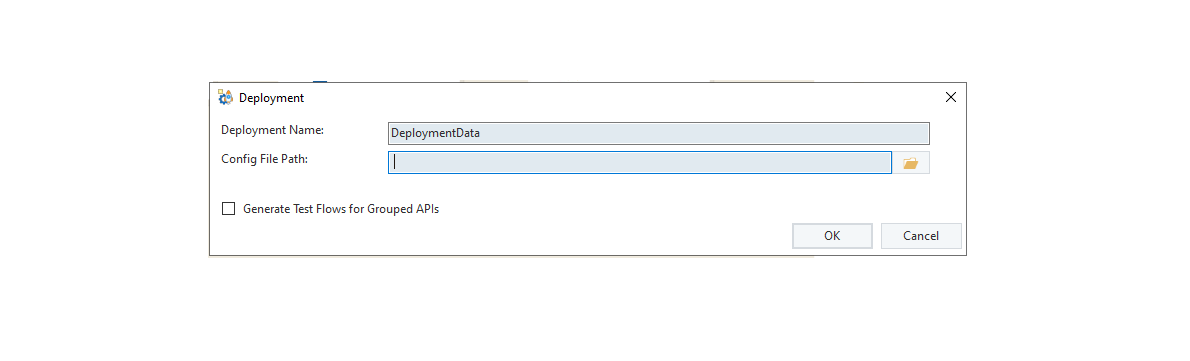
Config File Path: The path of an optional deployment config file to define runtime variables used in the API flows.
Generate Test Flow for API: Its functionality detail is given here.
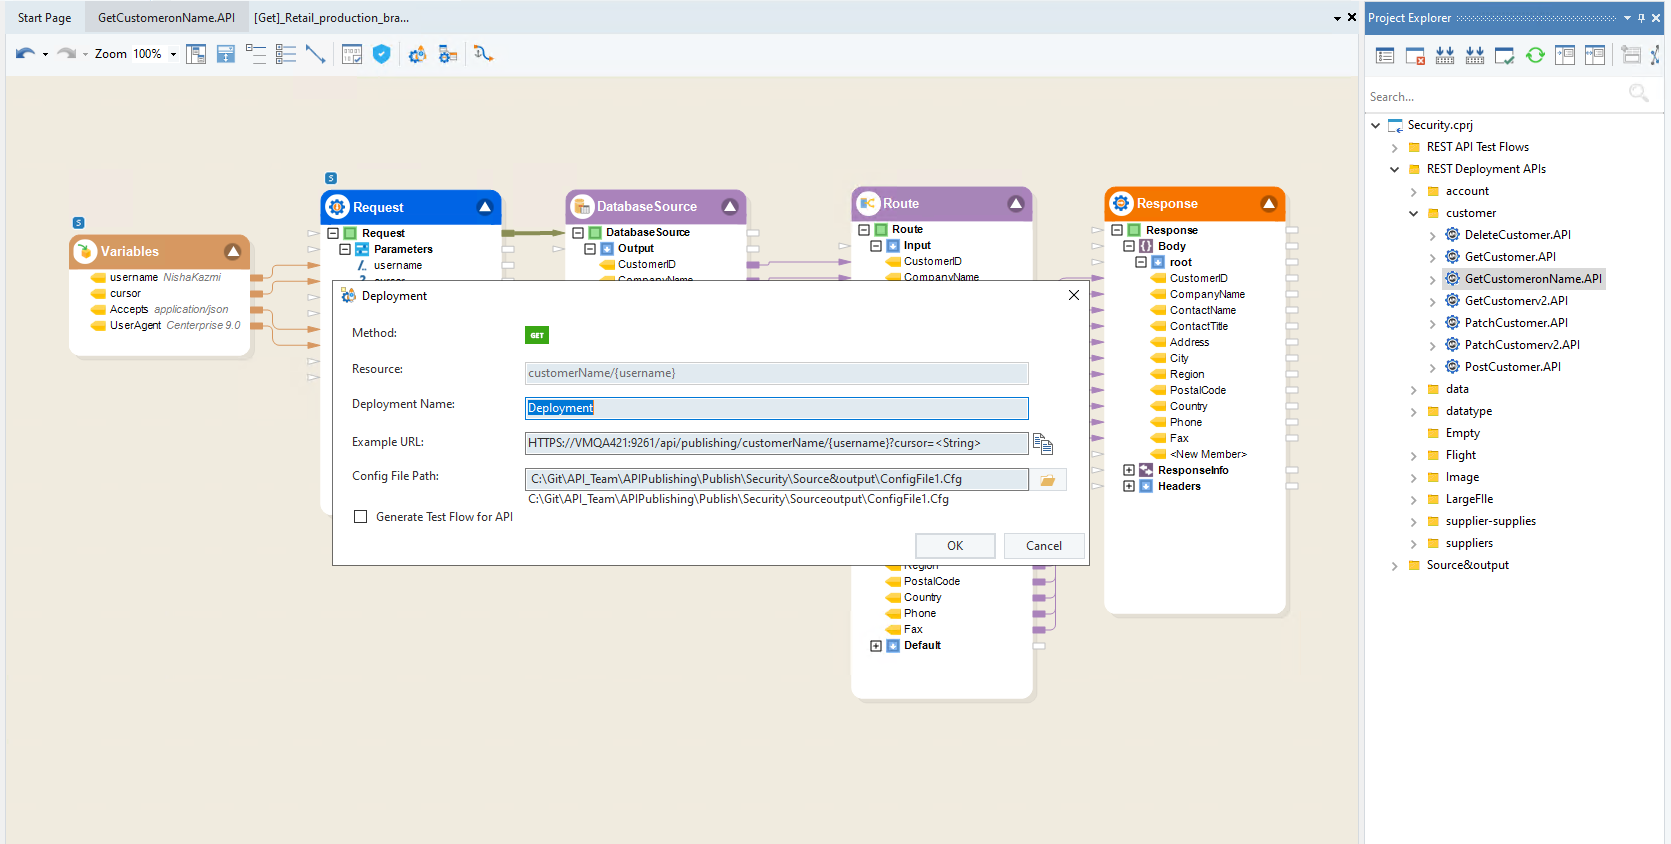
2. Define the Deployment Name and the Config File Path (optional). Click OK.
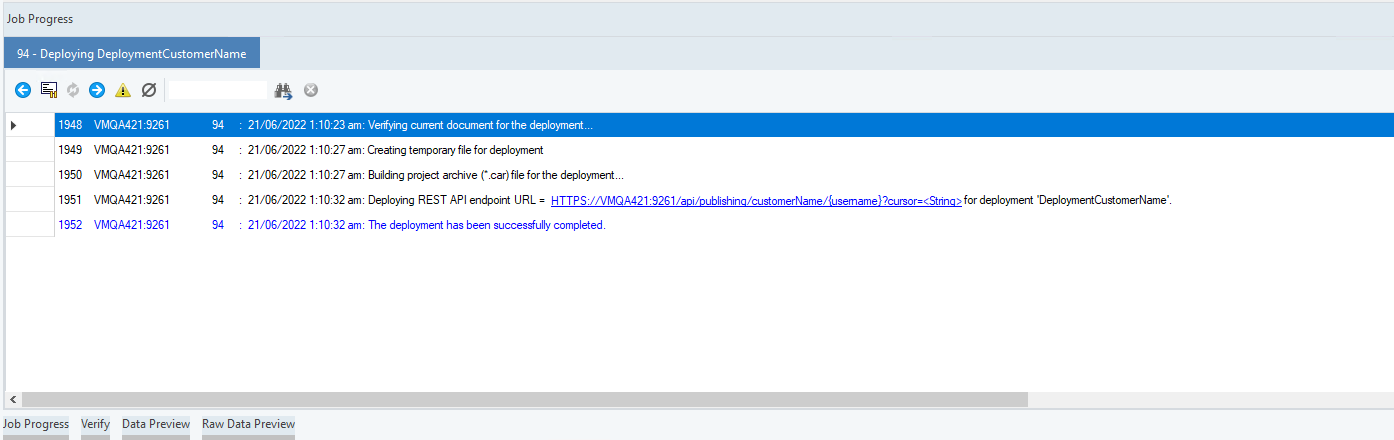
The API Flow is verified in pushdown mode before the creation of the deployment. In case of any verification errors, the deployment will not be created, and the success or failure of deployment status will appear in the Job Progress window. In this case, as you can see, the deployment is completed successfully.
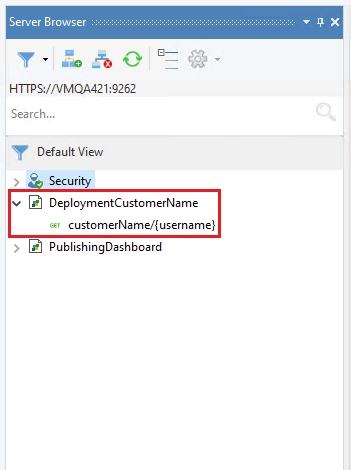
Once the deployment is successfully created, it becomes available in the Server Browser.
This is how you can deploy an API flow. Now, let’s see how we can group and deploy API flows at the folder level.
Group and Deploy APIs
We can group and deploy API flow(s) contained under a folder. All the folder nodes present under the project have the Group and Deploy All API Flows under this Folder option, including the parent .cprj project node. Only the API flows shall be verified and deployed whereas all the other artifacts will not be considered in the deployment process.
1. Right-click on the desired folder and select Group and Deploy All API Flows under this Folder option.
Note: It is recommended to first verify all flows in pushdown and resolve any errors before proceeding to deployment.
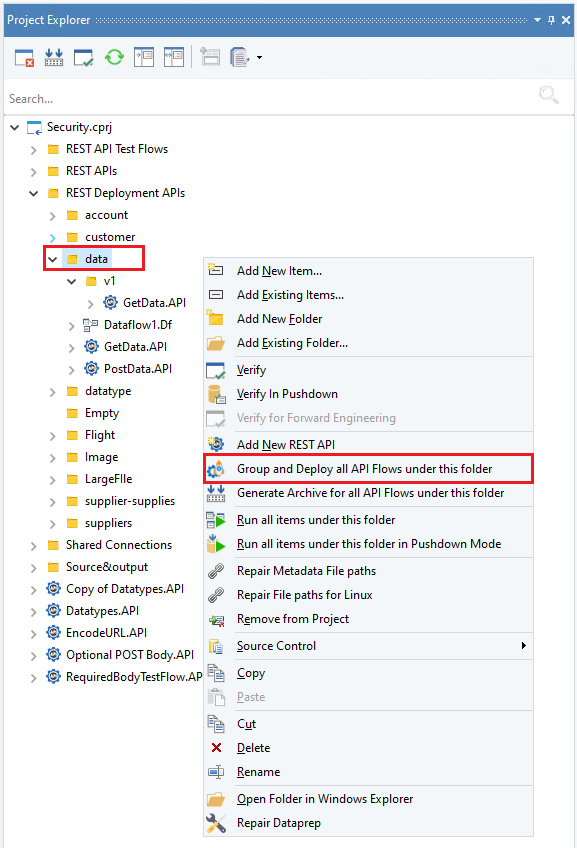
In this example, we have grouped and deployed all API flows under the folder called “Data”. It’s noticeable that the folder, “Data”, has a nested folder, “v1”, under it. In the case of deploying from a folder that contains nested/child folder(s), the name of the nested folder(s) will be appended to the API’s URL as a part of its Resource. For example, ‘’{base URL}/Nested Folder Name/Flow Resource/Parameters’’ such as ‘’https://localhost:9621/v1/{Resource}/{Parameters}.’’
Similarly, we can see a “Dataflow1.Df” artifact under the folder as well. As explained before, this dataflow will not be considered during the deployment process.
Note: Please note that during group and deploy, the parent folder’s name is not considered as part of the resource.
After selecting the option, the Deployment window will appear like this,
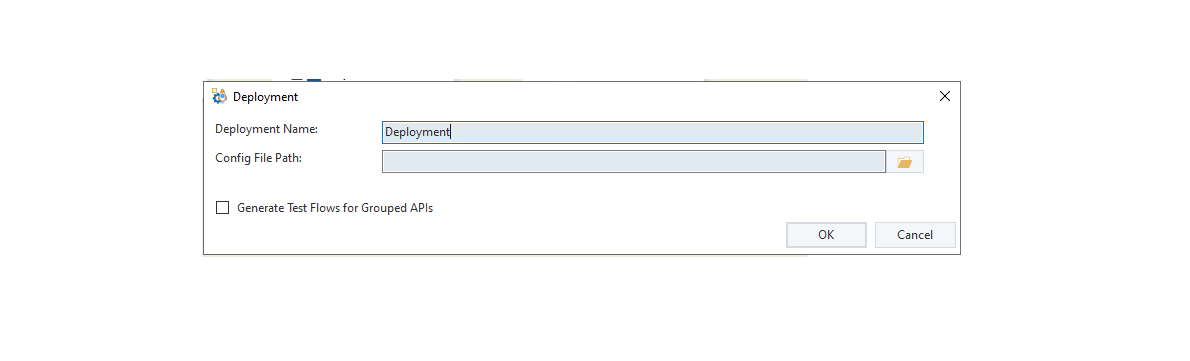
2. Write the Deployment Name and set the path of the Config File (optional). Click OK.
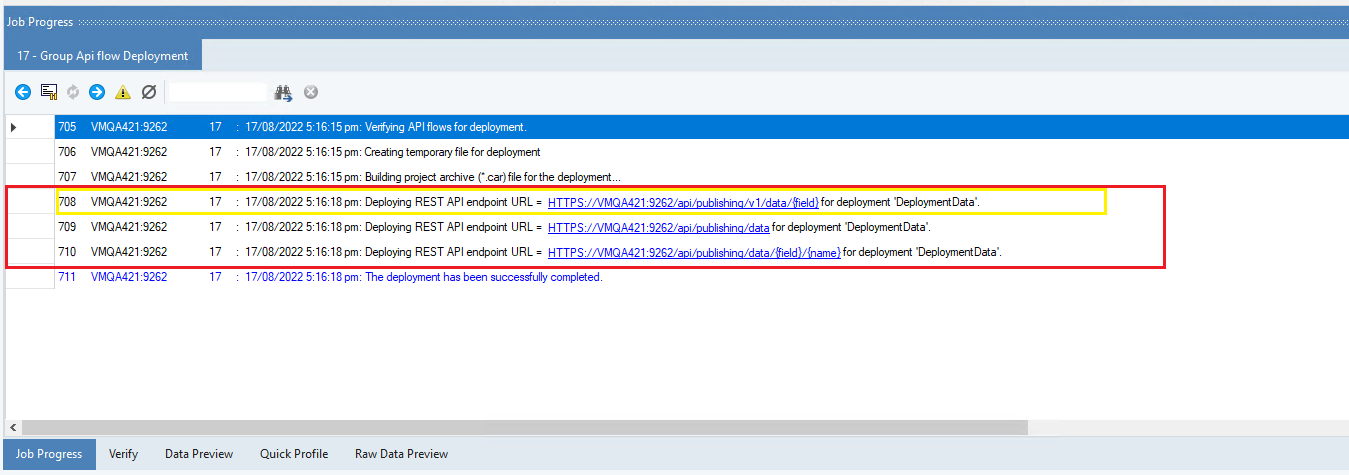
Note: All API Flows are verified in Pushdown mode before the deployment is created.
Success or Failure of the deployment will appear in the Job Progress window. In case of any errors, the verification window can be used to identify and fix errors. As the verification was successful, the API endpoints are visible in the trace.
The successfully created deployment is visible in the Server Browser.
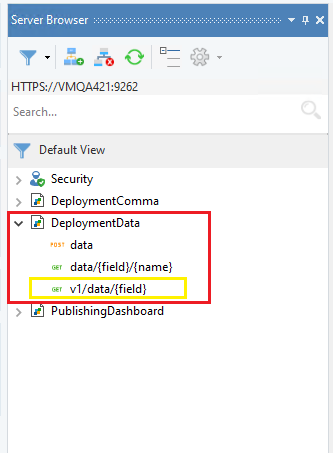
Note: Notice endpoint annotated in yellow. We can see here the nested folder name has been appended as a resource.
This is how you can group deploy the API(s) at the folder level.