Auto Creating Data Regions and Fields
Applies To:
- Centerprise
- ReportMiner
Overview
In order to export data from report models, data regions and data fields must be created. One way to do this is through the “Auto Create (Fields or Regions)” option. This method takes two lines as a sample of the data that is to be extracted, and creates the desired region or fields with them. This is the simplest, fastest method for creating data regions and fields.
Video
Creating Your Region
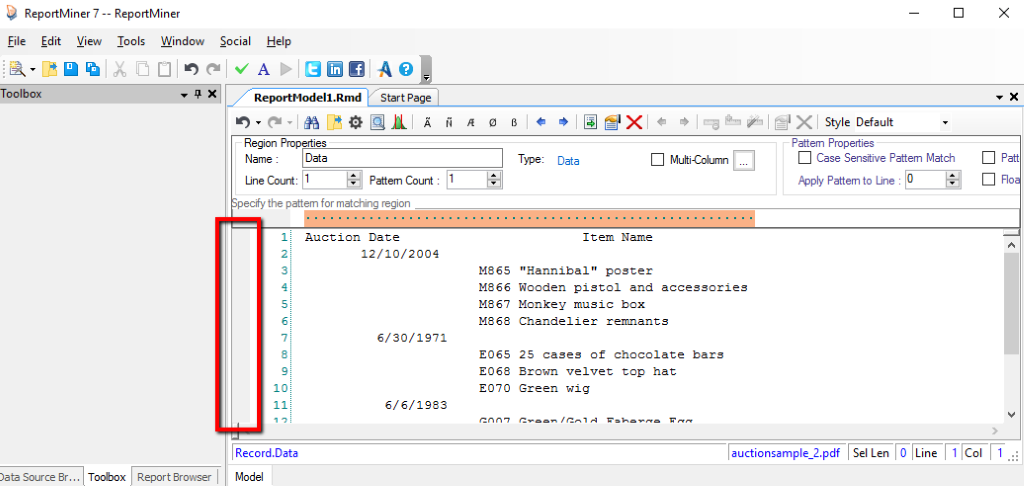
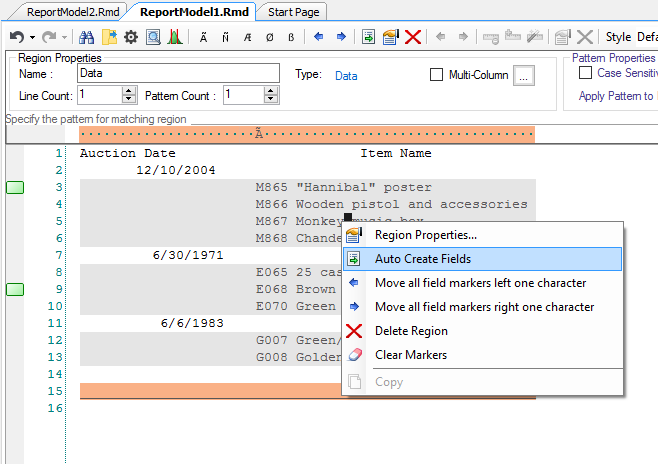
To auto create a data region, click on the grey column to the left of one of the lines that is to be included in your region.
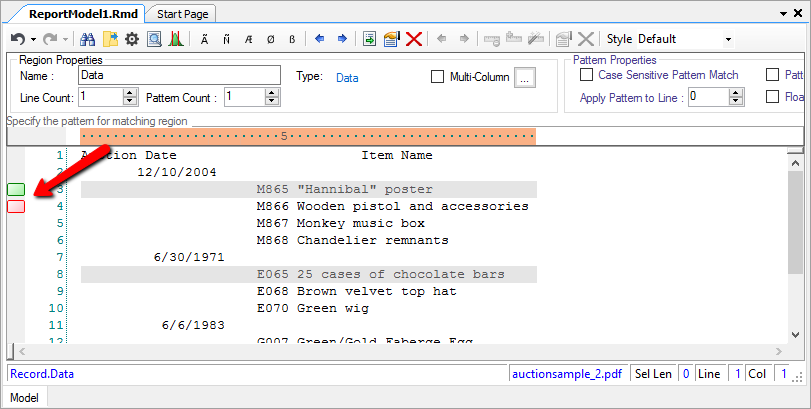
A green marker will appear: this means that the line is to be included. Clicking on the green marker again will make it turn red, which excludes the line. Clicking a third time will delete the marker.
Using this method, specify two lines that you wish to capture. Once two lines are indicated, the software creates a data region based on the selections. Note the orange bar (the pattern matching bar) at the top of the window below: the software has used a “match any alphabet” character above where the auction item numbers begin. This is because each auction item number begins with a letter, but not all of them are the same letter.
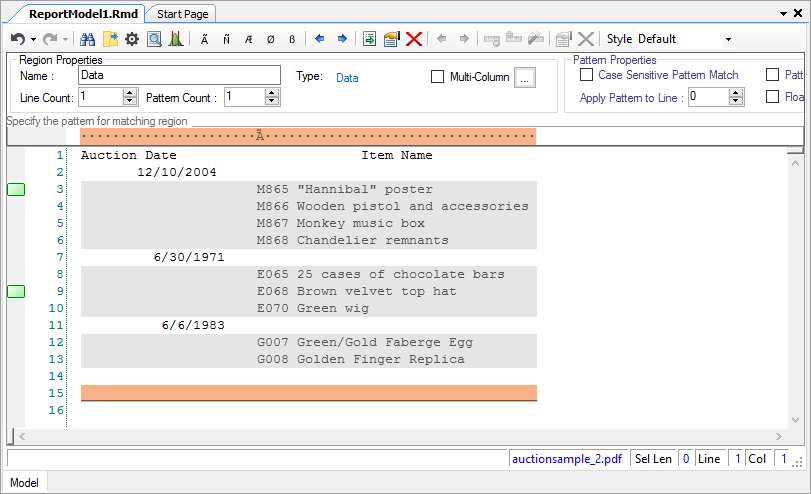
Your data region has been created. Data that can be captured will be highlighted, and a data region node (which has a name default of “Data”) will appear underneath your Record Node in the Model Layout display to the left of your report model.

Renaming Data Regions:
Data regions can be named by editing the “Name” field in the Region Properties menu above the report model editor. Astera recommends naming each data region and field that is created, as this avoids confusion.
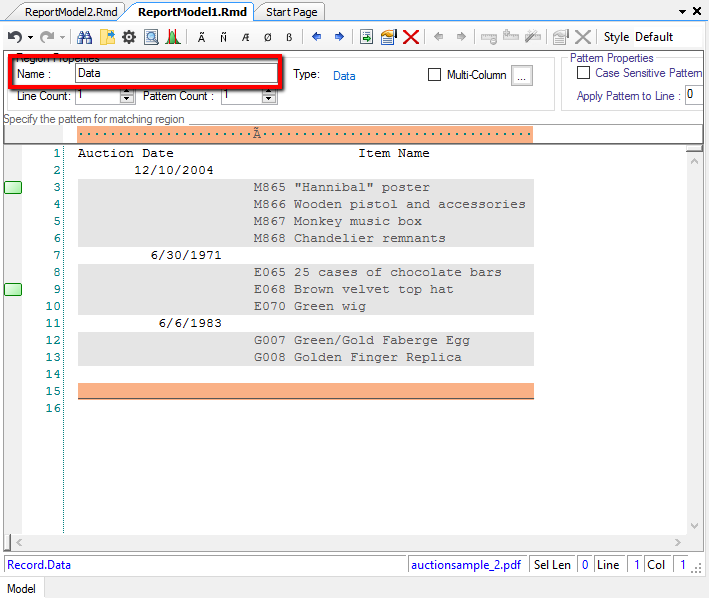
Your data region is now complete.
Creating Your Fields:
Once your data region has been selected, the next step to a complete report model is to create data fields: this shows exactly what data will be extracted from your report. As with the data region, the software can also automatically create your data fields. Right-click on your data region and select, “Auto Create Fields.”
Your data fields have now been created. Specifically, in figure one, you can see that there have been two data fields created – one for the item numbers and one for the item descriptions. The left field has been clicked on, which is why it appears as navy with light text whereas the other field is a light blue with dark text.
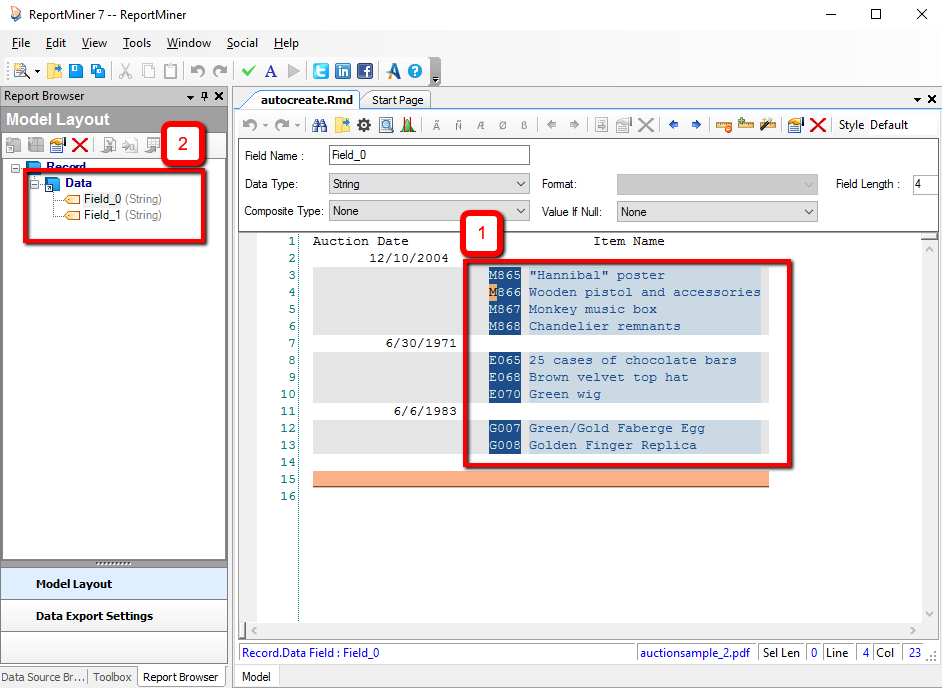
In figure two, the data fields are nested under the data region in the model layout window. As the item number field has been clicked upon, you can see a slight grey around the “Field_0” in the model hierarchy. This is the field that has been selected.
The data fields created are automatically named “Field_[NUMBER]”. To rename your data field, click the tree node representing which field you wish to rename and follow the same steps you took to rename your data region.