How to use Email Source Object in a Report Model
ReportMiner offers the capability of working with Email Source object to retrieve data from emails.
This article discusses the steps required to watch any email folder for incoming emails, and then process the incoming email attachments through a ReportModel.
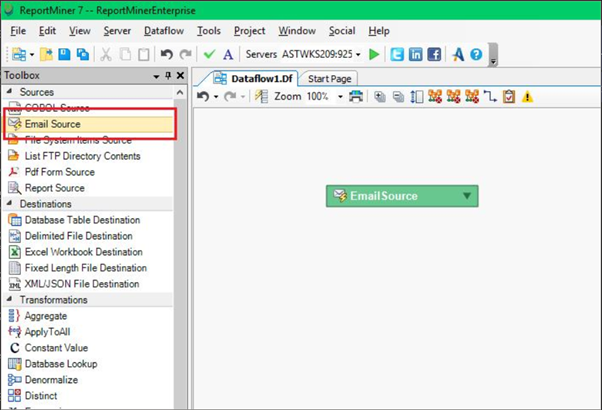
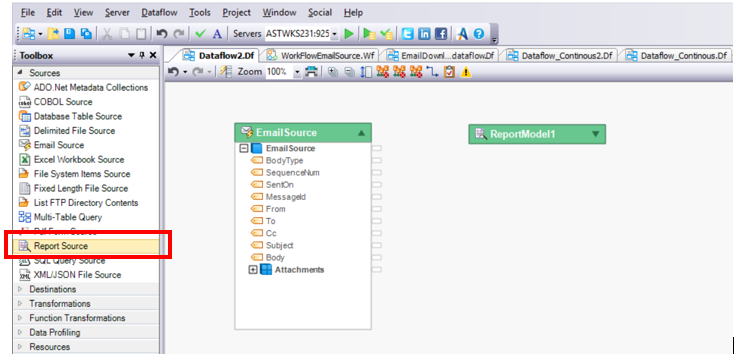
\1. Create a new dataflow and drag-and-drop the Email Source object from the Sources section in the Toolbox.
\2. Double-click on the source object to go to the Properties window or right-click and select Properties from the list.
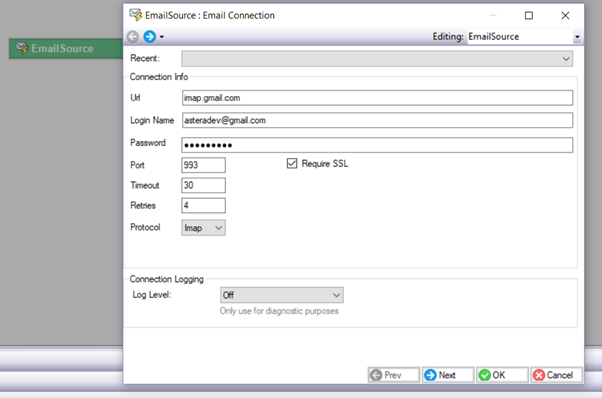
\3. The first screen will be the Email Connection screen. Here you will have to specify the connection details. You can use the Recent menu to connect to recently used email sources. Click Next and go to the next screen.
\4. The next screen will be the Email Source Properties screen. There are two important parts to this screen:
- Download attachment options
- Email reading options
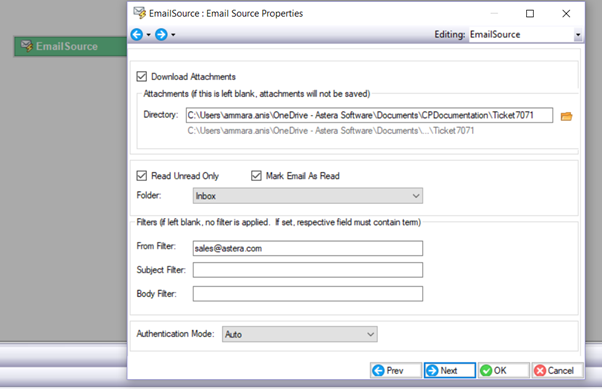
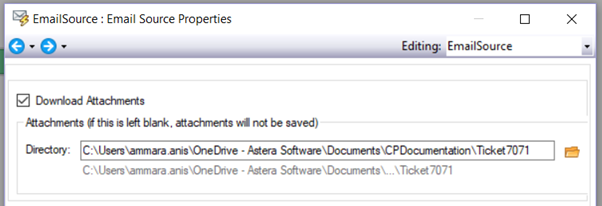
- Check the Download Attachments box if you want to download the contents of your email. Specify the directory where you want to save the email attachments, in the space next to Directory.
\6. The second part of the Email Source properties screen has the email reading options that you can work with to configure various settings.
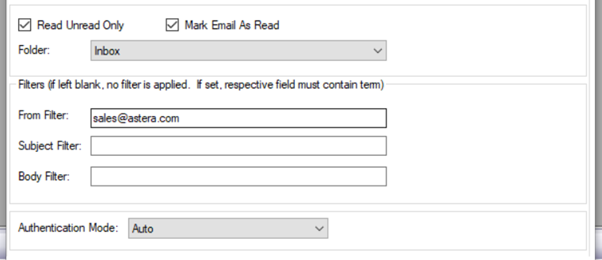
- Read Unread Only – Check the option if you only want to process the unread emails.
- Mark Email as Read – Check the option if you want to mark the processed emails as read.
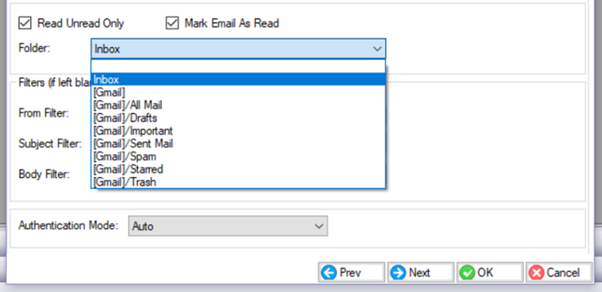
- Folder – From the drop-down list next to Folder, you can select the specific folder to watch in your email.
- Filters - You can apply various filters to only process specific emails in the folder.
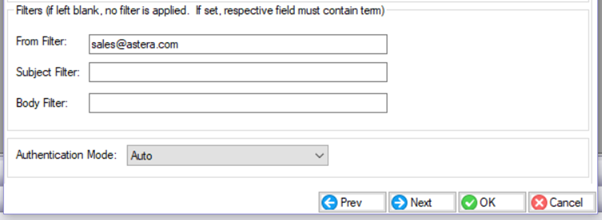
- From Filter: Filters out emails based on the sender’s email address
- Subject Filter: Filters out emails based on the text of the subject line
- Body Filter: Filters out emails based on the body text
\7. After you have configured the properties for the Email Source object, the next step is to give the path from the Email Source object to the Report Model. This is the path where the email attachments will be saved so that the report model can retrieve those attachments in the next step.
\8. Drag-and-drop the Report Source from the toolbox. Go to the properties of the Report Source object and specify the details for your report model.
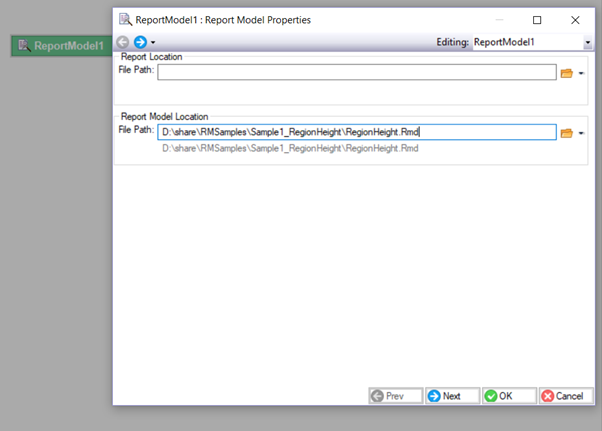
\9. In the screenshot above, on the Report Model Properties screen, enter the file path for the Report Model. Leave the file path next to Report Location empty because we are going to map the file path externally from the Email Source
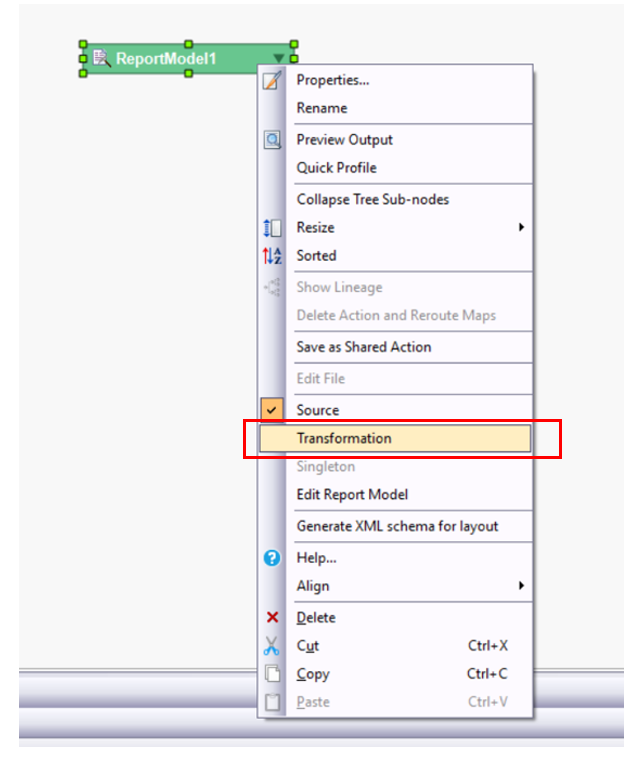
\10. To pass the file path information from Email Source to the Report Source, right-click on the Report Source option and select Transformation. This will turn the Report Source object into a transformation object and you will be able to pass the report source file path as input to it.
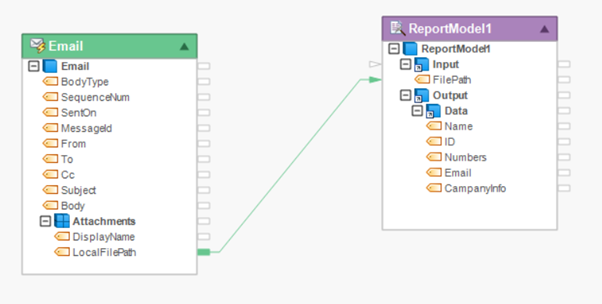
 11. Map the LocalFilePath field from the Email Source to the FilePath field in the Report Source.
This is how you can extract the reports in your email folders and process them through any report model in ReportMiner.
Let us know if this article was helpful. If you have any questions, leave them in the comments section below and we will get back to you.