How to work with OCR scanned files in ReportMiner
Astera ReportMiner can be integrated with third-party Optical Character Recognition (OCR) tools to read and extract data from image files.
In this document, we will use ABBYY Hot Folder and ABBYY FineReader together with Astera ReportMiner to read data from .png files.
ABBYY Hot Folder automates and schedule an OCR task while ABBYY FineReader processes and converts images containing textual information into PDF files.
Astera ReportMiner Scheduler, then, schedules the extraction of unstructured data from these PDF files into structured format for data integration.
Converting .png files to .pdf in ABBYY
ABBYY FineReader uses OCR to convert image files into text formats.
In the example below, we have an Orders Report file saved in .png format. We will use ABBY FineReader to convert it into a PDF document.
Adding a new task and configuring its settings is an easy process and clearly defined as shown in the screenshot below.
1. Specify the frequency of the task and create a schedule.
2. Specify the location where your files (that are to be converted) are saved.
3. Set the settings for analyzing and recognizing images.
4. Save as a PDF document.
The scheduled task can then be viewed on ABBYY Hot Folder along with its path, status and start time.
Learn how to automate and schedule OCR tasks on ABBYY Hot Folder from here.
Extracting Information in ReportMiner
Once you have the source files converted from images to text files, you can work with them in Astera ReportMiner.
In this section of the article, we will discuss the steps required to extract and read data from source files using ReportMiner.
1. Create an extraction template to capture the data points in the file. An example is shown below:
Learn how to create an extraction template here.
Save this extraction template. This template can be used to read data from multiple files that have the same layout.
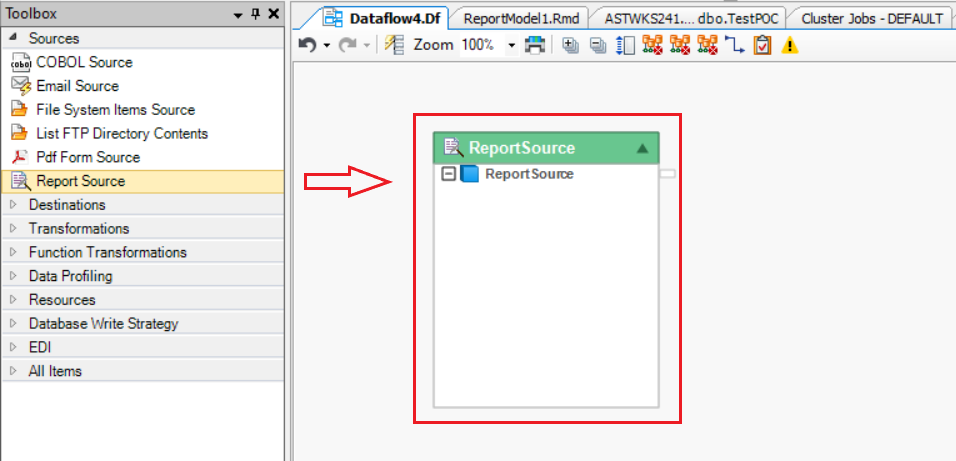
2. Open a new dataflow by going to File > New > Dataflow and drag-and-drop the Report Source object onto the dataflow designer.

3. Right-click on the object’s header and go to Properties. Here, provide the File Path for the unstructured PDF file and the File Path for the Report Model (extraction template) created in Step 1.
4. Click OK. The fields added in the extraction template will appear inside the Report Source object.
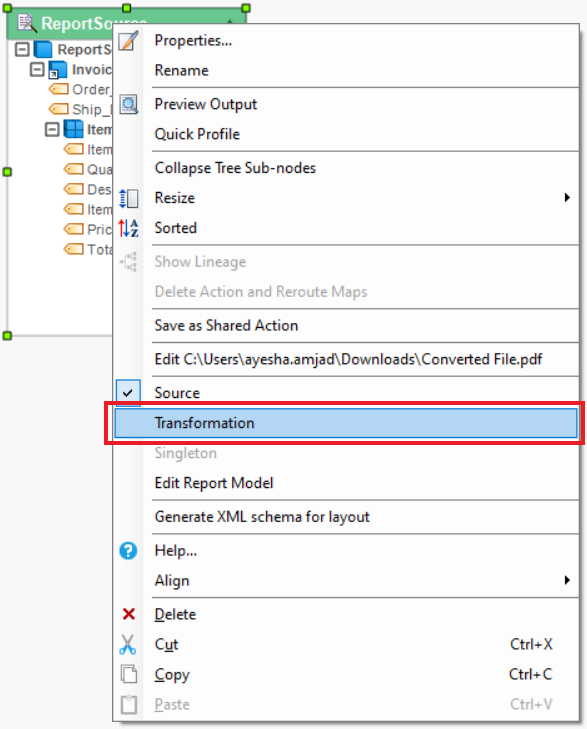
5. Right-click on object’s header and select Transformation from the context menu.

Report Source will now act as a transformation and dynamically process multiple files.
6. Drag-and-drop Context Information object, under the Resources Category in the toolbox, onto the dataflow designer. Map DroppedFilePath field from the Context Information object onto the FilePath field under the Report Source object as shown below.

7. Drag-and-drop the Excel Workbook Destination object from the toolbox onto the dataflow designer and map all the fields in the Output node of Report Source object onto the Excel Destination object.
8. Configure settings for the Excel Destination object.
Learn how to configure settings for the Excel Workbook Destination from here.
Now to automate the entire extraction process with files coming at asynchronous frequency, we will use ReportMiner’s Scheduler.
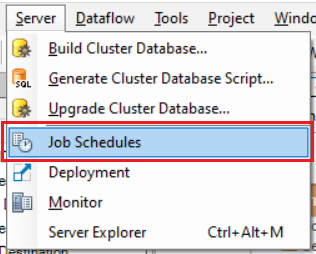
9. Go to Server > Job Schedules.

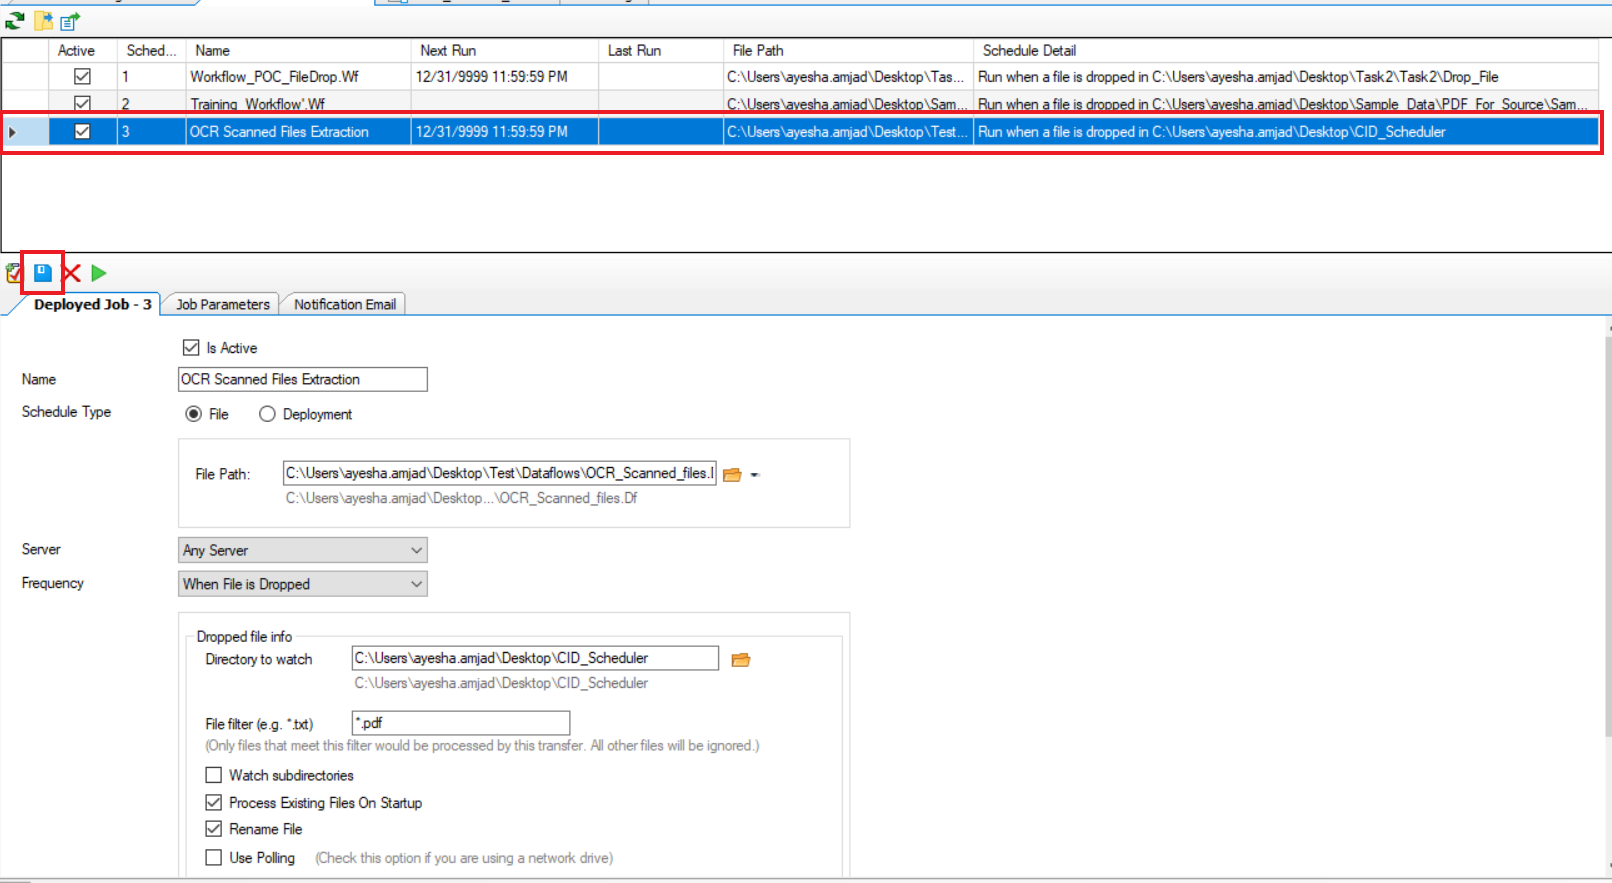
10. Set up a schedule for this task, provide the flow that is being scheduled , specify its frequency at file drop, and indicate the folder to watch for the dropped files.
Note: The folder you specify here is the same where ABBYY will drop the OCR scanned converted files in PDF format.
11. Set up a notification email to notify the administrator of the starting and ending of the job. (Optional)
12. Save this schedule.

Now every time an image file is converted into PDF and dropped in the specified folder, the entire process of extraction will be carried out by ReportMiner automatically.