Adding Workflow Tasks
Each task on the workflow is represented as a task object. You can have any number of tasks in your workflow, and your tasks can be linked in a sequence that controls the order in which the tasks are executed.
The chapter below explains the types of tasks available in Workflow Designer:
Decision
A Decision task invokes one of the two paths in the workflow, depending on whether the logical expression inside the Decision object returns a Yes (True) or a No (False).
To add a Decision task, drag the Decision object from the Workflow Tasks group in the Flow toolbox and drop it on the workflow.
An example of what a Decision object might look like is shown below.

To configure the properties of a Decision object after it was added to the workflow, right-click on it and select Properties from the context menu.
The following properties are available:
The Decision Properties screen provides the interface to create some decision logic.
In the Expression input, enter an expression. The expression should return a Boolean result, such as True or False. For example, ContextInfo1.ServerName= ‘cheto’. This will return a True if the server name of the server on which the workflow runs is ‘cheto’.
Note: The right-hand pane displays the object tree. You can double click on an object to get it pasted into your expression.
Click Compile to check for any syntax errors in your expression. The Status should read “Successful” for a successful compilation.
General Options screen:
The Comments input allows you to enter comments associated with this object.
File System Actions
The File System Actions task performs some action with a file or a folder. For example, the task can copy a file, or delete all files in a folder.
To add a File System Actions task, drag the File System Actions object from the Workflow Tasks group in the Flow toolbox and drop it on the workflow.
An example of what a File System Actions object might look like is shown below.

To configure the properties of a File System Actions object after it was added to the workflow, right-click on it and select Properties from the context menu. The following properties are available:
The File System Action Properties screen:
Select an action from the Action dropdown. The following actions are available:
- File Copy – copies a single file from a source folder into a destination folder
- File Move – moves a single file from a source folder into a destination folder
- File Rename – renames a single file
- File Delete – deletes a single file
- Directory Move – moves all files in the folder into a new folder
- Directory Delete – deletes the folder along with any files in it
- Directory Content Delete – deletes all files from the folder, leaving the folder empty (the folder itself is not deleted).
Source File (Directory) Path – specifies the path to the source file or directory
Destination Directory Path – specifies the path to the destination folder
General Options screen:
The Comments input allows you to enter comments associated with this object.
FTP Task
The FTP Task performs some action on an FTP server. For example, the task can upload a file to the FTP server, rename a file, or delete all files from a remote directory.
To add an FTP Task, drag the FTP Task object from the Workflow Tasks group in the Flow toolbox and drop it on the workflow.
An example of what an FTP Task object might look like is shown below.

To configure the properties of the FTP Task object after it was added to the workflow, right-click on it and select Properties from the context menu. The following properties are available:
The FTP Action Properties screen:
FTP Connection – specify the connection parameters of your FTP connection.
FTP Action: Select an action from the FTP Action dropdown. The following actions are available:
- Upload a File – uploads a file from a local folder into the remote directory
- Download a File – downloads a file from the remote directory into a local folder
- Delete a File – deletes file from the remote directory
- Rename – renames a file in the remote directory
- Remove Directory – deletes the remote directory
- Upload a File with Unique Name – uploads a file from a local folder into the remote directory, renaming the file if needed to ensure unique file name in the remote directory
Remote Info: Path – specify the path on the FTP server
Local Info: Path – specify the local path on the server running the workflow
General Options screen:
The Comments input allows you to enter comments associated with this object.
Run Dataflow
The Run Dataflow task is used to start a dataflow as part of your workflow.
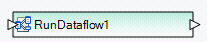
To add a Run Dataflow task, drag the Run Dataflow object from the Workflow Tasksgroup in the Flow toolbox and drop it on the workflow.
An example of what a Run Dataflow object might look like is shown below.
To configure the properties of a Run Dataflow object after it was added to the workflow, right-click on it and select Properties from the context menu. The following properties are available:
Start Dataflow Job Properties screen:
Job Info: Path – specify the path to the dataflow that this task will run.
Note: To ensure that your workflow is runnable on a remote server, please avoid using local paths for the dataflow. Using UNC paths is recommended.
Run At: select the server that should run the dataflow.
Parameter Information Replacement screen provides the interface to modify connection parameters as required by your target environment. For more information on changing connections, see Parameter Information Replacement.
General Options screen:
The Comments input allows you to enter comments associated with this object.
Run Program
The Run Program task is used to run an executable, command, or batch file, as part of your workflow.
To add a Run Program task, drag the Run Program object from the Workflow Tasksgroup in the Flow toolbox and drop it on the workflow.
An example of what a Run Program object might look like is shown below.

To configure the properties of a Run Program object after it was added to the workflow, right-click on it and select Properties from the context menu. The following properties are available:
Run Program Properties screen:
Program Path: specify the file path of the executable, command, or batch file that should be started by this task.
Run In: specify the default folder for running the executable, command, or batch file.
Arguments: specify any required or optional arguments for running your executable, command, or batch file.
Run As: enter the user account (if different from the current user account) that should be used for running the executable, command, or batch file.
Password: enter the password for the user account running the executable, command, or batch file.
Success Value: This is the value that is returned by the executable, command, or batch file upon successful completion. Default value is 0. The Run Program task will expect this value to signal successful completion of the task.
Fail Action if Unsuccessful – select this option to return an error when the executable, command, or batch file exited with an error code.
Wait for Task to Complete – if this option is on, the workflow will not proceed until the executable, command, or batch file has finished running.
General Options screen:
The Comments input allows you to enter comments associated with this object.
Run SQL File
The Run SQL File task runs the SQL code inside a file as part of your workflow.
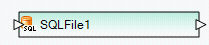
To add a Run SQL File task, drag the Run SQL File object from the Workflow Tasksgroup in the Flow toolbox and drop it on the workflow.
An example of what a Run SQL File object might look like is shown below.
To configure the properties of a Run SQL File object after it was added to the workflow, right-click on it and select Properties from the context menu. The following properties are available:
Run SQL File Properties screen:
Connection – specify the connection to your data provider, such as server name, database and schema, as well as credentials for connecting to the selected data provider.
SQL File Path: specify the file path of the SQL file that should be executed by this task.
General Options screen:
The Comments input allows you to enter comments associated with this object.
Run SQL Script
The Run SQL Script task runs some SQL code as part of your workflow.
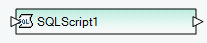
To add a Run SQL Script task, drag the Run SQL Script object from the Workflow Tasks group in the Flow toolbox and drop it on the workflow.
An example of what a Run SQL Script object might look like is shown below.
To configure the properties of a Run SQL Script object after it was added to the workflow, right-click on it and select Properties from the context menu. The following properties are available:
Run SQL Properties screen:
Connection – specify the connection to your data provider, such as server name, database and schema, as well as credentials for connecting to the selected data provider.
SQL Statement: enter the SQL code here. This code will be executed by the task.
General Options screen:
The Comments input allows you to enter comments associated with this object.
Run Transfer
The Run Transfer task executes a transfer setting as part of your workflow.
Note: The Run Transfer task is in place for compatibility with previous versions of Centerprise. In the current version of Centerprise, dataflows replace transfer settings and provide superior functionality, so you should use Run Dataflow task instead.
To add a Run Transfer task, drag the Run Transfer object from the Workflow Tasksgroup in the Flow toolbox and drop it on the workflow.
An example of what a Run Transfer object might look like is shown below.

To configure the properties of a Run Transfer object after it was added to the workflow, right-click on it and select Properties from the context menu. The following properties are available:
Start Transfer Job Properties screen:
Job Info: Path – specify the path to the transfer setting that this task will execute.
Note: To ensure that your workflow is runnable on a remote server, please avoid using local paths for the transfer setting. Using UNC paths is recommended.
Run At: select the server that should execute the transfer setting
General Options screen:
The Comments input allows you to enter comments associated with this object.
Run Transfer Batch
The Run Transfer Batch task executes a transfer batch as part of your workflow.
Note: The Run Transfer Batch task is in place for compatibility with previous versions of Centerprise. In the current version of Centerprise, dataflows replace transfer batches and provide superior functionality, so you should use the Run Dataflow task instead.
To add a Run Transfer Batch task, drag the Run Transfer Batch object from the Workflow Tasks group in the Flow toolbox and drop it on the workflow.
An example of what a Run Transfer Batch object might look like is shown below.

To configure the properties of a Run Transfer Batch object after it was added to the workflow, right-click on it and select Properties from the context menu. The following properties are available:
Start Batch Job Properties screen:
Job Info: Path – specify the path to the transfer batch that this task will execute.
Note: To ensure that your workflow is runnable on a remote server, please avoid using local paths for the transfer batch. Using UNC paths is recommended.
Run At: select the server that should execute the transfer batch
General Options screen:
The Comments input allows you to enter comments associated with this object.
Run Workflow
The Run Workflow task starts another workflow as part of your workflow.
To add a Run Workflow task, drag the Run Workflow object from the Workflow Tasks group in the Flow toolbox and drop it on the workflow.
An example of what a Run Workflow object might look like is shown below.

To configure the properties of a Run Workflow object after it was added to the workflow, right-click on it and select Properties from the context menu. The following properties are available:
Start Workflow Job Properties screen:
Job Info: Path – specify the path to the workflow that this task will run.
Note: To ensure that your workflow is runnable on a remote server, please avoid using local paths for the workflow executed by this task. Using UNC paths is recommended.
Run At: select the server that should run the workflow
Parameter Information Replacement screen provides the interface to modify connection parameters as required by your target environment. For more information on changing connections, see Parameter Information Replacement.
General Options screen:
The Comments input allows you to enter comments associated with this object.
Send Mail
The Send Mail task sends email at appropriate junctions in your workflow.
To add a Send Mail task, drag the Send Mail object from the Workflow Tasks group in the Flow toolbox and drop it on the workflow.
An example of what a Send Mail object might look like is shown below.

To configure the properties of a Send Mail object after it was added to the workflow, right-click on it and select Properties from the context menu. The following properties are available:
Send Mail Properties screen:
Recently Used dropdown – select from the list of recent email configurations to quickly populate your configuration
Server: enter the SMTP server for sending the email
From: enter the sending email account
To: enter the recipients of the email that will be sent by the Send Mail task
Subject: enter the subject line for the email
CC: specify any CC recipients
BCC: specify any BCC recipients
Attachment: Provide any attachments that should be sent with the email
Message: Enter the body of the email that will be sent by this task
Click Send Test Mail to check whether your Send Mail task is configured correctly. Enter the recipient email addresses and the subject for your test email, and optionally enter the email body. Click Send to send your test email. A successful setup should result in a test email being received by its intended recipients.
General Options screen:
The Comments input allows you to enter comments associated with this object.