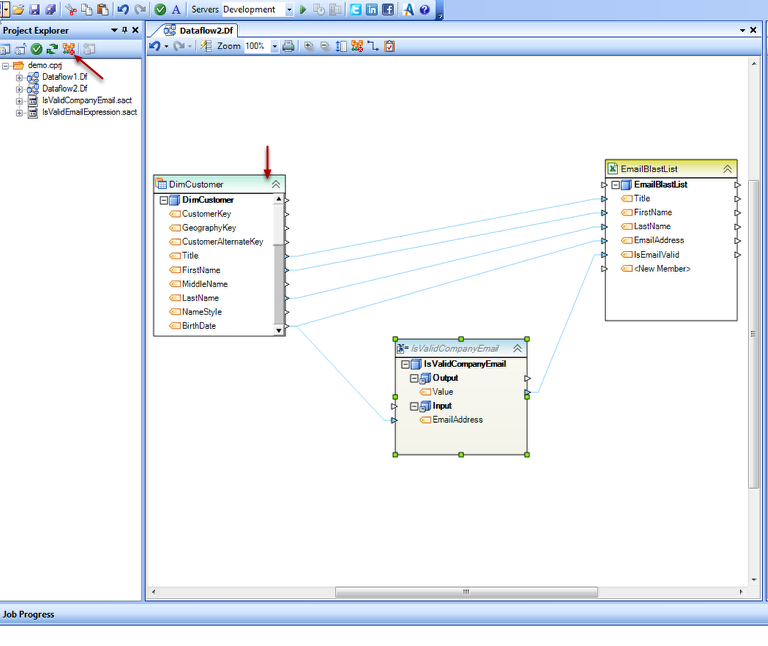
Shared Actions
How to create and and use shared action objects
Identify Candidates For Shared Action
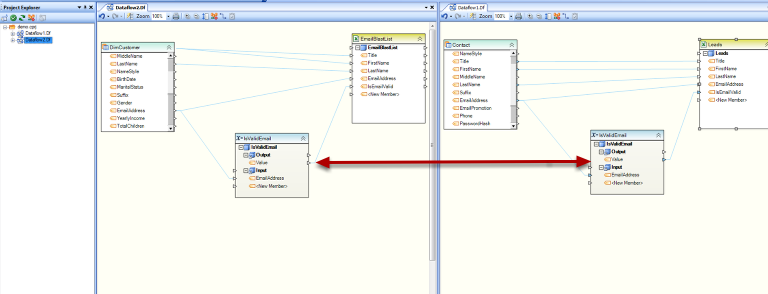
Shared actions are items that you want to use over and over again, so first identify which actions or logic are candidates to be extracted out of a dataflow. In the example screenshot, we have the expression “IsValidEmail” being used anytime we are building a list containing an email address. The expression consist of a regular expression, so to go maintain each flow anytime this regular expression needs to be updated would run into a maintenance issue of scale. Actions such as these are excellent candidates for shared actions.
Change Action To Shared Action
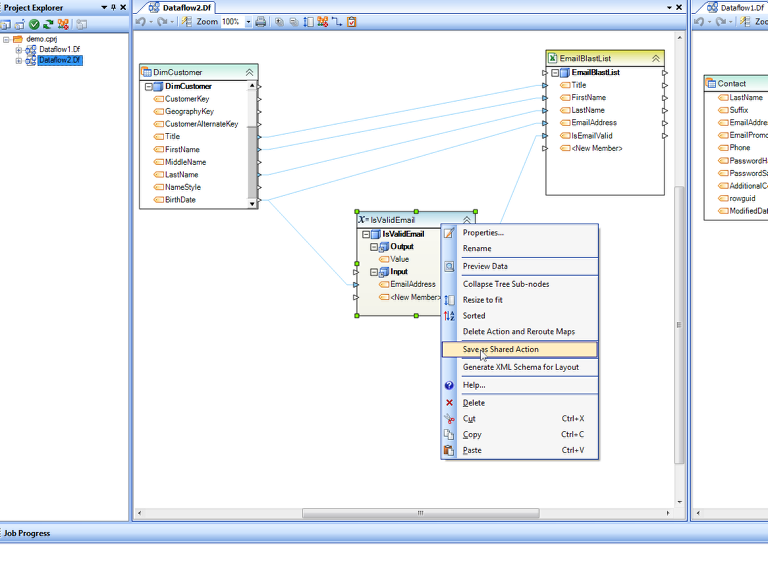
Right-click the action you wish to convert to a Shared Action and select “Save as Shared Action.”
Select File-Path for New Shared Action File
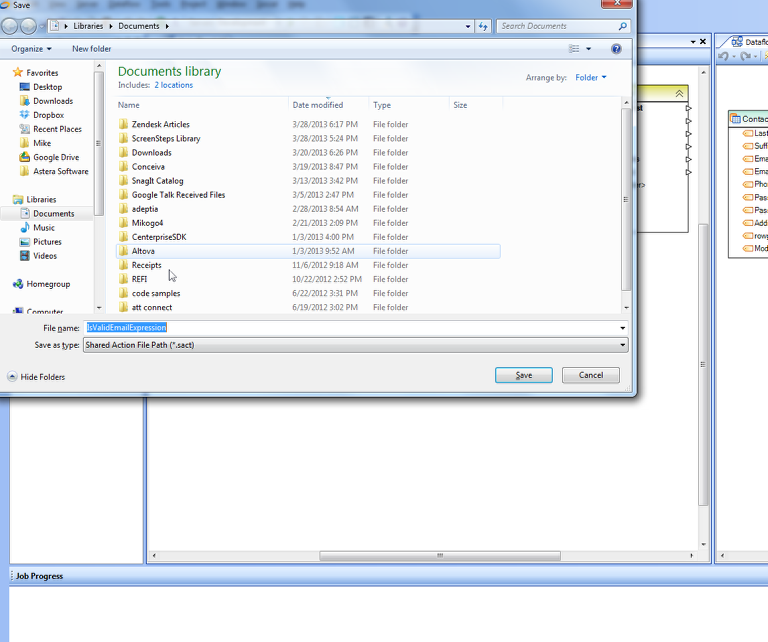
Being that Shared Actions are documents just like dataflows, you must select a location to store the shared action. Choose a file-path location. Shared Actions will be saved with the .sact file extension. You can name the Shared Action whatever you like, but it is good practice to name it something descriptive so you can locate it later. Note that the Astera Integration Server must be able to resolve the filepath when running the dataflow. Click the Save button.
Add the Shared Action to the Project
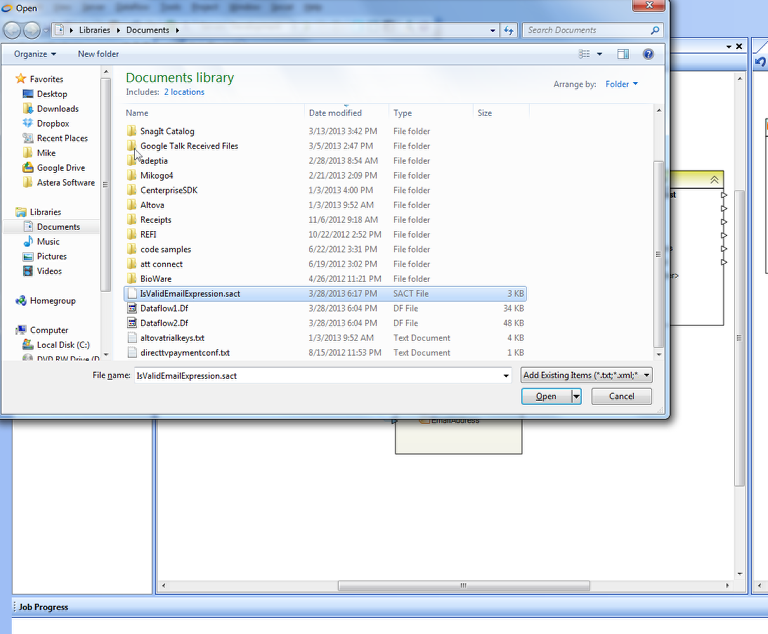
Without a project, it will be difiictult to add Shared Actions into a dataflow. Add the Shared Action as an “Existing Item.”
Replace Other Instances with Shared Action
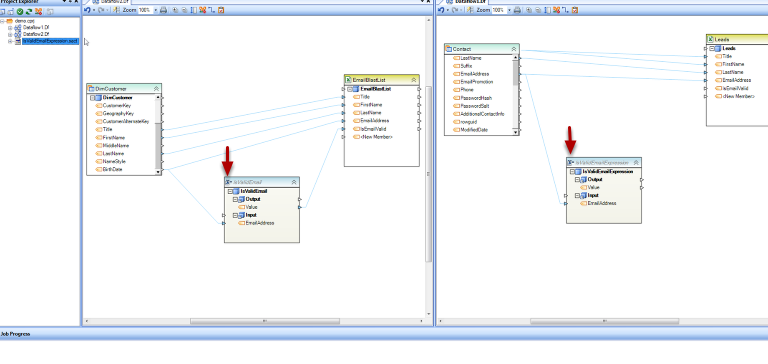
Now that the Shared Action is a part of the project, it can be dragged and dropped onto the diagram. Delete the instance to be replaced and reconnect the maps with the shared action. Notice that the Shared Action has an italic font and is slightly grayed out text to the header. It also displays an additional icon over the normal one. You can identify Shared Actions in this way.
Edit Shared Action File Path
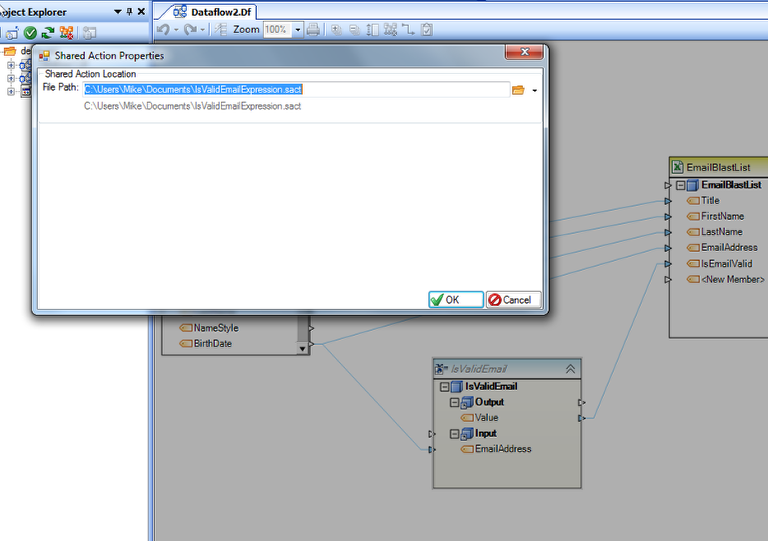
To edit the path that the Shared Action refers to, simply right-click and select “Properties” as normal. However, the “Properties” will only consist of the FilePath for shared actions.
Modify The Original Properties of the Shared Action
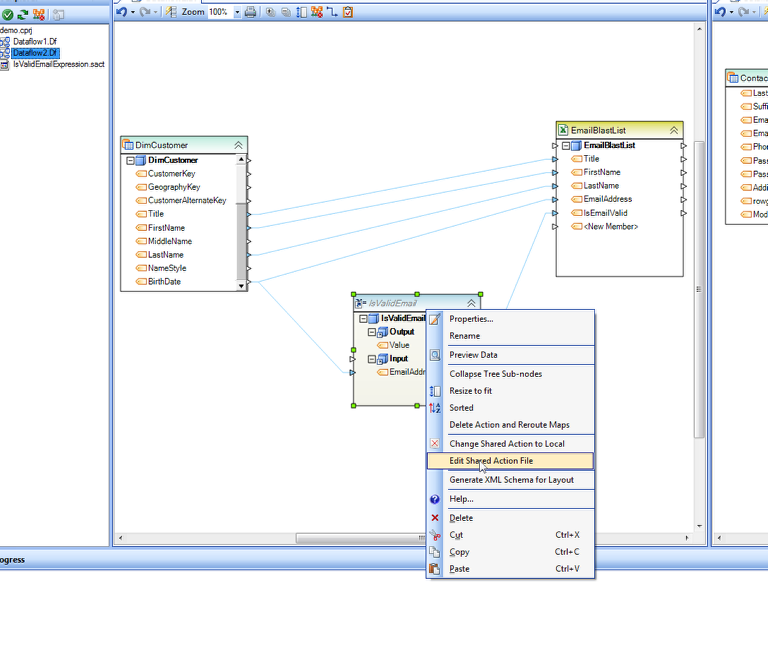
Since you cannot edit the properties of Shared Action directly, you can open the Shared Action file itself by right-clicking and selecting “Edit Shared Action File.”
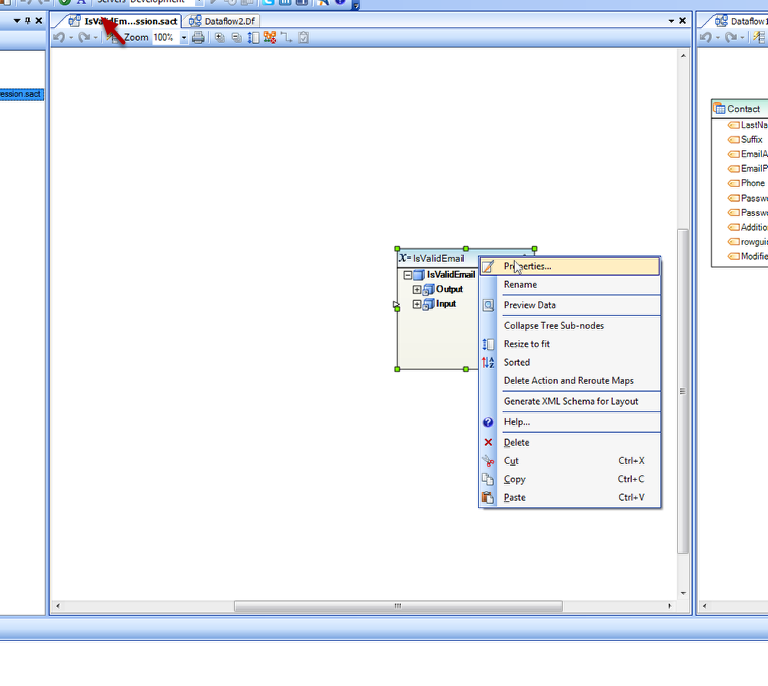
Now to edit the properties, simple right-click and select “Properties” as normal. This will open the normal property editor for the particular action you are editing. Note the file extension in the document. There is always only one Action allowed in a Shared Action file.
Revert Action Back to Instance
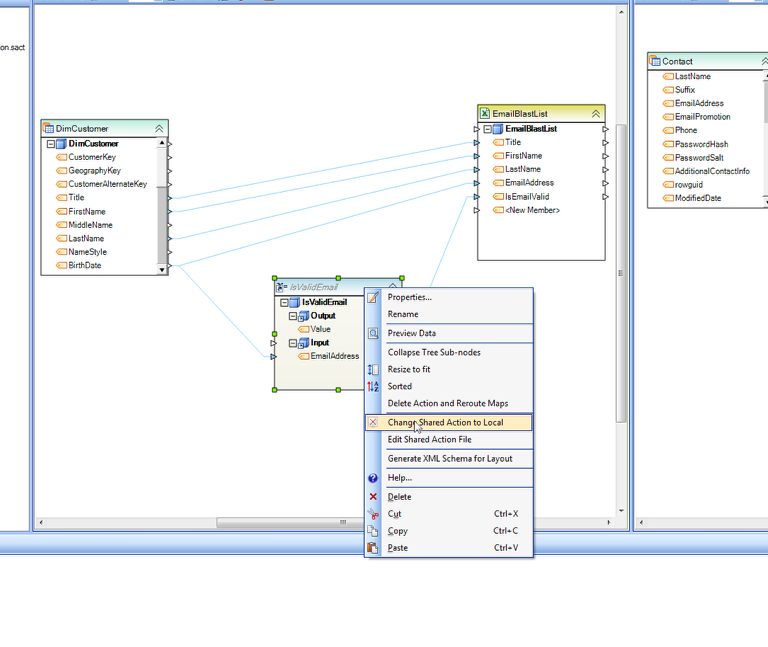
Sometimes, for whatever reason, a particualr instance of a Shared Action can no longer use the properties or logic of the Shared Action reference. When this occurs, simply right-click and select “Change Shared Action to Local.”
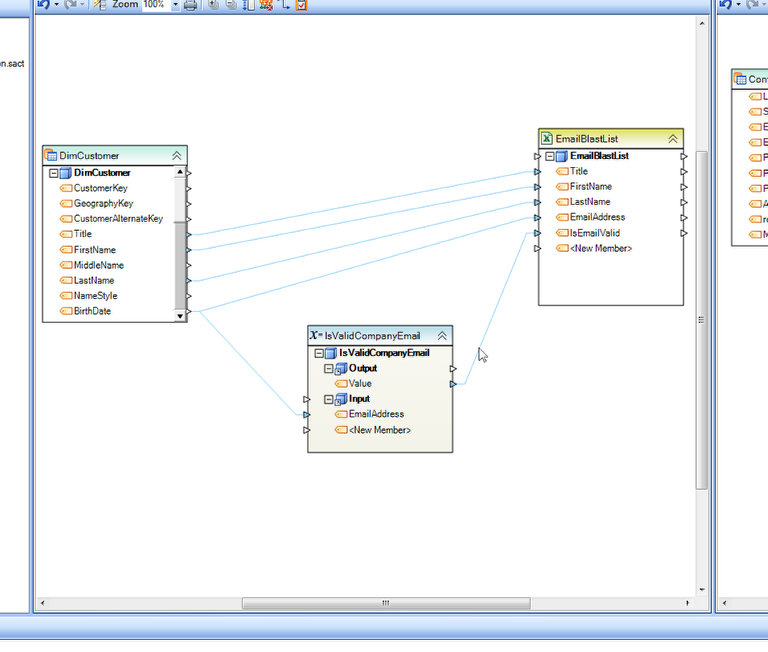
Now the Action is no longer a Shared Action and properties can now be modified for this particular instance.
Shared Action Creation Shortcut
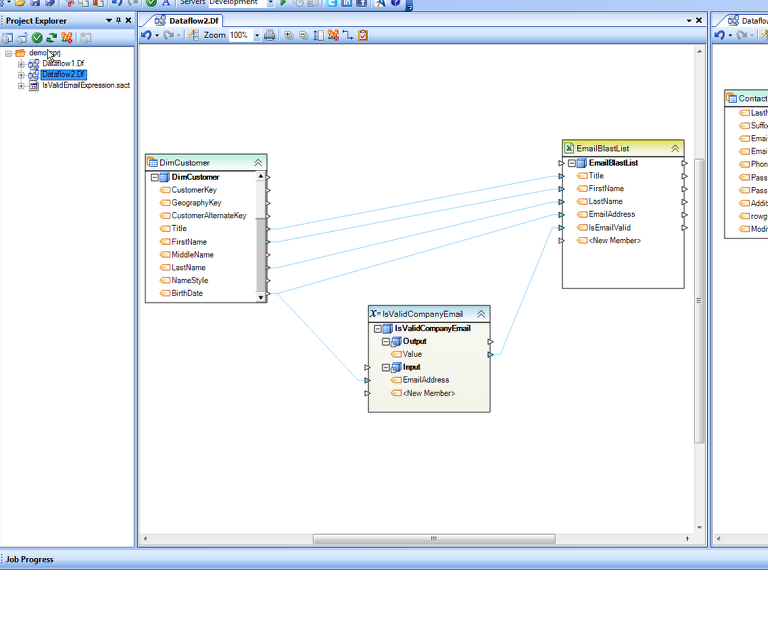
You can combine the steps of creating a Shared Action file and then adding into the project by dragging and dropping the Action from the diagram directly to the project.
